How to make an original weather vane and properly install it on the roof. Drawings, diagrams, sketches of exclusive weathervanes and methods for their manufacture with visual photos
Depending on the purpose, they are divided into:
- Meteorological- a real instrument, very high accuracy of readings, thanks to good balancing during manufacture. Most often made by forging.
- Decorative. Its main task is to decorate the house, giving it a finished look. The work is not particularly accurate, may give an error in the readings.
- Weather vane with propeller- measures the strength of the wind and simultaneously scares away birds from the roof.
Learn more about how to properly make the basis for one of the most popular roofs from the article:.
An extension to the house allows you to increase the area of \u200b\u200bthe existing building and add another room. Read how to do it right from the project to the roof.
How to choose the right weather vane
In our time, the choice depends only on one's own preferences, although earlier the shape of the weather vane could indicate the occupation of the owner of the house: a boot indicated the house of a shoemaker, a loaf of bread - a baker, a dress - a tailor. Notable personalities ordered a weather vane in the form family coat of arms, rider or knight.
The people simply installed figurines of animals or birds on the roof, which also carry a semantic load:
- figurines of horses and cows - designed to promote a friendly life;
- the stork is a symbol of new life and happiness;
- griffin - symbolized prosperity and power;
- the dog is a symbol of devotion and friendship;
- cock - vigilance, activity, awakening.
Over time, the weather vane became a talisman at home and was taken with them when moving.
The latest metal processing technologies allow you to order a wind vane of any shape, and the offer of ready-made figurines is quite rich. Now there is almost a tradition when settling in new house give the owners a weather vane, which is designed to become a family talisman.
Choice of vane material
 Historically, weathercocks have been made of metal. This is still the most common option. But wooden and plastic figures are also quite actively used.
Wooden figurines are relatively short-lived and are more often used as a temporary option. They can be cut from plywood or planed from a single piece of wood. Then the product is painted or varnished for greater safety.
Plastic will last longer, but does not cause much enthusiasm. For the manufacture of homemade weathercocks, plastic bottles are often used.
Metal weather vane can be cut from sheet metal or forged to order. It is certainly a product that is durable and makes an impression that is incomparable. Copper figurines are very beautiful, especially those mounted on a tiled roof.
The main parts of the weather vane:
- a rack that is firmly attached to the roof of the house;
- wind vane - rotating part;
- wind rose, used to determine the direction of the wind.
Today, the size of the weather vane is somewhat standardized and is approximately 400 * 800 * 700 mm. But for small buildings like a gazebo, garden house or garage, you can choose a smaller weather vane.
Do-it-yourself weather vane installation
 In order for it to fulfill its purpose, a weather vane must be installed on the roof of the house correctly and conscientiously:
- fastening is made at the highest point of the roof - on the ridge, and even better - not on the chimney cap;
- to securely fasten the structure to the roof, metal strips can be used, which are fixed on the side of the weather vane support.
- it is very important to maintain a strict vertical position, for this you can use a special mount, which makes it possible to adjust the position of the weather vane vertically;
- direction indicators are set using a compass;
- the figurine itself is attached to a steel pipe, which is put on a vertical rod;
- at the base of the weather vane, you need to install a bearing, which will ensure that the wind vane follows the wind freely;
- It is very important to protect the pivot assembly from moisture, otherwise one day your windsock will simply stop.
For more reliable operation of weathercocks, a special rotation unit has now been developed, equipped with two metal-graphite plain bearings. This design allows you to increase the sensitivity of the device to weak air currents, increases the accuracy of readings and the durability of the entire assembly, thus increasing the life of the "wind blade".
In the old days, installing a weather vane on the roof was necessary to determine the direction of the wind. This was especially true for fishermen and sailors. After the invention of precise meteorological instruments and devices, the installation of a weather vane on the roof was due to the desire to give the building individuality.
Types of weather vanes by design
Before you install a weather vane on the roof, you need to decide on its shape, material of manufacture and purpose. In some European countries, for example, in Denmark and Norway, residents believe that the symbolism of this device can bring either good luck to the house, or, conversely, misfortune and lack of money.
In ancient times, among Slavic peoples figurines of animals or birds were considered the most popular, but on the roof of Scandinavian houses, images of fabulous and mythical creatures: dragons, angels, griffins. Then people were sure that these figurines would protect against evil forces and demons, as well as help strengthen family ties. In the houses of judges and officials, it was customary to decorate the roofs with the image of a horse or an elk.
On the territory of Russia and neighboring countries, the symbolism of the figurines was based on natural motifs. Most often, a rooster, goose, cat or stork decorated the roof ridge - they warned of a change weather conditions depending on the direction of the wind.

Today, owners of private houses prefer representatives of the animal world - a lion, an owl, a bear. In areas close to the sea coast, you can usually see such decorative element like a ship.
As for the material of manufacture, here preference is given to metal alloys. The most durable and durable will be a weather vane on the roof, made of bronze, copper, steel. The determining factor in the choice of material is the resistance to atmospheric precipitation and condensate. If you make a weather vane out of wood, it will last a short time.
According to the manufacturing method, these products are made:
- forged;
- cast.
Differences in purpose
Currently, forged weather vanes are preferred, having small sizes stylish design.
According to the purpose of the device, indicating the direction of the wind on the roof, there are:
- Chimney. They do not apply to meteorological instruments. They are entrusted with a number of tasks, including traction control, improving smoke removal, and protecting the chimney from wind blowing. They are made of copper or other metals to avoid fire.
- decorative. Distinguished by their stylish appearance. They often decorate residential and public buildings. The design of the weather vane in this case is forged or cast elements, decorated or not with stones. Sometimes they perform the function of a meteorological instrument. For this, products are equipped with special plates with symbols that allow you to find out the direction and strength of the wind. Such weather vanes can be flat or voluminous.
- Meteorological. They are forged from metal alloys. They are complex weather devices. They have marks on them, thanks to which meteorologists predict the weather. Such weather vanes are divided into household and professional appliances. The latest products are installed at weather stations - they are called anemorumbometers. The domestic version has a simple design, it usually has two marks - north and south.
- Vilde metal weathercocks. They are used to determine the strength of the wind. They are equipped with a thin metal plate, usually made of alloy steel. The principle of their device is very simple. Initially, the plate is located strictly vertically. At the slightest breath of wind, she changes position. Based on the magnitude of the deviation from the sensor, determine the strength of the wind and the frequency of its gusts.
Homemade weather vane
Before you start making a device with your own hands, you must have a sketch. You can find the picture on the internet. When choosing, many are guided by what the weather vane on the roof means, which has a certain silhouette.
Various materials are used as the basis for the device:
- wood;
- plastic;
- metal plates;
- other coatings.

When choosing a material, pay attention to its following characteristics:
- Moisture resistance. To prolong the life of wood, it is coated with exterior paint or emulsion.
- fire resistance. This is especially important for chimney weathercocks.
- Rigidity. The device must meet certain rigidity and strength requirements. Otherwise, with significant gusts of wind, the weather vane will distort the readings.

To make the device look interesting, the static form is complemented by a dynamic detail. Then, at the slightest gust of wind, it will begin to rotate, and thus the illusion of constant movement of the figure on the roof will be created. This technique will allow you to simultaneously drive away flocks of birds from the roof, as they can damage the coating.
After drawing the outlines of the figure on the base of the weather vane, it is cut out with a cutting tool, the sections are trimmed and, if necessary, painted.
Installation of a weather vane on the roof
Before you fix the weather vane on the roof with your own hands, you need to study the information regarding its elements:
- figurine. She is assigned the function of a guiding element. For convenience, it is supplemented with an arrow with marks to quickly determine the direction of the wind.
- Counterweight. It is installed at the end opposite the guide arrow. Helps with accurate determination of wind direction and prevents false readings.
- Axis. It is used to set the figurine. Since the axle is not fixed rigidly, the weather vane can rotate freely with gusts of wind.
- metal sleeve. It is placed on top of the axis for protection, since it is fragile and strong wind will crush her.
- Rain cone. It is cut from a thin steel sheet and rolled up. Then fasten with a screw.

After you figured out the design of the weather vane, you can begin to assemble and install it. Quite often, pointers are placed on the ridge, since it is the highest point of the building. An axle and a sleeve are placed in it.
So that this assembly does not have to be lubricated often, a metal ball can be mounted in it, by analogy with a bearing - as a result, the sleeve will be easier to rotate around the axis. A cone is put on top, on which a weather vane is attached.
How to install counterweight
At the end of the installation, a counterweight is installed. The weight of both the plates and the counterweight must be taken into account, otherwise the device will not function properly. If you have a drawing, installation is easier.

After the weather vane is fixed, it is painted with exterior paint, or enamelled. Properly performed installation assumes relative rigidity - the weather vane should not be strongly tightened with fasteners. Otherwise, they will be highly susceptible to wind loads.
The original weather vane can be purchased at a building materials store, focusing on its functional purpose, taking into account the symbolism.
A weather vane is a meteorological instrument used to determine the direction of the wind, as well as its speed and strength. It is a metal flag with a counterweight at the other end. Rotating around its axis, the device rotates under the influence of the wind. A wind rose is set on the same axis.
Of course, in our time, wind parameters are measured with special electronic devices, so an ordinary weather vane is often used as a decorative detail on the roof of a house.
The easiest way to get a beautiful front lawn
Of course, you have seen the perfect lawn in the movies, on the alley, and perhaps on the neighbor's lawn. Those who have ever tried to grow a green area in their area will no doubt say that this is a huge job. The lawn requires careful planting, care, fertilization, watering. However, only inexperienced gardeners think so, professionals have long known about the innovative tool - liquid turf AquaGrazz.
No one can guess exactly when people began to use weathervanes. The oldest on this moment can be considered a weather vane made by a Greek astronomer a little over 2000 years ago. He crowned the Tower of the Winds in ancient Athens and also had a symbolic meaning.
Weathercocks were very popular in the Baltic and Scandinavian countries. In coastal port cities, it was necessary to determine whether the wind would allow the ship to moor. To this day, they decorate the roofs of buildings, striking with a variety of forms and, at times, being real works of art, but only as a decor.

Types of weathercocks
According to their functional significance, weathercocks are divided into the following types:
- meteorological instruments. Precisely balanced wind vanes that measure wind direction. This also includes Wild weathercocks, which allow you to determine the speed of the wind. In the design of the latter there is a propeller or a plate that swings under the influence of air currents. The propeller also serves to scare away birds;
- Chimney weathercocks . Protect the chimney from wind blowing, preventing smoke;
- Decorative weathervanes . Skillfully made weather vanes are usually used to decorate the house and give the dwelling a personality, bringing a unique zest. Mostly they are figurines of animals, mythical creatures or birds, but there are also very original ones, reflecting the tastes of the owners of the house.
Often, all of the above types include one device.

Symbolism of weathercocks
Over the past centuries, the weather vane has become the object of legends and served not only as a decoration of the building, but also as a kind of amulet. According to the eastern teachings of Feng Shui, the weather vane helps to establish warm friendly relations with neighbors.
The most popular weathercocks with the image of a rooster, especially in Russia. The rooster symbolizes vigilance. In folk legends, he could scare away evil spirits, protect the home from fires and other troubles. In Christianity, the rooster is considered a symbol of the holy apostle Peter.
In Asian countries, weathercocks in the form of dragons are often found. The dragon personifies wisdom, and the weather vane with its image also has the function of a talisman.

When choosing a weather vane figurine for your home, it will not be superfluous to ask what this or that image means. For example: a cat serves as a symbol home comfort, the eagle is designed to protect from enemies, the lion represents strength and power, the ship - determination, the stork - the family hearth.
It is not necessary to strictly adhere to any canons. You can choose your favorite figurine. If desired, it is not difficult to make a weather vane with your own hands.
Materials for the manufacture of a weather vane
To create a weather vane, it is preferable to use metal: sheet steel or copper. This design will last a very long time, without losing its attractiveness and without spoiling from exposure. environment. Forged products look very impressive.
Structures made of wood and plywood also take place, but suffer from precipitation and temperature changes. To extend the service life, they are covered special composition and varnish.
Quite often recently, plastic is used to make weather vanes. It is lightweight, non-corrosive and resistant to precipitation. But his age is comparatively short.
The simplest weather vane can be made from plastic bottles or CDs. Of course similar device can decorate a modest garden house, a greenhouse or a shed, but not a solid cottage.

Required Tools
The material chosen for the manufacture of the weather vane determines the set of appropriate tools for processing it, including everything necessary to install the weather vane on the roof.
Possible set of tools: ruler, drill, various drills and files, emery, hammer, soldering iron, jigsaw (for working with wooden details, plywood or plastic). Depending on the complexity of the design, it may be necessary lathe and anvil.
The main parts of the weather vane
The design of the wind vane includes:
- bearing axle;
- flag with a counterweight;
- frame;
- a cap that protects the body from water;
- wind rose showing 4 cardinal points

Before you make a weather vane with your own hands, you must select or carefully draw up a drawing of a weather vane. This will help to avoid errors and inaccuracies in the design.
The dimensions of the weather vane can be any, there are no strict rules here. But mostly they stick to the size of 70 x 40 cm (for a cottage).
Making a weather vane from metal
- For the construction of the hull, a piece of metal pipe is taken, about 130 mm long and 13 mm in diameter, in the upper part of which a thread is cut. A bearing is installed inside the lower part of the pipe with inside diameter 9 mm. It is advisable to use a bearing with a closed housing, which is not afraid of moisture;
- A rod of smooth reinforcement, 450 mm long and 10 mm in diameter, is used as the axis of the weather vane. The rod is ground to a diameter of 9 mm on a lathe or using emery. Adjustable to bearing size;
- To make a wind rose, metal bars (preferably steel) of small diameter are taken. They are welded at right angles to the housing cover and end with letters indicating the 4 cardinal directions;

- On the inside the covers are carved, then the cover with the wind rose is installed on the weather vane body;
- The core of the structure is fixed in the opening of the cover, and is fixed in the bearing. Then it is checked whether the structure rotates easily around its axis;
- To prevent the penetration of atmospheric moisture into the case, a special cap is fixed above the lid;
- The axis is adjusted to the desired size and a decorative flag is fixed on it - the main decoration of the product. This is done by welding, but you can use bolts or rivets.
Weather vane figurine
The most interesting creative moment is to make a weather vane flag figure.
The size is chosen individually, taking into account the dimensions of the entire structure as a whole. For sailing, the figure should be somewhat stretched along the horizontal plane.
The drawing you like is cut out of paper and glued to the material from which the figure will be made (metal, plastic or plywood). Then it is cut with an appropriate tool (for example, metal shears).

The edges of the product are carefully processed with a file. On a metal flag, chasing is often used.
How to install a weather vane on the roof
Immediately before installation, the body of the product should be filled with lubricant (for example, grease).
The height at which the weather vane is mounted must be at least 10 m from the ground, at the highest point of the building. The weather vane is fixed on the roof ridge or on the cap of the stove (or ventilation) pipe. Since the structure is constantly under load under the influence of wind, it is advisable to carry out installation and strength testing with great care.
An important point is the orientation of the weather vane to the cardinal points. A compass is used to determine them.
Mounting the weather vane on the pipe cap
The cap of the stove or ventilation pipe is the most convenient place for fixing the weather vane. In this case, the thickness of the metal of the cap itself must be 1.5 mm or more!

A bracket is installed in the cap. For this, a strip of steel, 2 mm thick, bent at both ends by 30–50 mm is used. The bracket is fixed with rivets.
In a pre-drilled hole in the cap, the axis of the weather vane is inserted with a thread at the very bottom, and fastened using a washer and nut to the bracket.
Mounting a weather vane on a roof ridge
In order to fix the weather vane on the roof ridge, you will need 2 strong, bent at an angle, metal plates.
When installing, it is necessary to act carefully so as not to damage the roof and not to violate its tightness.
A simple do-it-yourself weather vane
Not everyone can afford luxurious cottages decorated with exquisite forged weathercocks. For a modest country house, you can build a weather vane from inexpensive materials, showing your own imagination with minimal material costs.
To decorate a summer cottage, you can make an animal figurine that is set in motion in the wind using a propeller.

For the manufacture of such a device, you can take plywood, if possible, moisture resistant. The propeller wheel is made of tin, the edges are bent to form the blades. The parts of the device should not fit tightly to each other in order to ensure the free rotation of the weather vane. The resulting product can be painted.
How to make a weather vane with your own hands from plastic bottles
The most "budget" option is to make a weather vane using two plastic bottles.
One bottle is cut and a propeller is made, the second is used to make a wind vane. Further, the parts are strung on a metal rod and installed in the right place.
Regardless of the complexity of the design of the weather vane, its creation and installation must be approached responsibly, then the device will function correctly and not only provide aesthetic pleasure with its appearance, but also be useful as a meteorological instrument.
With the external design of the house, many owners strive to give their possessions an accentuated individuality. To do this, various methods are used - original finish facade, unusual shape roofs, with pronounced decorative qualities, and more. Do not forget about other design elements, including those that have long been traditional in some countries, but for some time - undeservedly out of fashion. Currently, many exterior decorative details are making a comeback, and one of them is the weather vane on the roof.

Agree that with such a detail appearance buildings acquire a completely different “sound”, so there are more and more people who want to decorate their roof with a weather vane. But just where to get it? - look for a finished product in stores or go through the ads of craftsmen in the hope of finding a quality product at an affordable price? Neither one nor the other - if desired, it is quite possible to make a weather vane with your own hands, choosing for its manufacture suitable material. And this role can be played by metal of different thicknesses, wood or even ordinary plastic bottles.
In this article, we'll look at several options. self-manufacturing such a roof decoration. However, for starters, it’s worth understanding what weathercocks are, what they are used for, and also what types of these devices are most often used.
What is a weathervane
A weather vane is a device that in domestic use is designed to perform several functions that are usually combined in one model. Moreover, the "options" have both decorative and applied significance.
- The first, and as many believe, the main one, is the meteorological function - it consists in a visual demonstration and even in a quantitative measurement of the direction and strength of the wind.
- The second, and no less important function, can be considered the use of weather vanes to protect the chimney from wind blowing into it, which prevents smoke in the premises.
- A somewhat unusual function - a propeller mounted on a weather vane and rotating under the influence of the wind creates peculiar vibrations that scare away rodents from the house, and shrews and moles - from garden plot. If the weather vane is intended for this purpose, then it is not installed on the roof, but in the middle of the garden or garden. However, in this case, to install it, you need to choose an open area on a hill, since there the propeller will capture more wind.
- And, finally, the weather vane is used as a purely decorative element that adorns the roof of the building.
Weathercocks served and serve as traditional elements for decorating roofs in the countries of Eastern and northern Europe in particular - they are very characteristic of the Baltic architecture. Therefore, in those parts, almost everyone a private house equipped with this device, and building owners always try to choose original version that you won't find anywhere else.
What are the main parts of an ordinary weather vane

The main elements of the basic design of the weather vane for the roof
The design of the weather vane includes several basic elements:
- Flag (pos. 1), which, due to its windage, rotates under the force of the wind, rising parallel to it and thereby indicating its direction. The checkbox can be in the form of a regular simple geometric figure or artistic performance, thanks to which it becomes the main decorative element of the weather vane.
- The flag is placed on one of the ends of the boom (pos. 2), and if the weather vane is working properly, it should be located on the side where the wind blows. The arrow is not obligatory element designs, since sometimes the figure of the flag is fixed directly on a vertically mounted rod - the axis.
- Counterweight (pos.3), located opposite the flag. However, this element is also not always used in the design, as sometimes the flag itself balances the arrow. If it is necessary to install a counterweight, then its weight should be slightly larger than the mass of the figure - then it will contribute to the return of the weather vane to its original position.
- A vertical axle (pos. 4) fixed in the housing and equipped with bearings in a special block (pos. 5), or simply inserted into a larger diameter pipe (pos. 6). In the second case, the axle is usually supported at the bottom by a metal ball. Bearings or a ball provide ease of rotation of the axis along with the flag.
- A cap, often centering the axis from above in the body of the rotary mechanism and protecting the latter from rain and melt water getting inside.
- Modern weather vanes are often equipped with an electronic device - angle sensors or encoders, which record the readings of the mechanical part of the device.

- On some models of weather vanes, it is installed metal plate, suspended on a horizontal axis and in a free position, swaying under the influence of the wind. The angle of deviation of this structural element from the vertical shows the strength of the wind. This plate can be replaced with a lightweight propeller. Such structures, combining the function of demonstrating the direction of the wind and an anemometer (measuring the speed of the air flow), are called Wild weathercocks, by the name of the developer, a famous meteorologist of the 19th century, for a long time who worked at the Academy of Sciences of Russia.

Quite often, on the lower, fixed part of the weather vane, points with letter designations of the cardinal points are fixed. This makes it easier to navigate with the direction of the wind. But one nuance should be correctly understood. In meteorology, winds are named after the direction they are blowing from. The weather vane is organized according to the same principle - the flag will be on the leeward side, and the arrow will show the direction from which the wind is blowing. In particular, according to the weather vane shown in the illustration above, it can be judged that the wind direction is west-north-west (WNW).
A few words about the symbolism of weather vane flags
Silhouette figures for flags, chosen for the manufacture of weather vanes, were previously made for a reason - they served as various symbols and a kind of amulets. For example, according to the Chinese teachings of Feng Shui, fixing a weather vane on the roof of a house helps to establish good relationships with neighbors.
Basically, figurines of various animals and birds are chosen for the weather vane of a residential building.
- The rooster is a sign of vigilance. It is especially common in Russia, and folk beliefs- scares off well evil spirit, as it is a symbol of the apostle Peter.
- The cat symbolizes home comfort.
- The owl has always been a totem of wisdom.
- Leo is power and strength.
- The eagle already protects the dwelling from enemies with its appearance.
- The stork is a sign family happiness and mutual understanding.
- The Dragon. Weathercocks with this mythological animal are most often found in Asian countries, as in local culture it personifies wisdom and spiritual strength.
In addition to animals, you can also see other real or fairy-tale characters on the flags of the weather vanes:

- The chimney sweep usually brings good luck to the house.
- George the Victorious is a traditional defender of the house from various negativity.
- Baba Yaga, oddly enough, is also the protector of housing from evil spirits.
When choosing this or that figure for making a weather vane, it is advisable to ask what it means, since not all images bring positive emotions to the house.

It is not at all necessary to adhere to some canons, focusing on Russian or Eastern culture. No one forbids simply choosing the picture you like, and using it to make a weather vane flag. The main thing is that the image should be positive or even cheerful.
You can also add that earlier, above the workshops or trading shops, their owners installed weather vanes with images that indicated the type of activity:
- The shoemaker had a boot on the weather vane.
- The baker chose a picture of a pretzel.
- The hairdresser used flag-scissors to designate his workshop.
Passers-by saw from afar where the necessary shop was located, focusing precisely on the figures of the weather vane. So street advertising has very ancient roots.
How to make a weather vane with your own hands
Materials for the manufacture of a weather vane
So, we figured out what a weather vane can be intended for, and what basic elements its design consists of. Now the question arises of what material they can be made of.
The flag is usually made of metal - sheet steel or copper, but sometimes wood is also used for this purpose. However, today craftsmen make the outer part of the weather vane from improvised materials, such as used plastic bottles or old unnecessary CDs.
Previously, flags for this device were often made from steel bars using a forging technique. And today, too, some craftsmen make weathercocks in a similar way, but such products are quite heavy and are very expensive. Therefore, not every budget will pull a forged product, and in addition, in order to place it on the roof, it will be necessary to provide for reinforced fastening, since under its own weight, multiplied by wind pressure, the weather vane can collapse down.
Metal and wooden flags must be covered with moisture-resistant paint, which will protect their surfaces from external destructive influences - moisture, ultraviolet radiation, biological damage, and abrasive action of the wind.
The specifics of the axis and the rotary unit of the device leads to the conclusion that they must be made exclusively of metal, otherwise the weather vane will not work properly - it will start to jam or, conversely, dangle, and the non-metal axis will quickly wear out and become unusable.
Prices for weathervanes
Tools for the job
To make a weather vane design with your own hands, you will need to prepare some tools. Moreover, for a metal product and a wooden one, they will be different, that is, their set primarily determines the choice of material. However, given that the unit for installing and rotating the axis of the device will in any case be made of metal, even if the flag is planned to be made of wood, some metal tools will still be required. If it is not possible or there is no experience in working with metal, then the mechanism itself, due to which the weather vane rotates, can be ordered from a qualified craftsman, and then you can independently attach a flag to it.
So, for work you will need the following tools:
- Electric jigsaw with saw blades for wood or metal - this device is necessary for cutting a flag and other elements of the outer part of the structure.
- Electric drill and a set of drills.
- A hammer.
- Powerful soldering iron.
- Clamps.
- Vice.
- Nippers and pliers.
- Angle grinder and hand files different sizes- for processing the edges of a metal flag.
- Sandpaper.
- In the manufacture of complex structural parts, an anvil, a lathe and
Flag stencil
Even before acquiring the material, it is probably necessary to decide on the choice of the figure that will be located on the wind vane as a flag, and to choose the right stencil for this. If there is no experience in cutting out complex small details of a flag from plywood or metal, then it is better to choose a simple pattern, without intricate bends. But still, decorative weather vanes look much more attractive, so it makes sense to try.

This contour drawing has some difficulties and requires some skill and considerable time when cutting it out. Therefore, choosing a similar option, you need to soberly assess your capabilities.

This stencil of a weather vane flag, despite its volume, is easier to transfer to metal or plywood, as well as to cut it out, since it involves the removal of large parts of the pattern and has a minimum of small pattern elements and complex bends.
You can make a stencil yourself, first on a regular landscape sheet, and then draw it in the natural size of the flag. It is convenient to transfer by squares, breaking a small pattern into them. When making a drawing, you need to take into account that it will then have to be cut out with a jigsaw, so all its lines and edges of the bends must be clear.
The finished stencil, made in full size of the future flag, is applied to a sheet of metal or plywood, and with the help of a simple pencil, the drawing is circled, highlighting the cut lines.
The optimal parameters of the flag for a weather vane can vary from 300 to 500 mm, since if you make it larger, then the body of the structure will have to be strengthened, otherwise it will break under the influence of gusts of wind.
Prices for electric drills
The process of making a weather vane - step by step
Whatever figure is chosen for the weather vane flag, the manufacturing principle of this device is the same.
The main nodes of the rotary structure are its axis and body, on which it directly depends on how the flag will react to the wind. The best option will install bearings on the axis and close this part of the device with a housing. Bearings do not require constant lubrication, since in a closed housing they will not come into contact with moisture.
The axle itself must have a diameter of at least 10 mm, which will ensure a stable position above the fixed structure in case of strong wind gusts.
In the hull, it is necessary to provide fasteners for the element of the roof structure where the weather vane is supposed to be installed.
It is very important to observe all proportions when planning and manufacturing a product, therefore, having drawn up a drawing, it is recommended, if possible, to show it to specialists who are able to assess the correctness of the project. It is possible that they will help with advice on how best to do some details for him.
As an example, we will consider the manufacture of a weather vane with a flag in the form of a cute cat figurine, which is quite simple in execution, as it has smooth, curved lines.

For work, you will need to prepare the following materials:
- Steel sheet with a thickness of 2.5÷3 mm.
- Steel tubes with a diameter of 15 and 22.5, as well as a piece of pipe 50 mm long and 60 mm in diameter.
- Steel wire with a diameter of 3 mm.
- Copper pipe with a diameter of 15 mm with a wall thickness of 1.5 mm, a length of 367 mm.
- Steel hollow ball with a diameter of 80 mm and solid metal or glass with a diameter of 15 mm.
- Square bar with a section of 15 × 15 mm.
- Square tube 25×25 mm, wall thickness 2 mm, length 120 mm.
- Steel bar with a diameter of 12 mm.
- Steel plate 3 mm thick and 60 × 60 mm in size.
Having prepared everything you need, you can start work, which is divided into several stages:
- Preparatory work.
- Transferring the outline of the drawing to a metal sheet.
- Cutting out a figure.
- Making an arrow to place a flag.
- Production of the rotation mechanism.

The above drawing shows the parameters of the arrow and the turning mechanism of the weather vane, suitable for the dimensions of the flag, the manufacture of which will be described later.
The stages of manufacturing a weather vane, after drawing a pattern on a metal sheet through a stencil, are shown in the table:
| Illustration | Brief description of the operation to be performed |
|---|---|
 | After the outline of the flag figure is transferred to a sheet of metal 2.5 ÷ 3 mm thick, they start cutting it out. So that when performing this work, the metal plate does not move and the cut does not go to the side, it must be rigidly fixed in one position, for example, using clamps. Work is carried out on metal table, and the plate is fixed with an overhang. Having cut one edge of the figure, the clamps are loosened, the plate is installed in them with the other side and the next line is cut. This happens until the entire figure is cut along the contour. |
 | In the next step, the edges of the resulting figure must be aligned and slightly rounded, removing the burrs. This stage of work is carried out by a grinder (grinder) with a grinding wheel installed on it. Performing this process, the figure is also rigidly attached to the table with clamps. |
 | In places where it is impossible to reach with a grinding wheel, the work is done manually with a file of the right size. The figurine is rotated and fixed so that the area to be treated hangs off the table. |
 | Small holes, such as animal eyes or blanks for inserting other elements, in this case, the nose and whiskers of a cat, are drilled with an electric drill. If used hand tool, then the figure should also be fixed to the table, but it is more convenient to carry out this process on a stationary drilling machine. The drill is selected according to the diameter of the hole. In this case, the master used drills with a diameter of 12 ÷ 15 mm. |
 | Further, drilled holes that will not be used for inserting other elements must be well cleaned with files. First, their edges are processed with a tool with a large notch, and then with a small one, since their edges must be perfectly even and smooth. If it is necessary to expand or give an elongated shape to round holes, a file or needle file 5 ÷ 7 mm wide and 2 ÷ 2.5 mm thick is used. |
 | If the figure of the flag according to the project has protruding elements, as in this case, these are the mustache and nose of the cat, then they are made from steel wire with a diameter of 3 mm and from a steel bar with a diameter of 12 mm. The wire for the future mustache is cut with wire cutters into segments 110 ÷ 120 mm long, then a distance of 15 ÷ 20 mm is measured from one of their sides and this part is bent with the help of pliers so that the workpiece has an L-shaped shape. |
 | The nose is made of a steel rod, the edge of which is processed with a grinder to a semicircular shape. To make it easier to work, the rod is rigidly clamped in a vise. Having shaped the edge and polished it to smoothness, three strips are cut into it with a chisel, which will make this detail look like a cat's nose. |
 | After that, 4 ÷ 5 mm are measured from the prepared edge, not counting the rounded part, and the workpiece is cut off from the rod along this line. You need to cut the bar as evenly as possible, otherwise, when it is put in place, it may stand up crooked. The cut is made with a cutting wheel for metal mounted on a grinder. In this case, the rod must be clamped in a vice, but this time, setting it horizontally. |
 | The next step in preparing the nose and mustache is to fix it on the muzzle of the cat figurine. Parts are fixed using welding semi-automatic, spot welding. First, the prepared L-shaped mustache blanks are inserted into the previously drilled holes on the front side of the figurine, hooking with the bent side. Then, they are fanned out, as intended by the project, held with pliers and welded from the inside out. The nose part is inserted from the front side of the figurine into a wide hole drilled between the whiskers, and then it is also welded with reverse spot welding. |
 | After welding work is completed, the parts of the welded parts protruding from the wrong side must be carefully cut off, and then cleaned with a grinder until smooth. |
 | The finished figure is temporarily set aside, and they proceed to the manufacture of an arrow on which this flag will be fixed. First, its tip is made. For this, a plate of 60 × 60 mm is taken and a drawing is applied to it, in accordance with the dimensions indicated in the above drawing. After that, the plate is fixed with a clamp to the table, leaving its part with the drawn detail on the overhang. Then cut out the tip with a jigsaw, installing a metal file in it. The elements of the shank are immediately prepared - its dimensions are also indicated in the drawing. Two elements of this part are cut out - from metal 3 mm thick. |
 | For the manufacture of the base of the arrow, on which the tip and plumage will be fixed, a square bar with a section of 15 × 15 mm is used. The base consists of two elements - a tip will be welded to one of them, and plumage to the second. The piece of bar to which the plumage or shank will be welded has a length of 470 mm, and the one intended for installing the tip is 290 mm. The bar is cut with a grinder, after fixing it in a vice. Further, as can be seen in the drawing, the rod in the region of welding of the tip narrows to 3 mm, that is, to the thickness of the plate from which the tip is made. These sections are called flats, and they are intended for a good fit of the two structural elements to each other. Part of the shank bar is also turned in its back. Cutting off protruding parts is also necessary to create a higher streamlining of the product, that is, so that they do not slow down the weather vane when exposed to wind. |
 | Now the tip and two parts of the shank, after marking their location on the bars prepared for them, are carefully welded to them. Then the welds are cleaned to smoothness. |
 | The elements of the arrow are ready, and you can proceed to the manufacture of the rack on which the arrow and the swivel will be attached. To begin with, a prepared hollow metal ball with a diameter of 80 mm is taken, on which the previously made figure will be attached. A hole with a diameter of 13 mm is drilled in it. In addition, a cover is cut out of a metal plate 12 mm thick, under which a rotary mechanism will be located and a hole of the same diameter as in the ball is also drilled in it. |
 | Next, a cut-out lid with drilled hole is fixed in a vice, a piece of pipe 50 mm high and 60 mm in diameter is installed on it, and from the inside these elements are welded together by a semiautomatic device. |
 | Next, a steel bar 600 mm long and 12 mm in diameter is taken, fixed in a vice, a ball drilled through it is put on its edge and fixed on both sides by welding. |
 | The next step is to take a piece of a square pipe 120 mm long and 25 × 25 mm in section and welded to a cover with a hole fixed on the pipe segment. Then, the rod with a ball welded on its end is inserted into the resulting structure, the square pipe is joined to the ball and carefully scalded. |
 | The next step on the ball is marking the points to which two parts of the arrow will be welded horizontally, at a right angle - one on one side of the ball, the second on the opposite side. For the convenience of performing work, at the marked points, you can drill recesses with a diameter corresponding to the size of a square bar. The parts of the arrow inserted into the holes are carefully fixed by welding. |
 | When the arrow is securely fastened to the ball, a cut-out cat flag can be welded to it. To perform markup, finished structure fixed on the table with clamps. Then, the lower part of the figurine, in this case, the front paw of the cat, is applied to the ball. A semicircle is drawn on it with a marker, which is then cut out with a jigsaw. |
 | Then, the flag, with the cut out part, is applied to the ball and welded. So that during welding, the sparks from it do not fall on the flag and do not leave melted spots on it, it is recommended to cover it with a metal sheet. The figurine must be securely fastened to the structure, for this the front paw is welded to the ball, and the rear paws are spot-welded to the back of the arrow. It turns out that the flag is shifted to the rear of the boom, which is necessary for the weather vane to work correctly. The counterweight in this case is not required, the design is normally balanced. |
 | After completing the assembly of the upper part of the weather vane, you can proceed to the installation of the lower one, which includes a swivel - a rotational mechanism. In addition to the supporting rod that unites the two parts of the weather vane, the rod, to assemble the lower part of the structure, you will need to prepare the following parts: a copper tube 367 mm long, 15 mm in diameter, a steel tube with an outer diameter of 22.5 mm (1/2 inch), a cut steel bar 50 mm long and 15 mm in diameter, as well as a steel or glass ball with a diameter of 15 mm. |
 | The hole in the steel tube at the bottom is welded, as it must be deaf. Then a piece of a bar 50 mm long is installed in it, a ball is placed on top of it, then goes copper tube, inside which a support rod is inserted, welded in the upper part of the structure. It is recommended to lubricate the ball installed inside the tube with grease - this measure will facilitate the free rotation of the weather vane under the influence of the wind. When the assembly work is completed, the structure must be coated with a special paint for metal, which prevents the appearance and spread of corrosion. |
 | After the paint has dried, the weather vane is installed in a mount that is installed on the ridge or chimney of the roof. On the this photo a ridge mount is presented, but it, of course, may be different. |
The above instructions can also be used to make a weather vane with a different flag. The difference is not fundamental, and consists only in the choice of a stencil and the size of the steel sheet onto which the pattern will be transferred.

There are other schemes for manufacturing a weather vane, in which elements indicating the cardinal points are involved. They can be used in combination with an arrow or without it. To distinctive features include the following manufacturing steps:

- Instead of a ball, a bearing corresponding to the diameter of the vertical inner column can be used as a turning mechanism. A bearing with an outer diameter of 20 and an inner diameter of 9 mm is well suited for a weather vane, however, it must be borne in mind that it must fit tightly into the housing tube. Therefore, for this purpose, the so-called reinforced VGP pipe¾ inch, having an outer diameter of 26.8 and an inner diameter of 20.4 mm, with a wall thickness of 3.2 mm. The bearing is installed in its lower part. If it enters too freely, then a layer of tin is welded onto the outer part of the ring, but this procedure will require a powerful soldering iron.
- Instead of fastening individual parts of the structure with, you can use threaded connections, but in this case, you need to purchase a pipe with already threaded threads or have a special tool - an appropriate die for cutting it or a die.
- If it is supposed to include indicators of the cardinal points in the design, then it is more difficult to do without welding, although if desired, a solution can be found here. For the manufacture of this part of the structure, metal bars are required - they can be round or square. You will also need metal letters N, S, W, E (or in the Russian tradition - C, B, Yu, Z), cut from a steel sheet 1.5 ÷ 2 mm thick. The size of the letters depends on the height of the building, as they should be clearly visible from below.
The letters are welded to the bars, and the bars to the lid. They should be perpendicular to each other, forming four right angles.
- If a metal sheet of 1 ÷ 1.5 mm is selected for the manufacture of a weather vane flag, then it can be cut with metal scissors.
Taking into account the peculiarities of the manufacture of a particular design, it is possible that additional tools will be required for work.
Installation of a metal weather vane on the roof
In order for the device to work properly, it is not enough to make it with high quality - it is also necessary to correctly install it on the roof, while orienting the scale with the letters fixed on the crosspiece to the cardinal points. You can set the points correctly using a regular compass (many people now have it even in mobile phone), as well as, for example, by position polar star(North, N) or, with some error, simply by sunrise (East, E).

The weather vane can be fixed to the roof in several places and in various ways:

- On the weather vane (cap) of the chimney using several metal strips for fixing, which are screwed or welded to the base. If it is planned to position the weather vane in this way, then the installation is carried out before the hood is raised on the roof to the installation site.

- On the ridge, corner or spire of the roof of the building with the help of special brackets, which are fixed with self-tapping screws.

- On the wind board of the pediment.
It should be noted here that if the end of the steel wire is fixed to one of the fixed parts of the metal weather vane, and the second, stretched to the ground, buried one and a half meters into the ground, then the weather vane will become an excellent lightning rod. However, it still requires a professional approach.
Checking the operation of the weather vane is quite simple - it should rotate even from the influence of a weak wind and take a position parallel to its direction.
In order for the structure to function properly, it must be maintained in working condition by regularly lubricating the bearing or the metal (glass) ball installed inside with one of the traditional lubricant compositions.
Weather vane from plastic bottles
For those who do not have the opportunity to make their own or order experienced master a metal weather vane, but there remains a desire to decorate a country house with this accessory, you can use for its manufacture the material that is found in every home today - these are empty plastic bottles. Of course, this option is used more as a decorative element than a functional one, but there is no doubt that it will enliven the exterior of the house.
There are many options for decorative weather vanes made from plastic bottles. In the following, some of them will be briefly discussed.
First option
This weather vane model can be called the most difficult to manufacture from this “line”, since, in addition to bottles, this design will require a bicycle wheel and a tube on which it will be installed. In addition, it is necessary to prepare a support for fixing the wheel - it can serve, for example, as a pole. It is not recommended to install such a weather vane on the roof, since when exposed to wind during rotation, it will make a certain noise that the inhabitants of the house are unlikely to like at night.

This version of the weather vane is also called the "Ferris wheel" or "mill", for its external resemblance to these designs. If on suburban area found for this device appropriate place, then for its manufacture you will need:
- A wheel that can be taken from an old children's or adult bicycle.
- An even number of plastic bottles of different sizes and preferably different colors.
To make such a weather vane does not have to make much effort.
First, with the help of a marker, the wheel is divided into equal sectors, and the bottles will be fixed along these markings. To fix them, you need to do the following manipulations:
- Holes with a diameter of 3 mm are drilled along the markings.
- Then, through these holes, using metal screws, bottle caps are screwed to the outside of the wheel.
- Further, the main structural elements are being prepared, which will act as blades - plastic bottles. To work on them, you need a sharp clerical knife. They cut off one edge from large bottles as shown in the photo. Half-liter bottles remain intact.
- The next step is to alternately screw the bottles to the caps fixed on the wheel, and so that the cuts on the larger bottles are turned in one direction.
The wheel is fixed in such a way that it can move - it can be bent with the letter “G” and a flattened tube, with an external thread at the free end. The tube is fixed on the top of the pole with self-tapping screws through holes drilled in its flattened part. After that, a wheel is put on the edge of the threaded pipe and fixed in such a way that it can spin.
Such a wind vane must be installed on open space so that the wind could, falling into its blades, set the movement.
Second option
A similar weather vane model is called a "turntable", as it rotates around the axis on which it is installed horizontally.

For the manufacture of this product, you will need one liter or one and a half liter bottle and a metal rod that will act as an axis. A spoke from a bicycle wheel is well suited as an axle, since it has a thread at its end, and if necessary, fix the structure in a certain place, it can be easily bent.
Work on the manufacture of this weather vane will take quite a bit of time, and they are carried out in the following order:
- The selected bottle is marked into several sectors (in this case, six) using a marker. There are bottles that already have a relief pattern, which will allow you to do without markings at all.
- Further, in the marked places, peculiar stripes are defined, rounded off from the bottom side of the container. The stripes should be located in the middle of the bottle, as shown in the illustration.
- The next step is to cut out the marked strips around their entire perimeter, except for the upper part, and then bend them from the bottle at a right angle. When the spinner is spinning from the wind, the blades will take the optimal position.
- After that, in the lid and in the middle of the bottom of the bottle, holes for the axis are drilled or pierced with a heated awl. They should be slightly larger than the diameter of the rod - only then the bottle will spin freely on it when exposed to wind.
- The prepared rod is rigidly fixed in the selected place on a wooden base using, for example, metal clamps. The axis must take a horizontal position.
- Then, a bottle with cut-out blades is put on the rod and a nut is screwed onto the thread of the rod in the bottom part, which will hold the resulting weather vane on the axis when it rotates from the wind.
Both the bottle itself and the bent blades, if desired, can be decorated with insulating colored tape or paint to make the weather vane more picturesque, especially when rotated.
Third option
This version of the decorative weather vane resembles a children's spinning top or hanging lantern, so the master himself can give it a name.
To make this model, you will need a two-liter or one and a half liter bottle and a threaded rod at the ends. If the previous turntable was installed horizontally on the axis, then the spinning top is fixed in a vertical position.

The work on the manufacture of this uncomplicated model is simple and is carried out in the following order:
- The plastic bottle must be marked, setting aside 50 ÷ 100 mm from its upper and lower parts, depending on the shape of the bottle, defining the lines between which vertical cuts will be made.
- Then, from the top to the bottom line, the middle part of the bottle is cut into strips about 10 mm wide.
- In the next step, the bottom side of the strips is bent at an angle to one side outward, and the top side to the other side, also at an angle. Additionally, in the middle part of the strips, you can also make one or two bends in different directions.
- Further, in the center of the bottom part, as well as in the bottle cap, you need to make holes with a heated rod or awl.
- Then a rod is inserted into the holes made, which should be less than the height of a whole, uncut bottle, by about ⅓ part. In the bottom part, as well as on top of the cover, nuts are screwed onto the thread of the rod from the outside. At the same time, the design seems to be “flattened”, acquiring the characteristic shape of a New Year's “lantern” or a children's top.
- Now, it remains only to choose a place and fix the finished "windmill". To do this, the protruding part of the rod can be bent into a loop, for which the weather vane will be fixed. However, there may be other options - any owner will surely be able to figure out how it is more convenient for him to install or hang this "toy".
When making holes and choosing a rod, it must be borne in mind that the bottle must rotate freely, without any interference and braking, on the axis.
Fourth option
This model, unlike the previous weather vane, consists of two horizontally arranged tiers, along which semicircular blades are cut. The weather vane is also made from plastic bottle, which is fixed on the axis according to exactly the same principle as the previously considered model.
Prices for popular jigsaws

However, marking and cutting the bottle walls for this model will still be more difficult. First, on the walls along the vertical, you need to define two wide strips separated by one narrow one. The next step is to draw semicircular blades on each of the strips with the help of a marker, somewhat reminiscent of large fish scales. Then, with a sharp knife, cuts are made according to the drawing, while maintaining integrity in the upper and lower parts of the future blades - their width should be equal to 10 mm. After the blades are cut, they are bent at an angle of 90 degrees to the main surface of the bottle.
Further, if there is such a desire, the weather vane can be painted in different colors by picking them up optimal combination between themselves. After the paint dries, the weather vane is assembled and fixed in the same way as the top. In addition, this model can be simply suspended only by a cord that is threaded through a hole in the lid. And so that the suspended weather vane does not dangle much in the wind, it can be loaded by putting a pebble inside the bottle.
* * * * * * * *
In conclusion, we can add that if you plan to decorate the roof of the house with a full-fledged metal weather vane, but the right tools no, and experience in this type of work is small, it is best to order such a product to a master who is professionally engaged in welding and plumbing work and has a whole arsenal of devices for this. Such a specialist can be found in any auto repair shop. Well, a sketch of a weather vane can already become the owner's personal contribution to its manufacture.
And finally, to complete the picture - an informative video that shows the manufacturing process of another interesting model of a metal weather vane:
Video: The work of the master in the manufacture of a metal weather vane for the roof
A weather vane is a traditional instrument for measuring the strength and direction of the wind.
It has its own history, which, I must say, lasts for several centuries.
The main task that it solves is metrological, however, in addition to measuring wind indicators, it can be used for a number of other purposes - for example, protecting a chimney in a private house.
When installed, blowing out the chimney definitely does not threaten.
The aesthetic side is a separate conversation.
The weather vane may have different forms and decoration and often they have their own meaning.
Let's be honest - many people today are not interested in the strength and direction of the wind.
The decorative function becomes the main one, which means that here you can show your imagination.
One of the most famous forms of the tidy is the rooster.
It symbolizes the beginning of a new day and protects the house from thieves, the elements and warns of enemies.
According to legend, it also protects from evil spirits.
The weather vane, made in the shape of a cat, represents freedom and independence.
This form is the second most popular.
Horses and cows are a sign of indestructible bonds of friendship.
The griffin is a symbol of fertility, power and prosperity.
Just by looking at the weather vane of a house, you can learn a lot about the people living in it.
Construction and materials
What is a weathervane?
This is a metal plate mounted on a metal rod on the roof with a hinged method.
There are several parts, if we consider the device in more detail:
- Rack. Installed on the roof of the house. It is firmly fixed with feints, fixing the rod and giving it support.
- Vanes. Everything that spins. Moving parts of the wind vane
- Rose of Wind. Actually, it is she who serves as a measurement of the direction of the wind. Set according to the compass data.
What can this device be made of?
There are two options: metal and wood.
The first is more reliable and more expensive.

There are also plastic figurines, but they will not last long.
True, at proper processing a wooden weather vane can last longer - if you cover it with a special varnish.
If you want a quality weather vane that will last a long time, lean towards metal.
Today, such figures can be made of steel if the image is flat, and of copper if it is voluminous.
When cutting out, laser cutting technology is used.
Despite the strength, the metal weather vane also needs special treatment to protect it from mechanical stress and make it more attractive.
It also increases corrosion and UV resistance.
Where can I buy
If there is a blacksmith shop in your city, best place You simply cannot think of such an order - blacksmiths will not only fulfill your order as soon as possible, but will also take into account all individual wishes.
But if you are not interested in the little things, and you just want to buy a quality weather vane at a good price, contact the appropriate stores.
In addition, with the advent of the Internet, it became possible to order a product you like from another city in case the choice in the store did not satisfy you.
Photos of weathervanes


Installing the appliance on the roof
First of all, remember: the weather vane will perform its functions only if the installation is done correctly.
- Installation is always done in highest point, which is called the ridge of the roof. The ideal option would be to install a weather vane on the chimney.
- To correctly calculate the cardinal directions for the wind rose, use a compass.
- The figure is directly attached to a steel pipe, which is put on a rod located in a vertical position.
- In order for the weather vane to move freely in accordance with the breath of the wind, it is necessary to install a bearing at its base.
Negligence can have disappointing consequences: one day the weather vane can simply stop.
Today, there are already special technologies for the construction of the rotation unit.
Ideally, it is equipped with two bearings, which significantly increases its sensitivity to minor wind fluctuations and overall reliability.
And now let's expand the functionality a little: you can make a lightning rod from a weather vane.
Attach the wire at one end to the pointer and ground the other - it will take about one and a half meters.
Here's another interesting move in using the weather vane.
Correct installation on the roof ridge
We have already said that the weather vane must be installed at the highest point of the roof. Now let's look at the step-by-step installation instructions.
Everything is much easier than it seems.
To determine the direction of the wind, two parts are needed, namely: the plate itself and the counterweight.
Take care of balance first.
So let's go:
- Fasten the weather vane to a metal sleeve - this is done for freedom of rotation.
- As mentioned earlier, one, preferably two, bearings must be placed between the end of the axle and the sleeve to reduce friction.
- An umbrella mounted on a sleeve will help protect the rotation assembly. Then the sleeve is attached to the axis through the hole for the fixing screw and the annular working located in the axis.
- To prevent the screw from preventing the weather vane from moving freely, you need to install rubber gasket between him and the sleeve.
- A coupling with pins is installed on the rod, coinciding in direction with the main divisions of the compass. The direction of the wind is determined.
- A flange is welded at the end of the axis, which will hold the structure on the roof.
Self-made weather vane
The simplest design for self-production is a metal flag on which a counterweight is installed.
The direction of the wind, changing, will turn it around the vertical axis.
You can also make a wind rose from two plates crossed with each other.
If you want to determine the strength of the wind, so to speak, "by eye", then you can equip the weather vane with a propeller.
By the speed of its rotation, you will immediately determine the force.
Decide on the form yourself - there are many of them.
Dimensions are much more important: there are no standards as such, but it is customary to count from 400 mm in height and about 800 in length, if the weather vane is made for a large house or cottage.
To make a support, you will need a metal pipe with the following sizes: 13 mm in diameter and 125 mm in length.
A thread for fastening is cut at the top, and a bearing is installed at the bottom.
It will be fixed on the roof with 4 metal strips bent at an angle of 90 degrees.
They are fastened with screws.
The cover is made of steel, inside it is the same thread.
The wind rose is an optional element, but, as a rule, it is installed.
Two long pipes, very small in diameter, folded crosswise, will do the job perfectly.
The cardinal directions are indicated by letters welded to the ends.
Yes, and do not forget to organize a canopy over the bearing so that moisture does not spoil it.
And finally, the checkbox.
It is usually made from sheet steel or copper.
The second option looks richer and more interesting, especially with proper processing.
The drawing is transferred to the sheet, after which the figure can be cut with scissors for metal.
The edges are processed with a file.
If you want more expressiveness for a detail, use embossing.
A weather vane is showiness and efficiency in one.
Your home will change with its installation in ways you never imagined.
The exterior beauty that will make your home stand out from all others cohabitates with many features that are beneficial to you and your family.
Video about the weather vane on the roof of the house.
We also recommend
 Dionysus - Greek god of winemaking
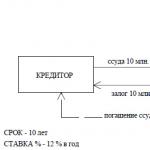 The essence of the concept and classification of mortgage lending
 Prince Vsevolod Yaroslavich Mention of the princes in the "Word ..."
 Urinary tract infections Treatment of mixed urinary tract infections
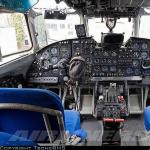 Description of an24 At what height does an24 fly
 What battle is considered the collapse of the "blitzkrieg"?