The technology of laying a soft roof made of bituminous tiles. Bituminous tiles: do-it-yourself installation - fastening standards
Installation of any roofing must be done in accordance with the regulations. Today, the roof is covered not only with slate and galvanized metal sheet, but also with other modern materials. bituminous tiles- the material is beautiful and very high quality. He is one of the five most popular roofing in Russia. Let's talk about it in more detail, and also talk about what are the features of installing shingles. Additionally, we will provide a video of the work.
Description of shingles
Any owner of a house or cottage dreams that his roof is not only reliable, but also beautiful and inexpensive. Bituminous shingles in this regard - one of the best roofing. The quality of the future roof is affected by:
- coverage reliability;
- correct styling;
- observance of all nuances.
Let's talk about the advantages of shingles. Otherwise, it is called soft or flexible. It consists of sheets of various colors and designs measuring 0.33 by 1 meter.
The structure of such a sheet is both simple and reliable. Fiberglass impregnated with modified bitumen is applied to the layer of adhesive material. A layer of bitumen is again applied on top of it, and then finished with stone granules. They give the material an aesthetically pleasing appearance and serve as protection.
Bitumen provides roof tiles with excellent waterproofing, flexibility and resistance to harmful effects. In general, bituminous tiles have a number of advantages:
- environmental Safety;
- durability;
- fire safety;
- high aesthetics;
- resistance to mechanical stress;
- thermal insulation, waterproofing and sound insulation properties are high;
- the ability to use for any type of roof;
- the compact dimensions of the sheet allow the coating to be used economically;
- rich variety of shapes and colors.

The installation of bituminous tiles is quite simple. If you follow some rules, you can do it yourself. Before we come close to this issue, we will describe the disadvantages of shingles:
- cost (it is not low, so many initial stage refuse to buy)
- for installation, it is necessary to install an OSB plate;
- in the conditions of the far north, where the temperature is often kept below 40 degrees below zero, only very high-quality expensive coverage(the minimum temperature that the material can withstand is 55 degrees below zero).
Bituminous shingles have no other disadvantages, they are reliable and durable.

Mounting technology
Many are interested in the question of whether it is possible to lay the bituminous tiles on their own. Below will be detailed instructions, following it, everyone can do such work. Before you start, you need to carry out the preparation process. When laying shingles, this is very important.
Preparatory process
If you want tiles to last long years, it is important to follow all installation recommendations. Let's start with what should be 11.5-12 degrees. Otherwise, you should not lay flexible tiles on it. As a rule, a slope above this mark is more common. The maximum indicator is defined as 90 degrees.

The whole process of preparing for laying bituminous tiles consists in the construction right foundation. Otherwise, it is called a continuous crate. For the base, the OSB-3 plate is used. Oriented strand board is a multi-layer sheet made from wood chips. They are glued together with various resins. The main characteristics of the material:
- high strength;
- resistance to high humidity(if the plate is placed in water for a day, it will not collapse and remain strong);
- absorbs sound;
- does not interfere with installation shingles(all manipulations are carried out easily);
- does not require additional processing, since it is not subject to rotting and damage by insects.
Thus, OSB boards are an excellent basis for bituminous roofing. All its positive properties, in addition to the properties of the tile itself, will make the roof resistant to precipitation and wind.
Often, OSB boards are used for wall cladding, laying floors and other works. You can also use them when installing metal tiles, however, more and more often in this case, a crate is used.

To make a base for shingles, you will need:
- OSB boards 15 mm thick;
- grooved boards;
- waterproofing film;
- nails;
- insulation (if necessary).
Let's start preparing the foundation. Initially check the angle of inclination. It must be even. If there are deviations, they need to be corrected at this stage. After that, a protective waterproofing film is laid. If the winters in your area are harsh, you will need to lay insulation between the rafter board under the waterproofing layer. As for these materials, it is very easy to choose them from what is offered on the market today.
The OSB board itself is a vapor barrier material, so the use of vapor barrier under insulation is not always justified. Groove boards are fixed on top of the waterproofing layer. They will become the basis for OSB sheets. Pre-boards are treated with an antiseptic to extend their service life. The result should be a crate. Before laying it, calculate the dimensions so that the joints of the OSB fall on the grooved board.

Now we fix the OSB boards with nails. A lining carpet will be applied over them. It is mounted horizontally or vertically with a run. You do not need to lay it out in one line so that the edges of the seams converge. Fasten the carpet tightly. Putting it in in early spring or late autumn, be sure to stretch the canvas well. Bituminous glue brand K-36 is used for gluing the carpet.
Important ! Leave a 3 mm expansion gap between OSB boards. In the hot season, the plate can expand, this compensates for this property.

Detailed instructions for arranging the base for shingles are presented in the video below.
Installation of cornice strips and additional elements
For each roof, you will need to additionally purchase and install:
- cornice strips;
- end strips;
- carpet for the valley;
- skate (to be installed later).
Start laying with cornice strips for shingles. They are fastened with nails over the lining carpet. The main thing is that the nails are staggered in increments of 10 centimeters. The head of the nail should be wide.

Keep in mind that for the future drain, brackets for fixing the gutter are pre-mounted. This was also discussed in the previous video.

Laying end strips is a similar process. On top of the lining carpet, an additional one must be laid important element shingles - a carpet for the valley. The photo shows in detail how to do this. The numbers indicate:
- valley axis;
- lining carpet;
- valley carpet.
Step for nails with a wide hat - 20 centimeters. According to all of the above, it is necessary to know even at the time of designing that the more complex the roofing project, the more expensive it will be to cover with shingles.
Installation of bituminous tiles
Before you start laying, check the color range of all tile packages. Sometimes the shade may differ. The technology is quite simple, so it is important to follow the advice and adhere to safety precautions when working at height.

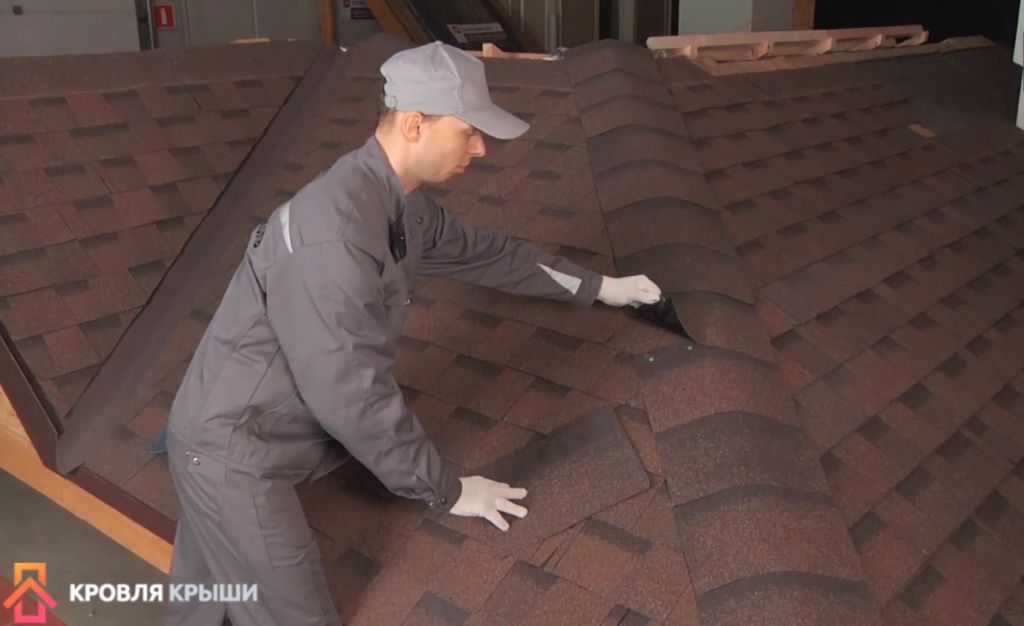
Small and light sheets of bituminous tiles are easily delivered to the roof. Begin installation from the bottom up from the center of the cornice overhang to the ends. The first layer is laid in this way: the lower edge is laid 3-5 centimeters above the edge. First remove the protective layer and glue the strip of tiles. Additionally, each strip is nailed to the OSB board. It takes 4 nails per tile. Now the layer is well fixed.
Advice ! After removing the protective layer, do not throw the tile tiles, otherwise the adhesive mass will stick together.
One caveat: if the angle of the roof slope is very sharp, then it is better to use 6 nails for reliability.
At the end edges, the flexible tiles are smeared with K-36 bituminous glue for at least 10 centimeters. Each subsequent layer is superimposed in such a way that a clear pattern is obtained in accordance with the selected shape.
Advice ! Laying will be simple if you immediately lift everything up necessary tools. Don't forget a sharp knife and a piece of plywood. With their help, you can quickly and evenly cut the edges of the tiles.

Below is a video instruction for the correct installation of shingles. It is easier to understand the essence of the process.
Mounting is also quite simple:
- a triangular rail is nailed around the chimneys and heat-insulating material is necessarily used;
- around penetrations of small diameter it is better to equip rubber o-rings.
If a seam is formed, it is additionally coated with bituminous glue.
Final stage
As soon as the laying of bituminous tiles is completed, it is necessary to move on to the ridge. Rainwater and other precipitation must flow from the top of the roof to the bottom. The ridge is the most important part of the roof.

During installation, a special tile for the ridge is used. It can be purchased or cut out tiles of 0.33 by 0.25 centimeters in size from the eaves. It is very simple to do this: there is a perforation on the cornice tiles, it divides the sheet into three parts. You need to cut strictly along these lines, and you will get the elements of the ridge.

The material is laid in this way: the protective film is removed, the bituminous tiles are glued and nailed on one side with four nails. The next tile will be laid so as to overlap the nail heads by at least 5 centimeters. For multi-pitched roofs, in places of the upper ridge shingles, bituminous tiles are folded in such a way that rainwater did not fall under the sheets.
The nuances of laying flexible tiles
Bitumen works well at high temperatures. This is often not mentioned in laying instructional videos, but it is important to know this information. It is important to remember that even a modified cold working composition of this material works at a temperature of 30 degrees. That is why, when laying bituminous tiles in the cold season, be sure to use building hair dryer. This will soften the adhesive backing.

Laying bituminous tiles is a fairly simple process, you can do it yourself if you follow simple rules. Do not ignore safety regulations. When working at height, secure ladder and use insurance. This will allow the beginner to quickly and better cope with the work.
Flexible (or bituminous) tiles are the undisputed leader among commonly used materials for roofing. It is used in the field of low-rise construction, perfect for roofing. residential buildings and various other buildings. Bituminous tiles, the laying technology of which is quite simple, has a lot of advantages due to its operational characteristics. Consider how the process of decorating the roof with this material takes place, whether it is complicated or whether you can still do the work yourself without the involvement of specialists.

The bituminous tile is rather soft roofing material, but at the same time strong and durable. It is made on the basis of fiberglass, which is covered on both sides with a layer created on the basis of bitumen. Its outer side - the front - usually has a special dressing made from mineral chips. Its function is to provide protection from external influences such as precipitation and wind. In addition, due to this dressing, bituminous tiles acquire a rather beautiful appearance.

The bottom layer of material covers a sticky layer, which makes it easy to stick to the prepared substrate. It helps the tile withstand the onslaught of bad weather, and also increases its tightness.

On a note! For the first time, shingles entered the building materials market at the beginning of the 20th century. It appeared in America thanks to Henry Reynolds, a specialist at Grand Rapids. By the middle of the 20th century, about half of all low-rise buildings in the United States were covered with this roofing material.
The service life of bituminous tiles, if it was laid correctly and operated in compliance with all standards, is at least 30 years. It can be used on any roofs, including those with complex geometric shape. The material does not give additional load on the rafters or the foundation, it is strong enough, not inferior in quality to the usual metal tiles. In addition, its installation is simple, and big choice colors/shapes allow you to match it to any style of home.

What is important to consider?
So, the installation of this material is quite simple and understandable even for beginners. However, in any case, it implies compliance with certain norms and rules, therefore, before starting with them, installation work it's important to get to know each other. So, what is important to remember when laying shingles:
- the base for such a roofing must be smooth, carefully leveled, sufficiently rigid and solid;
- the roof must have excellent ventilation;
- when laying, it is important to observe temperature regime, and therefore such a coating is recommended to be laid in the summer. The temperature outside should not be less than +5 degrees;

On a note! Installation of this type of tile can also be carried out at a lower temperature, however, in this case, the material must be supplied to the roof from a warm room and must not be stored before work begins outside. Adhesive layer in cold weather, be sure to warm up with a hairdryer before styling.
- the terms of work directly depend on the size of the roof, the experience of the master and the type of material. On average, the installation of bituminous tiles takes about 2-40 days. In the first case, the time indicator is optimal for a simple roof with two slopes. The more complex the roof, the longer it will take to fiddle with laying the coating;
- the angle of the roof slope, where bituminous tiles are mounted, can vary from 10 to 90 degrees.

GOST 32806-2014. The tile is bituminous. General specifications. Download file (click on the link to open the PDF file in a new window).
The right foundation is the key to success
As mentioned above, bituminous tiles are very demanding on the quality of the base on which they are laid. It should be solid and carefully aligned. The materials for its creation can be different - plywood, wood, OSB boards etc. It is important to remember that when laying plates or sheets of material, a small gap is always left between them. It will provide the possibility of compensatory expansion when the material increases in size under the influence of humidity or temperature. Otherwise (if there are no gaps), the roof will come in waves. The sheets are fastened to the crate using self-tapping screws or nails - the main thing is that their hats are recessed into the material.

Attention! The greater the step between the individual boards of the crate on which the sheets are laid, the thicker the material should be.
Table. The dependence of the thickness of the material on the step of the crate.
| Step between individual elements of the crate, mm | Boards, thickness in mm | Plywood, thickness in mm | OSB board, thickness in mm |
|---|---|---|---|
| 600 | 20 | 12 | 12 |
| 900 | 23 | 18 | 18 |
| 1200 | 30 | 21 | 21 |
| 1500 | 37 | 27 | 27 |
Ventilation is also of great importance. These should be air vents, holes for the possibility of entering them fresh air, openings for air outlet from under the roof.

Preparing for installation
To work on laying soft tiles, you will need the following tools:
- metal scissors;
- a hammer;
- screwdriver;
- small spatula;
- construction dryer.

Among the materials, bituminous tiles themselves are useful, as well as mastic for creating sealed joints, self-tapping screws, roofing fasteners, lining carpet or roofing material, material for steam, hydro and thermal insulation, double-sided adhesive tape.


The process of installing shingles
The installation technology of this type of tile is known to many masters, as it has long come into use and is used quite often. Installation involves several stages of work - this is the flooring of the lining carpet, the installation of the cornice strip, the laying of the shingles themselves, the design of the roof ridge and pipes.
Installation of the cornice overhang
Step 1. The plank is applied to the edge of the blood, while a small protrusion - 10 cm - is displayed beyond the border of the roof. This is necessary for the correct docking of the part with the gable plank. These elements are required to protect the roof from external factors.

Step 2 The eaves plank is fixed in place with roofing nails in 15 cm increments, which are driven in in a checkerboard pattern. Individual elements the planks are necessarily connected with an overlap, which should be equal to at least 10-15 cm.

Strap fastening step - 15 cm


Step 4 The lower and upper edges of the plank are bent along the pediment using a hammer. Better to use a rubber mallet. Curved edges are additionally fixed with a roofing nail.


Underlay installation
The lining carpet will provide not only a good surface for laying shingles, but also additional waterproofing of the roof.
Step 1. The self-adhesive underlayment carpet is laid parallel to the eaves strip of the roof with a plant on it, while about 2-3 cm should remain until the edge of the eaves strip. The strips are glued parallel to the eaves strip so that subsequent pieces of material overlap the previously laid ones. The overlap is at least 10 cm. The strips of material are glued from bottom to top on the surface of the base - this way it will be possible to achieve better protection of the roof from leaks. The roll is gently rolled out, and the protective film from under it is gradually removed.

Step 2 In the area where the chimney pipe is located, the lining carpet is cut in accordance with its shape and glued with a small factory on it.

Attention! The underlayment carpet is required for laying in the roof valley and on the cornice overhang. If the angle of the roof slope is 18 or more degrees, then the rest of the surface of the base can not be covered with it. If the slope angle is 12-18 degrees, then the entire base will have to be closed, otherwise the roof will leak.
Step 3 Above the location of the self-adhesive carpet, a mechanically fixed carpet can be used. It is rolled out on the surface of the roof so that its individual strips are overlapped by 15 cm, the same overlap is observed when laying the edge of the material on a self-adhesive carpet that was previously laid.

Carpet end overlap - 15 cm
Step 4 The overlap of the carpet with mechanical fixation on the self-adhesive carpet is made with the gluing of a thermoactive strip. It will provide reliable sealing of joints.

Step 5 The underlayment is fixed using nails and a hammer. It is desirable that the fasteners have a wide hat. Step - 20 cm.

Step 6 All overlaps between the segments of the lining carpet are smeared with a thin layer bituminous mastic to improve joint sealing. It is most convenient to apply mastic with a metal spatula. The thickness of the composition layer should not exceed 1 mm.


Step 7 After laying the lining carpets, the gable of the roof is closed with a gable strip.

Step 8 The edge of the plank is cut to the shape of the roof.

Step 9 Fixation of the gable plank is carried out with nails hammered in a checkerboard pattern in increments of 15 cm.

Step 10 A lining carpet is also laid in the valley area so that it extends 50 cm from the place of the axial part of the valley to each side of the roof.

Then one of the most important stages of roofing begins - the installation of the tiles themselves. Before starting work, it is recommended to apply markings that will allow you to lay the material neatly and evenly. This is especially important if the roof geometry has an unusual shape.
Step 1. The first row of tiles is mounted at a distance of 15 mm from the bend of the eaves. Before laying, the corner of the first sheet of tiles is trimmed - this is necessary to repel rainwater.


Step 2 On the wrong side of the tiles, which will be located in the first row, a thin layer of mastic is applied along the edge. The composition is also applied to the part that will lie on the gable bar.


Step 3 The tile smeared with bituminous mastic is glued to the place chosen for it. At the same time, it is important to leave 1.5 cm free to the edges of the gable and cornice strips. This is necessary for proper and efficient water drainage.

Step 4 The tiles are nailed with special roofing nails, which are equipped with a wide hat. The first nail is hammered at a distance of 2 cm from the edge of the material.

Step 5 Each tile shingle is fastened with 5 nails, of which 2 are hammered along the edges, the rest are evenly distributed in the middle of the shingle.

Step 6 In places of adjunction to the gable part of the roof, each tile in subsequent rows is smeared with bituminous mastic.

Step 7 The second row of shingles must be laid with shingles offset relative to the first. The offset can be 15-85 cm. The second row of tiles is laid with an overlap on the first, previously laid.

Step 8 A special valley carpet is laid in the place of the valley. The material is rolled out so as to cover the entire valley with itself. On the reverse side, the edges of the material are smeared with mastic at a distance of 10 cm from the edge.


Step 9 Additional fixation of the carpet is made using nails. They are clogged around the perimeter in increments of 20-25 cm.

Step 10 In the valley area, by analogy with conventional slopes, bituminous tiles are also mounted.

Step 11 Along the axis of the valley, the tiles are cut at a distance of about 10 cm using a sharp knife.

Step 12 At the edges, the tiles along the axis of the valley are also trimmed (corners are cut) to repel rainwater. Also, each shingle is smeared with mastic.

Step 13 The other part of the valley is formed in the same way. Thanks to this design, a gutter 10-15 cm wide is formed, along which water from the roof will easily drain into the drain.


Step 14 The edge of the roof (that is, its outer fracture) is made using ridge-cornice tiles. Several shingles are broken into separate elements.

Step 15 The resulting elements have a self-adhesive strip on the reverse side. They are laid sticky side down on the roof edge overlapping each other. The overlap is 3-5 cm. Also, the petals are additionally fixed with nails on each side of the slope - 2 nails per slope. The ridge of the roof is formed in the same way.

Video - Installation of flexible tiles
Installing roll tiles
Rolled tiles are in demand due to the simplicity and ease of installation, as well as the high speed of work. It is also mounted on a perfectly flat solid base.
Step 1. The installation of the eaves and gable strips is carried out by analogy with the previous instructions.

Step 2 To improve adhesion, the surface is treated with a primer.

Step 3 Roll tiles are recommended to be mounted vertically relative to the ridge or eaves of the roof. First of all, the roll is rolled out and a piece of the required length is cut off from it, equal to the length of the roof slope. It is most convenient to cut using a long metal ruler or rule.

Step 4 The resulting segment is tried on in place.

Step 5 To make installation easier, a protective film is peeled off from the upper part of the inside and the rolled tiles are glued to the base in this place.

Step 6 Cornice and gable strips in places where rolled tiles will be laid on them are smeared with mastic.

Step 7 The protective film from under the tile is pulled out, at this moment the tile is pressed against the base.

Step 8 The material is additionally fixed on the base with roofing nails.

Step 9 Similarly, the installation of rolled tiles is carried out in the valley part of the roof.

Step 10 Excess material at the edges is trimmed in accordance with the shape of the roof.


Step 11 In the lower part of the valley, when cutting off excess material, a small curly cut is left, which will ensure uniform and efficient removal of water from the roof.

Step 12 Along the perimeter, the material is pierced with nails. This will additionally fix it in the valley. Step - 15-20 cm.

Step 13 A groove is formed from the material. To do this, another piece of rolled tiles is overlapped on the previously laid segment in the valley.

Step 14 At the top, it is fixed with nails.

Step 15 The next segment is tried on in place. At this point, it is important to ensure that the pattern on the individual segments of the material matches.

Step 16 A protective tape is peeled off from the edge of the rolled tile, the material is pierced along the edge with nails. From the axis of the valley, the last nail is hammered no closer than at a distance of 30 cm.


Step 17 The next piece of material is overlapped on the previously laid one. The protective film is carefully removed from this part.

Step 18 After the valley is completed, the excess roll tiles are cut off. A board is placed under the material layer, which will protect the lower layer from cuts. The distance from the undercut to the axis of the valley should not exceed 7.5 cm.


Step 19 The overlap must be smeared with mastic to increase the tightness index.

Chimney pattern

Step 22 Complex junctions are additionally smeared with mastic.

Step 23 On ribs and skates, simple patterns are fixed mechanically, that is, using nails.

Step 24 The next elements of the tile overlap the nails of the previously laid pieces.

In this way, you can quickly and beautifully decorate the roof of any small building. Bituminous tiles will provide good waterproofing of the roof and give it an original look.
Video - Installation of flexible roll roofing (tiles)
Everyone knows that styling roofing material will have a positive end result only if you strictly follow the installation instructions and follow the recommendations of specialists. This applies to all roof coverings, including shingles. And if you decide to use this particular material for roofing own house, then you will have to make sure that the installation instructions for the duration of the work become a Talmud for you.
Stages of roofing with bituminous tiles
Immediately make a reservation that bituminous tiles can be used on roofs, the slope angle of which will be at least 11.5 °. This is approximately a 1:5 ratio.
Stage number one - preparatory
Preparatory in the sense that it is necessary to prepare a roofing system for bituminous tiles, or rather, a roof sheathing. So, the crate for this roofing material should only be solid, so either moisture-resistant plywood or OSB boards, or edged grooved boards. As for the boards, they should be very dry, the humidity should not exceed 20%.

It is very important to fix the crate tightly, it must be very strong and fairly even. Bituminous shingles can cover a small difference in the plane with themselves. There are several serious points in the construction of the crate.
- The joints of two adjacent elements must be located only on load-bearing elements roof structure. That is, on the rafters.
- If boards are used as battens, then one board should span two spans in length, that is, it should lie on three rafter legs.
- Again, with regard to the boards. truss system subject to changes in temperature and humidity, so it is necessary to leave a small gap between the boards (2-3 mm). This is compensation for changing the size of the boards.
- Be sure such a roof, covered with bituminous tiles, must be equipped ventilation system. Therefore, even at the stage of roof construction, it is necessary to leave gaps at the cornice and at the ridge.

Stage number two - laying the lining layer
What is underlayment carpet? This is a rolled bitumen-polymer material, which is covered with sand on top, and a polyethylene film is fixed on it from below. Laying is done with the sand layer up.
It is necessary to pay attention again to the angle of the slope of the roof slopes. If this is not less than 11.5 °, then there is no point in laying the lining carpet over the entire roof area. The main thing is to close the refractions of the structure and the extreme planes, which are most subject to loads. These are valleys, ridge, cornice, gables and junctions.

Attention! At the corner of the valley, it is necessary to lay the lining roll along, and the places of overlap between two adjacent strips must be glued and fastened with roofing nails.
It is better to apply several strips of glue. But glue cannot be applied under the entire plane of the laid roll.
All other sections are covered with strips of lining material and fastened to the crate with nails. The overlap of elements among themselves - 10 cm.
If the coating of the lining layer is continuous, then laying can be carried out either parallel to the cornice or perpendicular to it. As shown in the photo below.

At the same time, each laid strip must first be laid out, let it straighten out a little, and then pull it slightly with your hands. On the surface of the slope should be a flat surface without bubbles and distortions. The strips are overlapped with an offset of 10-15 cm. Fastening every 10 cm is done with roofing nails.
Now you need to install and fix the metal strips that are mounted along the edges of the roof slope. Namely, at the eaves and ends of the roofing system. Experts often call these strips cablemen. All metal planks are laid on top of the underlayment with a slight offset along the laying direction. Offset - 20 mm. Planks are fastened either with roofing nails or self-tapping screws. The fastening line is a zigzag, installation points every 10 cm, as shown in the video. The gables have a special shape with a side, which acts as a stiffener and drains rain and melt water.
Attention! If the cornice of your house has a curvilinear shape, then the cornice metal strips are installed in small pieces (segments), forming a curved line. The size of the length of the element must be determined by the roofer himself, who will cover the roof with shingles.

And another very important point. After the entire roof plane has been covered with lining material, another strip is installed at the locations of the valley. Its edge at the cornice should close the installed metal bar, and be glued there. And fastening along the laying in this case is carried out only with nails every 10 cm (see video).
As for the roof ridge, here the lining material is overlapped with respect to different slopes. That is, the upper edge of the lining spreads along one slope, not reaching the edge of the roof by 5 cm. In the second slope, the roll passes through the ridge to the first slope to a depth of 15 cm. It turns out that the overlap creates a continuous layer covering the ridge completely. This is clearly seen in the photo below.

Stage number three - laying shingles
All preparatory stages passed, you can go directly to the roofing with shingles. The installation instructions say that you need to start laying from the bottom, moving up, like, in principle, all roofing materials. But shingles have one point regarding the start of this construction operation. So the instruction says that the elements of the roofing are laid end-to-end along the eaves, and overlapped over the rest of the area.
Wherein cornice tiles it is necessary to lay a little deeper into the slope by about 2-3 cm. Be sure to align the edges of the material strictly along the eaves. To do this with an open line of the cornice is not difficult. The elements are fastened with nails closer to the place where the roofing material is cut (see video). Before installing bituminous tile strips, do not forget to remove the protective polyethylene film. The same will apply to the elements that will be installed in the main areas.

It is necessary to start the installation and fastening of sheets (shingles) of bituminous tiles from the middle of the slope, placing them further to the edges of the roof structure. The first row is laid so that it completely covers the cornice row. At the same time, the petals top row should cover the perforation of the cornice row. The element must be fixed with four nails, positioning 4-5 cm above the perforation. If the angle of the roof slope exceeds 45 °, then it is recommended to add two more nails per shingle, and hammer upper corners roofing element.
The edge elements of the bituminous tiles that will cover the gable planks must be cut exactly to size. And these edges must be glued. The glue is applied in several strips with a thickness of 1-2 mm. The length of one adhesive strip is at least 5 cm. After that, the glue is smeared over the surface of the lining material with a brush, the edge of the shingle is pressed by hand with little effort. Be sure to fasten the element with a roofing nail.

We return to the valley. On the laid lining material from the corner of the valley on both sides at a distance of 15 cm, two parallel lines are applied on each side. This can be done with a marker using a ruler or dyed thread. You just need to make marks at the lower and upper edges of the valley, connect them together with a thread (pull it well, which will require two people), lift and release, a clear line will be drawn on the surface of the valley material.
The edges of the material must be cut along the lines. It is better to do this with a construction knife, after placing a small board under the material and the blade of the knife. Now shingles of bituminous tiles are laid in place, the places of intersection of the shingle itself and the lining strip are marked on it. The tile element is trimmed along the resulting line. Now the bituminous shingle itself needs to be fixed, for which you need to use glue applied to the lining along the edge of the cut to a width of five millimeters. Be sure to make additional fastening with roofing nails.

The most difficult operation in this entire installation process is the laying of bituminous tiles at the junction (see video). For example, to the stove chimney. There are several positions that you need to know and strictly follow.
- It is necessary to install along the entire perimeter of the pipe in the lower part of the junction wooden lath with a triangular section. Size: 50x50 mm. You can use a cornice for these purposes.
- The lining carpet is laid over the installed rail.
- After that, a row of bituminous tiles is mounted adjacent to the vertical plane of the chimney.
- Now, a valley carpet is laid on top of the installed elements. It should cover the pipe itself in height by 30 cm, and in width protrude beyond the junction perimeter by 20 cm.
- A metal junction bar is installed on top of the laid valley carpet, which is fastened with self-tapping screws to the surface of the chimney. Be sure to fill under the bar silicone sealant, which will ensure complete sealing of the joint.
- On the side of the pipe, ordinary bituminous tiles are laid on top of the valley carpet, and can be laid under it.
And the last element of the roof is the ridge, which is also covered with shingles (see video). To do this, a strip is cut off from the valley carpet, the width of which should be such as to cover the ridge and slopes to a height of 50 mm or more. Fastening is done with nails. After that, shingles are laid on the ridge itself under this element, which are called ridge shingles. In principle, for this you can use cornice elements that are simply cut under required size. Ridge shingles must be fastened with nails that will be covered by adjacent shingles, because the laying is done with an overlap (5 cm).

Attention! If a hip roof is covered with bituminous tiles, then the installation of ridge panels begins to be carried out from the lower edge of the rib near the eaves. AT gable roofs installation starts from the middle of the ridge.
Man, at the dawn of his history, learned to cover the roof of his dwelling with various soft materials. Today there are many types . Video editing soft roof shows how convenient it is to close housing with such flexible and pliable materials. What are the options for arranging a soft roof? What is the production technology for the installation of soft roofing? These questions are asked by everyone who is interested in the opportunity to equip the roof of their house with the help of modern and beautiful roofing materials.
As the name implies, this type of roofing is flexible and elastic. You can see and feel these qualities with your own eyes only if you touch them with your hands or look at the video. Installation of a soft roof complex roofs, due to these properties, often becomes the only possible one. Soft roofing materials have many other advantages.:
- lack of difficulties in installation, no need for bulky equipment and a large number of workers;
- such a roof itself is a waterproofing material, so additional layers are sometimes not needed at all;

- thanks to a small specific gravity, the load on the structural elements of the roof is significantly reduced, which makes it possible to save on other materials;
- ease of repair. In case of damage, only a small area is changed;
- there is no strong noise during rain, which is important for residential premises located on the attic floor;
- when installing a soft roof, the laying technology is such that almost no waste remains;
- corrosion of such materials is not terrible, since they do not have a metal component;
- Some materials are not very expensive.
This type of roof, like any other, has a number of disadvantages.:
- the fire resistance of soft materials is weak, since bitumen is often their basis. To a greater extent, this is true for roofing material and roofing felt. Modern technologies have made it possible to increase fire resistance to acceptable levels;

- under a soft roof, the installation of a continuous crate is mandatory, which increases the total cost of work. The exception is, which is somewhat stiffer than other materials, so its installation is also possible on the crate with small gaps;
- weak thermal insulation properties, what is he doing necessary styling insulation.
All these pluses and minuses are to varying degrees inherent in various materials for the installation of a soft roof. The laying technology is also different for everyone.
Installation of flexible tiles (video)
Types of materials for soft roofing
Materials for the installation of soft roofs are of the following main types:
- Bituminous mastics. They are rarely used in private construction, as they are mainly used to cover horizontal or slightly sloping surfaces.
- polymer membranes. Made from PVC and other polymers. They are glued to the prepared screed using adhesives.
- Roll covers. There are self-adhesive or requiring heating.
- Soft tiles. The most popular and expensive material. Due to the variety of shapes and colors, it has gained great popularity. It is a piece product.
- Ondulin. Slate-like, ribbed sheet material made from cellulose and bitumen. Possesses properties of rigid and soft roofing materials.
All these materials are completely different technology laying of a soft roof. The device of the roof requires careful selection of the most suitable of them.
Installation of shingles Shinglas (video)
Soft roof device: technology for laying rolled materials
Roll roofing materials include: roofing material, roofing felt, glass roofing material, glass oil, tecloizol and euroroofing material. All of them have a similar production technology. A layer of bituminous mastic with polymer components is applied to the base of cardboard or fiberglass. If ordinary roofing felt and roofing felt, belonging to the first generation of materials, are not very popular today due to a short (5 years) service life, then the rest are actively used in construction. Modern roll materials have several colors and a 20-year service life. This allows them to cover roofs industrial buildings, hangars and outbuildings.

Roll materials are not very convenient for soft roofing. The laying technology is too complicated and laborious. It is important to remember that this type of material can only be laid on a roof with a slight (up to 30 degrees) slope. Before starting the main work, the base is leveled, waterproofing and vapor barrier are laid, mastic and primer are prepared.
Sticking starts from the far corner from the place of lifting to the roof. The material is glued to the base using mastic, which is heated by a burner. In the case of a self-adhesive coating, this condition is not necessary. Usually several layers are laid, so that the joints overlap with the next layer. Their number depends on the angle of the roof. If the roof is flat or tilted no more than 5 degrees, then 4 layers must be done, up to 15 degrees - 3 layers, and above 2 layers are enough. Each layer of glued material is rolled.

Helpful advice! If air bubbles are found on the roof surface during operation, it is necessary to cut them with a knife. After that, press the place of the cut tightly until the mastic flows.
The use of rolled materials is more justified in the construction of large industrial facilities or apartment buildings with flat roofs. For private housing construction, a roof made of soft tiles is better suited.
Soft roof device (video)
Soft roof device: technology for laying piece materials
Soft or bituminous tile is a piece material of small size. Its length is 1 m, and its width is 33 cm. Thanks to this, all installation work can be done by one person. Each canvas is divided into 4 parts in the form of different geometric shapes and resembles a classic tile.
Before laying soft tiles, the base is prepared. The crate must be continuous. It is often made from plywood or the like. sheet materials. If necessary, on the entire surface or in certain places requiring special attention, the lining carpet is laid under the soft tiles. It is a special rolled material that contributes to additional waterproofing.

Laying sheets starts from the eaves. The main thing is to lay the first row exactly, then it will be easier. Sheets are glued with mastic and punched with nails at the perforation points. At the final stage, the ridge and wind sheets are installed. A typical representative of shingles is a shinglas soft roof, the installation video of which shows the simplicity of the work being done, even on complex roofs of private mansions.
Helpful advice! It is best to lay bituminous tiles in hot weather. This contributes to better bonding of the material.
Whatever the soft roof from piece materials, the use of a lining carpet for soft tiles, insulation and vapor barrier is an indispensable condition for its normal functioning.
Do-it-yourself installation of shingles (video)
The very name of the material, bituminous, or flexible, tile, is quite eloquent, it initially suggests that the material should be flexible, plastic, soft. It is also clear that the material for the manufacture of soft roofing is bitumen. Bituminous tiles, the price of which is quite affordable, are often used in construction with a modest budget, but the intricate shape and complex geometry of the roof of an expensive mansion may also require the use of this attractive and fairly durable material.
What do bituminous tile sheets look like and what structure do they have?
By appearance bituminous tile sheets are rectangles, they have the shape of a plate (shingle), decorated with petals along the edge different shapes. Bituminous roofing material from different manufacturers has a variety of color scheme, may differ significantly in size and print, but the structure of the tiles remains standard.
The basis for the tiles is a fiberglass fabric impregnated with modified bitumen, the use of this modern raw material makes it possible to give the roofing material improved qualities:
- good viscosity at high temperatures,
- preservation of elasticity - at negative.
A layer of armoring substance is applied to the front layer of the tile, then a fine fraction of stone chips or thin metal sheets(zinc-titanium or copper).

The finished material is a layering:
- in the center - fiberglass with bituminous impregnation, bituminous layer,
- on the front side: sheet metal or stone granulate,
- with inside- silicon sand spraying, adhesive layer, protection film.
The layering of the material allows it to perfectly cope with loads, precipitation, temperature effects, ultraviolet radiation of the sun.

If we analyze the quality of the roofing material, then it can be argued that flexible bituminous tiles have the following properties:
- variety of shades, patterns and shapes,
- aesthetic look,
- relatively light weight
- enough high level noise absorption, higher than that of a metal counterpart,
- the possibility of mounting on surfaces of complex shape and curved sections,
- simple installation process,
- the possibility of providing waterproofing,
- excellent water repellency.
About shingles and its features - in the video:
Bitumen roofing - installation features
To get high-quality coverage, you should take note of a few simple rules:
- bituminous tiles should be stored in pallets stacked in 16 rows in a dry and warm room before the installation of the roof.
- lining material is stored in rolls, installed vertically, preferably in a heated warehouse.
It is recommended to use bituminous coating on roofs with a slope of 15 to 85 degrees. When calculating the amount of material are guided next rule: the greater the slope of the roof, the less material required for her. The calculated surface indicated on the packaging refers to roofs with a slope of 45 degrees.

When laying tile shingles, it is forbidden to use a burner; exposure to sunlight is sufficient to bond sticky surfaces. If the work is planned to be done in the off-season, when sunny days are rare, it is recommended to stock up on special glue, such as Shingle Stick or Plastal. Removal of the lower protective film is carried out immediately before shingles are laid.
Even one series does not guarantee that the color of tiles from different packages will match perfectly, so for laying one slope, you should take shingles from one package. If circumstances develop in such a way that you will have to use shingles from different packages for laying on one slope, then it is recommended to initially plan their laying out in the form of a pattern.
Installation of bituminous tiles is not done on concrete base or on a layer of insulation. In warm sunny weather, it is forbidden to walk on bituminous roofing- Use ladders when moving.
Bituminous tile laying - we prepare the crate and lining carpet
For styling soft roof the construction of the crate will be required, it must be solid; OSB-plate, ordinary plywood or board can be used as a material for its construction.

When arranging the crate, the longitudinal side of the boards or panels is laid parallel to the ridge, it is impossible to allow the seams between the sheets of material to coincide from row to row. After the complete assembly of the crate, a primer roofing should be laid on it, it provides high-quality waterproofing and makes it possible to simplify the process of installing soft tiles, with a roof slope of up to 30 degrees, the roofing sheet covers the entire surface of the slope.

The rules for laying the underlay carpet vary depending on the slope of the roof, for example, if it is about 15-20 degrees, then overlaps will need to be made - about 15 cm vertically and 8 cm horizontally, laying is carried out parallel to the cornice overhangs. If the primer roofing is laid in two layers, then it is desirable to leave an overlap of about 0.5 m horizontally, and 0.3 m vertically.

If the roof has a slope of 20 to 85 degrees, then an overlap of about 5 cm horizontally and 10 vertically will be required, fastenings are made along each joint line, droppers are installed on the soil layer along the edges and cornices, in the future they will protect the roof from ice formation. In the valleys, the overlaps should be vertically - about 30 cm, on the sides - about 15 cm.
Bitumen shingle installation technology
Special difficulties in the process of installing bituminous tiles usually do not arise, of course, if you treat the work with due attention and follow all the steps as carefully as possible.

To perform the laying beautifully, it is recommended that you first mark guide lines on the primer field, which can be guided in the process of work. For every four rows, a horizontal line should be drawn along the slope. First of all, mark out the areas on which windows, outlets of ventilation pipes, etc. are placed.
If there are no foreign elements, then first the middle vertical is beaten off with a cord rubbed with chalk, then, with a step of four rows, the next ones are marked.
How flexible shingles are attached
For fixing bituminous material, it is recommended to use roofing nails, their main differences are large caps, about 0.8 cm, the length of the nail should be 2.6 cm.
They should be hammered back 2.5 cm from the side edge of the shingle and 14 from the bottom. It is important to determine the depth of driving a nail - too deep recession of the hat in bituminous material will lead to the appearance of depressions, during rain, moisture will accumulate in them. Not deep enough immersion of the cap will make it visible. Both options will lead to the fact that the metal fastener will be affected by moisture, eventually it will rust.

- ruffed, characterized by the presence of a cone-shaped headrest that allows wedging a nail, which provides a fairly strong fastening of the shingle,
- screw, with a groove cut along, which provides increased fastening strength.
In some cases, installation is carried out without pre-laying roofing, then brackets can be used for fastening. In this case, you will need to get a stapler.

It will be necessary to purchase special glue even if the installation of tiles will be carried out in the summer, it will be required when arranging valley lines, junctions with windows and walls, and a ridge.
Apply glue with a syringe or spatula. To harden it, a temperature of the order of +10 C is required, so it is recommended to apply the glue preheated, this is important for working with low temperatures air.
For a quick setting, the glued shingle can be heated with a hot air gun, you cannot use a burner! If the weather is hot outside, then hot air treatment is not needed. It is better to press down the surfaces with force, the bonding will become stronger.
About the procedure for constructing a roof from flexible tiles - in the video:
Installation of shingles Shinglas and its features
Start installation after completion preparatory work. Note that one person can easily handle the laying process. They start laying with Shinglas ridge-cornice tiles; for the starting strip, you can also use ordinary sheets, but pre-cut, with cut petals.

Experts recommend: if shingles from several packs are used on the slope, then before laying they should be thoroughly mixed, it is recommended to lay out fragments slightly different in shade randomly, ideally, the drawing should turn out to be abstract.

Remove the protective film from the wrong side of the shingle immediately before laying it.
It is desirable to start fastening the first row from the center, moving towards the edges - this will simplify horizontal alignment. For work, the same galvanized nails are used.
Subsequent rows are also stacked from the center, but always with an offset, enough - half a petal. At correct installation the level of the lower edge of the petals should coincide with the upper edge of the cutouts of the previous row. In places where there is no self-adhesive layer, a layer of bituminous mastic is applied to the shingles. She also processes the cut lines of the shingle along the edge of the slope.

In addition, insulation will need to process the exit areas of chimneys and ventilation pipes. It is not recommended to smear all sheets with mastic - this will lead to a loss of decorativeness by the roof.
About the installation of Shinglas shingles - on the video:
For a long lasting roof

To maximize the life of the soft roof and ensure its attractive appearance, you will need to periodically perform simple maintenance procedures:
- in spring and autumn, inspect the roof for leaks,
- debris that has fallen on the roof should be removed using a soft brush,
- if there are objects on the roof with sharp or cutting edges, they should be removed manually so as not to damage upper layer tiles,
- to ensure a normal flow of water, it is desirable to systematically clean the drainage devices,
- to remove accumulated snow, use light wooden shovels,
- minor repairs of structural fragments should be carried out in a timely manner.
We also recommend
 Productive and reproductive thinking
 Reasonable egoism - what is the theory of reasonable egoism?
 Boris Nikolaevich Yeltsin, the first President of Russia
 Underground fights. Underground kings. What is “fighting not for the masses”? Where can you fight for money?
 Yakov Pavlov and Other Heroes of Stalingrad You Need to Know
 Survive an accident at sea in a dream - in reality experience a new love