Correct installation of the fan in the bathroom. How to connect a bathroom fan to a switch Do-it-yourself bathroom fan connection
Good day dear blog readers. The topic of the post is how to connect the fan in the bathroom to the switch and we will try to do it ourselves.
The bathroom is considered a high-risk room, according to building documentation. High humidity is also dampness, odors, mold, so good ventilation is a must.
bathroom fan
According to regulatory data, the value of air exchange should be 25 cubic meters. m / h, so when choosing a fan, consider this requirement. The fan still has an indicator, which is also regulated by the norms, this is the noise effect of operation.
During the daytime, the fan noise should be within 23 - 58 dB, at night within 13 - 50 dB. It is better to buy a fan in advance in order to know what diameter to make a landing hole when laying tiles.
At the moment, fans are available with a humidity sensor, timer, photo timer, motion sensor, etc. Before buying, you will need to decide what you would like to purchase. Let's take a closer look at connecting the most common options.
During installation work, connections and connections, make sure that there is no voltage in the wires using.
Wiring diagram for a fan with a timer
In this option, the fan and bathroom lighting are turned on at the same time. When the lamp is turned off, the fan is switched off for a certain time.
Connecting a fan with a timer
Let us consider in more detail the connection and connection of wires in this diagram. We lay a three-core power cable in the junction box, the cores of which have a certain color of insulation.
A wire in brown insulation will be phase, blue zero and yellow ground. We will lay the next three-core cable from the lamp to.
We will run a two-core cable from the switch to the box. A three-core cable and an additional fourth core will have to be run to the fan from the box.
Now let's connect the wires and connect them. We cut all the cables in the box from the outer sheath and clean each wire from the insulation by six centimeters.
We take the blue neutral wire of the power cable, the blue wire from the lamp and the blue one going to the zero contact of the fan (N), twisted together.
Then we take the brown wire of the power cable, the brown wire coming from the contact L fan and the brown wire going to the switch, twist together.
Now we take the brown wire coming from the lamp, the blue wire coming from the switch and the brown wire from the contact A fan, twist together.
We solder or crimp the twisted ends, isolate them, put them in a box and close it. We turn on the power supply and check our work.
Wiring diagram for a fan with a lamp
If you don't need fan bells and whistles, you can buy a simple fan and connect it in parallel with the lamp.
If repairs are not expected, then you need to run a three-core cable from the bathroom lamp to the installed fan and connect the blue wire to the contact N fan and neutral wire going to the lamp.
We connect the yellow wire to the grounding contact of the fan, the other end of the wire to the grounding of the lamp. Connect the brown wire to the contact L fan, the other end of the wire to the phase wire of the lamp.
If you are in the process of repairing, then it is better to bring all the wires to the junction box and make a connection in it. In our case, the three-core cable has three colors, blue, yellow and brown, and the two-core blue and brown.
The box comes with a three-wire supply cable, three-wire from the lamp, three-wire from the fan and two-wire from the switch.
Fan connection diagram
We cut all the cables, we clean all the wires by six centimeters. Next, we take the blue (zero) wire of the power cable, the blue wire from the lamp, the blue wire from the fan and twist it together.
Now we take the brown (phase) wire of the power cable and the brown wire of the cable coming from the switch, twist it together.
Then we take the brown wire from the fan, brown from the lamp and blue from the switch, twist it together.
For all twists, we bite off uneven ends with side cutters, solder the twists or crimp them, isolate them, put them in a box and close it.
We connect a switch, a lamp, a fan to the wires, apply power and check the operation of the circuit.
Scheme of connecting a fan to a two-gang switch
This is another common option for connecting a fan, when the light in the bathroom is turned on separately, and the fan is turned on separately.
In this option, a junction box is installed, into which three-wire cables are brought from the lamp, double switch, fan and power panel or adjacent box.
Connecting a fan to a two-gang switch
We connect the wires in the box. We cut all the cables, we clean the wires. We take the stripped blue (zero) wire from the power cable, blue from the lamp, blue from the fan and twist it together.
Then we take the brown (phase) wire of the power cable, the brown wire from the cable coming from the switch, and twist it.
Now we take the brown wire from the cable coming from the fan, the green wire from the cable coming from the switch, and twist it together.
We take the brown wire from the cable coming from the lamp, the blue wire from the cable coming from the switch, and twist it. We connect the switch, lamp, fan according to the electrical diagram.
We bite off the uneven and sharp ends of the twists with side cutters, or we crimp the twists, isolate them, put them in a box, close it, turn on the power supply and check the operation of this circuit, in which each key will turn on the lamp and the fan separately.
Here are all the wisdom of connecting, I think everyone can handle it. Good luck with your electrical installation.
Sincerely, Igor Vilkov.
As often as we shower or soak in the bath, mold and mildew can form on the walls of the room. What does it say? First of all, that the usual ventilation of the room is not enough, and it is necessary to install additional ventilation as soon as possible.
Ventilation is in a wall device or door. You heard right, ventilation can also pass through the doors, but this method of ventilation is preferable only when the rest of the apartment is well ventilated.
To avoid excess dirt, it is better to deal with the arrangement of additional ventilation devices even at the stage of overhaul. But more often we are already moving into a living space where other tenants lived before, so we have to bring the square meters to the desired state with our own hands.
Masters and builders know how to install a fan in the bathroom, but any beginner can take up the installation work in this case, the main thing is to have the desire and motivation.
When is forced ventilation necessary?
What to pay attention to?
To decide that it is unlikely that it will be possible to do without an additional hood, simple observations will help. If, after taking a bath, glass coasters, shelves and mirrors fog up, this means that condensation has formed on the walls, and dampness has settled on them thoroughly.

Any unpleasant foreign smell also indicates insufficient ventilation. This is direct evidence that pathogenic microbes are attacking square meters, where, according to plumbing standards, there should be perfect cleanliness, because it is here that hygiene procedures are carried out daily.
If there is equipment in the bathroom, for example, a washing machine, a damp environment contributes to the rapid deterioration of equipment and destroys the integrity of the joints between ceramic tiles on the walls.
How to check ventilation?
In order to check ventilation, it is necessary to carry out a series of simple sequential manipulations:
- Open a window or window in the apartment.
- Tear off a piece of a thin sheet or napkin.
- Place a tissue on the outlet of the ventilation ducts in the bathroom.
- If the paper is pressed and even goes inside a little, we can talk about a good hood. If the sheet remains unchanged, think about the reasons, perhaps the ventilation duct is clogged or the neighbors on the floor above, while carrying out major repairs, decided to experiment and simply walled up the passages.

If you have a lighter or matches on hand, you can use them to check the draft in the bathroom. Depending on how large the angle of deviation of the ignited flame towards the shaft is, the exhaust air exhaust force is determined.
Stagnant conditions are often observed in sultry calm weather, when it becomes impossible to breathe in the bathroom. The same manipulations should be repeated with the windows closed and the door closed.
The masters insist that, if possible, a forced hood must be installed in any case. The product will help to avoid the occurrence of a pair effect, the room will always be dry and comfortable.
How to clean the ventilation passage?
If you think your bathroom vent is clogged, clear it out by dropping a cone-shaped weight inside. Some recommend solving the problem of insufficient traction by building a gap under the door (by sawing a piece of the door structure a couple of cm).
But the last option, perhaps, is only suitable for those owners who do not mind spoiling their own door. Expensive door models always close tightly and, of course, making a hole in them is an absurd and unconstructive method of dealing with low thrust.
How to choose a hood?
Hood Requirements
In order for the new built-in fan to work correctly and at full capacity, it is in your interest to follow a set of rules:

How to calculate the performance of the desired device?
- First of all, calculate the area of the bathroom.
- Multiply the resulting number by 5.
- Add one fifth of it to the indicator - this will be the desired performance.
Varieties of fans
There are many types of bathroom fans available today. They can be installed both at the inlet and outlet of the air duct. Aesthetically more attractive is the last sample, which is called radial.

Air flows can be manifested with the help of blades, there are hoods with a drum type of construction, with a spiral casing. Give preference to the centrifugal-axial principle of the product, which has a small size, moderate noise and excellent performance.
Expensive appliances are equipped with air humidity sensors and convenient timers that delay turning off after using the bathroom.
Preparatory stage
To install a fan in the bathroom, you must clearly understand the entire installation process of the device. So, installation includes:
- cable laying;
- expansion of the air channel (if necessary);
- connecting the hood to electricity;
- placement in the vent;
- filling cracks with mounting foam;
- puttying after swelling of the foam.
The ventilated air will move faster and better if the bathroom has an exhaust fan installed on the opposite side at the same time. The inflow is achieved by installing a neat grill in the door, which you can buy in a store or order a door with a grill already built in.
How to choose a place for a fan?
Most often, apartment owners use the usual passage to the ventilation shaft as the area where the forced exhaust is located, it is convenient that this shaft is made by default in all residential premises.

The hole made for the natural outflow of air masses is 100, 125 and 150 mm in diameter. Therefore, before buying a hood, be sure to measure the hole in your bathroom and select the product that fits closest to the recess.
If the fan you like in the size ratio exceeds the size of the channel, the latter should be expanded using a perforator. If the diameter of the air hole is larger, stock up on a piece of plastic pipe or a corresponding corrugation and identify it in the recess. Near the pipe, walk through the voids with the help of mounting foam, when it hardens, get rid of the excess by carefully cutting it off with a well-sharpened knife. If necessary, fill the remaining gaps.

In a large, spacious bathroom, you will have to equip a powerful fan. To do this, in the wall structure, you will need to break through a powerful ventilation passage. But do not rush to do it yourself - firstly, for the repair work of such a plan, you need to obtain the appropriate permission from the state authorities, because the wall may well turn out to be load-bearing. Secondly, if permission is obtained, it is better to entrust the complex installation process to experienced builders.
Installation and connection of the fan in the bathroom
It is easy to make a fan in the bathroom, but certain difficulties may arise at the stage of connecting the device to the electrical wiring. Connecting the hood to the lighting is carried out by paralleling with some of. If you went the other way and want the fan to depend on turning on the switch in the bathroom, you need to build a separate branch of electricity.

Make a small ditch from the switch to the ceiling, where the main cables will be located, the rest are hidden in the suspended ceiling structure. When the wiring has already been laid, perform the following manipulations:
- Remove the cover from the device, under it you will see a screw, unscrew it.
- From the terminals that will be on the surface, also unscrew the screws and fix the wires extending from the air duct to them.
As for how to put a fan in the bathroom, the manufacturer often indicates in the instructions that it is necessary to drill 4 holes in the tile, on which the hood is attached using self-tapping screws. In order not to spoil the tile, we offer another option - to fix the product with ordinary white silicone, just glue the hood to the tile and leave it to dry completely. You can provide a tighter fastening in the first half hour of installation with ordinary tape.
Conclusion
In conclusion, it should be added that if the ventilation duct passes away from the bathroom through 1 or several rooms, the ventilation ducts must be laid with your own hands and hidden with ventilation ducts.
The highest quality is considered to be a plastic frame that absorbs noise and is suitable for the interior of the living space. Excessive softness and plasticity of the corrugated pipe do not make it possible to mount the material over long distances.
Surely you had to deal with such a situation in your life when there is an exhaust fan in the bathroom and it is turned on with a conventional switch. Often, bathrooms in hotels, sanatoriums, boarding houses, guest houses are equipped this way. Maybe someone from acquaintances or friends saw such a hood? By the way, this is a very good idea. And if your bathroom is not yet equipped with such appliances, we advise you to think about installing it. In this article, we will talk about the advantages of the device and how to connect a bathroom fan to a switch.
Advantages
The bathroom belongs to the rooms with high humidity. And excess moisture leads to the appearance of fungi and mold, various unpleasant insects, such as centipedes and wood lice. If the bathroom is large, it can be equipped with various furniture (wardrobes and shelves), and high humidity causes stratification of materials. Also in the bathrooms there are metal structures (towel warmers, towel and toilet paper holders), moisture accelerates their rusting.

Also, humidity is often accompanied by an unpleasant smell of dampness. And it's even worse when the neighbors downstairs smoke in the bathroom, and the ventilation duct brings these smells to you.
Condensation also constantly collects on mirrors and walls, which can lead to premature destruction of the tile.
Natural ventilation does not always cope with humidity and “aromas” in the bathroom, sometimes it is further enhanced with the help of exhaust systems. One of these options is the fan.
Channel Check
Before connecting the fan, it is necessary to check the condition of the ventilation shaft.

Some advise this method, how to bring a sheet of thin paper to the vent. It should be attracted if the hood is good. But it’s still more reliable to check with a flame, you can use matches or a candle. Light a candle and bring it to the hole, the flame should, as it were, stretch towards the channel. If this does not happen and the flame is even, then the ventilation duct is clogged and needs to be cleaned. To do this, you need to contact the special housing and communal services.
Connection methods
Installing a future fan is half the battle, the main thing is to bring a power cable to it. If the bathroom has already been well renovated, this will be problematic. The ideal option would be to install a ventilation device at the stage of repair work, then the cable can be laid in the walls. Otherwise, you will have to come up with some kind of decorative design for it or plug it into a power outlet.

Consider the options for connecting a ventilation device:
- Scheme of parallel connection of a fan with a light bulb. In this case, both the fan and the lamp will work from one switch at once. That is, the ventilation device will begin to rotate at the same time as the light bulb lights up, and will be in operation as long as the light is on. The undoubted advantage is the simple and cheap execution of such a scheme. However, there are many downsides. If the switch is off, then the fan is not working, and this is not enough to ventilate the room. You will have to turn on and additionally leave the light on for a while. On the other hand, the fan will always work when the light is on, and when a person takes water procedures, he does not need these drafts.
- Circuit from the switch. This method is definitely good, because it eliminates the stupid operation of the hood. That is, the device turns on and off only when it is needed. You can install a switch separately for the fan, or mount a 2-key switching device and power the lighting from one key, and the ventilation device from the second. This option will increase costs, as more cable is required. After all, the device is already connected directly from the switch by a separate line, and not parallel to the lighting.
- The latest models of fans are already equipped with automation, in particular a timer. To connect such a device, you will need a three-core wire or cable, the third core is connected through a light bulb and is a signal. There are two options for the operation of such a fan. It can start at the same time as the lighting is turned on, and then turn off after a set time. Or vice versa, while the light is on, the engine does not start, and as soon as the light goes out, the fan starts to work, and then it turns off after a certain period of time.

There are also fan models that are initially equipped with their own switch. It has the shape of a cord that comes out of the case. Pulling this cord starts and turns off the device. But keep in mind that such models are quite inconvenient to maintain. Fans are usually installed near the ceiling, and this place is difficult to reach in order to reach the cord every time.
Fan mounting
A two-wire cable must be laid to the installation site of the ventilation device. The fan model with a timer is connected to a one- or two-gang switch using a three-wire wire (the third wire will be a signal wire).

Make strobes from the junction box to the vent. Remember that you can only ditch with vertical or horizontal lines, there should not be any inclined ones. Do not make strobes closer than 10 cm to doorways. Lay the cable in the strobe and fix it with alabaster or cement mortar. One end of the cable must be brought out into the vent, the other into the junction box.
You can also run the cable in a corrugated pipe. Be sure to ensure that the bellows are not positioned across the vent, they must be moved and secured to the side, otherwise they may obstruct the air flow.

The fan terminals are marked in English letters:
- "L" for connecting the phase conductor;
- "N" for connecting the neutral core;
- "T" - this letter is in models with a timer, it indicates the place where the signal wire is connected.
In a cable, cores are usually distinguished by color. The zero core is made in blue, the phase conductor is in brown or white. Connect the cable cores to the fan terminals accordingly. Check the reliability of the contact connection.
To mount the fan in a ventilation duct, first remove the mesh top cover. On the bottom panel, to which the device itself is attached, there are four holes for self-tapping screws (usually they are included in the kit along with dowels). But if you already have tile and don't want to drill it, use an adhesive such as silicone or liquid nails (anything can happen, suddenly the tile will crack or the glaze will chip). Spread it on the back of the lid, insert the fan itself into the ventilation hatch, and press the lid tightly against the wall, hold for 1-2 minutes and release. Now replace the top decorative cover.
For more information on installing the fan, see this video:
And the connection diagram for a fan with a timer is discussed in detail here:
Switch mounting
Gates from the junction box must also be made to the installation site of the switch (in the case of plasterboard walls, a corrugated pipe is used). In the gates, it is necessary to lay a two-wire wire and fix it with a solution. The ends of the wire must be brought out into the junction box and into the hole for the switch.

The switch consists of a working part and a protective cover with a key. A socket must be installed in the hole. Now take the working mechanism, its contact part has two terminals for connecting wire cores. One terminal is an incoming contact, a phase conductor from the mains is connected to it. The second terminal is an output contact, the phase from the fan will be connected to it. Make the necessary connections and check the reliability of the contact connections.
Fix the working mechanism in the socket. Install the protective cover and put on the key.
If a switch with two keys is installed, then such a switching device has two output contacts, one of which must be connected to the fan, the second to the lighting fixture. Accordingly, one key starts the ventilation device, the second turns on the lighting in the bathroom.
Wire connection

Now the following connections must be made in the junction box:
- Connect the neutral conductor from the mains to the neutral conductor of the fan.
- Connect the phase conductor from the supply network to the conductor that goes to the incoming contact of the switch.
- Connect the phase conductor of the fan to the conductor of the wire that comes from the output contact of the switch.
In the case of a two-gang switch, the junction box will additionally have the following connections:
- The zero core from the mains will still be connected to the zero of the lamp.
- The phase conductor of the luminaire must be connected to the conductor of the wire that comes from the second output contact of the switch.
As you can see, nothing complicated. Be sure to consider installing a fan in the bathroom. Now they come up with a lot of trendy electric things, but half of them are a complete whim. But the ventilation of such a room as a bathroom is really not an unimportant issue. So this article is relevant and helpful.
Have you noticed that there is an unpleasant smell in your bathroom? It's time to take care of installing the right fan in the bathroom, which will help eliminate high humidity, eliminate odors and prevent the appearance of dangerous mold. By the way, if there is already a hood in the bathroom, but the unpleasant smell still remains, it is possible that significant mistakes were made when installing the hood. In the article, we will dwell in more detail on the problems that may arise as a result of improper installation of ventilation, and on the installation of various types of fans.
How to install a fan in the bathroom
When installing a ventilation system, never forget that it depends on the installation how the hood will work in the future, whether an extraneous smell will stagnate in the bathroom and mold will appear.
Wondering how to properly ventilate the bathroom? First of all, you should take care of the system of supply and exhaust channels. Recently, the so-called forced ventilation systems, which come complete with a built-in fan, have been popular with buyers. When performing normal ventilation, it is extremely important that the exhaust and supply ducts are located directly opposite each other. The exhaust duct, preferably, should be mounted in front of the entrance, in this position, moist air will be drawn in as much as possible.
What to do if there is an unpleasant smell from the ventilation in the toilet? Most likely, this is due to the spread of mold in the room, which in turn indicates a malfunction in the operation of the hood. Malfunctions begin when a sufficient supply of fresh air is not supplied to the ventilation, this may be caused by the following reasons:
- a new door was installed in the bathroom, which fits too tightly and does not allow air masses to enter the bathroom;
- the apartment uses plastic windows and metal-plastic doors that close the inflow of fresh air.
It is extremely simple to identify malfunctions in the ventilation system; it is enough to bring a burning match to the exhaust duct. If the flame does not oscillate, there is a problem. So that detailed troubles do not arise, it is enough:
- Leave a gap between the floor and the door of the bathroom to ensure the natural movement of air masses;
- Use special exhaust valves in window and door openings that will help air pass through;
- In a country house, you can make a small window under the ceiling, which will additionally ventilate the room and prevent an unpleasant smell from stagnating.
Choosing the right bathroom fan
In order to improve the ventilation in the toilet and get rid of the unpleasant smell, it is preferable to give preference to a system with a fan. When choosing a fan, be sure to pay attention to its dimensions (depending on the volume of your bathroom), as well as the noise level (it is advisable to choose models up to 40 dB, otherwise the noise will cause discomfort.
Separate fans for extracts in the bathroom and by type of connection. Basically, the hood is connected to the same electrical network as the light in the bathroom, so it starts working when the fan is turned on. If a constant hood in the bathroom is not important, it is advisable to allocate a separate switch to turn it on. There are more modern models with a built-in humidity sensor - they start working if the humidity level in the room reaches a certain parameter.
Regardless of which fan you decide to buy, make sure that it is made using waterproof technology. The bathroom and toilet are among the rooms with high humidity, and water entering the housing can cause a short circuit.
Tip: choose a bathroom fan with a non-return valve. Such a device will prevent air from entering the bathroom from the ventilation if the fan is turned off. The use of such a device allows you to minimize the likelihood of unpleasant air in the bathroom from the ventilation.
Connecting a fan is not difficult, however, if you are far from electricians, it is still advisable to call a professional.
It is most convenient to use a fan with a separate switch. There are no special requirements for choosing a switch, fans have low power and switches for lighting devices are quite suitable for their use. Do not forget that the switch itself, like the fan, must have a moisture-proof design.
Tip: if the room is too humid, it is advisable to give preference to an electric fan, since a conventional hood is unlikely to cope with the task.
Fan connection
You can connect the fan to the nearest outlet. Connecting the fan in the bathroom through the switch is as follows:
When conducting ventilation in the toilet, it is better to adhere to the following scheme:
- Select a suitable location for the hood. If mistakes were made at this stage, it will be possible to get rid of them later through the labor system. As for the choice of the appearance of the ventilation itself, there are no fundamental requirements here, absolutely nothing depends on the shape of the hood.
- Preparatory work. It is necessary to mark the wall, in particular it concerns the organization of wiring from the switch to the hood. If the vent does not fit the size of your fan, you can use a plastic pipe to act as an adapter. !!If the hood is installed after repair and it is not possible to hide the wires in the wall, it is advisable to purchase special plastic panels on the market that will hide the wires.
- Installation of ventilation equipment
Before installing the fan, make sure that the air duct is not clogged with foreign objects. A clogged hole threatens that even the most powerful fan will not cope with its tasks and an unpleasant smell will appear in the bathroom.
We figured out how to connect the fan in the bathroom to the switch. It is worth noting that according to this scheme, the simplest devices are connected that work when the light is on. The need for constant operation of the hood is not always there, which is why models were invented that work only at a certain time, or turn on when the humidity rises to certain values.
Fans for the bathroom or toilet with a timer are popular among consumers. To turn on the device at a certain time intervals, you can use a universal timer, in addition, there are devices on sale with an already built-in timer.
Connecting an exhaust device with a timer is as follows: 
Maximum protection against high humidity in the room will provide automatic ventilation. Such a device is equipped with a humidity sensor, which helps to activate the hood when the humidity level rises to a certain level.
Ventilation in the toilet
Installing ventilation in the toilet is not much different from installing a hood in the bathroom, but this process has its own nuances. First of all, do not forget that the toilet hood with a fan is installed not to reduce the level of humidity, but to eliminate an unpleasant odor. In this regard, the use of a fan with a humidity sensor becomes useless.
For the toilet, it is advisable to use either conventional fans connected to the switch, or devices equipped with a motion sensor. Such a fan will start working when there is movement in the room, and turn off after a while if there is no movement. Please note that in most motion sensors you can set the time after which the device will turn off in case of no movement.
Summing up
Ventilation in the bathroom and toilet is an irreplaceable thing. A properly implemented system will not only save you from unpleasant odors, but will also significantly reduce the level of humidity in the bathroom, as well as prevent the development of mold, which is dangerous to health.
How you choose the hood and install it in the bathroom, the operation of the entire system directly depends. It is better to give preference to automatic systems that will be activated if necessary, while fanless hoods are considered the most useless devices, especially in apartments where there are no drafts, high-quality windows and doors are installed.
We paid attention to the fact that:
- the glass in the bathroom fogs up;
- condensation accumulates on furniture;
- mold started to appear.
It's time to think about installing a reliable ventilation system in the house. Do not forget that installation in an apartment and a private house may differ, so it is better to seek help from professionals.
A bathroom in an apartment or house is always a “wet place”. Even if you don't make puddles on the floor. Cold and hot water, steam, wet towels - everything evaporates moisture. And it's hot in the bathroom and you get a greenhouse effect.
Excess dampness and heat, ideally, should "leave" in the ventilation, but as you know, its efficiency in urban homes is far from the norm. Moreover, both in the old fund and in new buildings. The reason is that the ventilation is of a natural type everywhere, that is, without additional exhaust.
It is in America that there are huge fans on high-rise buildings, and in our country the air is removed by gravity due to the difference in pressure and temperature. As a result, it moves moderately, or even barely at all, if the houses are old and the canals are clogged.
And our “wet place”, the bathroom, is slowly acquiring all sorts of useless flora and fauna in the form of fungus, mold and even wood lice. To get rid of such a neighborhood or stop it in advance, you need to put an exhaust fan in the bathroom. He will pull all the dampness where it should be, and attack in the form of useless settlers will happily pass you by.
How to choose a bathroom and toilet fan
Everything seems to be simple, we decided that we need a fan, we go to the store and buy it. But soon only cats will be born. The store is waiting for a big surprise from a bunch of types and models. Where there are several tens, and where a couple of hundred will be typed. And you will “hover” over the question, “what kind of fan to put in the bathroom?”.
No wonder. Different types, power, models, installation methods, characteristics - the devil will break his leg in this variety of technical progress in the field of ventilation. Sellers and those understand with difficulty, if the range is huge.
That's why we've put together a "Guide to Bathroom Fans". To facilitate your task and help you quickly buy the right equipment. And first, let's deal with the general characteristics of bathroom fans
So let's go!
1. Axial, centrifugal - what does it mean
This is the kind or type of fan. He talks about the design of the equipment and how it works.
Axial fan- this is a paddle impeller in the body. The impeller turns the motor, on the rotor of which it is mounted. The blades are inclined inward relative to the placement plane, they draw in air well and move it along a straight axis. Therefore, this type is called an axial fan. It differs in good performance, it makes moderate noise, and, most often, it is taken for installation in the bathroom.
Centrifugal fan arranged differently. The air is sucked in by a turbine with blades. Inside the housing, the flow is twisted into a spiral and receives additional acceleration due to centrifugal force. The flow comes out not along a straight axis, but at an angle of 90 degrees into a special device - a snail. A centrifugal fan is also called a radial fan.
It has a lower performance compared to the axial one, but it can “drive the flow” under pressure of different strengths. The noise level is low or medium, depending on the direction of the bend of the rotor blades. With the front bend, it makes less noise, with the back - stronger, but it saves energy.
2. Overhead or channel
Ventilation equipment is for outdoor installation and for indoor. The outdoor type of installation is fastening to a wall or ceiling to the exit of a ventilation hole into a shaft or into a pipe system. A duct fan is a built-in equipment that is placed inside a ventilation duct (duct). Ventilation duct systems are constructed from metal or plastic. For the bathroom, plastic channel systems are more often used, for example, Vents companies.
Often the exit to the ventilation shaft is located in the toilet. To extract from the bathroom, they put an air duct with an intake grate. The ventilation sleeve is pulled up to the mine window. A duct fan with an additional grill is installed in the toilet. The hood simultaneously takes air from the entire bathroom and sends it to the ventilation shaft of the house. By design, external and duct fans are made both axial and centrifugal.
3. Choosing a fan in the bathroom by power
The power level or fan performance is one of the main characteristics. In fact, the hood is chosen according to it, paired with the design (axial / centrifugal). Performance "says" how many cubic meters of air the fan pumps per hour - 100, 200, 300.
To choose the right power, you need to calculate the volume of the bathroom and multiply it by 8. "Eight" indicates the sanitary requirement for the frequency of air changes in the room per hour. To put it simply, the fan has to pump through the volume of your eight bathrooms. Then there will be purity, beauty and no mold.
Example! For an urban standard bathroom with dimensions of 1.7x1.5x2.5m with an exchange rate of 8, productivity is needed from 51 cubic meters per hour. Axial fans are produced with a capacity of 80 cubic meters. Such a hood will cope with the task even with a margin. The centrifugal model usually "drives" from 42 to 100 cubic meters per hour.
4. Choosing a fan in the bathroom according to the noise level
It is clear that the hoods are noisy, but not very much. If you want a completely quiet one, take an axial model from the Silent line. In their design, the engine is mounted on silent blocks that “extinguish” noise and vibration. Among the "quiet" you can choose a model with a noise level of even 22 dB.
Centrifugal ones work louder because the turbine pumps air under pressure. But they also make moderate noise, approximately like a cooler in a computer. It does not prevent you from watching movies, listening to music or playing games. So the fan will be just a background if you are in the bathroom when it is turned on.
Attention! Noise is a secondary characteristic. The most important thing is that the hood “drives” the required amount of air for a good microclimate and fits the ventilation design.
5. Which bathroom or toilet fan is better - reviews on additional features
Modern technology can do a lot, and fans are produced with various additional functions. Their list includes:
- Additional sensors. They measure humidity or react to movement.
- Sleep timer. It sets the turn-off delay time, minimum 2 minutes - maximum 30.
- Light indicator. Lights up while the fan is running.
- Lanyard switch. You can turn the hood on and off at the right time. For example, when you take a shower or bath. That is, when the light in the bathroom comes on, the fan does not start automatically.
- Automatic blinds. They are used to close the ventilation grill after the duct fan is turned off.
- Check valve. Its main task is to prevent the penetration of foreign odors from the ventilation shaft.
According to the feedback of our customers, most often they take models with humidity sensors and a shutdown timer. The check valve, which blocks the flow of air from the shaft or duct back to the fan, has already become part of the design. Very rarely it is sold separately and is considered an additional option.
6. Degree of moisture protection
All bathroom fans have increased moisture protection within 4-5, dust protection can be either zero or 3-4. The equipment passport will indicate IP X4, 34, 44, 45.
We figured out the characteristics, now let's talk about the range.
Fans for the bathroom and toilet in the website catalog
Our store offers well-known and popular brands of domestic bathroom fans:
| Soler & Palau | Blauberg | Fresh | Era | Vents | MMotors JSC |
Let's divide them into groups and get to know each other better.
1. For a city bathroom or a bathroom with a standard area, the most popular type of exhaust fan is a model with a capacity of up to 100 m3 / h
The catalog contains:
Mounted axial fans
Soler & Palau
| SILENT-100 CZ SILVER DESIGN-3C | SILENT-100 CZ GOLD | SILENT-100 CHZ | SILENT-100CMZ |
| ECOAIR DESIGN 100H (with humidity sensor) | ECOAIR DESIGN 100M (with lace) | ECOAIR DESIGN 100 S (base model) | EDM 80L |
| SILENT-100 CZ | |||
Power 65-95 m3, noise 26.5-33 dB, in the basic Silent model there is a check valve and quiet running bearings (CZ), in other models, optionally, a timer (R), a humidity sensor (H), a pull cord switch (M) can be added ). |
|||
Blauberg
MMotors JSC
Power 60 cubic meters, noise level 25 dB, ultra-thin models with a thickness of 4 cm.
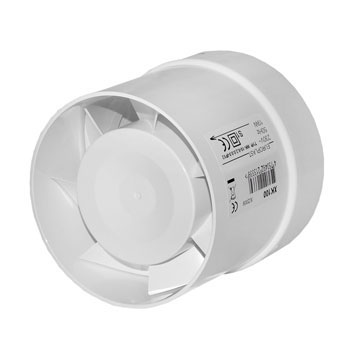
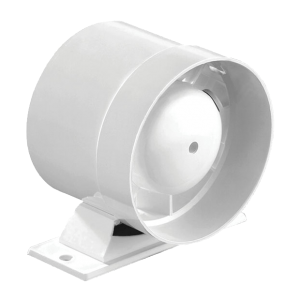
Inline axial fans
For installation in a round duct, channel models are taken. From low-power we offer Bulgarian MMotors JSC
| B.O.90 | BO90T |
Power 50 m3, noise level 36 dB, operating temperature +100-150°С.
Centrifugal fans
Due to the design and the creation of additional traction, such hoods, even at low power, are more efficient than axial ones. They are more expensive, so they are taken less often. Although the "usefulness" of a centrifugal fan quickly pays for its cost.
The main operating mode is minimum speed and minimum power consumption. The hood perfectly “pulls” for a long time in the background, for “duty” cleaning. When the humidity rises, the maximum mode is activated and the air in the bathroom is quickly replaced.
From centrifugal fans we offer the company Era
| SOLO 4C era |
Three-speed, capacity 42/64/100 m3, noise level 25.8-30 dB, equipped with a check valve and a filter. Suitable for wall/ceiling mounting and air vent mounting.
2. In new houses, with large apartments, townhouses and cottages, bathrooms are more spacious and they are cleaned with exhaust hoods with a capacity of 100 to 400 m3 per hour
Models in the site catalog are:
Axial fans for wall or ceiling
Blauberg
| Aero Chrome 100 | Aero Still Vintage 125 | Aero Still Vintage 150 | Aero Still 125 |
| Aero Still 150 | Deco 100 (ceiling) |
Power 102, 154, 254m3, noise level 31-33-38dB, all models have a check valve, additional options are marked with letters, T - with a timer, ST - with a cord and a timer. Ceiling power from 105 cubic meters, noise 37 dB.
Soler & Polau
Productivity 175, 180, 280, 320m3, noise level in the SILENT series 35-36db, in other models 42-47db.
Productivity 140-183, 250-290m3, noise level 30-33, 36-38dB.
Productivity 110-132m3, noise 17-22dB. Fans of new generation. Equipped with a smart control system, speed switching mode, sensors. They can work automatically according to the built-in program or run in the selected mode via a smartphone or computer.
Duct hoods
Blauberg
| Tubo 100 | Tubo 125 | Tubo 150 | Turbo 100 |
| power 137, 245, 361 m3, noise level 38-39-40dB. | two-speed, power 170/220 m3 per hour, noise level - 27/32 dB, wall or ceiling mounting. | ||
Soler & Palau
intelligent, maximum power 106 m3, in quiet mode - 72. noise level 31dB (22 in quiet). Basic humidity control, timer, speed control additionally - work on a motion sensor. Suitable for non-stop ventilation up to 40 m3/h.
Exhaust fan in the bathroom - the best option
If we talk about the choice and answer the question, “which exhaust fan in the bathroom is better?” then there are several optimal options:
- for a regular bathroom with a separate vent;
- for general ventilation of the bathroom;
- for large bathrooms.
The bathroom has direct access to the shaft
The best option is a wall-mounted axial fan with a capacity of up to 100 cubic meters per hour. Take Blauberg or Soler & Palau. In most models there is a check valve, it will protect against the reverse flow of air from the mine when the hood is turned off. And during operation, it will quickly clean the air and do it very quietly (the sound background is within 25-33dB).
Models with a classic design from Blauberg
German hoods are quite a budget option, Spanish ones are both budget and expensive. Although their "high cost" is very conditional. You take equipment that will work for a dozen years, or even more. So, let's divide the price by the life of the fan, and we get the cost as for 10 lunches in a cafe, even for a hood for 6300 rubles.
If the apartment is rented, or you just bought it in an old fund and for now you plan to do without a major overhaul, take an inexpensive fan from Era:
| FAVORITE 4 | OPTIMA 4 |
The price is in the range of 400-500 rubles, they pull perfectly, of course they make a louder noise than imported ones, but they will work like clockwork for their 2-3 years.
General ventilation in the bathroom
If the exit to the shaft is in the toilet, an air duct and a duct fan must be installed to extract from the bathroom. The best option would be
| Tubo 100 by Blauberg | Silentub 100 by Soler&Palau | Silentub 200 by Soler&Palau |
They quickly clean the bathroom from moisture and steam. The air intake from the bathroom and toilet will go through the ceiling grids.
If you want to separate ventilation:
- Install a Deco 100 ceiling fan in the bathroom. Its performance is higher (105m3) than calculated for a standard bathroom (51m3), but it should be so. The hood will have to “drive” air through pipes with a bend, so you need a power reserve for fast air exchange.
- In pairs and for separate ventilation of the toilet, install a duct fan. The Vents iFan D100/125 model will be optimal. It can operate in turbo mode with a capacity of 106 m3 and 72 cubic meters. In addition, there is a mode for constant ventilation, at a minimum power of up to 40 cubic meters per hour.
| Deco 100 | Vents iFan D100/125 |
Ventilation for a large bathroom
If the bathroom is large, choose a powerful fan. The best options would be:
Axial outer
| Aero Still Vintage 125 | INTELLIVENT White | SILENT-300 CHZ |
ducted
| Tubo 100 | TDM100 | PRO 4 | iFan D100/125 |
Centrifugal
| SOLO 4C |
Take outdoor and duct axial fans with a power reserve, as they clean the air faster both directly into the exhaust shaft and through the sleeve. Centrifugal creates increased pressure and a large margin of performance is not needed.
To install a hood in the bathroom, you will have to perform three stages of work.
1. Lay the cable from the switch
A three-core cable is needed, for example, VVG 3X1.5 mm2. It is best to “throw” it in the corrugation under the tiles and in the wall if the bathroom is not yet finished. If the bathroom is finished, then we lay the cable in the corrugation along the main ceiling, you can additionally take the cable channel. We will hide all this “good” behind a suspended or stretch ceiling, after installing and connecting the hood.
2. Fix the fan
When the cable is laid, you need to install the fan in place. The outer one is fixed over the wall, the duct is inside the ventilation hole. Please note that the standard hole width is 10 cm, just for inserting fans with a size marking of 100 mm (diameter of the flange or the device itself). Such a clearance is designed for the passage of air with a volume of up to 100 cubic meters per hour. The power of the hoods connected to the hundredth pipe “fits” into this requirement or slightly exceeds it by 10-15 m3.
Fans with higher performance are connected to air ducts with a diameter of 125 mm or 150-160 mm, and the hole will have to be expanded. Otherwise, the hood or flange simply will not fit into the gap.
Information to think about! Is it possible to put an adapter from the diameter "larger to smaller" for an outdoor fan? You can, but you don't need to. You will get a decent gap between the hood body and the wall. The gap will prevent the fan from being properly fixed. In addition, the back panel, which does not press against the wall, will accumulate moisture and dust. And by "cutting" the width of the gap, you "cut" the bandwidth of the channel. The ratio "channel diameter - fan performance" was not chosen by chance. Your unfortunate hood will try to shove 150-200 cubic meters where only a hundred "crawl through".
Installing a fan in the bathroom - installation methods
The hood can be installed in different ways. Attach the invoice to the wall with self-tapping screws or glue it, insert the channel directly into the hole and fix it or first install the pipe in the gap, and “fix” the fan already in it.
To install an overhead hood, remove the front panel, which is fastened with a screw at the end or with plastic latches. To install on self-tapping screws, mark the holes on the wall with a pencil, then drill and insert dowels. Attach the fan and tighten the screws.
For fastening with glue or liquid nails, apply it along the edge of the case on the fan and on the wall. In order not to miss on the wall, circle the hood around the contour and coat with glue inside the rectangle, slightly stepping back from the edge. Press and fix with masking (mounting) tape so that the glue grabs.
Note! We do not recommend using regular tape because it can leave marks on the wall and the fan itself.
Bring the power cable before fastening to the outside through a special hole. If it is located inconveniently, you can drill your own, in the right place. The front panel is put in place after connecting the power cable.
To install a duct hood, use a piece of duct of equal diameter, into which a fan with a ledge is placed. The hood housing “fits” tightly in the round channel and is fixed without additional fasteners.
If the body is without protrusions, then it is fixed in the pipe with self-tapping screws through special grooves. For such fans, it is more convenient to first insert the hood into a piece of duct, fix it, pull out the cable, and then install the entire assembly into the vent and fix it with mounting foam.
For case-mounted models, the insert is not required. The fan is simply screwed to the hole wall.
3. Connect the fan in the bathroom to the switch
Connecting power to the hood is the most important step. A damp room requires mandatory laying of a cable with grounding. Therefore, use a three-core VVG for one and a half squares (3x1.5 mm2), as for lighting in the bathroom. The electrical power of the fans is not high, usually within 14 watts, and a cross section of 1.5 squares is enough to operate the hood without overheating the cable.
A ground wire is required to divide the working zero on the N bus and the ground zero on the PE. Even if you have an apartment in an old house and there is no ground loop, a PE bus is installed in the shield to connect the "ground". This increases the safety of your electrical wiring and protects against the trouble of electric shock.
How to connect a fan in the bathroom, choose for yourself. If you want to ventilate longer, put the switch on two keys and separate lighting and ventilation.
The connection diagram through a two-gang switch will look like this:

The one-button switch scheme is suitable for infrequent use of the bathroom, for example, in a one-room apartment with one occupant. The hood turns on with the light and turns off in the same way. For additional ventilation, you will have to leave the light burning. It won't generate many kilowatt-hours because of this, unless you fall asleep. But even there, the "lion's share" will be behind the fan, and not the light bulbs in the bathroom.
The connection diagram with a single-gang switch looks like this:

Both schemes are suitable for hoods without additional functions.
Connecting a fan with a timer and other sensors
We will tell you in more detail how to connect a fan with a timer and other sensors to the switch in the bathroom. The main difference in the circuit is that the timer has a separate power supply to start the hood on the signal of a triggered humidity sensor, movement, or the signal of the timer itself in models with a delayed start. Simply put, separate phase / neutral wires go to the fan to the motor and to the timer. The motor circuit is connected to the fan switch button, and the timer circuit is connected to the light switch, and "activates" as soon as the lights in the bathroom come on. If a two-button switch is used. You can turn on such a hood yourself with a button or it will work automatically from the built-in timer.

If the switch is common, then the circuit will be different. When the light is turned on, only the exhaust timer will receive power, and when it works, the fan motor circuit will be closed.

In models without a timer with a humidity sensor, the power is "started" on it.
As you can see, the connection diagrams are quite simple, but do not forget about the installation rules - we connect the wires at the terminals, without twists and protruding ends. We make connections in a junction box or recessed sockets. We put the front panel and insect net in the overhead fans in place correctly, without distortions.
Summing up
What if the "guide" helped, but there were doubts? Contact us! Fans know by sight. We will tell you the installation methods and connection diagrams at any time of the day or night. Like a multiplication table.
We also recommend
 Productive and reproductive thinking
 Reasonable egoism - what is the theory of reasonable egoism?
 Boris Nikolaevich Yeltsin, the first President of Russia
 Underground fights. Underground kings. What is “fighting not for the masses”? Where can you fight for money?
 Yakov Pavlov and Other Heroes of Stalingrad You Need to Know
 Survive an accident at sea in a dream - in reality experience a new love