Self-laying tiles on the floor. Laying floor tiles with your own hands Laying floor tiles with offset
The most extensive selection of floor ceramics does not affect ground rules its installation. There are many characteristic features, technological nuances, without knowing which you can get something completely different from what you expect.
Absolutely all manufacturers of ceramics insist: it is necessary to start not at all with testing the base for compliance with standards, but with checking ceramic finish and development of a laying plan.
Your first task is to choose the right design and caliber of the product. As a rule, stands in stores are tiled with tiles of one collection in the optimal, according to the designers of the plant, layout. Approximate variations can be found in professional catalogs on manufacturers' websites or in trading floors.
You can change, supplement or completely reshape the proposed design to your taste. To do this, ask to provide you with several samples of the main tile and its components (borders, decors, panels, etc.) and form a layout suitable for your room.
But keep in mind - upon entering the room, the center of the room or the area that is completely free from furniture and equipment (the so-called free patch is popularly called) is the first thing that catches your eye. In small kitchens and bathrooms, this is usually no more than 1-2 m². Therefore, laying tiles on a concrete floor should be planned in such a way that the center falls exactly on the visible square meters area. Thanks to this simple technique, solid elements will be glued in the “empty” area, and cut ones - only around the perimeter. This is especially important in the presence of uneven walls.

Offset design planning.
The next stage is the choice of floor ceramics installation scheme. There are several basic types:

Thanks to a wide variety of formats and types of tiles (elongated planks, polygonal, oval products, etc.), installation of floor ceramics can be carried out according to parquet patterns (herringbone, wicker, deck, squares), randomly or modularly (combination of different-format facings).
If you intend to use decorative elements or a combination of colors, then do not be too lazy to make a drawing to scale. You can also request the development of similar sketches from ceramics of the same series, thickness or manufacturer from consultants in shopping malls specializing in ceramic cladding. As a rule, factories provide not only the relevant computer programs, but also special devices (outwardly resembling ATMs), on which even an inexperienced user can create their own floor design, and in two or three dimensions. BUT! If you want to arrange tiles of different manufacturers and calibers, then be sure to make sure that the thickness matches perfectly, down to a millimeter. Otherwise, laying the tile on your own is absolutely even, without flaws, it will not work.
It is better to think over the layout in advance in order to purchase the required quantity facing material. The calculation of the required quadrature is based on:
Surface areas
The indicated value must be divided by the area of \u200b\u200bone element, taking into account the tile joints. If the tile has complex shape or one design uses multi-format ceramics, it is better to draw a drawing.
Tiles sizes
The number of whole and trimmed elements in one row depends on this. To calculate the first value, you can ask consultants to make calculations in special programs(provided to sellers by manufacturers) or use the formula:
If, in accordance with the project, it is necessary to lay out a frieze and embedment along the perimeter (a wall section of the main or complementary tiles), then the overall pattern must be designed in such a way that the curb strip is laid out of whole elements, and full-length or trimmed tiles can be used on the embedment border.

Tiled floor with border frieze.
At the time of buying ceramic tiles be sure to take a small margin, that is, you need about 10-15% more than required. Partially finishing material will go into scraps, a possible fight or will be useful in the future for repairing damaged elements.
Styling techniques
In what cases are tiles laid with a gap or a seamless method, with a straight or zigzag seam? It does not depend on your desire, but on the characteristics of the floor material. Firstly, a monolithic canvas looks, of course, beautiful, but it is made only from rectified porcelain stoneware. That is, the most stable and resistant to temperature extremes lining with edges processed on special machines. It is very difficult to lay this material yourself without solid work experience.
Secondly, almost all ceramic products for the floor must be installed with a gap. The larger the size of the products, as well as the load, the wider the seam should be, otherwise various defects (cracks, etc.) will appear in the future due to seasonal deformations. Recommended values:
- For tiles of caliber from 5x5 to 30x30 cm - 1-1.5 mm;
- For ceramics with sizes from 30x30 to 60x60 cm - 2-5 mm;
- For products of large formats from 60x60 cm and more - 5-10 mm.

Intertile seams: zero, narrow and wide.
The choice of seam option - straight or curved - also depends on the shape of the tiles, design features. Some collections involve laying the base with inserts, joining the pattern in a certain order, etc. This information is on the box.
So, we have come to the finish line. The cladding is selected, the layout option is approved, you can proceed to the last stage - the selection of flooring material for quality. When buying, pay attention to the following:
- Tile higher grades must have a uniform thickness, width and length (maximum deviations, as a rule, do not exceed 0.5 mm), as well as the same shade, without streaks, stripes, foreign inclusions, spots, chips, small cracks, scratches, irregularities and other design defects .
- The glaze should be uniform, without smudges and sagging, the surface should be as even as possible with a minimum of negative (concavity) or positive (convex) deviations from the plane, and the side edges should be free of burrs, bumps, and crevices. This is easy to check - connect the two tiles to each other at the ends and front sides, carefully inspect. Any deviations negatively affect the evenness and aesthetics of the future floor.
- The purchased kit must be from the same batch and one tone, which guarantees the absolute identity of all elements in color, caliber and other parameters. This information is indicated on the box.
- Tiles should be cleaned of packaging and paraffin or wax protective coatings, which are applied to the surface of some collections to prevent scratches during transport.
Tools and materials

To mount the tiles with your own hands, prepare the necessary set.
Including tools:
- tape measure and metal ruler;
- rail and moisture meter;
- level and square;
- a marker for marking on facing elements (main and complementary tiles, decors, borders, etc.);
- dyeing cord marking;
- electric tile cutter or manual tile cutter, special saws for ceramics for forming figured cutouts or a drill with nozzle cups for drilling round holes for pipes;
- a plastic bucket and a construction mixer for mixing glue;
- trowel and notched trowel for applying the mortar. The choice of the number of the last tool depends on the dimensions of the tile, and the larger the facing element, the larger the size of the spatula teeth;
- pliers;
- mallet and spatula for grouting;
- sandpaper for processing tile slices;
- mounting gloves and knee pads;
- bucket, sponge and soft fabric to remove excess adhesive that has come out.
From the materials you will need:
- Ceramic tiles with a full set of shaped elements;
- The adhesive mixture is cement or polymer, corresponding to the specifics of the base (mineral screed, wood, plywood, etc.), as well as the operating conditions of the cladding. That is, allowing you to lay tiles on the floor in a heated or unheated space, on a heated base, in showers or pools;
- Priming emulsion;
- Waterproofing suitable type(in damp rooms);
- Cement or polymer grout and water-repellent impregnation for joints;
- Silicone sealant. It will be needed in order to process joints, internal and external corners;
- Crosses for tile joints or tile leveling system (SVP).
Because for internal works mainly non-frost-resistant ceramics are used, manufacturers recommend mounting at a room temperature of at least +5 ° C and not more than +30 ° C at a humidity of 40-60%. Exterior finish, including facing of facades, steps, is carried out only in the warm season.
Step by step instructions

From quality installation work depends on the service life and ease of use of floor ceramics. This axiom, unfortunately, is often neglected, and the result is a fragile, unaesthetic or defective coating. Therefore, we recommend that you follow all the rules, from the preparation of the base to the grouting time.
The process can be roughly divided into 6 stages:
Foundation preparation
The quality of the subfloor should ensure the possibility of creating a layer under the tiled coating of adhesive cement mortar with a thickness of 2-15 mm, under a mosaic - up to 20 mm. Therefore, the following actions are required:

The foundation must be;

By the beginning of work, pipelines and other types of communications laid in ceilings must have outlets in accordance with the design of the premises. Do not forget that on large areas, uniform expansion joints are required to compensate for temperature and hygroscopic deformations of the base. When laying tiles on concrete or mineral screed indoors, it is recommended to arrange thermal gaps every 20-25 m² of area, with outer cladding– 16 m².
In small rooms, the role of temperature-shrinkage joints is played by a gap 4-5 mm wide along the perimeter between the ceramic coating and the walls.
Once again, we recall that the floor must be monolithic. Many craftsmen believe that irregularities are easily leveled with tile adhesive - the layer will turn out to be thicker than it should be. However, they forget that the cement-polymer mortar shrinks, therefore it is ideal even coverage will not work. All recesses, cracks and bumps more than 5 mm must be eliminated - filled with repair mixtures or scraped off, and dust and debris removed. Treat the surface with primers with the required properties - hardening, adhesive, etc.

Applying a primer to a concrete base.
If you're thinking about tiling your shower, bathroom, or bathroom, pay special attention to waterproofing. To create a reliable water barrier, you can use polymer paints, coating penetrating agents, impregnations, membranes, or any other material available to you. The main thing is to correctly form a layer with an institution on the walls 10-15 cm in height and carefully sealing the corners.
markup
When marking, the center lines of the room serve as the basis. Connect the midpoints of the more closely spaced walls to get the longitudinal axis, and the center points of the farther ones to calculate the transverse line. On the walls, mark the level of the future finishing floor. This will help to correct minor flaws in the tiling process. It is better to apply a marking drawing with an alcohol marker or with a coloring cord.

First, check the correct geometry of the room. This will allow you to adjust the plan for tiling the floor with ceramic tiles and significantly speed up the work.
To make sure the walls are perpendicular to each other, stretch diagonally from opposite corners two cords, measure their length with a tape measure. If the corners do not correspond to the ideal 90 °, and the sides have different lengths, then various tricks can be used to visually level the effect. For example, move the picture or lay out friezes around the perimeter, and between it and the wall - a background tile with trimming.
The principle of marking formation depends on the chosen design.
Standard seam-to-seam or corner installation
If the room has an even rectangular shape, then the laying starts from the corner. The first element is mounted in the corner of the room, the rest - in different directions from it.

Corner layout.
In a run or with an offset
For tiles produced in the form of elongated strips, it is not correct to use the simple corner method. Installation should be carried out from the center of the room. The method is quite laborious, requires care and accuracy in work.
First, the reference point (central) is calculated, the first row is laid from it, then the subsequent lines are formed as shown in the figure below.

Laying pattern with offset or from the center.

Laying scheme from the center of tiles of different calibers.
The shift coefficient of each subsequent row relative to the previous one depends on your desire - by 1/2, 1/3 or more. Since it is not a laminate or parquet board, here tying of seams is not required. It's rather decorative effect, which allows you to create decking, brick or typical for laminate.
In two perpendicular rows
To lay tiles in a room with irregular wall geometry (including various ledges, bay windows, etc.), this method is used. We mark the center of the room, from it we set the first element. With respect to this cladding, we apply two perpendicular central lines, along which we lay the floor covering up to the wall. From the finished rows we lay the remaining ceramics. This is very convenient for forming panels and various decorative or accent inserts.

Diagonally
In addition to the finished centerlines, you need to draw diagonal lines from opposite corners. The layout is carried out either from the center or from the far corner of the room. The pattern can be anything.

Diagram of diagonal tile laying.
After the necessary marking lines have been applied, lay the ceramics on a dry floor surface. Needed for an accurate fit. general scheme laying out, as well as cutting edge tiles or shaped elements with a tile cutter (including for forming figured cutouts for various plumbing fixtures, water pipes and other communications).
Instructional and technological map for facing works, developed back in 1973 and updated in 2003 by the Design and Institute of Technology industrial construction, recommends craftsmen to make landmarks for themselves in large areas: either from a mooring cord stretched between extreme anchor points (for example, along a long wall or diagonally) or install so-called beacon tiles. These are single ceramic elements or a series of facings laid along an extended surface, which allow you to control the level of finish and the correct formation of stripes.

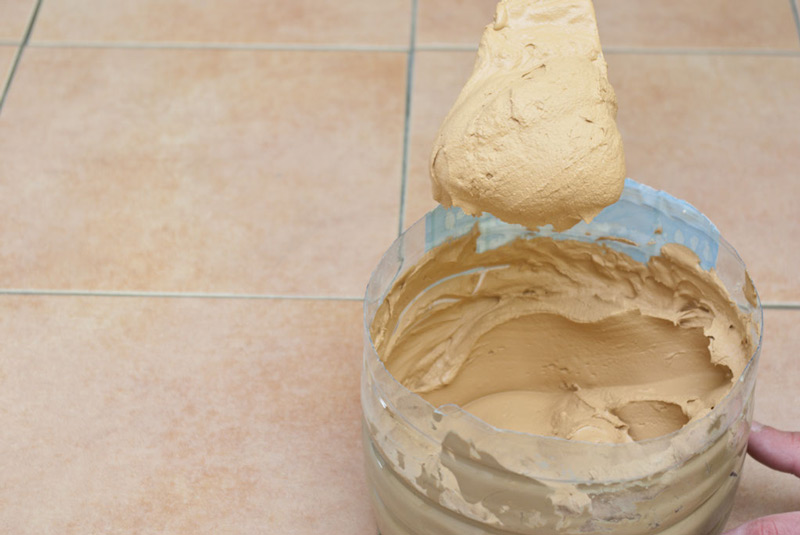
Preparation of the adhesive mixture
The solution must be perfectly homogeneous and fluid enough to be easily applied to the surface and distributed. The dry mixture is mixed with water in the proportion recommended by the manufacturer, thoroughly mixed with a mixer until a homogeneous mass without lumps is formed. Remember that the finished adhesive can be used for a certain time (20-60 minutes), so for large laying areas it is better to prepare the mortar in batches.

Elastic polymer mixtures for ceramics are one- and two-component. Mix them thoroughly before use, and apply with a notched trowel.
Cladding installation starts from fiducial point located in the corner farthest from the entrance, or from the center of the room. Floor finishing is recommended to be done in stripes or small squares, gradually moving towards the doorway. If the design assumes the presence of a frieze and panels, then laying should begin with decorative elements.

Laying from the corner and from the center of the room.
Some types of tiles with a highly porous structure are recommended to be soaked before use. This is done so that the ceramic does not "pull" moisture out of the solution before it polymerizes. But most of the products on the market do not require such an operation, so carefully read the information on the packaging before use.
If you are laying floor finishing material with a thickness of more than 12 mm or with a side of more than 50 cm, then carefully consider the recommendations of the manufacturers. The adhesive solution must be applied not only to the base, but also to the underside of the tile with preliminary moistening.
Can't be stacked ceramic lining on the floor with the heating turned on or when the room heating system is running. It should be turned on only after the complete "seizure" of the adhesive solution.
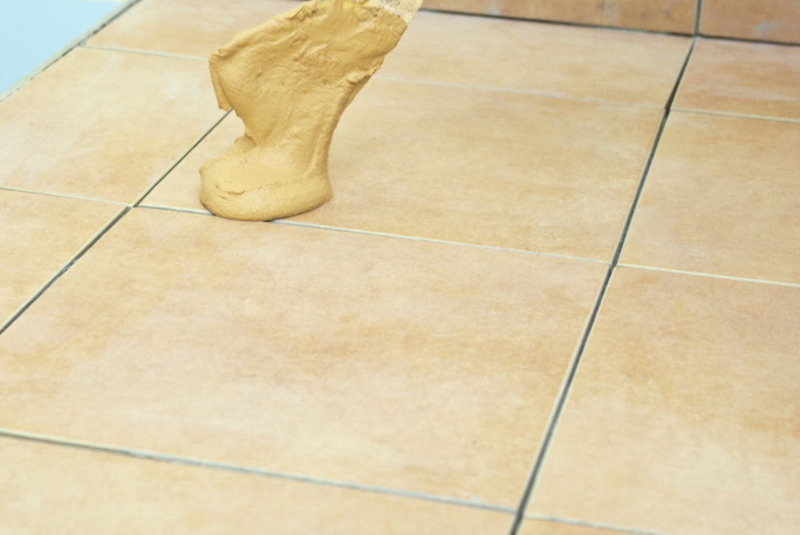
Apply the adhesive mixture to the base with a spatula with an average thickness of 2-5 mm (polymer - a layer of 2-3 mm) and spread over the surface in 1 m² or in an amount covering one row. Next, lay out the tiles in accordance with the chosen scheme, align them, lightly tap with a mallet or press down with your fingers. Clean the seams of excess glue and insert spacer crosses or SVPs. Next, apply glue to the surface as needed and mount the cladding, periodically checking the evenness with a hydraulic level, as well as the geometric correctness of the laying - horizontal, drawing, laying scheme.

Application of adhesive mixture on the floor and installation of tiles.
If required according to the plan - at the end, mount the wall plinth from the curb elements or trimmed tiles of the main background using dividing crosses.
Grouting
Filling gaps can be carried out only after the coating has been laid completely and the adhesive has hardened. As a rule, 24 hours is sufficient.

Mix dry cement grout with water in accordance with the manufacturer's instructions, apply with a spatula and fill all joints without exception. After 15-30 minutes, collect the remaining color mixture with a damp sponge. After an hour, rinse the surface again with a wet cloth, and the next day, treat the seams with water-repellent impregnations.
Coating cleaning
The ceramic floor after completion of the grouting work has a whitish coating, which must be removed with a solution of acid-based special detergents for ceramics (Pramol Ceracid, Pufas Glutoclean acidic, Italon A-CID), then rinsed clean water until all foreign liquids and dirt are completely removed. In the future, it is recommended to use neutral detergents or a mild soap solution, and to remove stains or heavy dirt, purchase professional concentrates that do not damage the surface and do not leave streaks (Litokol Colored Stain Remover, Bellinzoni Mangia Macchia, etc.).

Do not use abrasive cleaners that may cause scratches, especially on polished, lappated or high-gloss ceramics.
It is possible to load the finished coating with furniture and other household items after 48-72 hours.
Advice! If you need repairmen, there is a very convenient service for their selection. Just send in the form below detailed description work that needs to be done and offers with prices from construction teams and firms will come to your mail. You can see reviews of each of them and photos with examples of work. It's FREE and there's no obligation.
Tiles on the floor of the kitchen, bathroom, hallway or utility room - ideal floor covering from all points of view. The coating easily creates the desired effect in the design, the main thing is to choose the right colors and texture. It does not require effort when cleaning, it is easy to clean, it is cleaned of dirt, it has a neat appearance. Properly selected floor ceramic tiles are not afraid of high humidity, temperature, are durable, and do not wear off like paint.
Disadvantages - a cold floor, painstaking laying work and increased hardness, due to which broken dishes that fall on such a floor are sure to break. However, these shortcomings are not significant. The tiled floor can be insulated, the kitchen can be equipped in such a convenient way that the risk of dropping the dishes is minimal, and anyone with the proper desire and diligence can master the correct installation technology.
When choosing a tile for the floor, you should consider a few points.
- When choosing a tile, do not be lazy to attach two or three tiles to each other to make sure that there are no gaps between them and that they fit snugly together.
- Floor tiles must not slip. You can check for slip by moistening the front side with water. The surface must be rough, with corundum coating or ribbed. Slippery tiles are not suitable for flooring and are suitable for walls.
- You should buy material with a margin, during installation you can split it, damage it. To do this, the area to be covered must be measured and then compared with the size of the sample and correctly determined the required amount. The remaining part of the coating after the repair can be stored in the house in case of damage during operation, for replacement.
- Calculate the required amount as follows: divide the floor area by the area of the tile sample to find out the required amount. You need to add another 10-15 percent for marriage and stock.
- Pay attention to moisture resistance. look specifications, moisten. The reverse side should not absorb moisture.
- When choosing, preference should be given to heavier, thicker tiles (from 8 to 13 cm). It must be resistant to impact and withstand solid physical exertion.
- By hardness, the tile is divided into 5 levels. Flooring corresponds to levels from 3 to 5.
- Pay attention to how the tile is washed, reacts to washing abrasive substances. When choosing, designers are advised to choose floor tiles that contrast with the walls in color.
- The most reliable material for tiling is porcelain stoneware. It costs more, but does not create problems during installation and operation.
- If the kitchen is small, it is better to choose smaller tiles (10 by 10). Large tile visually reduces the room. The easiest way to lay square classic tiles. If you choose curly, do not forget about skirting boards, borders, corners. For such places there are special forms of tiles.
Tools and materials needed during the laying process
To lay the tiles yourself, you need to stock up on tools and materials.

Adhesive mixtures
Ready adhesive solution in bulk plastic buckets or packages is expensive, but in practice it is not very convenient to use it. It is better to buy a special dry mortar, which is easy to turn into building glue at home. In addition, the dry mix can be prepared in parts, choosing a convenient schedule and pace of facing work.
Ready-made glue or dry adhesive mixture can be replaced with a cement-sand mortar. Working with a cement mixture is tricky, but it will be cheap, it will help smooth out errors in the curvature of the floor, and in terms of the quality of installation, if everything is done carefully, cement mortar, prepared with his own hands, will not yield to glue.
A good composition for a building adhesive mixture is a combination of sand, ordinary quality cement and a dry adhesive mortar. It is both reliable and economical.
Fugue (grout for tile joints at the junction of tiles)
Fugue - grout for inter-tile joints at the junction of tiles. When choosing a fugue, you should pay attention to the fact that the contrasting grout makes the floor bright, emphasizing the shape of the tile, and the fugue matched to the color of the tile will give the effect of a uniform smooth coating. The width of the seam depends on the quality of the tile and ranges from 2 to 20 mm.
Before facing, it is necessary to prepare the floor for laying tiles. If the surface is not even, then the floor must be leveled, following the technologies adopted in construction work. Minor errors can be easily corrected with the help of cement mortar, as well as building aggregate from dry building mixtures.
Lay the tiles on a clean surface. Therefore, before work, the room must be completely freed from furniture and things, the floor must be thoroughly vacuumed, washed, cleaned of grease, dirt and dried. The room must be ventilated and closed for the duration of work and drying, eliminating drafts.
How to lay floor tiles in relation to walls
There are three main types of laying floor tiles.
- "Seam to seam" is the easiest, most understandable and simplest way, when the tiles are laid sequentially, one after the other, in even straight rows, while the seams are the same, located one above the other evenly, the plates are parallel to the walls of the room.
- "Diagonally" - the plates are not parallel to the walls, the corners of the tiles "look" at the walls. This is less economical, more troublesome, since many slabs have to be cut diagonally. But it is this method that can aesthetically make the room more attractive, visually more spacious, due to the diagonal lines on the floor.
- "In a run" - the slabs are placed one above the other, but the seams do not match, the fragments of the coating are laid like bricks, the border between the overlying tiles is in the middle of the seam of the underlying tile.
Video - Laying tiles
Laying tiles
The first thing to do is determine the point from which laying will begin and where the first tile will be laid. Such a point can be located at the middle of the wall or in the middle of the room. This is necessary for symmetrical styling, as it is convenient.
Having prepared adhesive composition, apply it to the floor. For thicker tiles, we give a thicker adhesive layer. Level it, distribute it evenly with a notched trowel. We make sure that when leveling the grooves are the same in depth and height.
Experienced repairmen usually fill 1 square meter with glue or cement. meter. If there is no experience, it is better to reduce the area. You need to lay the tiles quickly, until the glue is weathered and begins to dry out.
If a cement mortar or a more reliable mixture of cement and glue is used instead of a special adhesive, the tile must be soaked in a basin of water, for tight "sticking" and adhesion (adhesion) with the prepared floor surface.
On the finished fragment of the floor with the adhesive applied, the tile must be applied and pressed with your hands, then carefully tap on each side with a rubber construction hammer so that the laid tile adheres evenly.
For this, it is used building level. If the edge of the tile is higher than it should be, lower it with pressure or tap with a hammer. If the tile "sags", it is better to add a small portion of the adhesive solution.
We insert plastic dividing crosses between the tiles. so that the seams between the fragments of the coating are the same. Crosses can be replaced with matches or narrow wooden wedges, pegs with a diameter of 2-8 mm.
Sometimes a tile does not fit at the end of a row, in which case a tile cutter will come to the rescue, and if it is not there, an ordinary "grinder". Can be used for cutting and glass cutter. This will require additional effort, but - no additional costs.
While working on laying tiles, it is necessary to keep a damp cloth nearby to immediately wipe off glue and cement stains until the composition thickens and dries.
After laying the tiles completely, you need to wait until the glue is completely dry. It is necessary to exclude the slightest drafts, close windows and doors tightly, make sure that there is no one in the room with freshly laid tiles, including animals and children. The glue will dry in a couple of days. After complete drying, you can begin to complete the work - grouting.
The seams between the tiles are rubbed with a special building mix. We take out all the plastic dividing crosses (or matches) from the gaps between the tiles, then apply the grout mixture to the seam with a small rubber spatula.
By the way, puffer can be made colored by adding dye to the finished mixture. The paint is selected individually in accordance with the aesthetic tasks that you set for yourself.
If the tiled floor is in a crowded room, liquid cement mortar can be used instead of a fugue, it is stronger, more resistant to physical aggression and does not wear off quickly.
After grouting, the tiled floor must dry out. Usually this takes a day. After that, you can wash the floor and breathe easy: the repair and construction part of the work associated with flooring is completed.
Laying tiles on the floor can seem like an overwhelming task for an unprepared person. But do not immediately contact the tilers. Subject to all the rules and subtleties, even a person who is far from construction will be able to perform such work.
Surface preparation
The first step is to prepare the floor surface, making it perfectly flat. If you skip this step, the tile will not lay correctly. You have to align it with tile adhesive, and it costs several times more than the leveling mortar.
Many people ask the question: if there are already tiles on the floor, and the surface is perfectly flat, do they lay tiles on top of tiles on the floor? This option is allowed, but only if the previous coating is held firmly, otherwise it should be dismantled and the floor leveled.
For alignment are used:
- solution for rough processing;
- finish coatings.
First option is suitable if the floor has a slope or there are significant differences in height. Finishing compositions are applied in a thin layer to give the surface perfect smoothness.
The floor should be cleaned of dust and primed. If there are cracks and potholes, putty them, and after hardening, remove excess putty with a grout mesh. Further along the perimeter of the room, install beacons on the walls in order to further understand to what level to pour the mixture. The location line of the beacons is easiest to determine using laser level, which should be placed on the high point gender.
Next, you need to prepare the mixture with a drill with a nozzle and proceed to the floor with a wide straight spatula. When the mixture reaches the desired level, you need to walk over the entire surface with a special spiked roller. It will expel air bubbles from the solution, which will give the structure additional strength.
There should be no drafts during leveling, allowable temperature air is at least +5 degrees.
What you need for styling: tools and materials
Before laying tiles on the floor, you need to purchase everything you need for work.
The choice of tiles should be taken carefully. Only floor tiles are suitable, as they have a special structure that prevents slipping.
Tile adhesive
It is a dry mix that is diluted in water. To calculate the amount of glue, look at the consumption rate on the package: knowing the area of the room, you can easily determine how much glue you need. As a standard, glue is produced in bags of 25 kg, but smaller packaging can also be found.
Summary table of consumption of the adhesive mixture:
Crosses for tiles. Inserted between stacked tiles to create even seams. It is better to take sufficiently wide crosses (2 mm each) - this will make it possible to adjust the position of the tile if the tile is of unequal size. Instead of crosses, Tile Leveling Systems (Tile Leveling Systems) can be used to achieve a perfectly flat surface and even joint widths.

Level. To check the horizontal of neighboring elements.

Dry mix for grouting. When buying it, it is important to choose a shade to match the tile. To apply it, you will need a rubber spatula.

Other necessary materials and tools:
| Tool/material | Explanation |
| Drill with mixer attachment | Mixing the adhesive mixture |
| Construction bucket 20 l | You will mix in it. |
| Basin for dry glue | According to the technology, water is first poured into the bucket, and then glue is poured, so an additional container for the dry mix will be needed. |
| scales | Professionals make the glue mixture by eye, because they know what consistency it should be. If you are not one of those yet, you will need a scale to dose the glue exactly according to the instructions. |
| tile cutter | It is worth buying a good tool, the price of which is from 3000 rubles. |
| Bulgarian with diamond disc by tile | For the implementation of L- and U-shaped cuts of tiles. Segmented and turbocharged discs will not work, because they leave chips on the material. |
| Regular spatula | Application of the solution. |
| notched trowel | Leveling the adhesive on the surface. |
Laying tiles on the floor
The layout should start from the doorway, the tile should be symmetrical to it. There are two options: in the center of the entrance there should be either a seam or the center of the tile. To choose correct location, keep in mind that there should be a whole tile along the free wall, and a cut one under the kitchen furniture.
Draw a line perpendicular to the entrance and try to lay tiles from this guide to the nearest wall. If necessary, the symmetry can be broken by 2-3 cm, this will not be evident.
Features of laying tiles
First you should lay out a row of tiles from the door to the opposite wall. So that the row does not “leave” to the left or right, along the line that you already have, you should put metallic profile and attach it to the floor. After that, lay the first row along the profile, from which everything else will be laid.
The installation process looks like this:
1. Apply adhesive to the floor with a metal trowel and level it with a notched trowel. The glue around the edges is superfluous - it should be removed so that it does not crawl out into the seams. After that, lay the tile close to the neighboring ones and press down with your hands (or tapping on it with a rubber mallet), move it a little.


Check that the corners of neighboring elements are opposite each other. If there is a mismatch, move the tile a few millimeters in the right direction. Within 10 minutes after laying, check the seams for the presence of glue. If it is there, move the tile to the next one and the glue will come out. It must be removed and the tile moved back.
2. Insert two crosses into each seam

3. Using a level, check the horizontal with all adjacent tiles, including those located diagonally. Lay the level from center to center: since the tiles may be uneven, this will give a more accurate result.

Almost the entire amount of work in one room can be completed in one day. The next day, all that remains is to lay the cut tiles along the walls.
If the cut fragments of the tile are narrow, then it will be more convenient to apply the adhesive directly to them, and then level them with a notched trowel.
How to cut tiles
It is convenient to use a tile cutter to cut tiles. High-quality devices are easy to use, they do not leave chips on the material and do not generate dust. To cut the tile correctly, you first need to draw a line on it, along which the cutting will be performed.
L- and U-shaped cuts are made using a grinder. She does a good job of this task, but creates a lot of dust.
Before working with the grinder, be sure to put on a respirator and goggles.
When the adhesive has hardened and the floor is walkable, grout the joints. To do this, with a rubber spatula, go along all the seams, driving the grout mixture into them. Press the spatula firmly against the floor so that the seams are smooth. Next, wash the surface, removing excess grout and running a rag along the seams for perfect alignment.
Step by step grouting process:


To choose the right grout mixture, you should focus on the information in the table:
Ideal for rooms with high humidity: kitchens, baths and pools. Disadvantages - high price and complexity in work. It will be difficult to fill the seams with this material without experience.
So, you can lay the tiles on the floor yourself, even without having the appropriate experience. In this case, there is no need to rush - do everything consistently and follow the above recommendations, and the result will surely please you.
By purchasing floor tiles, you can save a significant amount of money on borders and panels, which are sold by the piece and, as a rule, are not cheap. You can do this by laying out the original drawing yourself, using the styling options proposed in this article. We will tell you what patterns exist for laying tiles on the floor.
Basic aspects of laying tiles
Ways of laying tiles, giving the room a unique unique look, depend on the shape and color of the finishing material, as well as on the selected decor elements. Creative person Can create any ornament by yourself. Many interesting ideas exist on the pages of magazines and in the catalogs of companies that sell tiles. Modern manufacturers offer the buyer various color combinations tiles. As well as sets consisting of material having different shape and size, saturated with various decorative details: inserts, friezes, etc.
When choosing patterns for laying tiles on the floor, you need to consider some of the nuances:
- From a tile that has an elongated or rectangular shape, you can lay out a variety of ornaments, and a square tile is laid diagonally or straight.
- If the master wants to give a small room volume and a calm look, then a solid pattern is suitable for this.
- It is best to lay out the pattern with small tiles.
- It should be remembered that the ornament, laid out with tiles that have a different format, is considered annoying. Therefore, before finishing the floor, you need to try to lay out the intended pattern in a small area.
It is best to draw the intended drawing on paper before starting work. This will help to create the most correct impression of him.
Ceramic and tile has several standard forms:
- square;
- rectangle;
- hexagon;
- octahedron.

When laying square or rectangular tiles, you can use colored decorative elements in patterns horizontally and vertically. This greatly diversifies the design of the finished surface.
Hexagonal and octagonal tiles themselves require the addition of colored inserts. And the use of tiles, the edges of which are wavy or simply rounded, will require a certain experience and ingenuity from the master.

Before you start laying ceramic or tiles, you need to choose an ornament that will have to draw attention to the surface. What this pattern will be depends only on the taste and imagination of the finisher or the owner of the apartment.
It should be remembered that the drawing can affect the visualization of the room. For example, laying out an elongated pattern, and using a rectangular frame, parallel lines, you can be sure that the room will appear longer and narrower.
Covering a surface with large area, you can apply modular styling. The method consists in selecting tiles that have the same color and texture, but completely different in size. The floor, and it is best suited for this method, will lose its monotony due to asymmetry. It will not be divided into clear squares, while it will make it possible to decorate the interior in any style. It is not recommended to use the modular installation method for walls.

A drawing laid out across the room will help to visually expand the room. The use of a through ornament that combines two rooms into a single whole will create the illusion of increasing space.
The most popular styling is considered to be a pattern made with tiles of the same size and texture, but having different colors and shades of the canvas itself, as well as borders and inserts. The fact is that this method offers a lot of different options and combinations of soft and contrasting colors.
Grout plays an important role in creating a pattern. If you need to draw attention to the ornament, then you should use a contrasting mixture. A single space on the lined surface is created by matching grout tone-on-tone matching the color of the tile.

Huge range of ceramic and tile various characteristics, gives a great opportunity to choose the interior according to your taste and desire. It is only important to use the tips correctly to increase or decrease the space, or to emphasize any details with the help of a finishing material.
In the photo you can see various options for laying tiles in the bathroom, kitchen, living room and other rooms, and choose the most suitable patterns for decorating the apartment.
The most popular styling methods
There are several of the most popular ways of laying tiles on the floor. Let's talk about them in more detail.

The basic ornament has existed in our country for a very long time. At one time, he designed standard bathrooms, for the decoration of which square-shaped tiles were used. Modern experts recommend using large tiles to complete the basic pattern (aprons in the kitchen may be an exception). Basic option ideal for laying rectified tiles without gaps.
Base at an angle
This drawing is somewhat more interesting than the base one. But to get started, you will need an inexpensive tile cutter, since you will have to cut the tile very carefully to complete the original pattern. An angled base ornament hides curvature and surface imperfections and is great for laying in kitchens and bathrooms.
Laying in a run
The method is usually used for surface tiling with rectangular tiles and is an imitation of the laying of old sidewalks and pavements. The runaway method is used by specialists when it becomes necessary to emphasize the authenticity of a room or when creating interiors with a historical focus. Laying should begin in the center of the room in the shape of a triangle.
Chess pattern

A spectacular ornament, which most often uses contrasting colors, greatly enlivens the space, giving it brightness and elegance. Suitable for all rooms and surfaces.
"Chess" at an angle

The original ornament, which has the same characteristics as the "chess", but at the same time perfectly hides the curvature of the surface. Laying in a run-up may have the opposite effect, since due to optical illusion the surface will appear uneven.
Line drawing
This pattern looks very original in any interior. To perform such installation, you need to purchase tiles of the same size and shape, but different shades. Looks great and unique as borders.
Carpet pattern

Ornament laying in the form of a carpet is suitable for people who want to create unusual design with tile or ceramic tiles. The idea of drawing is limited only by the imagination of a specialist. Tiles of various shapes, colors and sizes are suitable for laying.
Drawing "ornament"

It is similar to the previous figure. It seems that when compressed, you can see a checkerboard, so the “ornament” can only be enlarged. At the same time, an increase in the center gives the pattern additional advantage. In the photo you can see that the dark tiles around the central, lighter part, take on the resemblance to the borders.
Drawing "kaleidoscope"

This is a stacking of a number of cute and fun patterns. Used when executing small tile various colors and shades. A large tile in the “kaleidoscope” laying turns into a set of awkward spots.
herringbone pattern

The laying method imitates parquet and is suitable for rectangular and elongated tiles. The material in this case can be arranged both in a zigzag and randomly. It is not recommended to use tiles with imitation of marble or stone on the surface. Facing, which has a long and narrow shape, will visually enlarge the room. A larger tile, on the contrary, will reduce it. With this installation method, the use of a large number colors.
Applying in practice one of the laying methods, do not forget about the rules for working with tiles and some of the nuances of making ornaments. And then any, even the most daring experiment, will bear a positive result.
A photo


Laying tiles on the floor is one of the most expensive types of repairs.
Photo 1 - Ceramic tiles on the floor for the kitchen
Of course, if you turned to a knowledgeable master for help, such costs are justified.
Photo 2 - Combination of diagonal and parallel laying
Due to the high cost of quality cladding material and the salaries of repairmen, some people will prefer to try laying the tiles themselves.
Photo 3 - Modular tile laying
Laying floor tiles: preparatory process
The work is, indeed, hard work. However, if you are careful and follow the instructions exactly, everyone will be able to cope with it.
Photo 4 - Option for laying tiles on the floor
First, we measure the surface area to be lined. For more accurate results, instead of the usual tape measure, you need to use a laser meter.
Photo 5 - Laying tiles on the floor
We are interested in the length and width of the room: we measure from each wall. We calculate the surface area by multiplying the length and width of the room.
Photo 6 - Laying tiles on the kitchen floor
Photo 7 - Laying tiles on a warm floor
Photo 8 - Clinker tiles steps
Secondly, we approach the choice of tiles wisely: laying floor tiles in the hallway will technologically be in many ways similar to laying tiles in the toilet (often laid on polystyrene foam to provide greater thermal insulation, see the article: laying tiles on a warm floor) or in the kitchen, however, the choice of material for flooring in different rooms should also be different.
Photo 9 - Installation of a warm floor under a tile
Photo 10 - Installation of a warm floor under a tile
Photo 11 - Installation of the protective layer in the screed system and in front of it
Photo 12 - Warm floor under the tile
Photo 14 - Laying tiles on the balcony
Photo 15 - Bathtub tiling
Photo 16 - Laying tiles
Photo 17 - Tiles for the kitchen
Photo 18 - Laying tiles
Photo 19 - Laying tiles diagonally
It is important to consider not only color or size, but also such technical parameters:

The higher this indicator, the less the tile is amenable to abrasion. This parameter is selected depending on the intensity of floor use: for example, if people walk mostly barefoot in this room, the I-th abrasion class will be enough, but laying tiles on the floor in the bathroom will require a minimum of the II-nd class. Laying tiles on the floor in the kitchen is already III or even IV class of abrasion.
Photo 21 - Marble tiles
- slip resistance;
This indicator is designated as R 9–R 13 (see photo). Slip resistance is provided by the relief of the tile, the convex ornament on the entire front surface or on a fragment of the tile.
- thermal stability;
This parameter is especially important for kitchen flooring. Poor-quality floor material for the kitchen is not able to withstand even a drop of hot fat: if it gets in, the tile may not withstand internal stresses and burst.
- resistance to chemicals;
- water absorption;
- hardness.
The tile pattern should be selected in the style of the interior of the entire room, taking into account the tile laying option (we will talk about them below).
For public spaces, it is better to use porcelain stoneware, rather than ordinary ceramics, because. the wear resistance of porcelain stoneware is an order of magnitude higher.
Photo 22 - Laying tiles
In any case, whether you pay for the services of a tiler or decide to do the work yourself, marriage in the material is still inevitable, and therefore it is worth buying a tile with a margin. In addition, tiles can be useful for replacing damaged tiles during the operation of the floor.
Photo 23 - Replacing one ceramic tile in the floor
When choosing a tile, be guided by the offers of world brands: Aparici (Spain), Cersanit (Poland), Peronda (Spain), Sadon (Italy), Terranova (Spain).
Photo 24 - Floor in a tile bath
The prices of these manufacturers correspond to the quality of the material. Certified
a bathroom purchase will save you from disappointment and an early replacement of a cheap floor covering that has fallen into disrepair.
Photo 25 - The procedure for applying glue
Moreover, the systematized product catalogs of these brands will help you quickly navigate the choice of a really high-quality coating.
Photo 26 - Laying tiles on the bathroom floor
From domestic manufacturers you can consider tile options from Nephrite-Keramika companies, Volgograd Ceramics Plant, Gazkeramika and TM Sokol products.
Third, make sure you have everything you need to get the job done.
Photo 27 - Necessary tool for laying tiles: 1 - notched trowel; 2 - spatula; 3 - rubber hammer; 4 - aluminum rule; 5 - electric tile cutter; 6 - manual tile cutter; 7 - building level; 8 − mixer; 9 − laser level RED 2D CONDTROL
- tile;
- tile adhesive;
- cement;
- diamond file (for cutting holes for pipes and other slots);
- roulette;
- bucket;
- wet sponge;
- depth gauge;
- paint cord;
- plastic crosses;
- pencil.
Floor tiling options
Before starting tiling work, it is necessary to choose a tile laying method, as well as try to lay the tiles on the floor without fixing compound - see how the final result will look and, if necessary, accept changes in the work plan in time or adjust the laying design.
- Basic way. Does not include patterned tiles or tiles non-standard shape. The most commonly used tiles bigger size to make work easier.
Photo 28 - Tiles on the floor for the kitchen

Photo 29 - Finishing the loggia
Photo 30 - Do-it-yourself tile laying on the floor is a feasible idea
Photo 31 - Floor in the shower
Photo 32 - Tile layout option
Photo 33 - The method of laying tiles on the floor
Photo 34 - Tiles on the balcony
Photo 35 - Laying tiles on the floor
Photo 36 - Tiles in the toilet
Photo 37 - Underfloor heating under tiles on the balcony
Basic laying "at an angle" (diagonally). For laying tiles in this way, you can not do without a tile cutter. An oblique tile laying line in this case can significantly reduce the visibility of wall curvature.
Photo 38 - Laying tiles diagonally
Photo 39 - Quartz vinyl tiles
Photo 40 - Tiles for the hallway
Photo 41 - Tiles on the floor for the kitchen
Photo 42 - Laying porcelain stoneware without seams
Photo 43 - Laying tiles in the kitchen
Laying tiles "in a run". Laying tiles in this way always starts from the center of the room. For this method, a standard square tile is not suitable - you need to use a rectangular one.
Photo 44 - Tile layout option
Photo 45 - Knauf superpol
Photo 46 - Laying tiles in the bathroom
"Chess". A two-tone pattern can brighten up a room, but the colors and size of the tiles should be chosen carefully so that the floor does not look smudged or rippled as a result. The same pattern can be laid out at an angle.
Photo 47 - Layout of tiles in the bathroom
Photo 48 - Warm tiles on the kitchen floor
Line tiling. It implies the use of several colors of tiles laid parallel or perpendicular to each other.
Photo 49 - The process of laying tiles using the "kaleidoscope" method
"Carpet". The central part and the perimeter of the floor are decorated with decorative tiles, imitating a patterned carpet.
Photo 50 - Ceramic floor
Photo 51 - Marble floors
Photo 52 - Laying tiles in the bathroom
Photo 53 - Laying tiles
Photo 54 - Pamesa Albans tiles
Photo 55 - Tiles in the room
Photo 56 - Tile laying design
Photo 57 - Floor tiles
Photo 58 - Ceramic tiles on the floor
"Ornament". The method that involves creativity in thinking. Due to the variety of building and finishing materials you can lay out any ornament on the floor.
Photo 59 - Floor tiles
"Kaleidoscope". It involves the use of two or more colors in the design of the floor. The method consists in an ordered or chaotic laying of tiles of different colors.
Photo 60 - Laying tiles in the shower
floor tiling technology
So you have all essential tool and materials, you bought a tile suitable for this room and chose the option for laying it. Now let's decide which styling technology is right for you.
Ways of laying tiles do not differ in particular variety - there are only two options:

Photo 62 - Laying porcelain tiles
Photo 63 - Laying porcelain tiles
The option of laying tiles on the floor without seams means laying end-to-end. In this way, the continuity of the surface can be emphasized, as well as significantly speed up the installation process. However, the surface after tiling in this way becomes too rigid, which, for example, when shrinking a new house, can lead to swelling of the tiles. In addition, it will be quite difficult to achieve perfectly even lines, especially for novice tilers.
Photo 64 - Laying tiles in the bathroom
The second option (laying with an open seam) is more common. The tile is laid with a distance of a couple of millimeters, the evenness of the lines and the distance between the tiles is regulated thanks to plastic crosses, a level, a wooden rail.
Photo 65 - Ceramic tiles
Photo 66 - Proper laying of tiles on the mortar
Photo 67 - Laying tiles on the floor
The seams are then rubbed with a special paste.
Photo 68 - Grouting
Photo 69 - Grouting in tiles
Photo 70 - Grouting
Above, we wrote that before starting work, you need to lay out the tiles on the floor. This stage important for determining the further progress of work (floor marking is performed with any method of laying tiles). You need to start marking from the most prominent corner of the room.
Photo 71 - Laying tiles on the floor
Photo 72 - Applying tile adhesive
Photo 73 - Laying floor tiles diagonally
Photo 74 - Marking the tiles
So you will be more visible exactly how and how many tiles will need to be cut, in what order to lay, etc.
Photo 75 - Laying tiles on the floor
Laying ceramic tiles on the floor
Laying ceramic floor tiles begins with the placement of beacons - landmarks that help lay the tiles evenly. In a small room, four extreme tiles can be used as beacons, “seated” on a gypsum mortar: they expose the base tile, and on it, using the level, the second, etc.
Photo 76 - Laying the floor on the logs
Large areas require the placement of intermediate beacons - mooring cords or any similar methods. You can also use a control rail of two wooden blocks.
Photo 77 - Filling the floor
The cement-sand mortar for laying is prepared in a ratio of 1:3-1:4, i.e. 1 share of cement accounts for 3-4 shares of sand. Water is added based on the manufacturer's recommendations (indicated on the cement packaging).
Photo 78 - Dry screed
Photo 79 - Dry screed
The solution must be prepared in batches. Otherwise, you may not have time to use up all the prepared mixture before it solidifies.
ADVICE. Professionals prepare the fixing compound for a maximum of three rows of tiles. You can also start with one row.
If you use not a cement base, but an adhesive composition, instructions and recommendations for its preparation and use are also contained on all product packages.
To your attention the technological characteristics of the adhesive composition KNAUF (Germany):
Picture 2 - Technological characteristics of the adhesive composition KNAUF (Germany)
Photo 80 - Knauf superpol
Standard technology for laying tiles on the floor:
ATTENTION! The floor surface must be primed!
According to the laying lines previously drawn on the floor, starting from the far corner of the room, we distribute a portion of the adhesive solution with a trowel or spatula.
We lay out the tiles on top of the adhesive composition, tapping on it with a trowel handle for better shrinkage (in the case of using the adhesive composition, it will be enough just to press down hard with your hands).
Photo 81 - Primer of the concrete floor under the screed
Before laying out on the floor, the adhesive composition can be lubricated not with the base, but with the tile itself, while covering at least 70% of the surface area of the material. There is an option for double-sided application of the adhesive composition, however, it is used only when the back side of the tile has a relief surface. Excess adhesive may cause the surface to tear. Therefore, the adhesive composition is optimally applied with a notched trowel.
ADVICE. The teeth of the trowel used should be twice the thickness of the layer.
Photo 82 - Floor cladding: 1 - surface marking; 2 - seam processing; 3 - "combing" the glue; 4 - laying tiles
To date, in terms of cost and characteristics, the best choice is Ceresit CM 17 glue (the series also has variants of CM 11, CM 12, CM 14 and CM 15 adhesives, differing in type of purpose and degree of adhesion).
Figure 3 - Cutting tiles: 1 - cutting with a glass cutter; 2 - postponing the incised part; 3 - breaking off with a tile breaker
Photo 87 - Cutting tiles
When laying tiles, you must constantly control the level of the floor and the evenness of the laying, using a wooden lath, beacons and a level.
Grouting is started only a day after laying the tiles. The fresh floor must not be walked on or subjected to any load for another 24 hours.
ADVICE. When choosing a colored grout, keep in mind that the tone of the grout on the tile may change somewhat after drying.
It is better to opt for Ceresit and Sopro grouts. In terms of cost, wide range and sustainability indicators, the products of these manufacturers still have no equal.
The grout is applied with a rubber spatula or trowel. Some craftsmen after grouting process the seams with silicone sealant.
Photo 90 - Clinker tiles steps
Laying tiles on a wooden floor
The main condition for the base under the tile is a flat surface without visible defects and damage. As for the wooden floor, the tiles are also laid on it according to the standard technology, having previously cleaned the wooden coating from nails, old paint, covering up the cracks and smoothing out the bumps.
All defective areas should be removed and replaced, and the floor boards should be better reinforced.
Photo 93 - Semi-dry floor screed
If we are talking about laying tiles on a wooden floor in a bathroom or in a bathhouse, without making a new or replacing the old base with a stronger one and corresponding to constant humidity in the room, laying tiles is not possible.
Photo 98 - Floors in the bath
Bathroom. Laying floor tiles VIDEO
Laying tiles on the floor, as well as other types of tiles
The tile is the same ceramics, but this material is fired at higher temperatures and must be glazed at the exit. Therefore, the method of laying tiles is no different from the standard method of laying ceramic tiles.
Photo 101 - Photo of the finished threshold
Features of laying PVC do not differ from standard ones: PVC is placed on a wooden floor after removing nails and leveling the floor using special mixtures, on a concrete floor, as well as on old tiles, fresh PVC coating is laid under the same conditions.
Photo 102 - PVC floor tiles
IMPORTANT! The floor must be perfectly dry before laying! When laying, a special glue for PVC is used (for example, KIILTO PLUS or KIILTO EXTRA).
Photo 104 - Sticking vinyl tiles on the floor
It is laid on a perfectly flat surface - on a self-leveling floor or on plywood with worn seams and recessed fastener nails by at least 3 mm. Vinyl tile on the floor is also attached to the adhesive composition.
Photo 105 - Laying vinyl tiles
OSB boards
They can be used both for installation of a finishing floor, and when laying a rough one. This is a more serious material used not only for flooring, but also, for example, in work with the roof of a house. For flooring, OSB-3 boards are most suitable. More often given material used to level the floor surface. The thickness of the plate varies from 8 to 10 mm. The slabs can be used as a base for ceramic tiles, providing more thermal insulation to the surface.
Laying tiles on the floor. VIDEO
$ Price/value
Kyiv: 50-120 UAH. per sq.m. depending on the level of the master.
Moscow: 600-1,000 rubles per sq. m. depending on the level of the master.


