The subtleties of working with drywall. Figured ceilings - a novelty of modern design (80 photos)
2015-05-28, 00:28
Working with a drywall profile GCR design How to cut drywall How to attach drywall to a profile
Hello dear DIYers.
Consider the nuances that await you when working with drywall, knowing which you can significantly reduce the repair budget.
Working with a drywall profile
To work with the profile, you will need the following tool:
1. Scissors for metal.
2. Pliers.
3. Metal square.
5. Roulette.

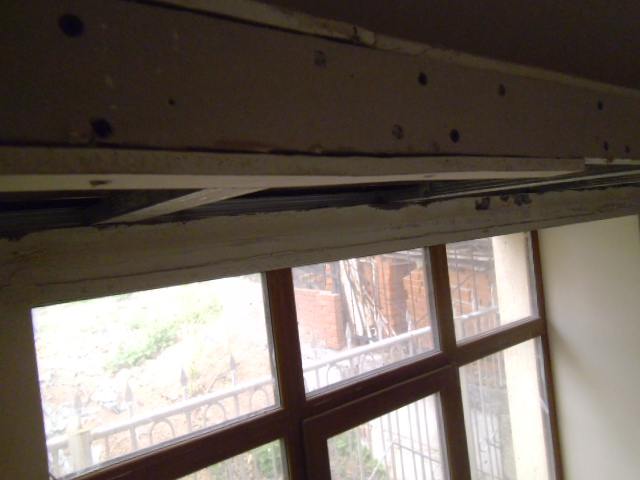
The first tricks appear when cutting the profile.
Although guide notches are applied on its plane, in the form of dots, it is better to make an accurate marking of the cut.
For marking, it is better to use a metal square and a scratch. The pencil is not noticeable on the metal profile, and the scratch can be seen better and will not be erased by accident.

After cutting, the following bends remain on the profile:

 .
.
It seems to be a trifle, 2-3 mm. but later, when assembling the structure, this trifle will lead the plane away, because the ceiling profile is inserted into the bypass, and such bends will expand the latter.


Often I heard that they say drywall will tighten up. No, it won't hold up. Or wait, but not all. So it's better to take pliers and align these bends.


The same applies to partition profiles. If you want less putty to be spent on subsequent finishing, then do not be lazy and trim the unnecessary protrusions formed when cutting the profile.
A couple of times I ran into lightweight profiles. Their price is lower, but the metal is thinner.
In no case do not get fooled by the price of such a profile. Thin metal does not hold the self-tapping screw properly, which then cannot normally tighten the drywall.
As a result, having saved not the price of a profile, you will lose on putty consumption.
GCR design.
If you have never assembled a drywall structure on your own, then it is best to contact the creator of this technology, the Knauf company, for familiarization. Click the link to find technical advice on the installation of the structure.
I will point out some little things that are not shown there, which can significantly lighten your wallet, and knowing which, you can avoid this relief.
Let's start with attaching the profiles to each other with self-tapping screws. A seed is a small self-tapping screw intended only for connecting profiles.
It is better not to use seeds on a plane to which a drywall sheet will then be attached. Or do it with one condition, which is just below.
Here is an example of a plane that is sheathed with drywall:

And here is the seed that fastens the ceiling and bypass profiles:

Now we attach a sheet to this plane (I really didn’t spoil the sheet and attached a strip, just to show you):
Let's substitute a ruler for clarity:

Here is such a "smooth" plane turned out. And they do it all the time!
In the head of such masters, the life-affirming thought firmly sits: “Nothing, it will be leveled with putty.”
Of course it equalizes. The puttyer (ca) will swear and level, and your loot, with a joyful exclamation of “Hurrah, freedom”, will fly away from your stuffy and dark wallet. It doesn't matter that he won't be free for long. It probably won't give you much comfort.
For reference.
If a package of putty is 25 kg. it costs an average of 350 rubles, and its consumption, with a layer thickness of one millimeter, is approximately 1.5 kg. per square meter, then every extra millimeter of the layer, grabs about 20 rubles from each square meter.
Seed cap thickness - 2.5 mm.
It turns out that there are several of these millimeters, and several tens of square meters. Here is the price of misaligned tips when cutting the profile, and not properly fastening the profiles to each other.
It happens when there is no other way out but to put a seed on the front. In this case, we apply the sheet going to this place and press it lightly, so as not to break it, but so that the screw head leaves a dent on the drywall, and in this place we make a recess.
Now we fasten this sheet, not being afraid to bend the plane.
The next point is the use of direct suspensions, extensions, clips, and crabs.
In the application of direct suspension, there are no nuances.
Extensions and clips should not be fixed on the profile with seeds, since the self-tapping screw will “take away” the profile a little, and it will only get worse.
But crabs are a controversial thing. They are conceived correctly - the crab creates a rigid crosshair, which, in theory, should set a flat plane for the structure.
In practice, it turns out differently. Firstly, 8 seeds provided for the installation of a crab is a clear search.
As I said above, each seed slightly leads the profile. To prevent this from happening, you need to hit the tip of the seed exactly in the center of the mounting hole, holding the screwdriver perpendicular to the plane of the profile, which is almost impossible, and even when mounting the ceiling.
Therefore, the crosshairs are better done in a different way. No crabs. In addition, this method is easier, since it requires 4 seeds instead of 8, and cheaper, since crab is a relatively expensive thing.
We cut the end of the profile as follows, bend the side planes, and fasten it to the transverse one.


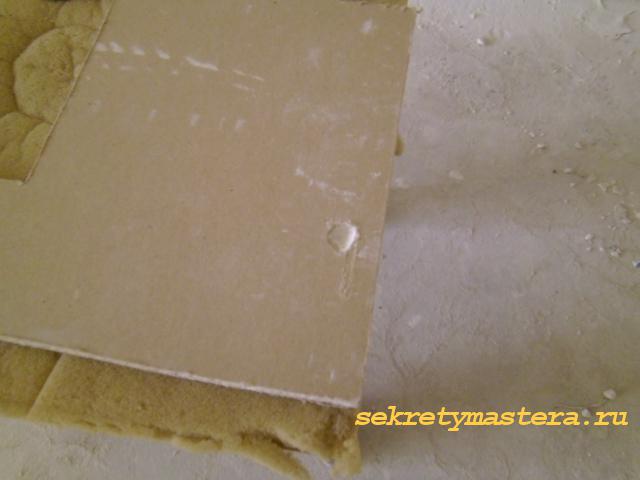
To cut drywall, you will need a knife and a ruler.
A knife can be purchased special for drywall, but a simple wallpaper knife is also suitable, and a profile is usually used as a ruler.


The process is as follows: a layer of cardboard is cut along the ruler, then the sheet is broken, and the second layer of cardboard is cut.


The nuances in this case are as follows:
1. You need to cut drywall on a flat and relatively clean surface. Bumps and debris trapped under the sheet can break through the drywall.
2. You need to cut through the cardboard with pressure. The deeper the cut, the smoother the break will be.
3. Since the knife is driven with pressure, at the end of the cut it jumps off the sheet, and so that at this moment the tip of the blade is not damaged, you need to put something at the end of the sheet (a piece of drywall, plywood, etc.).
4. Immediately after cutting, be sure to chamfer from the end of the sheet, which is joined to another sheet.

5. For cutting a segment, a hacksaw blade is suitable.

6. If you need to cut a thin strip, or cut a sheet by a centimeter - one and a half, it is better to cut through the cardboard on both sides, and then break the strip.
How to fix drywall to a profile
1. The self-tapping screw that fastens the GKL sheet to the frame is screwed in perpendicular to the plane. Going obliquely, with one edge of the cap it can break through the top layer of cardboard, while the opposite one will remain sticking out above the plane.
2. In no case should the head of the self-tapping screw break through the top layer of cardboard and sink into plaster, as this means that the fastening in this place turned out to be weak. The top layer of cardboard is broken, the gypsum under it is destroyed, only one bottom layer of cardboard remains.
3. The head of the self-tapping screw should not protrude above the plane of the sheet, as this will turn the work of the filler into hell, because the spatula will constantly stumble upon this self-tapping screw.


4. The cut ends of the sheet must be cut off at an angle to the inner plane. Otherwise, the probability of a crack appearing at the junction will approach 100%.

5. Do not screw in a self-tapping screw in places where one profile overlaps another. These are corners, crosshairs and entry points to the bypass profile.
In the figure, the red color shows the places where you can not screw the self-tapping screw.

6. Seeds are screwed in at the second speed of the screwdriver, self-tapping screws securing the sheet - at the first
How to use drywall and profile trimmings can be found in the article.
I wish you success in working with drywall
7 comments
- Single and multi-level ceilings can combine chandeliers, lamps, and built-in lighting, which will provide enough light in the room and help divide it into zones. In addition to the central lighting, in the nursery, additional lamps with different light intensities must be present throughout the room. The study area should be best lit, the sleeping area should be darker, and in the center of the room, where there is a lot of light at any time of the day, leave a place for games.
- With the help of drywall, you can create interesting ceilings and lamps in the form of all kinds of shapes such as a butterfly, a flower, an airplane, birds, which you can think of depending on the interests of the child.
- The choice of an arsenal for repairs in a children's bedroom should always be approached with particular responsibility. Drywall, on the other hand, refers to natural and environmentally friendly materials, so you don’t have to worry about the health of the child.
- The first level of the frame is always mounted in the same way. Before the drywall turns into a full-fledged structure, a simple single-level ceiling will need to be installed. To do this, we make markings on the ceiling using a laser level and place a wall profile at a distance of ten centimeters from the main ceiling.
- The size of the indent will depend on how the fixtures and engineering systems are located in the interceiling zone. To level the frame, use the laser level again.
- Fasten the longitudinal profiles by placing them at a distance of about 500-600 mm. The size of the profiles is usually fixed, so when installing the ceiling in a large room, they will need to be spliced together using special tools.
- Make hangers above the ceiling profile. Secure them with an anchor or with dowel nails. Attach the guides to the hangers and fix them with self-tapping screws.
- Wiring, ventilation, communication first, so that all wires are hidden under the ceiling before the sheets are placed. You can make holes for installing lighting both before and after installation.
- If the walls in your room are not completely even, then sloppy joints can form when placing sheets of drywall. Therefore, before you make the ceiling and start laying out the sheets, you will first need to slightly trim the places of these joints with the wall or corner of the room so that your sheet lies nice and neat. To begin with, take and process all the sheets with a special primer to provide them with good waterproofing.
- Leave a distance of a few millimeters from the ceiling to the wall so that the drywall sheets can "breathe" freely and do not deform later under the influence of high temperatures.
- Start fastening the sheets along the supporting profiles, strictly following the checkerboard pattern: the first sheet must be fastened relative to the wall, and the next - from the longitudinal profile that comes first.
- Installation stage completed! Now you need to make holes for fixing fixtures, laying pipes and other communications.
- Puttying the ceiling should only be started after the initial ground finish has been completed. Use one that will penetrate deep into the joints: this will help make the drywall stronger and at the same time process the sheets themselves, preventing the appearance of mold, microorganisms and other fungi on the ceiling.
- The installation of drywall sheets is completed, it remains only to add various decorations and decorative elements to them.
- Allows you to hide bumps, as well as wiring and other communications.
- The material is easy to cut and bend.
- Can be dyed.
- It is possible to carry out soundproofing and insulation with a sufficient height of the room.
- Breathability.
- Non-toxic.
- Fire safety.
- with spotlights;
- with strip LED backlight;
- with stretch fabric inserts;
- multilevel.
- Dark edges and a light center of the room will visually increase the height.
- A square shape in a narrow rectangular room will visually push the walls apart.
- The protruding structure and lighting along its perimeter will emphasize the importance of the zone and draw attention to it, snatching the desired element from the general interior with a spotlight.
- Gypsum and cardboard included in its composition are practically environmentally friendly components. They are neutral in relation to the human body and do not cause allergic reactions.
- GKL sheets have significant sound insulation and practically do not burn, which is very important when decorating office premises.
- This material has an affordable, or even “folk” price. Its shape and relatively low weight facilitate transportation and installation on a ceiling frame.
- For finishing the ceilings of rooms with high humidity, such as a bathroom or a bathroom, sheets of moisture-resistant drywall are available for sale. They are green on both sides.
- GKL has a perfectly flat surface, which allows you to quickly hide all the irregularities of the existing ceiling.
- Under the false ceiling made of gypsum sheets, you can hide any ceiling communications that previously spoiled the interior
- Almost any lighting devices can be built into such a ceiling - spotlights, rotary spots, chandeliers.
- Drywall can be painted with water-based paints and paints of any color or wallpaper pasted over the ceiling.
- Plasterboard ceilings are easy to combine with stretch ceilings made of fabric or PVC film.
- Curved ceilings
- Spiral ceilings
- Wavy ceilings
- Curly ceilings and boxes
- Wipe the mold with soapy water.
- Pour the 1st layer of plaster. Note that all layers of gypsum are poured sequentially, with each layer not exceeding 1 cm.
- The next layer is poured only after the previous one has completely solidified. During pouring, try to avoid air ingress and the formation of bubbles. Shake the mold lightly to ensure that it is completely filled with the gypsum mortar. Do not speed up the drying process with improvised means. If the mold is dried at a temperature above +16 degrees Celsius, the product will be fragile.
- After a while, we carefully remove the decor element from the mold and process it depending on the goals. Gypsum stucco is sanded with sandpaper and must be coated with a primer before painting - this will prevent the paint from being quickly absorbed, and also simplify the process of painting the surface.
- semicircular designs. Will look great in the living room or bedroom;
- "Sun". Perfect for decorating a child's room;
- "flower". Also quite a popular version of the ceiling. It will look worthy both in the nursery and in any other room;
- wave structures. Of the entire list, they are the easiest to make. They will also look great in any room.
- put on a clean sheet of paper the perimeter of the ceiling;
- determine the type of figure - Sun, flower or other elements;
- determine the position of the figure on the ceiling and its actual dimensions;
- first we apply the center of the figure (usually it is a circle or an oval), and from it we already draw outgoing rays or petals. Remember that these elements must also be proportionately and accurately measured.
- drill, perforator;
- building level;
- pencil and tape measure;
- metal scissors;
- drywall knife or jigsaw;
- spatula.
- remove all elements of falling plaster from the ceiling;
- pull out nails and other elements sticking out of the ceiling;
- determine the height at which height the first level will be located;
- at the right level, put a point and draw a straight line from it. Be sure to use the level to transfer marks to other walls. To do this, you can use a choline or a blue-dyed thread;
- for drawing lines, you should choose an angle as close as possible to 90 degrees;
- along the lines every 50 cm we make marks for fixing profiles in the future.
- mount the frame of the first level. It is done according to the standard scheme;
- first, along the lines on the wall, we install profile guides around the entire perimeter of the room. We fix them with screws with dowels;
- then we attach rack profiles to them. They are also installed on dowels with screws;
- between them we mount jumpers for additional rigidity of the structure. We stabilize them with crabs;
- when the first level is ready, we sheathe it with plasterboard sheets.
- we put the necessary markings on the first level: the sun or a flower;
- We draw a circle using a tied pencil and a self-tapping screw. An oval can be obtained by drawing two circles intersecting on the side and erasing the extra lines;
- for the sun, we divide the circle into 12 identical segments. In the end, you get 6 rays and 6 recesses. A drywall flower on the ceiling is drawn in a similar way, only the number and size of the segments depends on its type;
- we attach profile guides to the drawn lines. To create a circle or oval, we cut the profile on one side with metal scissors. Fasten every 50 cm;
- according to the drawing, we install jumpers and fasten them with screws and dowels.
- apply the markup of all curly elements on drywall sheets;
- cut them with a knife on drywall;
- cut out elements are applied to the frame. If everything fits, we begin to fasten them with self-tapping screws. If there are irregularities or shortcomings, we eliminate them with a knife or jigsaw.
- fasten the sheets in such a way that they do not crawl out of the frame.
- processing of joints with sickle with their further puttying. It is also necessary to putty the places where the screws are screwed;
- ceiling priming and painting.
- In order not to knead an excess amount of the solution, the volume of water for it is measured in the form where it will be poured. From the compound, water is poured into a mixing container, where gypsum is added in small portions, with constant stirring, until a homogeneous consistency is obtained.
- Then, after a ten-minute exposure, the solution is poured into the mold by three quarters of the volume, slightly shaken to compact and smoothed over with a spatula. The mold for casting must be placed in a rigid box in advance, which protects the hardening plaster from accidental deformation.
- Products such as cornices can be reinforced with twine or wire. In the process of setting, it is necessary to go over the surface of the casting with a spatula again - to remove air bubbles that come to the surface of the solution.
- After half an hour, the form is turned over on a flat surface, and carefully removed, starting from the middle. The released product remains lying until it is fully cured.
- In order for the stucco molding to fit well on the ceilings, the top layer is removed from the gypsum, the surface of which was not evenly smoothed with a spatula, with fine sandpaper. This gives a perfectly smooth back surface of the product that will be mounted on the adhesive. If necessary, the same processing can be done on the front side.
- After installation, the stucco can be simply painted with white water-based paint. But more often, the stucco elements are covered with gilding, or their artistic painting is performed - this is very beautiful. Such an interior will look expensive and rich, not to mention its aesthetic component.
- The range of gypsum boards can be roughly divided into the following categories: tape boards, standard boards, transitional boards, classic boards and design boards. In accordance with the design, of course, their price also changes.
- Standard gypsum ceiling boards are square, 0.24 m in size and are mounted directly on the structural elements of the room. Their textures are quite diverse: from a simple geometric pattern to complex patterns with stucco elements.
- The adapter plates have a richer design - large relief images are applied to them, creating the illusion of a solid ceiling surface.
- Tape slabs are designed to be combined with the first two options in order to create a specific ornament on the ceiling.
- The designer assortment set includes cellular, dome-shaped and coffered gypsum slabs - the ceiling decorated with them has a chic appearance and good acoustics.
- Cellular modules provide the ceiling with natural ventilation and make it possible to install split systems above them. Such ceilings are relevant in public institutions with a large flow of people.
- The classic gypsum ceiling is created from slabs that mimic the styles of the eighteenth century. They can be combined with any other type, complementing with beautiful cornices. In this way, you can get an exquisite interior design, no worse than noble mansions.
- Modules for cassette ceilings are made of lightweight drywall called "regips". They have a standard size of 60*60 cm, which allows them to be mounted on any suspension system.
- To reduce the weight of such panels, a special drying technology allows, due to which small granules are formed in the gypsum array. Their structure becomes similar to fiberglass, and the board becomes just as light.
- This is very important for a suspended structure. In addition, with this structure, gypsum panels become almost one hundred percent moisture resistant, and can withstand prolonged exposure to water without deformation.
- Gypsum ceilings are very popular due to their affordability and ease of installation. Only one person can handle this job by watching the video beforehand. The instructions that come with the kit will help with installation.
- Gypsum panels can be reinforced with fiberglass mesh, which gives them additional strength. There are options for plates pasted over from the back with acoustic felt. They are used in rooms where special sound insulation is needed. The front side of such a product does not require any additional finishing.
Thank you very much for a really useful article. The interior decoration of the house is just around the corner, we will do it ourselves. Are you planning material for exterior decoration, in particular siding?
I do the material in the process of this or that work, since the article needs photo and video material. If the information you need at the moment is not on the site, then ask a question in the comments. Almost all finishing works are well known to me, and I will quickly give you an answer.
Good evening Aryom. The plans are not of a doctor, but of a design engineer. But intentional……!
For a log house, in general, a particularly powerful foundation is not needed. In the Mari villages, log cabins still stand on six stones. Well, this is of course an anachronism, but they are worth it.
About driven piles. Do you have something special with the soil there? And now there are screw piles. Their installation is simpler and they themselves are cheaper, and there is no need for such a depth. Well, if of course the soil is marshy, then another matter.
About the excavator. To dig a meter-long trench of 60 meters together is half a day. More trouble with an excavator. Well, if of course the ground is rocky, then another matter. You see how difficult it is to answer questions about the foundation without knowing all the circumstances in the place.
After all, the excavator digs so much that then the solution leaves much more, spreads over irregularities. Smoothly by hand.
You often mention boot, apparently there is a lot of it, but in our country it is used more and more for decoration. The fences there are exclusive, etc.
Come on, it's better on the log house. A finished log house can only be taken with a good specialist, it’s right that he refused. And when they cut, do not be lazy, come and check that they cut a semicircular groove and maintain its width. Do not listen if they say that everyone does this and there are no complaints. This is deceit. Demand your own, and do not fall for prepayment. Categorically. Cut down part - check and if OK, pay. Though on the crown, but not in advance. And then you are tormented to prove your point, even though you have 1.92 m. The most common slyness is “You need to buy a forest.” You give money for the forest, and then there is nowhere to go. And the anxiety begins.
In size 9x12 this is a huge house. And vooobsche something purely individual question. And so, a 12-meter winter road is quite businesslike, you just need to make sure that such logs are from the butt, and the log run-off does not exceed 1 cm per meter. The logs will be hefty, more than 40 cm on the butt. You can't turn things like that without technology.
In height - if the log house is 3.8, then with floor-ceilings after shrinkage, the height of the ceilings in the room will be 2.6-2.7. So for you, you can probably make 14 (4+ m.) crowns so that the top of the head does not touch the chandelier.
I also have a request: if everything works out with turpentine, will you give me a contact?
Thank you for the phone, what the hell is not joking. But what if. Yes, and look for advice when I turn, because I have five grandchildren. I won't post it as a comment.
If anything, ask, only on individual positions and with details. I will definitely answer.
Sergey Yurievich, thanks for the answer!
The plot is not every spring, but it is flooded up to 1/2 of the area, I plan to build a house in the flooded zone, but the water is very close. Soil: 20-30 cm fertile chernozem, deeper entirely clay, after 50 cm quite dense, damp.
About turpentine: I searched the Internet for “natural gum turpentine” and came up with several links of 0.5 liters each from Beauty from Mezroll, Moscow, but it is not clear whether it is natural?
And I also found Moscow drying oil: BIASK in cans GOST 7931-76 linen, more: there is Belarusian and import: linavarnits from vekker (Finnish?)
Back in construction:
why concrete piles? cheaper and easier (100 thousand rubles / 1 day + 1 day for preparation, a huge margin of safety (maybe even excessive), there are no problems with heaving of the soil). Instead of a grillage - the lower crown of the log house.
Rubble stone in the Urals is really full, if you take a shaft of 11 tons - no more than 10 thousand rubles (or even 7 thousand rubles) with delivery. True, there is more fuss with it, but concrete can be made without reinforcement (the entire mining and industrial part of the region is on such foundations, though there is rubble masonry, although not always neat.
I don’t want screw piles, because not cheaper, but not so reliable, + corrosion of the metal at the place where the blade is welded to the pipe, the angle may sink due to a sharp change in the area of \u200b\u200bsupport of the pile to the ground. There are with cast tips, but even more expensive (like driven concrete products).
Another question: is it too late to harvest moss now? I often visit the mountains, we are about to get snow, until the “third Indian summer” :).
Regarding consultations: the mail from which the letter was written is corporate, that is, at work, you can use it.
I found a cutter in Argayash (Sosnovsky district of the Chelyabinsk region), he has already begun to cut a log house 12x12 m of 4 walls, everything seems to be neat. We took this log house as a sample (in size), I think to order from him, but requires a 50% prepayment now, although I said what we will do from the winter forest and on the moss.He promised to help with the moss too, there are people who harvest it (I hope after the Trinity :)). By the way, what is your price for moss (to ask the price?).
Your opinion? do the foundation now (I can do it before the snow) or in June? The log house will settle on the site of the cutters, although it is not known until what time.
Thank you, keep in touch!
Sergey Yurievich, hello again!
Tell me (main milestones) how to plan a log house 12x12 m to make it easier to overheat (logs, rafters, rafter beams?)
Internal size 10.7x10.7 m 4-rexwalls, internal partitions made of timber 200x200 mm. + annex 12x6 m.
The roof is simple gable, or mansard type (but a cold attic).
Entrance from the north through the annex.
Bathroom, toilet, boiler room and storage room in the outbuilding.
In the log house: two children's rooms, one adult bedroom and a living room / kitchen
How to do without a long corridor?
Thanks in advance.
Good evening Artyom. Well, piles, piles, since everything is calculated, there are no objections.
You know, I'm not a design engineer, and I can't say exactly how it will be better, since all my knowledge is based only on personal experience. What I did, I know about it.
Once I put a log house on driven piles on the banks of the Kama, but there the groundwater was close, 1.5-2.0 meters and loam, and you have clay and that's good. Usually the clay is damp on top, but if you dig deeper by 50 centimeters, then it is already dry and hard a la brick. In any case, there have never been problems with foundations on clay.
And we have a lot of soils similar in description to yours in Tatarstan. Especially along the right bank, it is completely black earth from 0.3 m to 1.0 m, and then clay.
Bored with a grillage on such soils showed itself very well. But since they make rubble there, then you need to do this. I always try to consult with the old-timers before I decide on the foundation, and this tactic has never let me down.
About moss. It can be harvested until specific frosts. But you probably don't care. If the log house was waiting for installation, then it’s another matter, but they will cut it down for you in the winter, it will settle until July, and there will be fresh moss.
As for the chopper, I don’t know how, but you need to make him cut down the right way. As you need, and not "everyone does it."
If only you knew how much frank hack-work is cut. The demand is huge, buyers have no knowledge, and this led to the fact that log cabins are made, with which then there are only problems.
Well, I seem to have described everything in my articles, I won’t repeat it, but keep in mind that everything that is said there must be observed, and only then the log house will correspond to your dreams.
Here is another article that I removed in connection with the termination of the work of the brigade. By age. . It also has some very useful stuff.
And more, if you need it. A high-quality log house made of good hand-cut wood cannot be cheaper than 12,000 per cubic meter. How many joys I saw in connection with the purchase of an inexpensive log house and how many tears during its operation.
The foundation is best done now and left for the winter. Definitely.
About the floor plan. Here is a free application https://www.sketchup.com/en. I draw everything in it. More or less like this:


There is a mobile version. The simplest toolbar, 3D, rotation in any angle, you can go inside, dimensions. Master a couple of days and do whatever your heart desires and however you like.
Yes, even more. There are two companies, a company in Mari-El Drevo12 and somewhere in Altai Kedroff. I dealt with their log cabins. I even visited the Mari on the site, and finished off the Altai log house. Log cabins of the highest class, manual cutting, do not require caulking, but a little expensive. But they will deliver in Russia. There are websites on the internet. The Mari have even better log cabins, or rather, the attitude to their production and installation is more responsible. Look if anything.
What is the first thing that catches your eye when you enter a room?
Without a doubt, this is the CEILING.
A straight white ceiling has long been outdated and, frankly, boring. A multi-level plasterboard ceiling is a great solution.
We have prepared for you everything you need to decide on the design of such a design. And also choose the location of the built-in backlight.
175 photos of plasterboard suspended ceilings for the bedroom, living room and kitchen. Detailed help in choosing a ceiling for a small room. Laconic and convenient infographics for choosing a design style.
Plasterboard ceilings come in all sorts of shapes, colors, designs and fit easily into any room style, be it classic or modern. Supporters of a simple interior can limit themselves to a single-level composition, and for those who want to create something unique and creative, the market offers several design options for plasterboard ceilings.
Two-level plasterboard ceilings
Two-level ceilings give the room additional volume and allow you to change the shape of the room literally beyond recognition, making the interior rich and sophisticated. The complexity and quirkiness of the ceiling structure depends only on your imagination! Such ceilings are first of all striking and attract the attention of guests!
Sharp changes in height or smooth flexible lines, built-in lights or unusual colors in the finish - all these decor features can be brought to life with the help of drywall. The geometry of the ceiling allows you to create any shape: corners, curves, curved and broken lines. Depending on the interior of the room, the ceilings can also be decorated with paintings or stucco.
With the help of height differences and competent lighting, they can be used as an additional technique for zoning the space of a room. And you can emphasize only individual interior items that you want to pay special attention to: a bed, a table.
Duplex ceilings will look great in. Drywall makes it possible to build any shapes on the ceiling: a flower, the sun, an alien ship, a soccer ball...


Lighting design on plasterboard ceilings
The main function of designer lighting is not even lighting, but rather the creation of a special mood and a pleasant atmosphere in the room. There are a lot of options for its design, but LEDs and LED strips are the most popular. They provide soft, even lighting, visually increasing the depth of the ceiling and creating the so-called "floating" effect. By combining models of different glow colors and shapes, you can come up with your own unique design.


Types of designer lighting:
Standard. Such lighting is simple to implement: simple ceiling rails for lamps and standard pendant lights are enough for it.
Target. Suitable for zoning space, visually separating different parts of the room from one another. For example, in a place of active pastime, the light can be made brighter, and in a relaxation zone - muted tones and soft light.
decorative. Bright contrasting colors or gentle light with overflows: well-designed lighting, in harmony with the room furniture and decor elements, will help create the atmosphere and festive mood you need in the interior.
Plasterboard ceilings for the kitchen: the choice of design
In the design of the ceiling in the kitchen, regular geometric shapes are most often used. The circular layout is good for highlighting the center of the room, while the rectangular ceilings perfectly adjust the shape of the room. For example, a square shape is recommended for visually expanding the walls. For the kitchen, you can also choose wavy shapes of unusual and bizarre configurations, starting with ordinary ovals and ending with unimaginable zigzags.
Attention! Complex structures cannot be placed in a kitchen with low ceilings: choose one or two simple shapes! When designing the shape of the ceiling, always measure the dimensions of the decor elements with the height of the room so that everything looks harmonious.
Designer ceilings made of plasterboard not only radically transform, but are also good from a practical point of view. Drywall has great moisture resistance, excellent sound insulation and fire protection, which will provide you with the beauty and successful operation of the kitchen for many years.
ceiling design in a small kitchen
Plasterboard ceilings are recommended only for kitchens with high ceilings or above average levels, as they take away the height of the room and do not reflect light well. For a small kitchen with low ceilings, you can make the design two-level or simply place a slight cornice around the perimeter: this will help visually "raise" the ceiling higher and make the space more airy and free. You can experiment with color and think of a different color scheme for each level.
An interesting design technique is the so-called "floating" ceiling. The floating effect of the ceiling is achieved by mounting the second level in the center without visible side walls. LEDs are placed inside this structure so that they are invisible, and only their light is visible.
Remember that the lights built into the false ceiling should be evenly spaced throughout the kitchen so that all functional areas are illuminated.


Ceiling in the kitchen-living room: competent zoning
What points should be taken into account when choosing for such an unusual room as a combined kitchen-living room?
As we have already mentioned, it is important to provide for a functional division into zones: a working (kitchen) and a place of rest (dining-living room). The boundaries between rooms can be created using unusual ceiling architecture, building various geometric shapes or dividing lines. Decorative lighting and the use of different materials when decorating the ceiling in the kitchen and living room will help enhance the effect.
Divide into zones not only the ceiling, but also the walls and floor. Play with design, duplicate different elements, emphasizing the overall style! This design will make your kitchen unusual, fashionable and will look much more interesting than the standard color of the ceiling in white.


How to decorate the ceiling in the bedroom?
Wavy lines and irregular shapes are the most popular among designer ceiling structures: there are no limits here! Any of your decorating ideas, whether it is an asymmetric finish, multi-tiered friezes, medallions, arches, columns and domes - all this will be relevant and will fit perfectly into the bedroom interior!
Multi-level ceilings are made out, as a rule, directly above the bed. Avoid bright and eye-catching colors: design should be relaxing! Ceilings in warm light and muted tones are best suited for this task.
Design for a small bedroom
Choosing the right color scheme will help enrich the interior of a small room and make it more spacious. Traditionally painted white. But you can come up with something more interesting: for example, a pale blue suspended ceiling will resemble an open sky. Another unusual option for the bedroom is to paint the middle of the ceiling with a deep warm color (for example, burgundy), and use lines from the center to make a systematic transition to the color scheme of the walls.
The use of glossy surfaces helps to expand small rooms well ... but this is not the case! In the bedroom, bright shine will only distract, so it is better to give preference to matte ceilings.
Avoid complex shapes and multi-level structures: piling up different elements will visually narrow the space. Such decoration is permissible only if it is necessary to delimit the functional areas of the room or create an emphasis on any design element.


Fixing a narrow bedroom
Unfortunately, square or narrow bedrooms in an apartment are far from uncommon! The main feature of such a bedroom is high ceilings, but this height can be easily adjusted with the help of color. To visually increase the height, pale tones are suitable, and dark colors will help to "lower" the top. If you paint the walls two tones darker than the ceiling, this will also make it look lower. Remember that the colors of the ceiling and floor should always be different!
Do not be afraid to experiment and boldly use original colors for the ceiling of a narrow bedroom, such as light colors of pink, purple, orange, coffee.
Be sure to build in a lot of spotlights in the ceiling structure. A large amount of light in the room will create the illusion of a spacious free space.


Original design for a bedroom 12-14 sq m


Creativity in the children's bedroom
A plasterboard ceiling is a great opportunity to realize all your original creative ideas in a children's room.
In addition to the incredible design of the ceiling, which is also easy to build on your own, it also has other visible advantages:
An individual ceiling design can also be created using hand painting. This method is still little known and not widespread, but it allows you to realize any desire of your child and make a room for him really special and dear.


To decorate the ceiling in the living room, designers advise using designs of geometrically regular shapes: these will be all kinds of circles or shapes that emphasize the frame of the base ceiling of the room.
Plasterboard ceilings will help you solve the problem of several zones. Spotlights and various decorative inserts will create a special atmosphere and will be the final touch when creating a unique room design.
The design of your ceiling should organically fit into the style of the hall itself. For example, in a glossy ceiling it will look at least strange, this option is more suitable for high-tech or modern.

Decoration of the hall in Khrushchev
The hall in Khrushchev is, as a rule, a room of a small area with ceilings up to 2.5 meters high and almost zero soundproofing. Therefore, when planning a room and ceilings, it is necessary to choose such design solutions that will help to correct these features for the better.
Say no to a large chandelier that will only clutter up the living room and make it look lower. The best option is a small false ceiling with built-in spotlights: ambient lighting will visually increase the space. Soundproofing can be laid in the suspended structure, which will provide the necessary sound protection.
Another interesting design solution is to combine plasterboard and glossy ceilings, which will reflect light and visually "raise" the surface of the ceiling.
Choose colors in warm light colors. And if you make the ceiling and walls the same color, then the boundaries of the room seem to blur, and this will also create the illusion of a large space.


Spacious living room 20 sq. m.
The area of the room at first glance may seem large, but its visual and actual size is more dependent on the ceilings. If they are low, then you should not build complex two- or multi-level structures that will visually reduce the living room: one level will be enough. For a low ceiling, choose tones that will be lighter than the walls or glue that will visually "raise" the ceiling.
To illuminate a large room, it is recommended to use plasterboard constructions with spotlights built into them, which have the function of zonal adjustable lighting. Then, if necessary, you can adjust the amount of light in each part of the room. For example, turn on only two light bulbs above the closet or three lamps above the bed.


We make a plasterboard ceiling with our own hands
If you have even the slightest skill, installing drywall will not be a difficult task for you. It is only necessary to know some of the features of drywall sheets and what to do with them, how to design everything and successfully hide all the imperfections of the finish under the ceiling. We will talk about all this now.
First of all, you will need to take an inventory of your tools and, if necessary, buy the missing fixtures and materials, such as, for example, suspensions, screws, profiles and dowel-nails. Take a profile with a size of at least 4 meters, so as not to encounter the need to dock them.
All these actions will require you to extreme concentration and accuracy in measurements. Now that the main ceiling frame has been made, the question again arises: how can we design a plasterboard ceiling ourselves?
The interesting design of the ceiling has become not just a nice addition, but actually an obligatory detail of modern interiors. Designers today are not limited to a smooth white surface, but use the ceiling as a canvas on which to “draw”, maintaining and developing the stylistic orientation of the interior of the room.
Such a ceiling has a lot of advantages:
In terms of design, plasterboard ceilings can be:
Plasterboard ceilings are relevant everywhere: in offices and residential areas, including kitchens, bedrooms, children's rooms.
Design
Mounting drywall, sometimes limited to one level. For example, if the room is low, then it is best to do so. Single-level structures are very easy to make on your own, and, nevertheless, even such a ceiling with built-in lighting will look stylish.

This design is not as refined and original as multi-level ceilings, but allows you to align them and install point built-in lighting. In some interiors, the deliberate simplicity of a single-level drywall is only at hand; it does not distract attention from other, more important elements of the interior.
However, not simple designs are in fashion, but multi-level ceilings with complex curly elements. They will look advantageous, royally in high rooms.

If the room is small, it is better to install a maximum of two-level structures so as not to burden the design.
Plasterboard ceiling allows you to zone the room. For example, zones will be emphasized by thoughtfully designed lighting.

There are many lamps on sale designed for plasterboard ceilings, which in themselves will decorate the interior. They are rotary and static, open and closed, built-in and overhead, single or block. Spot lighting is most suitable for these purposes, since only the decorative part remains visible, and the technical part is hidden from view.
The distance from the ceiling to the plasterboard structure must correspond to the size of the recessed fixtures.
Depending on the goals, you can make the room comfortable and cozy, or stylish and original, even futuristic. He often repeats the lines already existing in the interior, for example, the shape of wall niches is played up or the dividing line into zones on the floor covering is also projected onto the ceiling. Thus, plasterboard ceilings can be:

|
from one or more levels. Often, it is on the surface of the “frame” that spotlights are placed, and a strip illumination is installed in a niche from the side of the inner edge, so that the tape itself is not visible. |

|
Zonal. Emphasize the presence of several zones in the room. |

|
Diagonal. The level line runs diagonally from corner to corner, and it is not necessarily a straight line, it can be at least wavy, at least zigzag, whatever. |

|
curly. Any shapes are applicable: baguettes, ovals and circles, medallions. |

|
abstract. Abstract designs can take on a completely different form - these are zigzags, curls, all kinds of layers of levels. |

|
soaring. A niche is organized along the perimeter of the protruding level, an LED strip is mounted inside, so that it is not visible. Diffused light creates the effect of a floating ceiling. |
Video: how to make a floating structure.
Undoubtedly, a plasterboard ceiling is a good opportunity for space correction:
On the kitchen
The kitchen is a special place. I want it to be stylish, comfortable and functional at the same time. And all this can be achieved, including the competent design of plasterboard ceilings in the kitchen. Think about what flaws you would like to hide, and what advantages to emphasize.
In the kitchen, it is permissible to install multi-level structures, but still it is worth considering the height of the ceiling. If they are low, then it is better to abandon the "extra" levels.

With the help of a plasterboard construction, you can solve the problem of masking ventilation pipes from the hood and harmoniously fit the ventilation duct into the overall design. A popular solution is when the kitchen set literally fits into the created niche.

Be sure to organize high-quality lighting. This is the illumination of the working area: several spotlights are built in, the light from which falls on the countertop of the kitchen set. You also need lighting for the dining area, its role can be played by a chandelier chosen in accordance with the style of the room.

If the kitchen is divided into several zones, then a plasterboard ceiling of different levels can be made above each zone. Zoning is usually emphasized with color.

Video: installation of plasterboard ceiling in the kitchen
In the bedroom
In the bedroom, you can apply techniques that are relevant for other rooms. Suspended ceilings with smooth lines will look beautiful. The plasterboard ceiling in the bedroom can simply be painted or pasted over with photo wallpaper, glass or stained glass inserts can be made.

In the interior of the bedroom, the painting will look great, perhaps in conjunction with polyurethane moldings.

Basically, the whole design "spins" around the bed. Usually, it is its location that is somehow reflected in the design of the plasterboard ceiling. So, a protruding rectangular or oval level with illumination is often mounted above the bed, which draws attention to the sleeping bed and distracts attention from other elements of the interior, as if uniting them. You can do the opposite - make a niche corresponding to the width of the bed directly above it. In this case, it is often continued on the wall, installing the head of the bed in the resulting opening.
Video: installation of a plasterboard ceiling with a transition to a wall niche

You can somewhat lighten the design of the ceiling with the help of "floating" structures.

Undoubtedly, the combination of a plasterboard ceiling and a stretch ceiling - a starry sky - will look advantageous in the bedroom. Its installation is carried out using optical fiber and tension fabric.

Ceilings in the nursery
Thanks to its complete environmental friendliness, the installation of a plasterboard ceiling in a children's room is fully justified. Here, of course, it is a sin to be limited to one level and white color. The ceiling in the nursery simply must be bright, colorful. Pink, blue, yellow, green colors are often used. In the nursery, you will certainly appreciate the convenience of the possibility of coloring.
 On the ceiling in the nursery, the sun can light up ...
Create curly structures on the ceiling: flowers, silhouettes of cartoon characters and color them.

Video: plasterboard ceiling design idea in a children's room
A good solution is the visual division of the room into zones: play, study, sleep zone.

As well as in the bedroom, it will look good here - "starry sky". Kids will love this design. Find a place for the "starry sky" in the sleeping area.

Perhaps some new ideas can be gleaned by looking at the photo gallery.
Photos of the design of plasterboard ceilings


Plasterboard ceiling design: options and photos
Modern decoration and the creation of comfort in living spaces is unthinkable without the design of the ceiling. Properly selected plasterboard ceiling design can give a unique look to even the most unpretentious room. When designing the entire interior of the room, special attention should be paid to the ceilings.
Multi-level ceiling in the living room
To date, the most popular and sought-after material for finishing the ceiling is plasterboard or plasterboard. Thanks to the simple technology of assembling a suspended frame and a large area of gypsum boards, you can complete the work in a short time. In addition, it is easy to make almost any geometric figure from GKL, which will become an element of the ceiling system, and plasterboard ceilings will receive a unique design.
Plasterboard sheets
Why drywall dominates ceiling design
To answer this question, it is enough to list some of the advantages of this material:

Profile notch for ceiling bend
Plasterboard ceiling construction
The main element of such a ceiling, as already noted above, is a rectangular sheet made of gypsum and placed between the protective layers of cardboard.
Thanks to this combination of materials, the sheet can be given any configuration and any design of a plasterboard suspended ceiling can be realized. However, before that, it is subjected to a simple treatment with a spiked roller and moistened with plain water. So you can make a wavy ceiling of the second level or get a protruding or recessed circle or semicircle.

Round plasterboard ceiling
Suspended plasterboard ceilings are mounted on a metal frame. This is a construction of very light metal slats coated with zinc. This makes the metal resistant to corrosion, which makes it possible to use it in rooms with high humidity.
The frame rails are easily cut with scissors for metal or an electric grinder with a cutting wheel. Thanks to these elements of the frame, you can give almost any shape.

Spiral ceiling in combination with PVC stretch fabric
Important to remember! If the existing ceiling in the room is low enough, then the use of two and three level ceilings is not recommended. In this case, the volume of the room will be reduced, and the ceiling will “put pressure on the head”, which will cause discomfort.
Plasterboard ceiling options
A single level ceiling is the simplest drywall ceiling design and is ideal for rooms with a low base ceiling. The minimum height to which its surface can be lowered is only 3 cm, which is the thickness of the CD carrier profile.

Wave-shaped three-level ceiling
In this case, an overhead or pendant chandelier is used as the main lighting. If it is decided to use spotlights, then the ceiling level will have to be lowered by 10-12 cm. This is dictated by the height of the housing of the recessed lighting device.
If a wide ceiling plinth with imitation of gypsum stucco is glued to the walls around the perimeter of a single-level ceiling, then LED lighting can be placed in it. Such plasterboard ceilings in design will not yield to ceilings with different levels in their beauty.

Plasterboard star on the ceiling of the children's room
Important to remember! Glue the ceiling plinth 3-5 cm below the plasterboard ceiling.
The design of two-level plasterboard ceilings - this type of suspended ceiling allows you to visually perform zoning of the room for recreation, work or eating. All kinds of figures on the ceiling allow you to give an exclusive and attractive look to any room.
The backlight and the main lighting allow you to illuminate the required areas of the room with an intensity determined by the owners. For this, it is recommended to install lamps and chandeliers with rheostats. Thanks to the malleability of drywall, the design of the ceiling can only be limited by your imagination. For example, the drywall ceiling design of a kitchen is often made in the form of boxes that separate the eating area from the cooking area.
Recently, a combination of multi-level plasterboard ceilings and PVC stretch ceilings has been widely used. This allows you to achieve the best results in the implementation of design solutions. A striking example of this is the combination of plasterboard and stretch ceiling "starry sky" for the bedroom and the design of the ceiling of the kitchen from plasterboard with a glossy stretch ceiling.
Three-level ceiling - very often this method of decoration is used for children's rooms. Here, all kinds of two-level daisies and stars are used, which are mounted on the first level drywall plane. You can also make waves on the ceiling and paint them in different colors. In combination with built-in lighting and decorative lighting, this will give the nursery an original look.

Plasterboard ceiling in the kitchen
If you try to group the design options, you get a list like this:
Applying the listed options or combining them, you can create plasterboard suspended ceilings of any complexity. To do this, you need to show a little imagination and creativity.
vot-potolok.ru
How gypsum stucco is used in a modern interior (20 photos)Gypsum stucco has been widely used since ancient Greece. Plaster products were used in the decoration of interiors, facades, as well as bas-reliefs, sculptures and more. For many centuries, gypsum stucco was extremely popular, but in the 20th century it was replaced by similar elements made from cheaper and lighter materials, such as foam and polyurethane. But still, many connoisseurs of genuine, classic beauty still prefer this material today. Let's take a look at the photos of stunningly luxurious modern interiors with plaster moldings and give it its due!
How does gypsum molding differ from other materialsThe main disadvantages of gypsum stucco in comparison with modern analogues are low water resistance and the fact that the material turns yellow over time. Therefore, stucco decoration, which is destined to often come into contact with water and direct sunlight (in particular on the facades of buildings), today is almost always made of polyurethane or foam. Another disadvantage of gypsum stucco is the relatively large weight of the elements when they are large, as well as their fragility, which is especially characteristic of small products. This leads to the fact that the installation of gypsum decor takes a little more time and effort than the installation of products from other materials. So, when making a large gypsum decor, metal loops are inserted into it, for which this decor will be attached to a wall or ceiling, or they are fixed with dowel-nails. Then, as a stucco molding made of polystyrene foam and polyurethane, it is enough to simply glue it. Surprisingly, it is precisely the "disadvantages" of gypsum that many people consider as its advantages. The yellowed surface, chips and cracks are witnesses of antiquity and authenticity of stucco. The high weight of the material gives the products a powerful, expressive look and depth to each line. Therefore, you want to touch the plaster decor with your hand. To make you have such a desire, just look at the following photos of the interiors. Gypsum stucco in the photo of modern interiorsIn modern interior design, gypsum stucco is found, as a rule, as a decorative ceiling finish. The following 9 photos show us that gypsum stucco ceiling decoration can look chic not only in a classic design style, but also in combination with modern and even minimalist furniture.
Also Read: Modern Ceiling Design - 30 Stunning Ideas Also read: Stylish do-it-yourself concrete decor - ideas and photos Gypsum columns and wall decoration in the interior (10 photos)Moldings, cornices, bas-reliefs, columns and other elements of gypsum stucco molding on the walls of the interior practically oblige you to adhere, if not to the classic design, then at least to a very elegant modern style. The last 10 photos in this article show us how gypsum stucco brings a luxury effect to the design of private houses and apartments. Also read: Chic living room decoration - 2015 trends How to make stucco molding from gypsum with your own handsWorking with plaster is not very difficult when it comes to the simplest details. Almost any solid and hollow object can be turned into a mold into which plaster of paris is to be poured. General procedure: When preparing stucco products from gypsum with your own hands, among other things, you need to take into account the fluidity of the solution. It is approximately 2-3 minutes. During this time, the gypsum remains pliable for work, and after it it becomes viscous. Final drying time of gypsum mortar |


support-stroy.ru
Figured plasterboard ceilings | Gips Portal
We make curly plasterboard ceilings with our own hands
Today, drywall is widely used to create complex ceiling structures. Figured ceilings from drywall began to meet especially often in modern repair.
With the help of this design, you can decorate your ceiling in an original and beautiful way and make it a real work of art. It is worth noting that the figured plasterboard ceiling can be easily mounted with your own hands.
Design Options
Figured plasterboard structures on the ceiling can have a wide variety of variations:
"Flower" on the ceiling

Image 1 of 4
Flower figure on the ceiling
These are the most common design options for plasterboard ceilings. But there are also abstract types of designs that are suitable only for certain interiors.
Create a shape drawing
Figured ceilings from drywall without fail require the creation of their drawing. Without a scheme, it will be almost impossible to design them with your own hands without making a single mistake.
So, the drawings for the drawing are built as follows:
Note! Do not make the size of the sun itself or the flower larger than its rays or petals. Otherwise, the figure will not look correct and not beautiful.
 Figured ceiling drawing
Do not forget to include additional lighting in the drawing, if any. When the drawing is ready, you can start installation work.
Necessary tools for work
To create a figured structure of any type with your own hands, you will need the following tools:
In addition to tools, drywall sheets, guides and rack profiles, putty and primer are needed.
Preparing for installation
To create an even and correct curly structure, the moment of preparation for installation is very important. Here you should carry out the following operations:
Note! The lowering of the ceiling must be at least 2.5 cm, which is equivalent to the thickness of the metal profile,
After marking the ceiling, you can proceed to the installation work itself.
Installation work
So, we start assembling the frame with our own hands. For this you need:
Now we proceed to the installation of the second level:
Note! It will be somewhat more difficult to mark up a flower, since its petals, unlike the rays of the sun, can have different parameters.
When the frame is ready, electrical wires are led into it in a specially insulated way (placed in a channel). This is done if additional lighting was planned. Usually, a chandelier is installed in the center of such curly elements as the sun or a flower.
Now we proceed to do-it-yourself finishing of the finished frame with plasterboard sheets. To do this correctly, you need:
 Finished curly design
If you plan to install hidden lighting on rays or petals, then when installing drywall, you should create a small rim. You can attach an LED strip to it using liquid nails.
If you will mount spotlights, then cut a hole in the sheets for them and fasten them already inserted.
Construction finish
Do-it-yourself final finishing of a figured ceiling structure involves:
Now it remains only to attach the chandelier and the repair can be considered finished.
As you can see for yourself, you can build a curly ceiling structure at home without even having impressive knowledge in construction.
gipsportal.ru
Do-it-yourself plasterboard ceilings - manufacturing options!
Drywall is perfect for wall decoration, creating various niches, building partitions and, of course, arranging the ceiling. And if with the installation of an ordinary straight plasterboard ceiling there are usually no difficulties even for an inexperienced master, then the creation of a figured structure requires the performer to have certain knowledge and skills.

Do-it-yourself plasterboard ceilings
For your own arrangement of a figured ceiling, you must know how to cut drywall sheets, how to bend sheets and how to create bends in the design of mounting profiles. Check out the tips below and get started.
Advantages and disadvantages of curly plasterboard ceiling

Plasterboard ceiling
Advantages
Multi-level figured plasterboard ceilings allow you to visually increase the height of the room and the overall space of the room. Such a ceiling design opens up wide possibilities for zoning rooms. For all its advantages, curly plasterboard ceilings are extremely easy to install.

Plasterboard ceiling
Drywall allows you to hide even serious defects and irregularities in the rough base. This makes it possible to refuse self-sealing of cracks with means such as a primer, putty, etc.

Plasterboard ceiling
Sheet material is extremely easy to process. It can be bent and cut without much effort and complex tools, which allows you to create the most intricate ceiling structures with all sorts of recesses, protrusions and other additions.

How to bend drywall
Any lighting devices can be built into the plasterboard ceiling - from ordinary chandeliers to spotlights and LEDs. At the same time, the lamps can be placed in different places and at different levels, which allows you to create the most pleasant and effective lighting.

Any lighting fixtures can be built into the plasterboard ceiling
Drywall allows you to hide a variety of communications. Thanks to the GKL, electrical wiring, ventilation ducts and other elements will not be noticeable, which will favorably affect the interior of the room.
Wallpaper can be glued to drywall, and sheets can be painted and lined with other finishing materials without any problems.

Plasterboard ceiling
At the same time, the purchase of sheet finishing material is available to almost everyone. Despite the relatively low cost, drywall is characterized by high quality and excellent performance properties. You will spend much less money on the arrangement of a figured plasterboard ceiling than on the installation of a tension or cassette structure.

Multi-level plasterboard ceiling with lighting and hanging elements
Drywall normally passes air, does not rot and does not pose any danger to others.
disadvantages
The main disadvantage of a figured plasterboard ceiling is the rather large weight of the finished structure. Unlike the same PVC panels and stretch fabrics, GKL has a rather impressive mass - about 20 kg per 1 m 2 of finish.
The second significant drawback of curly plasterboard ceilings is their low resistance to flooding. For example, stretch fabrics are able to recover to their original state even after severe flooding. Drywall does not have this property.

Plasterboard ceiling in bathroom
Partially solve the problem allow moisture resistant sheets. If your home has a risk of flooding from above, use moisture-resistant drywall.

Also among the relative disadvantages of curly plasterboard structures is the fact that after finishing work, the system cannot be disassembled without causing serious damage to it. Therefore, plan in advance the order of placement of communications and lighting fixtures and install the appropriate components in the places provided for them.
Surface marking

Plasterboard ceilings with their own hands. Installation technology
Choose the appropriate design option. Make a plan for the future ceiling in accordance with personal preferences, or select the appropriate ready-made option from an open source. Also, the creation of the project can be entrusted to a specialist. In this regard, make your own decision.
When the project is ready, start marking the rough base.
First step. Remove old finishes, lighting fixtures and any foreign objects from the surface if they are found.
Second step. Find the lowest point of your ceiling and set aside from it along the walls the attachment line of the first level of the ceiling structure. The minimum allowable height is 2.5 cm. the mentioned thickness has a fixing profile (guide) CD. Mark up using a level.
It will be more convenient to apply the level points in the corners of the room, and then connect them with straight lines. To draw lines, you can use a thread dipped, for example, in blue. Pull the thread between the points, pull it slightly away from the wall and release. The thread will hit the surface and leave a streak.
Third step. Find an angle in the room that is as close to a right angle as possible (90-degree angles are extremely rare in residential areas). Start marking the ceiling from this corner every half a meter.
Do the same on the opposite side. Beat straight lines between the marks. On them you will fix the U-suspensions necessary for mounting the ceiling CD-rails.
Video - Secrets of installing complex stretch ceilings
Video - Installation rules and errors
First level frame

Tools for the job
Proceed with the installation of the frame for the first level of the ceiling structure.
First step. Fix the ceiling UD rails around the perimeter of the base. The profiles must be fixed in such a way that their lower edges fall clearly on the previously broken lines.

Mounting guides

Mounting the 1st level frame
Usually, profiles initially have holes for fasteners. If they are not available, prepare the holes yourself in increments of 400-500 mm. Screws and dowels are used to fix the elements. Dowels with a diameter of 6 mm are optimally suited. The best diameter of screws for fastening such products is 0.5 cm.
Second step. Attach the U-suspensions in accordance with the markings. The requirements regarding the dimensions of screws and dowels do not change. Hangers fasten with a step no more than 600 mm.

Mounting the 1st level frame
For fixing suspensions, flared dowels are best suited. Use them whenever possible. Such fasteners have a special cap that does not allow the dowels to go into the voids, which are most likely to be found in the concrete floor.
When mounting hangers, fasten the elements through the internal holes. It is better not to fasten using external ears, because. in the case of such installation, the suspension will be pulled back over time, which will lead to deformation of the ceiling.
Install all planned hangers.

Mounting the 1st level frame
Third step. Cut the CD rails according to your project requirements and fit them into the UD rails. Elements must be set strictly on the same level. To make it more convenient, stretch an ordinary nylon thread from below. Pull this thread across the CD guides, while attaching it to the UD ceiling profiles with screws.
The CD guides at this time must be tightened with hangers, otherwise the products will pull the thread. To do this, simply bend the middle suspension under the mounting profile. You can remove this thread if you wish. It will come in handy at the stage of arranging the second figured level.
Fourth step. Align the guides with the tensioned thread and fix them to the hangers with small self-tapping screws, designed specifically for mounting profiles under drywall.
Install electrical wiring and other planned engineering structures, and then proceed to attach the sheet trim.
Video - Installation of a multi-level plasterboard ceiling. Video lesson 1
Drywall installation
The standard length of a drywall sheet is 2.5 m. During the installation process, you need to lay the sheets in such a way that the CD guide sheet covers only half. The remaining half is needed to attach the next sheet.
It is quite difficult to carry out such a finish alone. Seek additional help if possible. In general, 2-3 people will be enough.
Fix all the entry-level sheets and proceed to the arrangement of the figured part of the ceiling.

Drywall installation
First, carefully draw on the base of the figure with a regular pencil. Next, mark on the walls the location of the second level of the structure and attach the UD profile to the walls.
To bend the mounting rail, it is enough to simply prepare cuts on it in the necessary places with a step of 50 mm. Make cuts on the side, as well as on the outer part of the bend of the guide.

Drywall installation

Installation of a multi-level plasterboard ceiling

Drywall installation
Screw the bent profile to the contour created earlier. Fasten to the CD-rails through the GKL of the first level. In some places, to maintain the correct bend, the fixing profiles will have to be fixed directly to the finish.

Drywall installation

Drywall installation
Video - part 2
Second level installation
After completing the previous manipulations, the frame design will become such that you will have nowhere to insert CD guides from the side of the curved line. To continue working, you simply need to cut off the sides of the products at the connection points and attach the bottom plane to the previously bent UD-rails.

Second level installation
The vertical CD-rails of the figured level with a length of more than 500 mm are additionally strengthened with U-suspensions.

Second level installation
Start fixing drywall. First, fix whole sheets, and then simply cut off the excess with a hacksaw in accordance with the contours of the planned figures.

Second level installation
Cut the vertical strip (if sharp bends are created) from the outside of the bend. Screw in the vertical strips of drywall. As a result, you need to close all voids.

Second level installation
This completes the main stage of work. You can move on to puttying and finishing the ceiling.
If during the construction of the ceiling structure it becomes necessary to bend the sheets, it will be enough to simply moisten the drywall with water and give it the required bend.

Second level installation

Do-it-yourself installation of a multi-level plasterboard ceiling

Do-it-yourself installation of a multi-level plasterboard ceiling
Thus, it is quite possible to cope with the arrangement of a figured plasterboard ceiling on your own. Having understood the main features of performing such work, in the future you will be able to build much more complex compositions from several levels, with sharp bends and atypical drops. In the meantime, follow the instructions and gain experience.
Successful work!
Video - Do-it-yourself multi-level ceiling
Video - Do-it-yourself plasterboard ceilings
svoimi-rykami.ru
Finishing and Decor, Options, Photo

The aesthetics of the gypsum ceiling will not leave anyone indifferent
The advantages of gypsum as a natural material have been known to mankind since antiquity. The fact that it is used in medicine speaks of its complete safety. Gypsum does not burn, is easy to process when wet, and is one of the most popular building materials.
It is most in demand in the process of interior decoration - no other material gives such a smooth and snow-white surface. We will talk with you about which gypsum ceilings can be made in your home, and what types of products based on it are used to finish the ceiling.
Gypsum screeds
Even 15-20 years ago, teams of craftsmen working with gypsum made a mortar for screeding walls and ceilings, the components of which were different for everyone. There was no single recipe, so the quality of the leveling layer often left much to be desired.
Variations of mixtures and their application
The appearance of gypsum-based dry plaster mortars on the building materials market has made a real revolution in housing construction. Mixtures balanced in terms of components, which are simply diluted with water in the ratio indicated on the package, allow you to make the highest quality surface leveling.
| Blend option | Scope of application |
Plaster composition | In comparison with putties, plaster compositions are distinguished by a larger dispersion of the binder. They are used in cases where the surface differs by very large deviations from the horizontal or vertical, and it is necessary to apply thick leveling layers (read more here). Plaster can close up a deep joint between the ceilings and eliminate the surface difference. |
Gypsum | Putties are used after the surface is leveled with plaster, or when it does not have large defects. The basic type of mixtures has a fraction of 0.2 mm, and allows you to apply layers with a thickness of no more than 3 cm. |
Finish composition from Perfekta | The finishing compositions have the finest grinding, they are designed to fill the pores on the plastered surface. Most often, plasterboard filings and suspended ceilings are puttied with similar compositions. |
Universal option | Universal putties occupy an intermediate position between the base and finish. If the finishing composition is applied with a thickness of no more than 3 mm, then the universal one can also be used when it is necessary to level out minor defects up to 10 mm deep. It is good for them to seal the joints between the GKL and GVL. |
Gypsum glue | Mounting mixtures are no longer used for leveling ceilings, but for their cladding of GKL with an adhesive method. Gypsum stucco molding is also mounted on such glue and partitions are erected from gypsum concrete blocks. |


Compared to cement mixtures, gypsum plasters have a higher fluidity, which means they are easier to spread over the surface. They set faster and gain strength, and this makes it possible to reduce the time for finishing work.
A well-made gypsum ceiling is a good basis for further decoration, which requires a perfectly flat surface: painting, wallpapering, tiling.

Perfectly smooth gypsum surfaces ready for finishing
Gypsum-based dry mixes are used for the preparation of stucco adhesives, putties for grouting, and decorative plasters. To regulate the hardening time, and improve the characteristics of the solutions, various plasticizers are added to the composition of the mixtures by manufacturers.
Not everyone can make such a screed with their own hands, as in the photo. Turning to specialists, you can be sure that the result will suit you. Especially if the plaster ceiling is decorated with stucco. However, this is a separate topic for discussion.
stucco work

Classic ceiling decoration with gypsum stucco
This method of decorating rooms has come to us since ancient times - only the technology for manufacturing gypsum parts has changed: rosettes, cornices, column elements. The beauty of palace interiors, in which stucco was the main decoration, delighted and fascinated at all times.
Ceiling decor can be done at home
No one has been making stucco elements by hand for a long time: soft silicone molds for gypsum, called compounds, facilitate the production of gypsum casting. With their help, it is possible to establish the production of elements not only in the conditions of the factory floor. But also right on the construction site.

Silicone compound
Gypsum boards and suspended structures
The possibility of creating various gypsum elements by casting, prompted manufacturers to create lightweight decorative slabs that can be used to paste over the surface of the ceiling, as well as create a suspended modular structure.
Gypsum ceiling tiles

Classic gypsum ceiling
Suspended ceilings, created from solid sheets of drywall, are diverse in shape and design. But the creation of these forms is a much more complex matter, requiring special skills. In addition, plasterboard ceilings take away the height of the room and they need finishing.
Conclusion
From the above material, we can conclude that gypsum ceilings are very diverse in design. Using tiles for finishing the ceiling is much more convenient for those who make repairs on their own.
Standard cladding does not have to be made by yourself - you can buy ready-made. With the help of concave patterns on the tiles, even a small room will seem more spacious and taller. Properly choosing lamps for such a ceiling, you will get an excellent result, and you will be able to please yourself and your family with a beautiful interior.
Figured plasterboard ceilings help to create not only a perfectly flat ceiling, but also to assemble a real shelf system.
All works are limited only by your imagination.


So, how to make a figured ceiling?

Character traits
Modern designers and people are trying to think uniquely. Everyone wants to create an ideal and non-standard apartment interior. One of the most interesting solutions to the repair issue is multi-level ceilings.

Over time, the technology for creating geometric shapes from drywall has reached unprecedented heights! If earlier the possibilities were limited to boring and angular structures, today you can build absolutely any flight of design fantasy.

Figured ceilings are attached to suspended systems. The main characteristic feature is the design of original forms based on several levels of the product. A multi-level system is created on the frame of the required figure using drywall.

The uniqueness of such a ceiling is the most important advantage. In addition to the visual component, there are other advantages.

Advantages
The building material is simple enough to work with and relatively inexpensive. In addition, drywall is a very practical material, especially for the ceiling.

Photo design curly ceilings in the interior


