Homemade tool for aerated concrete. Making trowels for laying aerated concrete blocks
Construction work with aerated concrete requires individual skills and specialized tools, and there are reasons for this: in addition to sand and cement, aerated concrete contains lime and powdered aluminum. These components make the blocks porous and light, which means that the load under the own weight of the porous product will not be sufficient to firmly adhere the blocks to each other. Therefore, to fasten the blocks together, a special construction glue is used, which is distributed over the bed using a trowel for aerated concrete.
Since lately these building blocks used in individual construction often heavy solid materials, it makes sense to consider their advantages, methods of work and tools for laying aerated concrete.
Tool for laying gas blocks
Aerated concrete requires the use of a special solution with adhesive additives, and during the laying process the blocks often have to be cut or drilled. Mechanical processing of aerated blocks is very easy; for this you can use traditional instruments(cutting with a hand hacksaw, planing, stabbing, drilling), but to facilitate and speed up processing and installation, there are also special tools:
- planer for planing aerated concrete;
- trowel for masonry;
- ladle;
- carriage for aerated concrete;
- and other devices that you can buy or make yourself.
Bricklaying tools, such as a trowel or trowel, are not suitable for laying aerated concrete. Therefore, you need a special tool, but, for example, the same trowel cannot always be purchased in a store - you will have to make it yourself. Moreover, it is not so difficult.
A uniform adhesive seam is the key to a smooth and strong wall, but to evenly distribute the adhesive composition over the bed, you need a trowel or a ladle for aerated concrete. This device has the shape of a deep container with a handle, and the teeth on the edge of the bucket help distribute the solution evenly and with the same thickness (3-5 mm) over the bed. Industrial models of buckets have different sizes of all elements, components, and different geometric shapes.
When cutting gas blocks with a regular hand hacksaw, its teeth quickly become dull and they have to be sharpened frequently. Another method is cutting with a grinder diamond blade. This method is very dusty, and the grinder must be designed to work with 180–230 mm discs.
A special hacksaw for cutting gas and foam concrete has pobedite soldered teeth. Mass-produced cutting tool without changing the chain it can cut ≈ 25 m³ of blocks. Before cutting, the product is marked using a metal square or tulle.
When cutting a block, it is important to ensure the evenness of the seam - differences in height make it impossible to apply a thin and even layer of glue. A grater or plane is used to level out differences and thresholds. Externally, the plane resembles a trowel for plastering, but in its lower part there are cutting elements.
For laying engineering communications In walls made of aerated concrete (electrical cable, Internet, telephone) and laying reinforcing bars, grooves need to be cut to strengthen the masonry, and a wall chaser is used for this purpose. This is a special cutting tool that allows you to make long recesses different sizes width and depth using a diamond disc. On a large construction site (low-rise building or private enterprise, industrial facilities), you need to do a lot of gating, so it is recommended to make communication wiring drawings, according to which the work will be carried out.
To distribute a lot of glue over a long and wide bed at once, use a do-it-yourself aerated concrete carriage or an industrial device, which is an improved model of a trowel. This professional tool narrow specialization, which is useful only in large-scale construction.
In addition to the tools and devices listed above, for laying walls with aerated concrete blocks you need a rubber or wooden mallet, which is used to knock down the blocks, aligning them in a row and pressing them more tightly to the adhesive seam.
How to apply construction adhesive
- Using a carriage, applying glue to the surface of a number of blocks is more convenient and economical, since the thickness of the solution will not exceed 3 mm. An adhesive is applied to the carriage reservoir, which comes out from below through a toothed slot. The carriage has a big drawback - it cannot be used to apply glue to vertical wall. In individual construction, a trowel or an ordinary notched trowel is most often used, since the work is usually carried out once, and the carriage is expensive, and there is no point in buying it due to its one-time use;
- A trowel and a notched trowel are often used in pairs; the operation scheme is simple - with a trowel, glue is applied to the bed, with a spatula, it is leveled and distributed more evenly, while the grooves formed help save expensive adhesive solution. This set can be used on any surface - both vertical and horizontal;
- The glue application bucket on its lower edge is equipped with teeth, like on a spatula, for uniform and economical distribution of the composition. A ladle is much cheaper than a carriage, but more expensive than a pair of trowel-spatula;
- Use a construction plane to level the top open row or surface of one gas block.
It is not difficult to make a homemade trowel - a drawing of the tool is made in expanded form, a template is made from paper, the geometry of the tool is checked in volume, and the shape of the workpiece is transferred to a sheet of metal 1–1.5 mm thick.
Using a wooden or rubber mallet, the shape is bent into in the right places on an anvil, and the ends of the contacting surfaces are welded using electric or gas welding. The teeth on the working end of the lower edge are cut out manually with a hacksaw, cut with metal scissors or a grinder with a grinding disc.
To secure firmly wooden handle on the body of the trowel, the handle must be drilled through, and a steel rod must be inserted into this hole, the end of which is riveted. WITH reverse side Using a trowel, drill a hole for the handle along the diameter of the rod. The cap at the outer end of the rod should completely cover the hole. The end of the rod that is inserted into steel sheet trowels must have a thread so that the handle can be secured with a nut and washer.
How to make a plane for aerated concrete with your own hands? Wide use Aerated concrete blocks are found in construction. The construction of walls from such material is quick and high quality. When using blocks, there is often a need to level their surface, for which a special plane is used.
Aerated concrete blocks are of high quality and even in shape, but surface correction may be necessary.
The building blocks have a fairly good geometry, but for all their high quality You can’t do without surface correction. The plane for these purposes has a very simple design. You can make a plane for aerated concrete without any problems.
Features of using planes for aerated concrete
An important advantage of laying aerated concrete with your own hands is the use of adhesive compositions that ensure a small thickness of the seam. If, with large layers of mortar, it is possible to level the plane of the row due to different indentations individual elements masonry, then when using adhesive compositions there is no such possibility and all errors in block dimensions accumulate when laying the row. This property aerated concrete masonry necessitates alignment of the blocks themselves.

Aerated concrete is held together thin layer adhesive composition and this does not allow leveling the plane with the depth of indentation of the blocks.
In general, a plane is a tool for leveling a surface using the planing method. When processing wood, planing is carried out by cutting off a thin surface layer of the material. This method does not work for aerated concrete. It has a porous, inhomogeneous structure, so cutting off a thin layer will lead to tearing out inhomogeneities and significant surface unevenness. Sometimes it is possible to use a regular plane to level aerated concrete with minimal overhang of the cutting edge, but it quickly wears out and becomes unusable.
For high-quality surface treatment of aerated concrete blocks, it is necessary to combine the functions of scraper and grinding. This principle should be incorporated into a self-made aerated concrete plane.
Return to contents
How does leveling occur: features of aerated concrete
In order to design a device for processing aerated concrete, you need to understand the basic parameters of the material. Aerated concrete blocks are made on a cement-sand base with the addition of gypsum, lime and slag, into which a gas-forming composition (aluminum paste) is introduced to create gas pores. After hardening under special conditions, the material acquires a solid structure in which pores up to 3 mm in size are evenly distributed. One of the varieties of porous aerated concrete is gas silicate concrete based on lime and quartz sand with a small cement content.

Aerated concrete is cut into standard blocks of fairly stable dimensions. Blocks are mainly sold in sizes 250x625 mm and thickness from 50 to 500 mm. Particularly stable block geometry is observed in gas silicate concrete. When laying walls, the following block thicknesses are standardized: for load-bearing masonry– 38-40 cm; For interior walls– 25 cm; for facing work – 10 cm.
When processing the surface, special consideration should be given to the strength and hardness of the material. The cement-sand base leads to fairly high abrasive wear of the tool. The strength of the blocks depends on their density, which, depending on the porosity, varies widely (from 300 to 900 kg/cub.m.). The strength varies from 10 to 50 kg/sq.cm.
Structural blocks with a density of over 700 kg/cubic meter have the greatest strength. Such blocks are used for laying load-bearing walls of large buildings and tall structures. Blocks with higher thermal insulation properties, having a density of about 500 kg/cub.m., are more often used. Aerated concrete with a density of 400 kg/cubic meter has significantly lower strength and hardness, but it must be processed with caution due to its high pore content.
Return to contents
Planer design

Branded planes can be made from wood and plastic, or entirely from metal.
An aerated concrete planer is needed to level a number of blocks when laying walls from them. Their task is exactly as much material as is required to ensure the horizontal surface of the row. If too large a layer is removed, then such a block will have to be thrown away, since it will be very difficult to correct the situation. In this regard, the main requirement is put forward to the cutting elements of the plane. The height of these elements is set based on work practice, so consultation with a specialist is recommended.
If you look at any branded plane, you will notice that it represents appearance a combination of a construction grater (semi-grater) with a kitchen shredder. In other words, it is a platform (body) with a handle, at the bottom of which sharp blades are fixed in rows, and the rows are located in two different directions. On one side there are 5-6 rows of parallel knives directed at an angle to the edge of the body, and on the other side there are the same rows, but directed in opposite directions. The blades themselves are fixed vertically in the body.
This design of the device allows you to scrape material from the surface of the block, while grinding it. The body material in branded planes is usually durable plastic. Tools are more simply made of wood. As practice shows, the material of the case does not matter if it is strong enough. The design of the handle matters only for ease of use, i.e. it should be well grasped by the human hand.
Return to contents
Homemade design

To make a plane, it is necessary to include in the design as much as possible available materials. The easiest way is to make the body wooden. For these purposes, a board 40-50 mm thick and 10-12 cm wide is suitable. You can attach any handle that is available. If it has to be made, it is better to make it from wooden board or a block.
As the cutting elements of a plane for aerated concrete, you should use saws made of hard alloys. Wood saws can be used if foam concrete or aerated concrete with a density of no more than 500 kg/cubic meter will be processed.
To make a plane for gas blocks, you need to glue wood and metal together, as well as wood to wood (if necessary). Typically, Moment glue is recommended for such a connection. At the same time, any adhesive composition that can reliably glue metal will do.
Return to contents
Making a plane

A wooden base for a homemade plane, due to its lightness and availability of material, will be the most successful option.
A do-it-yourself planer for leveling aerated concrete is made in the following order. A board 30-40 cm long is cut. The cut board is processed with a plane. All edges and corners are rounded or simply cut off. The location of the cutting elements is marked. The marking is done as follows. On one side of the board (about 40% of the area) total area boards) draw 5 parallel lines at equal distances from each other. The lines should be located at an angle of approximately 70° to the longitudinal axis of the board (slope to the right of the cross section). The same lines are drawn on the other side of the board, but tilted to the left. The lines in different halves of the board should be directed towards each other.
Using a jigsaw, cuts are made along the marked lines. The width of the slot should be sufficient to accommodate the saw blade. The cuts are made by stepping back from the edge of the board by 2-3 cm on both sides. The board is carefully processed with sandpaper. The saw blade breaks into pieces required length and is inserted vertically into the slot. Before placing the saw in the cut, its blade must be thoroughly coated with glue. The length of the file extending above the surface is about 5 mm, but in each case it is better to consult a specialist. The area where the file is placed at the base is treated with glue. After the glue has dried, it is necessary to check the quality of bonding of each cutting element to the base. All excess glue is cleaned off.
If cutting edge If the file is not sharp enough, it should be sharpened with a file.
The planer for aerated concrete will be ready after attaching the handle to the top side of the base.
It is well known that masonry made from aerated concrete blocks is less labor-intensive than traditional brickwork. But despite this, builders are trying to simplify the process of laying aerated concrete blocks and make it even less labor-intensive. Often for this, builders use inexpensive and accessible homemade devices.
How to simplify the laying of aerated concrete blocks?
Let's consider the use of homemade devices for quickly laying aerated concrete blocks. With the help of these devices, masonry is erected at a rapid pace with the efforts of one or two people.
Traditionally, a solution of the required consistency (“thick sour cream”) is obtained from a special dry mixture for laying aerated concrete blocks using a drill and a mixing attachment.


You will also need a simple tool:


And two homemade devices:
- block feed holder on high areas of masonry;
- And tray for distributing adhesive solution.
The tray is made of galvanized steel with a thickness of 0.8-1 mm and a notched trowel-comb with a tooth height of 5...6 mm.


The homemade tray is installed in its original position and, using a used scoop, the adhesive solution is poured onto the horizontal surface.


The tray is installed at an angle in the following starting position for applying glue to vertical surface previous stone.

Pour into tray required amount solution and apply it to a vertical surface.


Now you can supply the aerated concrete block for laying it in the wall.

When laying blocks on low areas (below the level of the mason’s chest), you can feed a gas block weighing about 15 kg by hand. But when laying on higher areas, it is convenient to use a homemade holder, which is made of steel strip and reinforcing steel. The holder is attached to the block using 2 screws; they can be easily screwed into and out of aerated concrete using a conventional screwdriver.

The block is simply fed and placed using a homemade holder.


The block is then aligned with the mooring cord.

Using a spatula without teeth, remove excess glue from the front surface of the masonry.

The screws are unscrewed, the holder is removed and the tray is set in its original position for laying the next stone.


On average, two workers need one and a half minutes for laying one aerated concrete block into the wall. One cube of aerated concrete is laid in about 40-50 minutes. That is, the productivity of one person per shift can be about 4-5 cubic meters of aerated concrete masonry.
You can watch a video of this process
We also recommend subscribing to our YouTube channel VideoGuide, where soon there will be many useful information both for the developer and for the designers.
Good luck with your construction!
Do you have your own ideas or homemade devices? If yes, then write your thoughts on this in the comments below.
Recently, aerated concrete has become very popular. Thanks to excellent thermal insulation properties of this material, its lightness and speed of installation, gas blocks are increasingly used for the construction of individual residential buildings. Since construction in most cases is carried out on our own, there were many people's councils for working with this material.
Today, aerated concrete is one of the most popular materials for building a house.

Aerated concrete is easier to install using homemade scaffolding
- It is better to lay aerated concrete blocks with glue. For these purposes, it is worth using a branded trowel, which will provide you with a seam between the blocks of 1.5-2 mm. We select the trowel depending on the block used (375 or 365 mm wide). When using a wide notched trowel, glue consumption increases, a thicker seam is obtained, and the laying process is greatly delayed.

The thickness of the mortar joint is too thick when using a notched trowel
- To cut grooves in aerated concrete, it is advisable to use a grinder with a diamond blade for dry cutting. Then the grooves are quickly and easily removed with a wall chaser.


It is better to cut aerated concrete using a “multimaterial” disc
- To speed up the process of building a house as lintels over door and window openings, and also easier to use for constructing an armored belt ready-made U-blocks. But if you want to save money, then such an element can be made yourself from a whole block.

- The speed of building a house directly depends on the quality of the masonry of the first row of aerated concrete. If it is laid perfectly level, then the laying of subsequent rows is faster and easier.

To fit the first row you can use grinder
- You should not lay the row from two corners towards each other. This will make it difficult to bandage the rows and adjust the last element to size.
- To lay the last block in a row, you need to lay the last two gas blocks without glue, cut last element taking into account the thickness of the seams. Then we place the cut gas block first on the glue, and then the whole element.
- We bandage blocks in rows like this. First, we place the last gas block perpendicular to the row on the other wall. Thus, he becomes the first in the next row. Then we measure the distance and saw off the element to the required size. Then we carry out the laying using glue.


You will need some advice craftsmen by choosing one or another tool:
- It is better not to use it for cutting aerated concrete. hand saw. For these purposes, an alligator saw with a pobedit-tipped blade is more suitable. This way you will save energy and time.

- Some people believe that a reciprocating saw makes cutting blocks much easier.
- You can use a sander to level the blocks in a row. However, it is worth providing protection from dust.
- For even and quick application of glue, you can make such a device (see photo below). It is also suitable for vertical seams.

- It is more convenient to lift gas blocks using homemade instrument– diamond grip (pictured below).

To carry aerated concrete blocks, you can make such a handy device (see photo below).


- It is better to use for sawing gas blocks band saw, which you can also make yourself

- To determine the longitudinal position of the block, it is worth using a level about 2 meters long, and for transverse alignment, you can take a shorter tool.
- To seat the gas block onto the solution, use a rubber mallet.
Based on the experience of folk craftsmen, one can draw conclusions about the need and feasibility of a particular tool. Therefore, we decided to take stock and compile a list of tools that will greatly facilitate working with aerated concrete and speed up the process of constructing a building:
- Hacksaw (preferably with pobedite tips).
- Building level 60 cm long and 2 m.
- Trowel (it is better to use a special one for gas blocks).
- Water level or level.
- Grinding machine or hand-held device (25-50 cm wide and 0.8-1 m long).
- Plane.
- Concrete mixer or low speed drill with mixing attachment.
- Plumb.
- Rubber mallet (weight depends on the weight of the block, minimum 300-400 g).
- Cord or fishing line.
- Wall chaser.
- Circular hand saw for wood (disc with pobedit tips).
- Extension cable for 2-2.5 m and 10 m.
- Wall platforms or scaffolding for laying the top rows.
- Containers for mixing glue.

Aerated concrete is ideal for the construction of low-rise private houses

- In aerated concrete, we make a longitudinal cut with a circular saw at 7 cm in two places. Then we cut out the central part with a saw.


- The technology for making U-blocks using an alligator saw is visible in the photo below.


Aerated concrete is often used in construction. It gained popularity due to its unique properties:
- low cost;
- light weight;
- low level of thermal conductivity.
Based on these qualities, the construction process using aerated concrete is many times faster, with less effort. To simplify the work process and achieve better results, specialists use special tools.
Many people work with improvised means, which completely replace professional tools, although they do not give the same good effect.
Kinds
The entire range of tools is conditionally divided into two groups: the main ones, without which it is difficult to carry out renovation work; auxiliary, the use of which is not necessary, but greatly simplifies the construction process.
Basic
Are you planning to do work related to aerated concrete yourself? Knowledge of basic tools is required. There are not many special tools, they are quite simple.
 The main purpose of a trowel for aerated concrete is to apply the adhesive solution and distribute it evenly on the surface. This is an indispensable tool for laying aerated concrete with your own hands. The edge of the trowel ends with a row of teeth. Regardless of whether the work is carried out horizontally or vertically, the trowel bucket significantly speeds up the laying.
Its other name is a carriage for aerated concrete. The material from which the equipment is made is polished galvanized rough metal sheet capable of withstanding heavy solutions which are used in construction. Trowel for aerated concrete can be different shapes, width - depending on the type of work.
Among its advantages are the following:
- suitable for thin joint masonry - up to 3 mm;
- allows you to uniformly cover the surface with the adhesive mixture;
- the solution does not spread over the surface.
Flaws:
- the handle is attached to the canvas using the spot welding– not very reliable fastening;
- operational period is about a year.
Wall chaser
During construction, it became necessary to make grooves in the surface of the wall for wiring, laying fittings, pipes - the work will be made easier by a wall chaser for aerated concrete. Tools for aerated concrete can be manual or powered by an electrical source. Manual is more convenient, lighter, creates little noise and dust, but it can only be used when working with lightweight materials, for example, if there are cells in aerated concrete.
An electric wall chaser can handle more than hard surfaces: concrete, reinforced concrete, brickwork. Externally, an electric wall chaser looks like a sander; the grooves are cut using special discs. When working with the device, you need to wear protective equipment - goggles, headphones, a respirator or mask - while creating the grooves, a lot of dust is generated, the device itself is quite noisy.
 The laying of each layer of blocks is preceded by the leveling of the previous row - it is for these purposes that the plane is intended. In addition to leveling, such a tool for working with aerated concrete cuts off protruding areas.
It looks like a construction trowel - a wooden base with two inserted fine-tooth saw blades, a comfortable handle for a secure grip on the tool. This arrangement allows you to carefully cut and level uneven areas.
During construction, some craftsmen replace a special plane with a carpenter's plane or semi-joint. This will extend the work time - you will have to spend additional time constantly sharpening the teeth of the tool, the leveling process will require more force.
Kiyanka
It is a rubber hammer whose main purpose is to level surfaces during the laying process. Aerated concrete blocks are fragile; using a conventional metal or wooden hammer will lead to destruction of the material. Rubber will gently eliminate unevenness without harming the surface structure.
 Often when laying walls, to complete a row you need not a whole block, but a fragment of it. In such cases, it is sawed using a special hacksaw. Squares are included with the cutting tool to obtain geometrically correct shapes with smooth edges. If you need to cut it yourself a large number of blocks, it is advisable to use an electric band saw. Externally, a hacksaw for cutting aerated concrete is no different from a regular one hand saw, but it is made of stronger materials - this does not allow the plate to deform during cutting.
Grater
Looks like a smooth small board with an attached handle for a firm grip. This tool is used to eliminate relatively small irregularities and grind the surface before plastering or putty. In addition, before laying each new row, each previous row is leveled and sanded using a grater.
Auxiliary
In addition to the list of required tools, without which construction works will take longer, and the result will leave much to be desired; there are tools for aerated concrete, the use of which is not necessary. To carry materials, each block has grooves for easy grip. But if they are not there, you need to use a special tool - a gripper, which looks like two crossed levers.
We also recommend
 Metal products - we decorate the house and yard with our own hands
 A tool bag is an indispensable thing for builders Patterns for belt bags for metalwork construction
 DIY oyster mushroom mycelium
 Airbrush for beginners: instructions from the master!
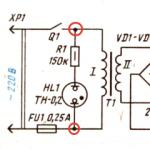 Designation of radioelements on diagrams
 Wood gasification Biomass resources for gasification