Auto airbrush airbrush for beginners. Airbrush for beginners: instructions from the master! Airbrush practice for beginners
People always strive to make the surrounding space beautiful and individual, so they paint facades and fences with drawings, and paint decorative items in unusual colors. To paint small areas, you can take a paint can or brush, but painting large surfaces with such methods will take too long. When decorating facades or fences, it is convenient to paint with an airbrush, which allows you to quickly create real masterpieces on the walls.
What is this device
Many, upon hearing an unfamiliar name, will be interested: “What kind of device is this? What is it for? How is it different from other tools used for drawing or painting?”

This device is similar to a spray gun, but has a different operating principle: a jet of dye released under high pressure makes it possible to accurately paint over large areas.
Working with an airbrush allows you to paint walls in the interior of premises, decorate facades, fences, and decorate a car body. With its help, you can paint over large surfaces, draw thin, precise lines, creating amazing works.
Selecting an airbrush
Depending on what kind of artistic work is planned, an airbrush model is selected. Most often, inexpensive dyeing devices with a thin nozzle and needle are used. Such units are quite suitable for beginners. But those who plan to engage in airbrushing seriously should pay attention to the following when purchasing a device:
- The volume of the removable tank (the optimal capacity is 2 liters or a little more).
- Seal the needle and nozzle (Teflon seals are the best option).
- Nozzle diameter (it should not be less than 2 mm).
- Easily replaceable main parts (tank, trigger, air and material nozzles).
- Resistance of seals to the action of the reagents used.
- Availability of control over pressure and dye supply.
 Airbrush device
 Purchasing a tool taking into account all the characteristics will allow you to economically and efficiently paint on various surfaces.
When choosing, you should also pay attention to the method of supplying the dye and purchase the desired option depending on the object to be painted:
- Single acting with pressure control function. The model is easy to use, does not require special skills, and is suitable for beginners. It is not difficult to use: when you press the trigger, the coloring substance is sprayed in an even layer, and the supply pressure is regulated using a trigger (special valve). As a rule, these models are purchased for. The disadvantage of this device is the inability to draw thin lines and small elements.
- Single action with dye supply control. This airbrush differs from the first option only in the ability to change the density of the applied layer of paint or spray it onto the surface using an aerosol. Using various techniques, you can draw quite complex elements with this unit. Most often, this particular model is purchased for decorating interiors, painting facades or fences with simple designs, and painting small decorative items.
- Double action with or without needle. This is an expensive professional option with a lot of features for those who plan to paint serious pictures on walls or cars. This model allows the artist to easily control the supply of dye and the power of the air jet during work using a trigger, and the position of the needle regulates the supply of the composition. The same device without a needle can quickly and evenly paint a large area. As a rule, professionals opt for the option with a needle; all designer paintings are carried out using such units.
Choosing the right tool will make the work easier, save paint, and allow you to get an excellent result.
Paint selection
To decorate walls, you need to take paints intended for airbrushing, taking into account the type of base on which the design will be applied. The most common are the following compositions:
- Water-based polyurethane. Durable, quick-drying, able to withstand temperature changes. The compositions are hypoallergenic; when using them, you do not need to use protective equipment. Suitable for exterior or interior use.
- Acrylic water-soluble (sometimes white spirit or alcohol can be used as a solvent), suitable for any base. They can be used for decorating interior walls, painting facades, or applying designs to car bodies. These paints are easy to use, they apply evenly to the surface, dry quickly, are non-toxic, and do not require the use of a protective suit or respirator.
- Acrylic solvent. They are diluted before use with a special solvent; as a rule, it is sold complete with a concentrate. They are toxic - when working with them, you must use protective equipment. They are rarely used, as a rule, in private car repair shops.

Features of airbrush application
Conventionally, the process of creating airbrush painting can be divided into stages:
- Select a sketch. The drawing and its color design are thought out, and a sketch is created on paper.
- The area for work is being prepared.
- The paint with which the paint can is filled is selected.
- The selected surface is painted.
- Drying and fixing with varnish are carried out (not always done).
The surface is prepared for drawing on it, in the same way as for painting:
- polished;
- washes;
- dried;
- degreased with white spirit (you can use other alcohol-containing compounds, but this one is the most affordable).

After this preparation, you can start drawing.
Painting with an airbrush is not difficult, although for beginners it will take some time to acquire a certain skill. To get a high-quality result, you must follow three rules:
- Start spraying the coloring composition over a piece of cardboard or other unnecessary material. It happens that a newly refilled unit “spits”, spraying out clumps of paint, and this can ruin the whole job. It is enough to release a small stream on the unnecessary material, and then start painting.
- The jet of paint should be applied with smooth, measured movements - this will help to avoid drips and unevenness when painting, especially when decorating walls or other vertical objects.
- You should not hold the painting device close to the surface - the paint layer will lie unevenly and drips will occur.
Having finished painting, you must immediately rinse the airbrush with solvent to remove any remaining paint, clean the needle and nozzle. The solution is selected depending on the composition of the dye.
For example, after using water-soluble products, you can simply rinse the instrument with water.
Little tricks when working
Once you figure out how to paint with an airbrush, you can create a picture on the wall or beautifully paint a fence. A few tips from the experts will help speed up the process and make it more convenient. These recommendations are suitable for both beginners and those who are not drawing on walls for the first time:
- When operating the painting device, it is advisable to hold it perpendicular to the surface. When applying a design to a horizontal plane, the paint spray angle should be greater than 45ᵒ. This technique will allow the dye to be evenly distributed.
- The intensity of coloring, thickness of lines, and quality depend on the distance between the device and the object of decoration. If you need to change this distance, then this should be done smoothly, without jerking.
- If leaks occur, do not eliminate them immediately. You need to wait until it dries, then carefully remove the excess paint with fine sandpaper, and then correct the drawing.
- To make the creative process faster, it is advisable to have several containers for different colors - this will speed up the process of changing colors. You no longer need to clean the tank additionally; just rinse the device and attach a container with a different shade of paint to it.

Using an airbrush, you can paint a large area in a short time, while the dye will be used sparingly, it will lie evenly on the base, and the design will turn out beautiful. By changing the supply of the mixture, using this device it is easy to create realistic, durable paintings on the walls.
Studying airbrushing
Airbrush art is a type of painting in which images are applied with liquid or powdered dyes by spraying. Instead of a canvas, any surface is used (in particular, a car body), and instead of a brush, an airbrush is used. But airbrushing for beginners is far from being like painting lessons at an art school. Although there are many similarities in creating drawings, there is a huge difference between an airbrush and a pencil or brush.
For beginners who have decided to learn airbrushing, this science should be divided into three main components:
- car painting technology (paints, solvents, preparation of tools, surfaces, etc.);
- specifics of using an airbrush (the ability to create a composition, quickly and accurately apply it to the surface);
- artistic component (independent creation of an image on paper and its modification in practice).
The main mistake of many beginners is mixing all these directions together. Airbrushing is used for local or complete painting of a car, so you must strictly follow the general requirements for painting. It is necessary to know the technology well and apply it correctly in practice. You can do without the artistic component, but if you want to fully understand the airbrush craft, then you should look for lessons on the pages of books or videos on the Internet.
When applying their first drawings, beginners are recommended to use stencils, and then gradually move on to applying images without improvised means. You can get faster results if you study the master’s movements from a video and try to repeat them exactly.
If you don’t want or have the opportunity to take airbrush lessons, you can simply take an airbrush and consistently perform the appropriate movements so that they become familiar to the point of automaticity. You will need an accessible surface and well-diluted paint. An expensive tool will not be appropriate for beginners; it is better to purchase a mid-range airbrush.
Also, it is not necessary to take special paints; any, but diluted to the desired state, will do. It is usually recommended to dilute the paint with a suitable solvent (selecting it according to the instructions for the paint) in a ratio of 3:1. The required thickness should be selected depending on the result obtained: the paint should not block the nozzle or drain from the painted surface.
Before you start lessons or training, it will be useful to watch a video about how the airbrush works. It is also advisable to follow the following recommendations:
- before starting painting, you should use an airbrush without spraying paint to rehearse the movement;
- the airbrush must be held strictly perpendicular to the surface;
- defects and smudges can be corrected only after the paint has dried;
- the path and spray of the airbrush should not intersect, so that two layers are not sprayed onto one place in one pass;
- Cleaning the airbrush with a solvent (running the product without disassembling the tool) must be done twice - before and after work.
Today, very often airbrushing for beginners is studied with the help of special videos. However, it should be borne in mind that such sources will only help to perfect the technique, since even among professional airbrush artists there are very few good artists. Therefore, to understand the basics of drawing (space, composition, light), it is necessary to either take lessons or study the topic using the appropriate manuals.
You can choose a different path and engage only in craft. For beginners, it is enough to learn how to use an airbrush. Then, even if you have no artistic skills, you can practice airbrushing professionally, creating images using special editing programs.
Airbrush Basics
 The quality of a drawing is determined by three components:
- direction of the paint jet;
- the distance between the nozzle and the working surface;
- time of spraying paint over one area.
It should be remembered that the air precedes the paint supply. The jet must be directed strictly perpendicular to the surface. The area of paint coverage depends on the distance: the closer the airbrush is, the thinner the line. To create a halftone, the paint should be sprayed 30-50 cm for a very short time. To get a bright area, you need to increase the spray duration and decrease the distance. A good knowledge base on this topic is provided by a video about methods and techniques in airbrushing, since it is much easier to learn from a visual example.
Additionally, it is very important for beginning airbrush artists to gain experience by creating lines and simple contours. You need to spend a lot of time with the airbrush, using sheets of paper or any suitable surface for practice. The first lessons should consist of drawing clear vertical and horizontal lines of different thicknesses and in different directions.
Any art, including airbrushing, requires constant practice. Only long-term training will allow you to gain experience and achieve memory of movements at the reflex level. Before painting a car, you need to learn how to perform high-quality airbrushing on paper and constantly whet your interest in the matter by studying your own mistakes and the good work of other artists.
As the leading specialized aerography school in Russia, we have developed our own training system for beginners so that anyone can sign up with us without any problems and be sure that the necessary skills will be developed. In particular, trainers conduct airbrush lessons for beginners.
The course provides an introduction to art, teaching the basics, techniques, key principles, etc. The program is structured in such a way that each student receives the maximum amount of theoretical information and practical skills, which will become the right basis for further work.
How does airbrush training work?
The unique program of the Diffusionart school is the foundation that will be laid in every student who wants to continue to develop and improve further. The main course of Diffusionart airbrush lessons is designed for three weeks. Classes are held in groups of 10-12 people.
We will tell you the basics of airbrushing, preparation, chemistry of paints and materials that will be useful to you in your future work. The design of airbrushes and other devices and equipment that are used in the process of airbrushing, in addition, we will touch on the painting business, so that when leaving our school, you can control the actions of the painter, the preparer, and a number of specialists who may be involved in working on the car, or other detail for painting.
Airbrush course lesson program for beginners
The course program is divided into two parts: theoretical and practical
Theoretical part
The theoretical part consists of seven topics that cover the entire process of applying an airbrush design in as much detail as possible. The theory is read in groups, usually in the morning from 10:00 o'clock or is discussed additionally. Then we move on to the practical part.
- Introductory, structure and principle of operation of an airbrush, types of airbrushes, quick connectors, connection, types of compressors.
- Preparing the surface, processing it during the drawing process (degreasing, removing dust) An excursion into materials.
- Types of paints, rules for working with them, mixing proportions, required consistency, combination.
- Basic principles and techniques for working with an airbrush. Air brush painting techniques.
- Creating textures. Making and using various masks. Liquid, solid, thick, disposable, reusable.
- Working with stencils. Creation, cutting, sampling, preparation, installation, filling, dismantling of the stencil.
- Possible errors and ways to eliminate them
Airbrush practice for beginners
The practice takes place directly in our studio. The workplaces are designed in such a way that they completely imitate real work on cars. Each workplace is designed for one person, equipped with everything necessary, and consists of: a tablet mounted on a flat surface, at the level of the side of the car, which makes it possible to understand already in the first days of training what it is like to work with a real car. We reproduced the fit, biomechanics, and other details with maximum precision.
Practical lessons are also divided into short parts - lesson/practice. As a rule, a certain time is allotted for the development and further consolidation of each of them, during which you can arrive at any time convenient for you. Receive instructions from the instructor, and then determine how much time you need to consolidate this material, and distribute it at your discretion.
The practical part includes:
- Getting to know the tool. Practical lesson aimed at mastering mastery techniques
- Working on creating textures. Mastering the proposed techniques, creating your own texture
- An exercise to practice fine lines using the example of creating a drawing of a furry animal or fur.
- Working with stencils. Geometric pattern using multilayer stencil technology. Working with vector images
- Performing final complex complex work with developing your own sketch and applying the acquired knowledge. Free theme, own sketch. Starting from September 2014 (optional), the final work includes the possibility of using EXCLUSIVE SUPER PAINTS. Such as: fluorescent and light-accumulating paints, invisible paints (special workplace conditions are created), mother-of-pearl, candy concentrates, metallics, xeralics. You will be able to discover additional surreal possibilities in creativity, learn to work with the latest materials from the world's leading manufacturers, and enormously expand the range of your skills! The program was created with the support of one of the most complete and advanced lines of airbrush paints at the moment - "Air-master".
Equipment for practical airbrush lessons
We provide everything necessary for work– airbrushes, paints, all related materials and washing liquids.


In addition, each student is individually supplied, if desired: with a respirator, plastic goggles to prevent possible chemical eye injuries in the early stages of training, until washing the airbrush and working with pressure becomes a habit, an individual cabinet-cabinet for storing personal belongings (to avoid the need to periodically carry work clothes with you) vinyl gloves, stands, washing devices, and many other things that are necessary for creativity.


Works of our students
If you wish, after completing the program, you can do work for yourself in our airbrush studio by painting your own helmet, laptop or snowboard. Which will be varnished by our specialists and will serve for a long time.


Gift for all students - discount on all products
We give each of our students an exclusive card giving a lifetime 10% DISCOUNT on all AIR MASTER products

Learning outcome
The main goal of the DIFFUSIONART school is to prepare a complete, complete specialist from a beginner, ready to face work of any complexity. A specialist capable of improving and developing further, an artist who will not be stumped by any problem, while the knowledge acquired at our school is not postulates. You will look for solutions on your own, possessing fundamental knowledge and experience.
At the end of the practical training, a course certificate is issued from the company “DIFFUSIONART”. The most successful students may be offered commercial projects in the future. We sincerely hope that one day students will surpass their teachers, and you will reach the heights of excellence and appreciation, as it should be with real talents, backed by experience and knowledge!
Successful airbrushing on cars with your own hands is a source of special pride. The technique is in demand wherever you need to evenly apply color in thin layers to a surface. The paint is pressurized from a spray nozzle, which is why the method itself is called “air brush painting.”
Non-absorbent surfaces are sprayed with appropriate paint; sometimes the surfaces themselves must be prepared for finishing with a special primer.
This primarily includes airbrushing on cars, motor vehicles, water transport and other metal and composite objects.
Types of airbrushing

Idea! If you don’t have enough experience to fully implement the idea - enhance the contrasts, work out the nuances... You can complete the work to an affordable extent, then invite a professional to finalize it.
Tools needed for airbrushing
The most convenient gravity feed sprayer. The paint reservoir in such a device is located on top. You need to choose a spray gun with a double setting, which allows you to control the air supply and paint flow, that is, with pressure adjustment on the pneumatic device itself.
Airbrush
Sold in departments with goods for creativity, nozzle thickness 0.3 mm, intended for drawing strokes and lines.

Mini spray gun
Sold in departments with goods for cars, nozzle thickness 0.8 mm, for creating backgrounds and gradients that do not require detailed drawing.
Compressor
Sources of compressed air are a compressor for an airbrush and a hose with corresponding connectors at the ends:
- spraying is most often carried out at a pressure of 2–2.5 atm, which means that the compressor must provide this mode;
- The hose for the compressor is included in the kit, but if you need a longer one, you can always buy it separately.
Acceptable phase - the workshop capabilities must match the compressor settings; three-phase equipment will not operate from a two-phase current source.
Important! Oil and moisture eliminators will come in handy for the job.

Protection
You will need: painting glasses, a mask with carbon filters, a cap or bandana to cover your hair, and gloves.
Place
The worktop is equipped with a hinged protective box in which the hood is mounted. If there is no such device, then you will have to work in a cloud of paint. Additionally, an external air supply system is connected to the room.
For one-time work, you can consider the option of renting. A suitable object would be furniture production, carpentry ( where frames are made and painted) or an art workshop.

Basic paints
There are car enamels on sale on different bases. Recently, a large assortment of acrylics has appeared. But it will be easier for a beginner to get his first experience with alkyds. They are more docile due to their plasticity and high covering ability.
Good choices would be the brands MOBIHEL and COLOMIX.
Colors and toners
There are three ways to get an assortment of paint:
- The most reliable. Buy a set of airbrush paints or buy cans of colors that you need a lot of. Then go to a store where car paints are tinted and purchase the necessary ready-made colors, 50–100 ml each. Their basics must be the same.
- Not for beginners. Buy basic colors - white, yellow, red, black and blue. Then mix as needed. Ready-made mixtures can be stored in plastic bottles for some time.
- The most difficult. Add universal colors to the primary colors. Such compositions must be carefully filtered.

Lucky
Work performed on a car is covered with a two-component auto varnish, which consists of a base and a hardener. These varnishes are sold as a set and are accompanied by instructions with recommended mixing proportions. For mixing accuracy, you can use disposable syringes.
Important! Varnish mixed with hardener cannot be stored. After application, you must immediately disassemble and thoroughly rinse the spray gun with solvent, then keep it in acetone for some time.
Solvents
There are special solvents for car enamels, they are sold in the same tins as the paints themselves.
Universal solvents for alkyd enamels are No. 645 and 650; they are also used to wash the spray bottle when changing color. Solvent No. 646 also does the job, but it is still intended for nitro enamels. Car enamels mixed with No. 646 will fly “drier” and apply “harder”.

Stencils and patterns
You can buy ready-made ones, order plotter or laser cutting, or do it yourself:
- disposable stencils made from thin cardboard, thick paper, thin plastic, unnecessary x-rays. But the best choice would be an adhesive film; it adheres tightly to the surface and prevents paint from getting onto the protected surface;
- reusable stencil can be done by laminating a disposable one.
Airbrushing on cars. Video lesson for beginners:
How to attach the stencil?
- A simple disposable one is attached with masking tape. A strip of masking tape is applied in the middle to the edge of the stencil and the edges of the tape are folded inward. Nevertheless, when painting, such a stencil is pressed with your hand, because the air from the sprayer blows it.
- Disposable adhesive film will ensure high quality. This stencil is indispensable when you need airbrushing on motorcycles, and there is a little trick to position it as accurately as possible. The surface should be sprayed with water from a spray bottle, a stencil should be applied and straightened as required. Then use a napkin to remove the water, smoothing the stencil from the middle to the edges.
Painting stages
Preparation
If necessary, the surface is sanded with a machine or sanded by hand with the addition of polishing pastes, napkins and other auxiliary things, then primed. You can degrease the surface before painting with alcohol or an alkaline solution.

Preparing the Paint
Pigments that provide density and opacity settle to the bottom of the jar. Therefore, any paint must be mixed. It is convenient to do this with a drill at low speeds with a long drill bit or a thick wooden skewer.
Applying paint
If the surface needs to be primed, then this is done from a distance of 25–30 cm, so that the paint is applied perpendicularly. For gradient and artistic works, the angle of paint application changes.
Each master adjusts the pressure differently. Some people can paint evenly with low pressure at close range. Others find it convenient the other way around.

The part to be painted should be positioned horizontally
The basic application of paint is carried out in 1–2 layers, then the surface must dry.
Drying time depends on conditions including the specifications of the paint itself and can take up to 12 hours.
Ideal when the paint does not stick at all. If you continue to work on wet paint, a new layer, especially a different color, will mix with the bottom one. The result will be a pale or muddy color.
Local pattern - here the layers dry quickly, in 10–15 minutes.
Principle
The paint is applied in layers starting from light colors. You can highlight details in the finished drawing. If the work involves a bright white color, then it is better to protect the desired area with a mask made of adhesive film or masking tape.
For example, the sequence of performing work in blue tones is structured like this:
White zones, then light blue or light gray, dark blue, blue, dark blue ( To do this, black is added to blue) and, if necessary, black zones.

How do you get vibrant color?
Multicolor work also done from light to dark, taking into account colors. Task: we need fire. Sequence: white, light yellow, yellow, yellow with a drop of red, orange, red, dark red, brown, black.
Each subsequent layer is applied to a smaller area. The spray angle is varied to achieve different effects, including "transparency".
Attention! To apply an even layer, you need to move your hand smoothly without stopping!
In this case, spraying should begin following the area of the surface to be painted and also finish by moving the airbrush to the side. Otherwise, at the beginning of spraying, the paint will form a spot.
Applying varnish
It is important to dilute the varnish correctly. Since there are no exact recipes, you will have to select the “right” consistency by gradually adjusting the pressure and adding solvent. Be sure to try it on a test surface.
The varnish is applied perpendicularly. If the varnish “floods” the surface, most likely it is too liquid. When it appears in spots, it means it is too thick or there is too much pressure on the feed.
Cleaning when color changes
The procedure is quite simple. You need to wash the tank with a wire brush and solvent and wipe with a rag. Then add solvent and spray until the airbrush is thoroughly cleaned. When using dark and light colors, consider two or more airbrushes to prevent cross-contamination of colors.
Having finished working and washed the airbrush and spray gun, you can pour a little solvent into them and leave it until the next session.
Errors
Usually they relate to the proportions of paint or varnish and thinner:
- An excessively diluted composition will form streaks;
- not enough - a rough surface layer, an effect called “shagreen”.
“Shagreen” tends to form with other errors:
Necessarily! There should be a test surface for test spraying. It can be a sheet of cardboard or even a wall.
Tricks
Airbrushing is characterized by some blurriness. If the drawing requires particularly detailed precision, this is achieved by drawing with oil paint and a thin brush. The disadvantage of oil is long-term drying - up to two weeks or 4–5 days in a drying chamber with a temperature of 60 ° C.
A solvent mixture will help speed up the process ( №646 ) and drops of vegetable oil added to the paint. This technique will ensure quick drying within a day or two.
Important! When painting with oil, you should avoid using whitewash; it takes longer to dry than all other colors. Black dries the fastest.

Painting your car with auto enamel from a can is a bad idea. If only because the pressure can be anything, including very low. Considering that it is not adjustable, the result will be wasted money or large drops of paint on the element.
Airbrush for beginners is about the same as painting lessons at an art school. There are many, many similarities in creating a drawing and a huge gap for those who want to master an airbrush, after a pencil and a brush. Thus, for those who have just decided to learn airbrushing, the entire subject can be divided into three basic components:
- Car painting technology (paints and solvents, surface preparation, tools, etc.).
- Specifics related to the use of an airbrush (the ability to quickly and accurately create the intended composition).
- The artistic component (creating a drawing on paper, finalizing it in practice).
A mistake many people make when trying to airbrush is mixing all three together. Airbrushing is local or complete painting of a car. All requirements for painting must be strictly observed, i.e. you need to have a correct understanding of painting technology and use it in practice. The artistic component may not be useful at all, but if we consider it as a separate practice, then it is worth looking for lessons on the pages of the relevant books. Remains...
 If you don't know how to learn airbrushing, just grab an airbrush and follow the exercises below one by one. To do this, you will need any available surface and well-diluted paint. It’s better not to stop at an expensive tool and take a mid-range compressor and a cheap Soviet A4 airbrush from an auction (the quality is comparable to Chinese ones, but it breaks less often). There are special paints for airbrushing, but in order to learn how to paint, you can take any paints, including acrylic ones, and dilute them to the desired state.
Usually it is enough to dilute a third of its volume into a can of paint, i.e. 3/4 of the paint requires 1/4 of a suitable solvent (see instructions for the paint). The first tests will prompt further adjustment of the thickness: properly diluted enamel should not block the nozzle, but should cover the surface without running off it. During and before work, it is advisable to pay attention to the following nuances:
- Before you start painting, you need to run the airbrush along a route without spraying paint - to rehearse the movement.
- Hold the airbrush strictly perpendicular to the surface of the car or canvas.
- Correct defects only after the paint layer has dried, including smudges.
- Do not spray two layers onto one spot in one go, i.e. The path and the airbrush spray should not intersect.
- Clean the airbrush with a solvent before and after finishing work (running the solvent without disassembling the tool).
Lessons for mastering the airbrush
 Any, even the most complex drawing, consists of individual parts. The simplest of elementary particles are line and point. Accordingly, you need to start with this exercise – lines and dots. Airbrush for beginners is a boring and monotonous drawing of lines of different thicknesses, lines parallel or in a certain combination with each other, for example, at an equal angle to adjacent lines.
Dozens of sheets are painted in this way, and automatic movement is developed. It is important to learn how to maintain the intended proportions, and this requires a way to measure these proportions. Therefore, those who want to learn airbrushing are often advised to draw parallel lines - in such a combination it is easy to track hand fluctuations, changes in thickness, etc. However, you don’t have to limit yourself to this: you can draw circles, squares, and complex combinations of lines.
You need to hold the instrument with both hands (leading and supporting), while the upper body is relaxed. The hands remain motionless relative to the instrument - movement is carried out by the elbows and shoulder muscles. Uniformity of movement and a constant distance to the surface are important (thin lines - 3-4 cm). During these exercises, you will have to learn to control the pressure on the trigger: its movement affects the nature of the spray. But it may turn out that in the selected airbrush model, adjustment is only possible by replacing the nozzle - the tool will be suitable for the first experiments, but in the future it is better to purchase a double-action airbrush.
Creating a Gradient and Transferring an Image
After the calligraphy is well fixed, you can move on to the drawing itself. On a car, on a canvas of paper, on a brick wall, a three-dimensional image is distinguished from a flat one by perspective and the transition of light to shadow. Setting perspective is not difficult (the main thing is not to forget about it in large drawings). But there is usually no great need for this.
 In order to learn how to create a smooth transition (light gradation), you can use the following exercise. Draw two lines, each of which has its own shade, and by spraying from different distances and gradually overlapping these sprays, try to create a transition between these lines. A light shadow is an airbrush far from the surface, a dark shadow is close.
Most people who have just become acquainted with airbrushing try to create volume by darkening that part of the depicted object that is further away. This technique can be used to image objects that do not reflect light, but in reality the path of light is much more complicated. Information about the reflection of light can be found in a reference book on still lifes or in the engravings of medieval engravers, who painstakingly depicted the transitions of light and shadow on real and abstract objects.
After the gradations begin to turn out reasonably well, you can try to transfer a simple image onto paper. For the first experiments, it is better to choose images of geometrically correct objects, the proportions of which are easier to understand. In reality, the transfer of basic proportions is carried out using stencils, but a well-developed eye is important for those who want to understand how to learn airbrushing and not give up after some offensive mistake.
First serious work
It takes a long time before a novice artist begins to correctly transfer lighting, shadows and highlights onto paper. In order to try your hand at a real car, you need to have examples of well-executed airbrushing on paper. It is necessary to constantly stir up your own interest in the matter, study your mistakes and photos of good works.
 Videos on the topic of airbrushing for cars and motorcycles provide a good base, but you should only take equipment from such sources. There are few good artists, even among professional airbrush artists (which does not prevent them from earning a living), so the basics of drawing (space, light, composition) need to be studied using special manuals or drawing with a pencil. Another way is to focus entirely on the craft, i.e. owning an airbrush. In this way, even with a complete lack of imagination and spatial vision, you can make good money. The main thing is to be able to use image editing programs.
We also recommend
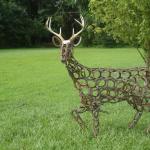 Metal products - we decorate the house and yard with our own hands
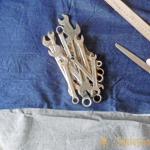 A tool bag is an indispensable thing for builders Patterns for belt bags for metalwork construction
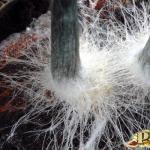 DIY oyster mushroom mycelium
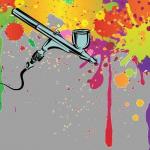 Airbrush for beginners: instructions from the master!
 Designation of radioelements on diagrams
 Wood gasification Biomass resources for gasification