How to make mycelium at home. DIY oyster mushroom mycelium
A vegetable garden on a windowsill will no longer surprise anyone, but growing oyster mushrooms and champignons is a rather rare activity that will not only significantly save money, but will also give you confidence that there are no carcinogens or nitrates in mushrooms. Many mushroom growers grow oyster mushroom mycelium themselves, which allows them to guarantee 100% quality of the product.
Growing methods
The process of growing mushrooms at home is quite simple, but very troublesome. To get a good harvest, you must comply with all the requirements for their cultivation and breeding. Oyster mushrooms are considered the most unpretentious and productive. The harvest can be harvested within 45 days after planting.
There are two methods for growing them:
- extensive (natural conditions for the growth of mushrooms are created, in which much depends on weather conditions);
- intensive (growing in an artificial environment, for example, plastic bags).
To create your own mushroom farm, you can grow oyster mushroom mycelium yourself at home or purchase it in a store.
Oyster mushroom mycelium is the vegetative body of the fungus, mycelium, which consists of thin branched threads. Usually develops in the substrate or on its surface. There are several ways to obtain it, both in the laboratory and at home.
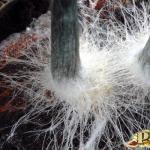
This is what oyster mushroom mycelium looks like before planting.
In nature, mushrooms reproduce primarily by spores. However, science does not stand still, and it was decided to learn how to grow mushrooms in artificially created conditions.
Previously, to grow oyster mushrooms, they took mycelium from the forest and propagated it in adapted greenhouses. At the same time, a small piece of it was planted on previously prepared soil, without sprinkling soil on top, so that the mycelium would not bear fruit. When all the soil was well intertwined with mycelium, it was taken out, slightly dried and used for dilution. In Russia, oyster mushroom mycelium was obtained in this way in the late thirties of the twentieth century.
The quality of the mycelium obtained under such conditions was not at a high level. Fruiting was scanty, and the mycelium quickly degenerated. When using such oyster mushroom mycelium, harmful bacteria and microorganisms were introduced, which inhibited development and deteriorated quality. Therefore, researchers were constantly looking for new technology for growing mycelium.

In 1894, in one of the institutes in France, mycelium was first bred from fungal spores grown in laboratory conditions. It had great prospects, since it took root much better and brought an extensive harvest before the mushrooms appeared in the forest. But spore breeding was successful only in laboratory conditions, which significantly reduced the frequency of its use.
The last to be patented was a method for growing oyster mushroom grain mycelium. In modern Russia it is still widely used. Mushroom growers grow mycelium on the grain of any type of cereal crop, as well as on sunflower shells, dry grape pomace, corn stalks, and sawdust.
Growing on grain
In the modern world, grain or royal mycelium of oyster mushrooms is used for the propagation of mushrooms. It is usually grown in sterile laboratory conditions to protect the mycelium from harmful microorganisms and increase yield. But amateur mushroom growers have found a way to create it at home. Moreover, homemade mycelium bears fruit no worse than laboratory one.
Mycelium using oat flakes. You will need to take:
- 40 grams of flakes, crushed to a powdery state,
- 960 ml water,
- 100 grams of gelatin,
- bactericidal lamp,
- sterilized test tubes and cotton plugs for them,
- grain cans, tweezers,
- mature oyster mushroom.
Oatmeal must be boiled for an hour, then strain through several layers of gauze. Soak the gelatin in water (take some from the already prepared water) and, when it swells, heat it in a water bath, then add it to the oatmeal jelly. Fill the test tubes with the resulting slurry to 2/3 of the total volume, close with cotton plugs and place to sterilize in a water bath for 40 minutes. Next, you will need to install the tubes in an inclined position so that the inoculation area becomes larger. When the substance in the test tubes has cooled, use sterilized tweezers to take an oyster mushroom plate (the part that grows under the mushroom cap) and carefully place it in the test tubes on the nutrient medium. Close the test tubes with cotton plugs and wrap them in foil. Place the tubes in a dark place with a temperature not lower than 24°C. After 2 weeks the mycelium will be ready.

Such mycelium will need a grain substrate. To prepare it you will need:
- 10 kg of grain (any grain crop),
- 15 liters of water,
- 130 g gypsum,
- 30 g chalk.
Boil the grain in water until it becomes soft, but do not boil it into porridge. Dry the boiled grain well and add gypsum and chalk to it. Fill the jars with the prepared grain, making a small depression inside to place the mycelium in the future. You need to make a hole in the lids with a diameter of 1.5 cm, and then close the jars with them. Plug the holes in the lids with cotton swabs. Sterilize in the oven at 120°C for two hours.
Now all that remains is to plant some oyster mushroom mycelium in the prepared grain substrate. It is necessary to slightly heat the test tubes with the mycelium ready for planting so that it can easily separate from the walls. Using sterilized tweezers, carefully transfer the oyster mushroom mycelium from the test tube into the depression prepared on the grain. It is important to close the holes in the lids again with cotton plugs and place the jars in a dark place and remember to maintain the room temperature at 24°C. Maintaining sterility is very important throughout the entire procedure from start to finish. Only in this case will the mycelium produce high yields for a long time.
Mycelium on sticks
Oyster mushroom mycelium on sticks has attracted everyone's attention due to its positive qualities, unusual appearance and very long shelf life. It can be stored at room temperature for more than 5 months, which allows it to be transported over fairly long distances. Such storage is simply necessary on hot summer days. Wooden sticks infected with mycelium are packaged in special bags and polyethylene and sent to their destination. During transportation, it is important that the humidity in the bags does not fall below 45%, otherwise the mycelium will simply die.
Dry oyster mushroom mycelium is not viable. Therefore, wet pieces of cardboard or cotton wool are placed in plastic wrap next to the bags of sticks.
The germination and productivity of mycelium on wood sticks is in no way inferior to the mother one, but mushrooms from it are grown mainly on stumps, logs or wood “cuts”.
At home, it is not so easy to infect wooden blocks with oyster mushroom mycelium, and not everyone is ready to trust all sorts of companies that send them by mail. Therefore, this growing method is not very popular among amateur mushroom growers.
Evgeniy Sedov
When your hands grow from the right place, life is more fun :)
Oyster mushroom is a safe, environmentally friendly mushroom. Even beginners in mushroom growing can grow it at home. You just need to study existing technologies for growing the crop, prepare the premises, purchase planting material, and 1.5 months after planting the mycelium, you can get the first harvest of beneficial mushrooms.
Conditions for growing oyster mushrooms at home
The key to successful cultivation of oyster mushrooms at home is the creation of an optimal microclimate for the development of the mycelium and its fruiting. The fundamental factors for obtaining high yields of oyster mushrooms are:
- Temperature regime. The peculiarity of the crop is that it needs different air temperatures for the development of mycelium and fruiting.
- Humidity. Fungal culture is very demanding of moisture, but a high level of humidity in the room where it grows can become a favorable environment for the development of mold and other pathogens. To disinfect the space of a mushroom farm, systematic cleaning of the cultivation site using a chlorine solution is required.
- Lighting. Oyster mushrooms are grown using single-zone or two-zone cultivation methods. If the mushroom grower uses the second option, then lighting must be carried out only in one of the two rooms for the incubation period of the mycelium. Mushrooms do not need light at this stage.
- Ventilation. An air ventilation system is necessary when growing a mushroom crop in one room to lower the air temperature during the fruiting period.
Table of necessary conditions for maintaining the microclimate at different stages of growing mushrooms at home:
| Mushroom development stage | Cycle duration (days) | Temperature (°C) | Humidity (%) | Illumination (lx/sq.m) | Carbon dioxide level |
| Germination of mycelium into the substrate (incubation period) | |||||
| ripening and fruiting (formation of primordia) | not required | ||||
| growth of the mycelium fruiting body: | |||||
| harvesting | doesn't matter | not required |
Breeding methods
All methods are divided into extensive and intensive. The first method is based on breeding agaric mushrooms in natural conditions, while the second requires a special room with a special microclimate. Types of intensive methods of growing oyster mushrooms at home:
- In bags with your own hands. The substrate and mushroom mycelium are placed in layers in plastic bags designed for 5 kg of weight. Place them at a distance of 20 cm from each other so that the growing bunches do not touch each other. The bags with the substrate are raised from the floor by 30 cm for normal air circulation.
- In ready-made substrate briquettes. Mycelium producers offer ready-made blocks for growing oyster mushrooms. This method of growing mushrooms requires significant material costs.
- On the shelves. Significantly saves room space and maintains a convenient approach to the blocks. Substrate briquettes are installed on specially made racks at an angle. Shelving structures are placed at a distance of 70 cm from each other. Leave 15–40 cm between blocks with planting material.
An extensive method of growing oyster mushrooms includes growing mushrooms on stumps or logs. It is more suitable for summer cottages where there is no necessary basement space. Cultivating mushrooms outdoors is highly dependent on weather conditions and requires preliminary preparation of deciduous tree stumps. The maximum yield with this method is harvested 2–3 years after planting.

Oyster mushroom growing technology - intensive method
Growing oyster mushrooms in an intensive way allows you to obtain harvests of oyster mushrooms all year round, but it requires painstaking work and careful care of the crop. It is able to provide mushroom growers with additional income. This business has high profitability with successful development of the technology and the necessary area for growing mushrooms at home. The extensive method is good for seasonally providing the family with mushrooms.
Preparing and disinfecting the premises
Growing mushrooms at home for beginners begins with preparing the premises. The place for breeding can be a cellar, basement, barn or greenhouse. The crop yield depends on proper preparation of the premises. For active fruiting of the mycelium, it is necessary to create a special microclimate in a clean place. For a budget option, the room is equipped with racks with hooks for vertical hanging of substrate blocks or shelves are made at a distance of 0.5 m from the floor for air circulation.
The next step is to equip the space with heating devices (for year-round production). The maximum air temperature in the room during the incubation period of the mushroom culture should be no lower than 20 degrees Celsius. During the fruiting period of mushrooms, it is lowered to 13°C. The thermometer should not fall below this mark, otherwise all the efforts of the mushroom grower will go down the drain. It is better when there are two rooms: one (warmer) does not have to be equipped with lighting, the second - with natural or artificial light.
Mushroom culture is very demanding on moisture. For its normal development, it is necessary to maintain humidity at 85–95% using electronic humidifiers. In a small area, you can create the necessary conditions by placing dishes in water, hanging a damp cloth and manually spraying the space. Sufficient lighting will be provided by fluorescent lamps, ventilation - by opening hatches, vents, doors or the operation of forced ventilation systems.
The main requirement for the room where mushrooms grow is cleanliness and the absence of mold. The presence of pathogenic fungi can ruin a mushroom farm. The walls and floor of the room must be made of concrete so that treating them with a solution of sulfate, lime, copper sulfate and chlorine takes a minimum of time and labor. Wooden surfaces are breeding grounds for pathogens and are difficult to disinfect. It is better to use plastic and metal to construct shelves and racks.
How to make your own substrate
Growing oyster mushrooms in a substrate made with your own hands at home will protect you from unnecessary costs and poorly disinfected components of the “soil”. In order to make the basis for laying seed with your own hands, you need to know the following rules:
- The best substrate for oyster mushrooms is wheat and barley straw, sunflower seed husks, buckwheat kernels, and corn stalks and cobs. Experienced mushroom growers practice growing oyster mushrooms on sawdust from deciduous trees. Beginners should avoid this method because it requires experience and hard work. All raw materials must be clean, well dried, free from mold and rot.
- The prepared material is placed in a large vat of water and boiled for about an hour. The first heat treatment is designed to thoroughly saturate it with moisture, wash away dust, and remove insects and larvae.
- The squeezed straw should be chopped to a size of 4–5 cm. The fraction of corn stalks and cobs should be the same.
- Before use, the substrate is subjected to repeated 2-hour heat treatment in a large container for disinfection. The water in the container should be 2 times more than the raw material.
- The heat-treated material is cooled and squeezed out so that the substrate is moist, but not wet (water should not flow when squeezing it in your hand). A waterlogged substrate negatively affects the growing process.
Selection and purchase of mycelium
It is necessary to buy mycelium from trusted suppliers of planting material - in specialized stores and from large companies involved in growing mushrooms. The second option is suitable for experienced mushroom growers and is advantageous in that from oyster mushroom producers you can purchase not a new mycelium, but one that has not been developed during the year, but is capable of producing a significant harvest, much cheaper. For beginners, it is better to purchase grain mycelium. It does not require additional processing. From 1 kg of raw materials up to 3 kg of products are obtained.
The appearance of the seed indicates its quality. The grains should be yellowish with an orange tint. Dark spots on them indicate the presence of mold, so you should immediately discard low-quality seed material. The mycelium should have a fresh mushroom smell. The ammonia scent should alert the buyer. It indicates improper storage of the mycelium and its deterioration. Before making a purchase, you should study online reviews about this product supplier. First, it is better to take a small test batch of mycelium to check its quality.
Laying seed and installing briquettes
The cultivation technology begins with laying mycelium in the substrate. First, the mycelium is taken out for a day in the room where it is planned to grow mushrooms in order to avoid its death from shock. After preparing the substrate for growing mushrooms at home, they begin to place the seed into briquettes. New plastic bags measuring 35 x 75 cm (per 5 kg), pre-treated with a bleach solution, are ideal for this.
To create briquettes, the container is filled layer by layer with substrate and mycelium. Filling the bag should begin and end with a layer of substrate. Alternately, pour 5 cm of nutrient material and lay out 0.5 cm of mycelium, after which the bags are tightly tied and labeled. The prepared briquettes are subject to perforation - cutting out holes through which the mycelium will breathe and the primordia of oyster mushrooms will begin to emerge.
Experienced mushroom growers consider it best to perforate the blocks diagonally across the bag or in a checkerboard pattern. On one briquette, 4 crescent-shaped holes are made so that when oyster mushroom primordia appear, the plastic film valve moves to the side and does not interfere with the growth of the mushrooms. The diameter of the cut should be 10 cm. Perforation must be carried out within 24 hours after the briquettes are formed. The finished “beds” are installed on special racks so that the distance between them is at least 20 cm.

Caring for mycelium during growth and maturation
Growing mushrooms in the basement is not difficult, provided that the cultivation technology is followed. Caring for mycelium during the period of growth and maturation is simple and does not require additional costs. Basic rules for ensuring a high yield of oyster mushrooms:
- Climatic conditions:
- The air temperature for mycelium growth should not exceed the range of 20–30 °C.
- Exceeding these indicators by at least 1–2 °C will lead to the death of the seedlings.
- At the beginning of fruiting, the air temperature in the room should be 3–6 °C, during mushroom growth – 12–15 °C.
- It is prohibited to ventilate the basement so as not to disturb the level of carbon dioxide, which is necessary for the development of culture. Ideally it should be 1300 ppm.
- The optimal humidity level is 85–95%. It is maintained with humidifiers, frequent misting of the space, and placing open containers of water near heaters.
- Lighting. During the incubation period (20–25 days), there is no need to light the room. The daily lighting requirement for growing mushrooms is at least 8 hours based on 5 watts of lighting power per square meter. m.
- Watering. At the stage of the appearance of mycelium primordia and fruiting of mushrooms, it is necessary to irrigate the briquettes with warm water from a spray bottle at least 2 times a day. The primordia of oyster mushrooms should not be allowed to dry out.
- Preventive measures for room disinfection. To prevent mold from growing in damp conditions, the walls and floor of the basement are treated with chlorine-containing solutions at least once a week.

Harvesting
The first harvest of mushrooms can be harvested 1.5 months after planting. Experienced mushroom growers recommend removing a mushroom bunch by twisting it around its axis. If you cut off a family of fungi, the remaining stem stump can attract bacteria and harmful fungi with its breeding ground. Infection of the mycelium and proliferation of pathogens will occur at lightning speed in warm and humid air conditions.
If, when tearing off a mushroom cluster on the substrate, there are no signs of mold infection, you need to remove the remaining parts of the oyster mushroom leg from the hole in the block with the substrate and cover the resulting nest with sterile straw. Then transfer the bag to a dark, damp room for the incubation period of the next wave of fruiting. After 2-3 weeks it will be possible to harvest a new crop. One planting provides 3 full harvests, the first of which is the highest.
Breeding oyster mushrooms at home in an extensive way
Growing oyster mushrooms at home is often done extensively. Its advantage is its simple technology, harvesting not indoors, but on stumps in the open air. The disadvantage of this method is the influence of negative weather conditions on the growth of the mushroom culture. To plant mycelium, only deciduous trees are used: ash, poplar, chestnut, etc. Preparation of logs and planting seed consists of several steps:
- Preparatory activities for growing mushrooms at home are carried out in June.
- When harvesting wood, the top cut should be marked.
- Logs with a diameter of 25–35 cm are dissolved into stumps 30–35 cm long.
- Soak for 1–3 days in water.
- In a shaded area of the garden plot, dig holes with a spade bayonet 50 cm in diameter at a distance of 15 cm from each other.
- Cover the hole with a layer of wet sawdust from deciduous trees to create a drainage layer and retain moisture.
- On the underside of the cut stumps, use a feather drill to make 10 mm holes to a depth of 5–10 cm.
- Mushroom mycelium is placed in the prepared recesses and covered with plasticine (wine corks or tape).
- The first stump is placed on sawdust with the holes down, deepening 15 cm into the ground for fixation, and buried with earth.
- The following blanks are installed on it so that the embedded mycelium is in the lower part. The stumps are secured together with nails without heads.
- The joints are wrapped with adhesive tape to maintain a moist environment for mycelium germination.
- Caring for the “beds” consists of periodically watering the soil around the stumps and irrigating wooden structures with water.
- The first harvest can be harvested in August-September.
- The plantation will bear fruit for 5 seasons. The largest harvests occur in the 2nd–3rd year.
How to grow oyster mushroom mycelium at home
The mycelium is grown in laboratory conditions, but you can repeat the process, creating the necessary conditions, at home. This will require patience and the ability to create sterile conditions. You need to collect the necessary tools, equipment, material and you can begin the procedure for growing mother, intermediate mycelium and seed material.
Equipment and tools
In order to grow mycelium at home, you will need gas, water, and electricity. It is necessary to prepare equipment and tools:
- agar-agar - a jelly-like medium for growing microorganisms (can be bought in a supermarket);
- alcohol for disinfecting tools, containers and surfaces;
- hydrogen peroxide to disinfect mushroom material;
- cotton wool;
- scotch;
- foil;
- thermometer;
- tweezers;
- test tubes;
- 3 liter jars;
- sterile rubber gloves;
- pipettes.
Stages of the procedure
Growing mycelium is not a quick process, but it helps to save money on the purchase of seed material. Self-grown mycelium, subject to sterility and technology, actively bears fruit. The mushroom grower will be calm about the quality of the seed obtained independently at home. Growing instructions:
- Disinfect all tools, surfaces, and equipment with alcohol to avoid introducing pathogenic bacteria.
- Wear gloves.
- Place agar-agar at the bottom of the test tube.
- Using tweezers, pinch off several small pieces of the mushroom closer to the cap. You need to choose a large, powerful specimen.
- Dip them in hydrogen peroxide and place them in a test tube on agar-agar.
- Seal the container with the seed tightly with cotton wool and seal with tape.
- Leave the test tubes in a place with an air temperature of at least 20°C.
- After 2 weeks, a white coating will appear on the surface of the agar-agar - this is the royal mycelium.
- Boil 1 kg of barley or wheat grains for disinfection for 15 minutes, cool, and dry.
- Mix cereals with gypsum (30 g) and chalk (10 g).
- The resulting mixture is poured into sterilized three-liter jars 2/3 full.
- The mother mycelium is planted in the plant substrate.
- Place foil on the neck of the jar and secure it with tape.
- The period for obtaining intermediate mycelium is 2–3 weeks.
- To propagate the seed, repeat the procedure, placing the intermediate mycelium in jars with grain.
- After the mycelium grows, it is planted in bags with substrate (described above).
Video
Found an error in the text? Select it, press Ctrl + Enter and we will fix everything!
It is impossible to imagine growing oyster mushrooms without purchasing or producing mycelium, as well as preparing a special nutrient substrate. Anyone who plans to grow these mushrooms at home should know how to make oyster mushroom mycelium at home, because the volume of the harvest will depend on the quality of the mycelium. Substrate preparation also plays an equally important role.
From this article you will learn how to obtain oyster mushroom mycelium at home and how to prepare a substrate for growing these mushrooms.
How to get oyster mushroom mycelium at home
The production of mycelium and the cultivation of oyster mushrooms can be carried out in any room where an optimal microclimate can be maintained. Basements, old mines or bomb shelters are great for this. If the room is above ground, it is additionally insulated.
Oyster mushrooms are grown using single- and multi-zone technology. With a single-zone system, germination and cultivation take place in one room, while with a multi-zone system, different rooms are provided for this.
For growth and development to occur normally, certain conditions must be provided:
- Temperature - within 24 degrees;
- Humidity - at the level of 75-90 percent;
- Lights and ventilation are not turned on in the room, as they slow down the growth of the mycelium.
As a rule, complete overgrowth occurs in 14-18 days, depending on the microclimate. During this period, care is taken to ensure that a mycelial crust (stroma) does not appear on the surface. It germinates if too many spores are added to the soil or the room temperature is higher than normal. In addition, stroma provoke a sharp decrease in yield.
Oyster mushroom diseases can also be detected during this period. For example, if moisture begins to appear on the surface and an unpleasant odor appears, it means that the soil has been contaminated with bacteria, and black, green or orange spots on the surface indicate fungal diseases.
 Figure 1. Options for placing blocks for oyster mushroom cultivation
 After the mycelium grows, the blocks are transferred to a room for cultivation, and in case of single-zone cultivation, the temperature, humidity and light intensity are changed (Figure 1). The technology for planting mycelium and preparing mushroom blocks is in the video.
Cultivation stages
Novice mushroom growers are often interested in whether it is possible to grow mycelium themselves for further cultivation of oyster mushrooms. Theoretically, this is possible, but no one can guarantee high yields.
Previously, for home cultivation, they took tissues of wild mushrooms and placed them in a nutrient substrate, without sprinkling them with soil on top. When the ground was covered with overgrown mycelium, it was removed and used for further cultivation. Another method is now popular: oyster mushroom spores are grown on grains of corn, millet, oats, sunflower husks, sawdust or grape pomace. Rye is considered a universal raw material, which is used to grow the mycelium of most edible mushrooms.
To prepare the grain, several manipulations are carried out:
- Cooking: 30 liters of water are poured into the digester and 30 kg of grain is added. Cooking time is 30-35 minutes. After this, the water is drained, the grain is dried a little and 360 g of gypsum and 90 g of chalk are added. These additives help with ventilation and prevent the grains from sticking together.
- Sterilization: Rye is packaged in 2-3 liter milk bottles. The container must be durable so that during the sterilization process it is not damaged and pathogenic microorganisms do not penetrate inside. Rye should fill 4/5 of the bottle. The top is covered with a cotton-gauze stopper. After this, the tanks are placed in medical autoclanes (any model will do).
- Unloading: After sterilization, the bottles are transferred to an area treated with disinfectants. Here the containers cool down for 12-15 hours.
 Figure 2. Containers and equipment for preparing and sterilizing mycelium at home
 At home, sterilization is carried out in a regular saucepan. Bottles are boiled twice for two hours at intervals of 24 hours (Figure 2). During this time, all pathogenic microorganisms in the grain die, but you must make sure that the water from the pan does not wet the plug. Detailed technology for growing oyster mushroom mycelium at home is given in the video.
Growing royal mycelium
How to prepare oyster mushroom mycelium at home? First of all, you will need tools: pipettes, tweezers and test tubes, which must be disinfected in advance. The table on which you will prepare the mycelium is wiped with alcohol to disinfect it.
Note: You can buy oyster mushroom mycelium, but you can also prepare it at home using the fruiting body of a mature mushroom.
To make oyster mushroom mycelium at home, follow these instructions:(Figure 3):
The container is transferred to a room without drafts and direct sunlight and left for two weeks. The room must be at a constant temperature. In such conditions, a fluffy coating will appear within two weeks. This is the mother mycelium, which can be transferred to stumps or to the substrate.
What does oyster mushroom mycelium look like?
If you are interested in what oyster mushroom mycelium looks like, you should know that this substance is a mycelium (a kind of mushroom roots) that grows in a nutrient substrate.
Mycelium looks like white fluff that covers grains or wooden sticks. You can buy it ready-made and sow it directly into the substrate, or prepare it at home. From the cap of a mature oyster mushroom you can grow mycelium on grain. Mycelium can also be grown on small wooden sticks for further cultivation of mushrooms on stumps.
Reproduction of oyster mushroom mycelium at home
In order for there to be enough mycelium to grow a large batch of mushrooms, it must be propagated correctly.
To do this, you need to prepare a sufficient number of containers (glass jars, bottles or test tubes) into which the mycelium will germinate. A mixture of crushed grain, gypsum or lime is placed in each bottle and sterilized with hot air or steam.
After sterilization, a piece of mycelium purchased from mushroom farms or grown at home is placed in each bottle. The bottles are left in a warm room with a stable temperature without drafts. Within three weeks, the mycelium will multiply into a full-fledged mycelium.
While the mycelium is germinating, you need to prepare the substrate and room for growing mushrooms, so that immediately after receiving the planting material you can begin sowing the mycelium.
How to plant oyster mushroom mycelium on stumps
Oyster mushroom spores are introduced into the substrate when its temperature reaches +20-30 Celsius. Inoculation cannot be carried out if the soil is heated too much, as in this case the fungal spores die. In addition, you need to ensure that the acidity is at the level of 6.5-6.8 pH, and the humidity is 60-75 percent.
At large industrial enterprises, the process of distributing the nutrient mixture and introducing mycelium is mechanized, but in household plots these operations are carried out manually. The compost is stuffed into plastic bags (size 50 by 100 cm), having made several holes in them in advance.
 Figure 4. Options for planting mycelium by spreading it over the surface of the substrate and placing it inside blocks or plastic bags
 The seed mycelium is transferred to a room at room temperature one day before, and then transferred to a clean, disinfected container and kneaded by hand. Gloves must be worn on hands.
Spores can be applied in layers or mixed with the top layer of soil (Figure 4). The application rate depends on the mycelium manufacturer (the product of domestic companies is applied in a proportion of 3-5% of the total mass of soil, and Sylvan products - 1.5-1.8 percent). As a rule, with manual inoculation, the mycelium is distributed more evenly. Subsequently, the finished bags are transferred to special racks or placed in containers.
If you plan to grow oyster mushrooms on stumps, the technology will be slightly different. The logs are soaked in water for a day, then slightly dried and dropped in a selected area, in a basement or greenhouse. When the mycelium is ready for sowing, small holes are drilled in the logs and mycelium or sticks with mycelium are inserted into them. It is advisable to sprinkle the top of the hole with wet sawdust.
How to propagate oyster mushroom mycelium on sticks
Oyster mushroom mycelium grown on sticks has many benefits. Firstly, it has a long shelf life, more than 5 months, without the need for refrigeration. Secondly, it is not damaged during transportation, so the finished mycelium can be transported over long distances. However, growing mycelium on sticks is more difficult than on grain, so amateur mushroom growers rarely use this method. In addition, mycelium on sticks is only suitable for growing mushrooms in conditions close to natural, that is, on stumps or logs (Figure 5).
 Figure 5. Using mycelium on sticks to grow oyster mushrooms
 To grow mycelium on sticks, first cultivate on grain according to the method described above. After this, beech, oak or hornbeam sticks are infected with the resulting mycelium, placing the mycelium in small splits on the sticks. In the future, such blanks can be stored in jars or bags. But it should be remembered that when oyster mushroom mycelium dries, it becomes unviable, so you must put pieces of damp cardboard or cotton wool in the container.
Preparation of substrate for growing oyster mushrooms in a tunnel
In nature, oyster mushrooms grow on stumps and tree trunks. To cultivate this mushroom at home, you can use wood or specially prepared soil.
For development, the fungus can use soil containing cellulose and lignin, but for high yields it also requires proteins and fats. As a rule, the main component is cereal straw, which is harvested in dry weather in environmentally friendly areas.
Note: Typically, material is stocked for a year, but it will be better if stocks are prepared two years in advance. During storage, the nitrogen content increases and hygroscopicity increases.
 Figure 6. Types of substrate for oyster mushrooms: 1 - straw, 2 - sawdust, 3 - sunflower husk
 The second required component is sunflower husk. It should contain more than 15% moisture, fat - a maximum of 3%, and dust - no more than 5%. As a rule, high-quality husks can be obtained at the beginning of the processing season. In addition, flax is used for cooking, but it is quite difficult to assess the quality of this material.
Additionally, sawdust is added to the compost. But you need to make sure that they do not contain fractions of coniferous species, since they require lengthy preliminary preparation. Sometimes cotton lint is added to the compost, but this element is too expensive for use in small household plots (Figure 6).
Note: Each of the listed elements can serve as the basis for compost. However, it is important to take into account that each material has its own humidity, rate of saturation with water and retention times, so the remaining components of the compost should be selected individually, focusing on the characteristics of the base.
Used as additional elements(Figure 7):
- Nutritional supplements, which optimize the nitrogen content in the finished raw material. As a rule, dry additives make up 1-10% of the total mass. As a supplement for compost, you can take hay, malt sprouts, brewer's grains, soy or feather flour, wheat bran, etc.
- Mineral supplements improve the structure of the nutrient mixture and maintain its acidity level. To improve the structure, gypsum or alabaster is added to it, and slaked lime or soda ash is added to normalize acidity.
- Water: Only drinking water is suitable for preparation, but in no case liquid from open reservoirs. You will find more useful information about the necessary components of a quality substrate for oyster mushrooms in the video.
 Figure 7. Additives for nutrient substrate: 1 - soy flour, 2 - gypsum or alabaster, 3 - slaked lime, 4 - soda ash
 Substrate preparation includes several stages:
- Grinding allows you to make the soil more compact. The smaller the particles included in the composition, the easier it will be for the mycelium to fill it. This step is especially important if fresh straw is used as the base. It must be crushed.
- Mixing used if mushrooms will be grown on complex compost consisting of several elements. It is important that all components must have a uniform structure.
- Hydration plays an extremely important role, since the yield will depend on the water content in the nutrient mixture. The mixed compost is soaked in water until it has absorbed enough moisture to last the entire growing period. The method of moistening depends on the method of preparing the soil (for example, when pasteurizing in tunnels, the nutrient mixture is soaked in a pool or on a concrete platform for two days). During the humidification process, washing is also carried out to remove dust and large particles that were not previously crushed.
In addition, the finished mixture is squeezed out to remove excess liquid. The optimal humidity level is 70%. Only with this indicator can a good harvest be grown.
How to make a substrate using hydrothermal technology
Processing the nutrient mixture is an important step, since during this process spores of competing molds are removed. As a rule, high temperatures are used for this, and less often - chemical, radiation or microwave irradiation. Below we will talk about the main processing methods (Figure 8).
- Chemical
There are many products that can disinfect soil and remove all harmful components from it. At large industrial enterprises, hydrogen peroxide or sodium hypochloride is used for these purposes. Regardless of the type of product, its use must be coordinated with the SES.
- Radiation
In this case, gamma radiation is used to prevent the growth of pathogenic microorganisms. Such compost is sterile, therefore, at further stages of cultivation it is necessary to ensure complete sterility of the premises.
- Microwave radiation
This processing method is still rarely used, but it is still used at some industrial enterprises. However, this method is successfully replaced by others, for example, exposure to high temperatures.
 Figure 8. Fermentation chamber (left) and compost pasteurization chamber (right): 1 - supply ventilation, 2 - air filters, 3 and 4 - control valves, 5 - air duct, 6 - fan, 7 - dispensing channel, 8 - substrate, 9 - exhaust ventilation channel
 But the most common is hydrothermal treatment. This technology is widely used in small farms. The soil is placed in metal containers with heating elements installed below or hot steam is supplied. In addition, you can use a feed steamer for this. You can place a wet substrate in it and turn on the heating, or pour in a dry nutrient mixture and pour hot boiling water over it. Processing time is only 3-4 hours.
At home, you can simply pour boiling water over the substrate and let it cool for 4-5 hours. After this, the excess water is drained and the mycelium is added.
But the most effective way is to prepare the substrate in tunnels. This technology allows us to obtain high-quality raw materials that are completely free of microorganisms and pest larvae.
Note: On large mushroom farms, water left over from the production of compost for champignons is used to prepare the substrate in the tunnels. At home, such compost can be reproduced by adding manure to straw (at the rate of 10 kg per ton).
Step-by-step instructions will tell you how to prepare a substrate for oyster mushrooms in a tunnel.:
- The straw is crushed in such a way that its particle size does not exceed 8 cm. This will make it easier to put the raw materials into bags.
- The chopped straw is laid out on a concrete platform and moistened for several days until the moisture level of the raw material reaches 78%.
- The straw is laid out in the tunnel so that the surface of the future substrate is smooth.
- The tunnel is closed and recirculation ventilation is turned on so that the temperature inside the substrate is equalized. Gradually they begin to add fresh air, moving from 1 percent to five. This allows you to increase the microbiological activity in the mixture and ensures its heating.
When the temperature inside the substrate reaches 65 degrees, the pasteurization process begins. Full high temperature treatment takes 12 hours in summer and 24 hours in winter. After this, the fresh air supply is increased to 30% so that the mixture is cooled to 50 degrees. Subsequently, fermentation is carried out by supplying up to 20% fresh air for 8-10 hours, the resulting mass is cooled and the formation of mushroom blocks begins.
Preparation of substrate for oyster mushrooms with steam
Thermal treatment of the substrate with water vapor can be sterile or non-sterile. During sterile processing, the substrate is subjected to high temperatures and pressure (120 degrees and 1.5 atmospheres), as a result of which all microflora in the soil dies. The duration of the procedure is 3 hours, after which the soil is cooled and inoculation is carried out. This method began to be used in the middle of the last century, but is now not actively used, since expensive equipment is used during processing, and sterility is maintained at all further stages of production.
Non-sterile processing, which is more accessible, has several options, so every mushroom grower will be able to choose the right one.
Xerothermal treatment of the substrate
It is often used not only in enterprises for growing oyster mushrooms, but also in factories producing mixtures for the cultivation of mushrooms. In essence, this method is similar to pasteurization. The soil is placed in a special chamber and exposed to hot steam, and if it is heavily contaminated, additional bactericidal preparations are added.
In addition, during inoculation it is necessary to maintain sterility, thoroughly disinfecting the room. Xerothermal processing is considered one of the most effective methods, since during this process there is practically no loss of dry mass, and the time spent on preparation is significantly less.
Anaerobic fermentation of substrate
It involves the use of both warm and fresh air (Figure 8). To do this, the temperature is raised to 60-70 degrees, held for 8-12 hours, after which it is gradually (over two to three days) cooled to 45 degrees. It is important to maintain humidity at 70-80%. Such conditions are destructive for pathogens, but are excellent for the development of oyster mushrooms. Steam and filtered air are used for regulation. When fermentation is over, the soil is cooled with air to 25-28 degrees. Natural cooling cannot be used, as it promotes the development of pathogenic microflora.
It is important that each type of nutrient mixture requires its own fermentation regime and duration. For example, straw-based compost is heated to +60 Celsius for 48 hours. At home, fermentation is carried out in containers that will later be used for cultivation, and in industrial settings special chambers are built for these purposes.
Substrate processing in sealed barrels
If you want to know how to prepare a substrate for oyster mushrooms without air supply, we recommend using sealed barrels.
A substrate of suitable humidity is pasteurized at a temperature of 60-70 degrees without air access in hermetically sealed containers. To do this, the barrels are placed in a heat chamber, where the substrate is treated at high temperatures, and the small amount of water that is in the straw evaporates and provokes the development of anaerobic bacteria. After just 12 hours the substrate will be ready for use.
As I already wrote in my article, the main cost when growing mushrooms in the basement of a house will be the purchase of mycelium. From an economic point of view, this issue can be solved in two ways: the first is to find the mycelium in the forest yourself, the second is to buy it. And then make grain mycelium. It doesn’t matter what kind of mushrooms you are going to grow, be it oyster mushrooms, champignons or shiitake.
After looking at information on various forums, I learned that they are starting to grow mushrooms from mycelium of the following types:
- grain mycelium
- mycelium on agar
First, I’ll explain what it means to find mycelium yourself. To do this, you need to go into the forest, find the desired mushroom that you want to cultivate. Basically, this mushroom can be the noble White mushroom. Then a 2 mm portion of the mushroom is cut out from the middle of the stem with a sterile knife and tweezers. Sterility can be achieved by dipping them in alcohol. This will be our initial mycelium, which will then produce growth in the grain.
Sequential operation when introducing a part of the fungus onto a sterile nutrient medium

On the Internet they mainly sell grain mycelium and on sticks. But it is expensive to buy grain and it is not known how good it will be. Therefore, I decided to buy oyster mushroom mycelium on sticks, and sow the grain with these sticks, thereby obtaining high-quality grain mycelium. 
So, let's move on to the process of growing mycelium. For this we need grain, it is better to take oats or wheat.

By tradition, at the end of the article there is a useful video on how to properly prepare grain for mushroom mycelium. I think it will be very useful, it shows how the grain is positioned during drying, what devices to use
We also recommend
 Metal products - we decorate the house and yard with our own hands
 A tool bag is an indispensable thing for builders Patterns for belt bags for metalwork construction
 DIY oyster mushroom mycelium
 Airbrush for beginners: instructions from the master!
 Designation of radioelements on diagrams
 Wood gasification Biomass resources for gasification