Growing cedar pine from walnut. Cedar: planting and care
Planting and caring for Siberian cedar
The root system of the seedling should be freely placed in the planting hole without bending the ends of the roots. At the same time, taking into account the superficial nature of the distribution of the root system of the Siberian pine, the roots should be located within the upper fertile soil layer. AT middle lane Russian soils are thin. The thickness of the fertile layer rarely exceeds 20 cm.
When planting cedar in heavy clay soil, it is necessary to add sand to landing pit.
- Dig a planting hole 1 m deep, 1.8 m in diameter (when planting large cedars, the diameter is larger).
- Fill the hole with a mixture of fertile soil with sand (if the soil in the area is clayey), if the soil is sandy, sand is not required.
- Top with 10 buckets of compost and dig carefully.
Top 20cm. the soil layer should be light fertile sandy loam (to provide air access to the cedar roots).
- Carefully remove the seedling from the container (pre-compress the walls of the container - it will be easier to remove the soil lump).
- Straighten the twisted ends of the roots of the seedling without destroying the soil clod.
- Place the roots of the seedling in a bucket of water (the roots should not dry out when planting).
- Form a cone of soil in the upper part of the planting hole and carefully spread the roots of the seedling along it.
If the crown of the cedar is asymmetrical, the less developed side is located to the south (in the south direction, the branches grow faster, and the crown will even out).
When planting large seedlings, drive a strong stake into the center of the pit and tie the cedar stem to the stake with a fabric tape (“eight”).
- Cover the roots with soil and compact the soil with your hands.
- Form a ring of soil around the planting hole and water the seedling abundantly (about 5 buckets of water).
- Mulch the soil surface with compost (after the water has been absorbed into the soil).
The soil in the pit will settle by 8-10 cm, so plant the cedar in a small mound so that after precipitation - root collar was at ground level.
On the damp areas, with high level groundwater, cedars are planted in bulk areas, 0.4-0.8 m high, with a diameter of at least 3 m. The soil is pre-dug with the addition of compost and sand (if the soil is clayey). Brushwood is placed in the sites (supply of cedar nutrition, improvement of soil structure). Along the edges - it is desirable to lay layers of turf (protection against soil erosion).
The active part of the root system (small suction roots) of the cedar is located directly under the forest floor. Therefore, when planting cedar, it is imperative to mulch the soil surface to maintain high fertility and good aeration of its upper layer. The best mulch is hardwood forest floor. In such a substrate, the activity of soil animals and microorganisms is active. It contains the mycelium of fungi - symbionts that improve the mineral nutrition of the Siberian pine and protect its root system from pathogens of the root fungus and other diseases.
A layer of mulch retains moisture in the upper soil layer, which is especially important when growing cedar on light sandy loams, and on heavy clay soil protects its root system from squeezing into winter period. It is necessary to add a layer of mulch annually to stimulate the formation of adventitious roots in the cedar, which enhance its growth.
During dry periods, cedars are required to be watered to maintain the moisture content of the topsoil. It is also desirable to periodically spray the crown of young cedars with water in the evening to remove dust and improve gas exchange through the stomata in the needles.
The soil under the cedars cannot be dug up - the roots will be chopped off (loosening only its upper layer is permissible).
You can’t remove side branches from a cedar (the more needles, the faster the cedar grows).
When small cotton balls appear on the needles (under them are small Hermes sucking aphids), wash them off with a strong stream of water and treat the shoots with ACTELLIK.
Trees and shrubs should not shade cedars. On the open space cedar forms a decorative spreading crown, is resistant to wind and snow, begins to bear fruit earlier and is more productive.
Cedar is a self-pollinating breed, but for the best cross pollination it is advisable to plant not single trees, but groups of 3-4 trees (at a distance of 8-20m from each other).
Details about the Siberian cedar and the features of its cultivation are on the author's website "Growing Siberian cedar in central Russia" http://kedrovik.forest.ru.
Below are my detailed step by step recommendations planting cedar.
Planting a seedling of Siberian cedar
Notes:
The root system of the seedling should be placed within the upper fertile soil layer on the site (about 20 cm). In the zone of the root system and above it there should be a light fertile sandy soil(to ensure air access to the roots of the seedling).
During the growing season, it is necessary to feed the seedling 3 times with a solution of potassium sulfate - 20g / 10l. water (water around the near-stem circle, consumption - 10 liters per seat).
Top dressing - at the end of May, June and July. Nitrogen fertilizers can be applied only one year after planting.
Regular watering is necessary in dry weather so that the top 5 cm layer of soil does not dry out.
Mulch - forest floor prepared under alder, birch, or hazel (mowed grass can be used). The soil in the pit will settle by 8 - 10 cm, so the seedling should be planted in a small mound (taking into account the sedimentation of the soil).
Planting Siberian cedar.
Photos were kindly provided by the customer Troshin Igor Mikhailovich.

Photo 1. Cedar removed from the container

Photo 2. Landing pit depth - 1m, diameter - 1.8m.

Photo 3. Fill the planting hole with a mixture of the top fertile soil layer with compost (if the soil is clayey, add sand to the mixture)
The mixture, when filling the pit, constantly moisten so that there are no voids.

Photo 4. Fill the upper part of the planting hole with fertile sandy loam (lighter fertile soil) and form a gentle cone of soil.
The planting hole must be prepared in advance, 2-3 days before planting the cedar, so that the water soaks into the soil and the soil settles!

Photo 5. Set the cedar soil clod in the center of the planting hole, release the twisted ends of the roots (without destroying the clod) and spread the roots over the cone of soil.

Photo6

Photo 7. After the water has been absorbed into the soil, mulch the soil surface 3 cm. a layer of compost and, additionally, 5cm. a layer of cut grass (to retain moisture in the soil)

Photo 8. Pieces of turf can be laid along the edge of the planting hole.
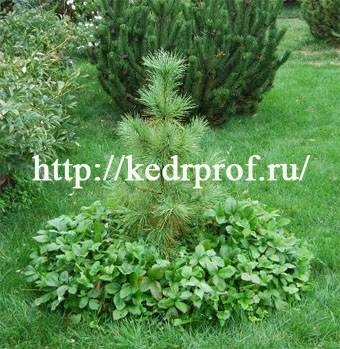
Photo 9. Cedar - a year after planting.

Photo 10. Cedar - 3 years after planting.
I wish you success in growing these wonderful trees.
Sincerely, Candidate of Agricultural Sciences Ageev Alexander Borisovich.
Siberian cedar is the abbreviation for the Siberian cedar pine. In nature, this powerful plant reaches a height of 35–40 meters, with a spreading tiered crown and a trunk diameter of up to 2 meters. The tree can rightfully be proud of its frost resistance, it can withstand cold temperatures down to -55 degrees. In comfortable favorable conditions cultivation, the plant lives up to 600-800 years, grows well in the territory of the central strip of Russia and Siberia.
For landing on suburban areas most often, seeds and seedlings of undersized varieties are used - they are no less decorative, and the aroma of their needles is just as useful as essential oils tall grandparents. The most popular of them are: Record holder - with a dense crown in the shape of a ball, and Icarus, which has a pyramidal crown.
Collection of cones and preparation of planting material
The Siberian cedar has inflorescences of both sexes on the same tree: shoots of male cones are located at the base of the growth in the central part, and female ones are at the top of the crown. Flowering time: May-June. From the moment the buds are formed, and until the full ripening of the seeds, a year and a half passes.
The ripening of cedar nuts consists of several stages:
- 1. In late spring - early June, ovules form on the tree, they bloom and pollinate. Seeds are formed during the summer.
- 2. Throughout the year, the ovules store pollen and gradually become a pine cone.
- 3. Overwintered winter cones actively develop from the beginning of the next warm season and by mid-July grow up to 6-8 centimeters in length, the yellow color changes to brown-brown.
- 4. In September, the ripening period comes to an end, brown cones with an oily nucleolus become dry, and the seeds are easily separated from the scales with the intention of finding a place to grow. Ripe specimens fall to the ground at the slightest blow to the tree trunk.

Ripening dates can be shifted by a couple of weeks depending on the region, climatic conditions and the condition of the tree.
The seed method of reproduction of cedar is a very laborious and very long process. In order to germinate nuts and successfully grow new ones from them, capable of independent life under open sky seedlings, it will take several years.
Collect cones for further landing seeds can be harvested in autumn or spring, when the collection of padanki, which have fallen from the tree on their own, takes place. After that, shake the nuts out of the cones, place in a container and pour hot water(not boiling water).
After an hour and a half, the seeds will need to be gently rubbed in your hands to wash off the resin and substances that prevent germination. The liquid after such a procedure will become very dark, it must be drained. These actions: pouring and washing the nuts are repeated until the water stops taking on a dirty shade - about a day.

The next day, the seeds are already sufficiently saturated with moisture, and the most mature of them will sink to the bottom of the container. They will serve as good planting material in the future. If planned spring planting, then the nuts, without drying, must be placed in glass jar with wet moss or river sand, filling it no more than 2/3. Holes must be made in the lid for oxygen access. In this form, the seeds are ready for stratification - cold treatment, by placing them in a cellar or refrigerator for 2-3 months.
After this period pine nuts should hatch - their shells crack and a small white root appears, then they can be germinated. Some experienced experts advise soaking the seeds for 30 minutes before sowing in a weak solution of potassium permanganate in order to protect them from fungus infection and stimulate sprouts.
Planting and growing cedar at home from seed
In order to grow cedar at home, it is important to follow the step-by-step instructions that describe the stages of development of young plants of this species. A pre-steamed substrate is poured into a prepared flower pot or container: either peat and clean river sand in a 1:1 ratio, or soil for conifers. The seeds are deep enough to top part shells were placed at ground level. Landings are well watered and covered with glass or plastic wrap to create greenhouse conditions.
Nuts can be planted both in separate small pots or cups, and in a common spacious pot - cedar grows for a long time, and plants will need to be transplanted into individual containers only after 3–4 years, when they reach a height of 15–18 centimeters.
On average, if the preparation of the seed was carried out in accordance with the recommendations, the seeds germinate after a few days. It is very interesting to watch the seedlings of cedars: the sprout gradually straightens up and throws off the shell it no longer needs, turning into a miniature "palm tree". It is important to understand that cedar seeds never germinate all at the same time, you can judge the percentage of germination after a month. Usually about 25–30% of planting material emerges.

Shelter in the form of a film or glass is removed from the pot after about 7-10 days, watering is done as the surface of the substrate dries.
Another no less popular and well-established way of planting cedar seeds is the germination of nuts in wooden box or a box with sawdust and needles. The height of the container should be about 25 centimeters, holes for excess moisture are required at the bottom.
Cedar pine seeds deepen into the substrate by 5–10 millimeters at intervals of 10–15 centimeters from each other. Top fit thin layer peat to maintain moisture. For the winter, the box is placed on the balcony or on the street.
Care of seedlings and their subsequent transplantation
Cedar sprouts do not require much attention, they only need to moisten the substrate and maintain temperature regime: room temperature in summer and cool in winter. It is useful to feed one-year-old seedlings with natural immunostimulating agents - nettle infusion, for example.
Then you can try to grow a wonderful tree from seeds. A little effort - and you can get a wonderful seedling. Our article will tell you in detail about how to plant a cedar from a nut. Follow all the recommendations, and the result will definitely be.
First option
There are several different ways how to grow a cedar from a nut. In any case, seed stratification is required - this means that they need to be kept at a low temperature for several months. If you are going to grow cedar from a nut at home, then you need to imitate natural conditions in which this tree grows. If you received seeds in late summer or early autumn, then you should simply plant them in loose soil - then you will get seedlings next spring. Of course, only if planting material qualitative.
How to grow a cedar from a nut? Second option
This method resembles the forcing of bulbous tulips).
First you need to prepare the land (or buy ready-made). Ideally, it should be a mixture of sawdust and sand. Place the seeds in the prepared soil, moisten it a little with a spray gun and put it in the refrigerator (on the bottom shelf), where the seeds should spend at least three months. As the soil dries, you need to moisten it a little, but not much. After three months, the seeds are removed from the refrigerator (it is better if this happens in the spring) and treated with a non-concentrated solution of potassium permanganate. They must spend two days in the solution. follows in a prepared mixture of sand and sawdust.
How to grow a cedar from a nut? accelerated method
If you can't spend three months, then you can apply the accelerated stratification method.

But in this case, it is necessary to strictly observe step by step instructions only then can you expect results. The quality of the seeds is also very important - they should be clean and ripe pine nuts, with a pleasant smell and without traces of mold or any other suspicious spots. Gnaw a few pieces from the batch you are going to sow - you should smell the cedar aroma and see the clean, firm flesh in each nut. Hustle the seeds, wash warm water(you can rub a little with a soft toothbrush - this will clean them of resin, and it will be easier for moisture from the substrate to get inside the seed). After preparation - the stage of direct stratification. The seeds are placed in cold water. Its temperature should not exceed zero degrees. They are kept in this state for three or four days. It is necessary to monitor the temperature of the water - it should not heat up, otherwise everything will go down the drain. This can be achieved by periodically adding, for example, ice cubes. Carefully monitor the container in which your nuts are placed for stratification. You will see that some of them will sink to the bottom. This is very milestone. The fact that the nuts sink to the bottom of the container means that they are suitable for planting. The bad ones stay at the top. There will be about half of them. Take out those that have fallen, plant them in the prepared soil mixture (its temperature should be equal to fifteen degrees Celsius). Now you know as many as three ways to grow a cedar from a nut.
Hello reader!
I am opening a new section with this article - trees. I want to tell you how to grow a cedar (officially - a cedar pine) myself from a nut. Cedar – unusual tree, everything is healing in it - bark, needles, wood, and, of course, fruits - cedar cones.
Growing cedar from walnut

Ways to get a seedling
- Sow in the fall in the ground;
- Sow in the spring;
- Plant in cups at home.
I'll tell you more about everyone. But first you need to prepare the nuts for planting - wake up the sprouts. It's called a terrible word - stratification .
preparing the ground
Now we are preparing the ground for planting. Where do cedars grow? In taiga. The earth there is rotted needles and leaves. Therefore, in the ground where our cedars will grow, be sure to add the ground from coniferous forest(from under the pines, firs, cedars), otherwise they may simply not ascend.
Landing

The nuts are ready, the ground has been prepared - you can finally start planting. I tried all the landing methods, I will tell you about all in detail.
Planting in the ground in autumn
The easiest way - 2 in 1 - is to plant in the fall in the ground. It is not for nothing that it is called “2 in 1” - and we are going through the stratification, and the nuts are already in place (we are waiting for shoots!) Shoots will appear somewhere in early June. We follow it like a regular garden bed: weeding, watering, loosening. To reduce all these procedures, we mulch small cedars.
Of course, not all nuts will sprout, some will die, others may sprout in another year, keep in mind. Of those that have risen, not all will become trees - you still have to survive the summer and winter. Conclusion: plant more nuts!
Planting in the spring
We plant in the spring in April-May after stratification. We choose beautiful, healthy, already hatched nuts. Remove spoiled ones (black, moldy). Shoots are expected in June-July. This year I planted half a glass of nuts in this way - not a single one came up!
Why? They went through stratification well - they sat in a snowdrift for 3 months and when planting, there were nuts that had already hatched. We had rain all summer and it was cold - I'm afraid they're rotten. And I didn’t prepare the ground in the garden for them (I myself learned about needles in the summer!), I planted them in loam - this is the result - the sprouts could not break through the heavy, rain-beaten ground. Of course, I could describe how well everything has risen and is growing by leaps and bounds. And soon I will collect cones from cedars in buckets. But I want you not to repeat my mistakes, but to do better and more correctly. So that your cedars are sure to rise.
In cups
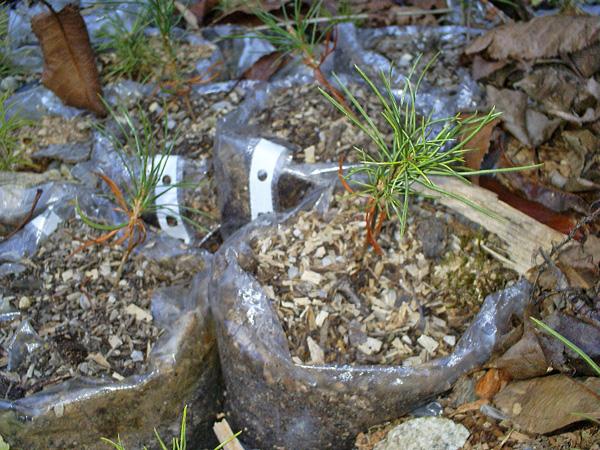
We got to the third method - plant in cups. It's all just pick up a flower pot of about 1-1.5 liters, prepare the ground and plant a nut to a depth of 3-5 cm. Water regularly, but do not flood. My experience of growing cedar at home was also unsuccessful. Kedrick rose, but then withered - I'm afraid I flooded him. I didn’t try to plant more at home, I sow immediately into the garden in the garden. But this good way for those who live in an apartment. Not everyone has a garden at hand. What do you all wish!
Caring for young cedars

I think we figured out the landing. It is important to keep seedlings after appearing! If you sow nuts on sunny place, then transplant the cedars in the shade or shelter from direct sun. Of course, it is better to choose appropriate place, but just know that as long as they are small, they tolerate the transplant normally.
In dry weather, be sure to water. Imagine for yourself how they grow in the Siberian taiga. High humidity + shade. While the sprouts are small for the winter, cover them with leaves.
Cedars grow very slowly. They will continue to grow up to 80 years. Well, the first cones, perhaps your children will try. Although I read that the first cones grew at the age of 25, but officially after 35-50 years. But still, the cedar on the site must be planted. It's great if you nurture and cherish him from birth. He will take care of you. Believe!
I wish you good luck)
Useful videos about growing cedar from nuts
If you like to grow plants from seeds and nuts, then I recommend reading:
- How to grow hazel from a nut
- How to grow an oak tree from an acorn
- How to plant a tangerine from a stone
- How to grow mango at home from seeds
Sincerely, Sofia Guseva.
We also recommend
 Hero pioneers in the Great Patriotic War Heroes of the Patriotic War pioneers presentation
 Presentation "Formation of posture in preschool children Hygiene of correct posture presentation for children
 Sciences of the human body
 Presentation "history and prospects for the development of robotics"
 The value of the struggle of Russia with the Polovtsy
 Asia and Africa after World War II