Reproduction of room gloxinia leaf. All about breeding gloxinia at home
Gloxinia - beautiful flowering plant. It has very large leaves that are great for vegetative propagation. Do you need a young gloxinia? Proper care at home and competent reproduction from specialists in the photo will help you get a young flower without resorting to the services of a flower shop.
Gloxinia - care and reproduction at home. Photo instruction
For propagation of gloxinia, healthy, bright green leaves without defects are selected. For successful work you need to take:
- new, clean blade. Leaves will rot from an old blade;
- directly gloxinia leaves;
- plastic cups;
- substrate;
- film or plastic bag.
How does gloxinia reproduce? Proper care and reproduction with photo instructions from specialists.
Training planting material . To begin with, prepare planting material. This requires a healthy plant. If gloxinia leaves are covered with spots or diseases, they are not suitable for propagation. If the leaves are large, they are divided into several parts. For this, a new blade is used. When cutting, do not press the leaves with your hands, as you can transfer the channels and pores. As a result, the leaf will rot.


All prepared material is suitable for planting. On each part of the gloxinia leaf shown in the photo, the result will be a tuber.
Is it necessary to reproduce gloxinia in water? Some growers to get young plant, carry out the rooting of parts of the leaf in water. How to do this is shown in the photo below.

To do this, about 1 cm of boiled, settled water is poured into a plastic cup. A cutting or a piece of a leaf falls into the water by 1 cm. However, rooting gloxinia in water is fraught with rotting of the planting material, and therefore the leaves can be rooted directly in moist soil.
Choosing a soil. In order for the propagation of gloxinia by a leaf to be successful, a light, loose soil is chosen that prevents stagnant water. A large number of nutrients not needed for seedlings. In addition, too fertilized land can harm the planting material. For planting suitable soil for seedlings with a neutral pH. It is possible to use a peat tablet. Vermiculite is added to the usual soil mixture. It gives the soil friability and saves the stalk from dehydration.
Tank preparation. To propagate gloxinia with a leaf at home, you will need plastic cups. The photo shows drainage holes at their bottom. The holes will prevent the accumulation of liquid, and consequently, the decay of the cuttings. For the same purposes in flower shops special small pots are bought. They are shown in the photo.


There are options for planting gloxinia leaves in a peat-humus tablet.

The soil in the pots must be moist. Next, each container is placed under the greenhouse. To do this, you need a regular plastic bag. Cuttings that are under the film should be watered as needed 1 time per week. The greenhouse is ventilated at the same frequency. In this state, the cuttings are up to 1 month.

If there is a lot of planting material, special plastic containers can be used to plant it. How gloxinia is cared for and reproduced in this way can be seen in the photo.

Holes are also made in the bottom of the tank, then drainage (expanded clay) is poured. It is covered with previously prepared soil. At the corners of the container are installed wooden sticks. They will serve as a support for the greenhouse. Polyethylene is wound on wooden sticks.
What happens as a result is shown in the photo. Thus, gloxinia will easily take root, and care and reproduction at home are much easier.

We choose a place for rooting. To reproduce gloxinia leaf cuttings was successful, the prepared greenhouses are placed in a warm place where the air temperature lies within +19 ... +24 degrees. The plant needs light, but not direct sunlight. The best option there will be windows on the west or east side.
When shoots appear. If the care and reproduction of gloxinia at home went correctly, then the children appear after 1.5 months. With the advent of the first children, the greenhouse is removed. If rooting was carried out with a leaf with a cutting, then the children appear from the base of the cutting already with a root system.

When rooting was carried out with part of the leaflet, then the children can appear from anywhere: from the top or bottom of the cutting. The photo shows gloxinia, the care and reproduction at home of which was carried out by part of the leaf.

Such children need to be carefully cut and re-rooted in the ground. How to do this is described above.
In some cases, tubers form on rooted gloxinia leaves, as shown in the photo.

Each tuber is cut off with a sharp blade and planted in a container with nutritious, loose soil. In this case, the top of the tuber cannot be sprinkled with earth. Further planted tubers and children should receive appropriate care, like an adult
Gloxinia is a gracefully flowering indoor plant popular among flower growers. It won love amazing beauty that gracefully fits into every interior. This flower conquers everyone with its amazing and unique brightness, sophistication.
Gloxinia. Appearance
A houseplant is a perennial that has tuberous rhizome. The stalk of gloxinia is short with large succulent leaves in the form of an oval, and a juicy green color. The flowers are bell-shaped, large enough, arranged on long stalks. Their structure can be terry, semi-double and even with wavy petals. The flowers have a different monochromatic color, as well as with different color transitions. Gloxinia, or, as it is called in another way, synningia, has a fairly large variety of varieties that differ in the size of the flowers and their color, in the height of the stem, in the color of the leaves. The most popular varieties of home flower:
- Gloxinia Avanti differs from other varieties in its large flowers bright colors that bloom together. The leaves of this synningia are dense and relatively small.
- Gloxinia Hollywood is widely known for its large uniform purple flowers.
- Gloxinia Brokada is just the perfect gift for the grower. Sinningia of this variety with a low stem and beautiful double flowers. So that after the acquisition the plant gives pleasure to the florist with its lush bloom you need to know how to care for gloxinia at home.
How is the flower cared for?
Gloxinia. Home care
Like all indoor plants, synningia has certain care requirements that flower growers follow.
Lighting and temperature
 Gloxinia, the photo of which can be admired below, loves space and diffused, but bright light, which should last at least 14 hours for her (for this, you can additionally turn on a fluorescent lamp at night). To find out if our beauty has enough light, you need to pay attention to her leaves: if they are located horizontally, then there is enough, and if they stretch upwards (towards the light), then there is a lack of it. But we must remember that the direct rays of the sun falling on indoor plant can destroy him.
Gloxinia is afraid of drafts, so putting on the windowsill home flower, do not open windows frequently. Sinningia does not need to be sprayed, because this home flower will not tolerate moisture on the leaves. But at the same time, a houseplant needs high humidity, this can be achieved by leaving a container of water on the windowsill next to a pot of gloxinia.
During the period of growth and flowering for synnengia room temperature required only in winter when home plant is at rest, it is necessary to provide a temperature of about 10 0C. If you look at the leaves, you can determine the problems of the plant (if any). Signs by which gloxinia show their temperature preference:
- if the leaves are omitted, then the houseplant is cold;
- if the leaves are raised up, then this is an overheating of the home flower.
Therefore, when a problem is found, it must be fixed.
Synningia blooms in May-June. When this period ends, the stems and leaves should be removed from the houseplant, leaving only the bottom 2 or 4. Then stepchildren will appear in the axils of this pet, only a couple of resistant ones should be left, and the rest should be removed.
Watering gloxinia
It is necessary to moisten synningia with slightly warmer water. room temperature. At growing season plants, watering should be carried out in a saucer or from above, but at the same time, so that drops of water did not fall on leaves and flowers. Water only when upper layer the soil is dry. By the end of summer, it is required to water less often, so that by mid-autumn the synningia enters a state of rest.
Top dressing gloxinia
The main rule for growing this plant is that an excess of fertilizer will cause more harm than their disadvantage. Gloxinia is fertilized once every 10 days with a specialized complex.
In preparing a home flower for a dormant state, the plant should not be fed. If you do not carry out top dressing at all, then the flowering will be short and small, and the colors will become pale.
After a dormant period, a houseplant can be fertilized with special mixtures for rapid growth, during the flowering period, synningia fertilize to improve flower quality.
Gloxinia transplant
 Care should be taken more carefully after a period of rest, as a rule, this occurs at the end of winter. A houseplant needs to be repotted once a year. It is better to purchase the soil in special stores or prepare it yourself from leafy soil, humus, in a ratio of 2: 1, respectively. When transplanting, you need to take a larger container for a home flower than before, lay drainage there, as well as a layer soil mixture, and then shift the earthen ball with gloxinia, sprinkled with soil, tamp. Synningia should be transplanted carefully so that the tubers are only half in the ground.
Gloxinia. reproduction
A houseplant can be propagated in various ways, of which there are quite a lot. But the choice of method primarily depends on the variety of synningia. Therefore, when purchasing a houseplant, it is necessary to recognize its variety, so that later it can be propagated with high quality. Methods for propagating room gloxinia:
Reproduction by seeds.
In special stalls you can buy any variety of room gloxinia. Better for self landing choose seeds in granules. The packaging will say when they will germinate, but it is usually 4 to 6 months. And if sowing will be carried out in winter, then even more - up to 10 months.
For sowing gloxinia seeds, you can use ready-made greenhouses or make them yourself. To do this, you need to take a deep container with a lid, you need to put it there and soak the peat tablets, distributing the granules over them. To ensure ventilation of the seeds, it is necessary to make a couple of holes in the lid. Then put the finished greenhouse in a warm, well-lit room. The temperature of this room should be approximately 23°C. Moisten the soil only as needed. After the emergence of seedlings, it is necessary to wait until they get stronger so that they can be planted in a permanent container.
leaf reproduction.
For self-propagation of gloxinia with a leaf, you need to take the smallest leaf and cut it along the thickest veins, cut the petiole, leaving no more than 2 cm. For these manipulations, it is better to take a tool with a sharp blade so that the leaf does not rot. This prepared material should be planted in a container with moist soil, covered with a film until the first leaves appear.
Reproduction by tubers.
This type of reproduction is quite painful for the plant, so it is carried out extremely rarely. A healthy tuber is chosen; if rot is found on the tuber, it must be cut off. Then cut them up and treat them with charcoal for disinfection. Each of the pieces of tubers should have a process. Then these tubers are planted in containers with moist soil.
Reproduction by peduncles.
After the flowering period is over, the flower stalk must be cut off from the plant and placed in a container with water for the roots to appear. Then, too, land in moist soil and cover with a film.
Reproduction by stepchildren.
Place the shoot in water for the appearance of roots, then plant it in the ground.
Reproduction by cuttings
This is the most elementary and fairly popular way of propagating home synningia. During the formation of buds, you need to take a leaf cutting, somewhere 4 cm no more. If the leaf is wilted, then to restore it, it must be lowered into water, then put in boiled water with a temperature of up to 25 0C. Then, as in the previous methods, place it in loose, moist soil. A month later, the appearance of a tuber is already possible.
Problems in growing synningia
Having considered home care for gloxinia, reproduction, it must be remembered that, like any houseplant, it can destroy various diseases.
Diseases and pests of synningia
 Gray rot is the most well-known disease that appears on synningia due to improper care. Signs of its appearance are brown spots on the leaves of a houseplant. When treating, it is necessary to remove damaged leaf fragments and treat with a fungicide.
root rot. It is also quite common on indoor syningia. Signs of this disease appear on the roots of the home flower, they turn brown and the stem may rot at its base. The reason for the appearance on gloxinia is excessive watering or the water that moistened the soil was cold enough.
Black leg, late blight - these diseases are also detrimental to synningia. To do this, as a preventive measure, a houseplant should be treated with phytosporin preparations. If the disease has already manifested itself, then the home flower should be treated with a drug - fundazol.
Cyclamen mites. Unfortunately, these mites are difficult to detect on gloxinia. But, if there is a deformation and thickening of the leaves wrapped down, dried tops of the shoots, withered buds, then these are all clear signs of their presence on a houseplant.
Thrips. They can be found on gloxinia by light dots, spots that appear on its leaves. If they are not removed, they will dry out. In order not to destroy the indoor plant, it is necessary to transplant it by replacing the soil and treating the home flower with insecticides.
To avoid damage or death of gloxinia as a result of damage by pests or diseases, it is necessary to carefully examine the flower for damage and promptly recognize the cause of their appearance.
Problems with growing gloxinia and their solution
There are also such phenomena:

Sinningia can be safely called a fairly unpretentious home flower. Caring for gloxinia at home is quite simple, but there are some features that flower growers need to follow. And with due attention, the beautifully flowering gloxinia will smell fragrant on the windowsill of any living space.
Gloxinia care at home
Not so long ago, you could go into any house and see these unpretentious flowers on the window - gloxinia, or "glasses", as they are called by the people. And now these "charms" are quite popular among flower growers. The flower owes such a double name to the botanist and doctor Peter Gloksin and the scientist botanical garden University of Bonn to Wilhelm Sinning.
Gloxinia leaves are green, velvety, on juicy petioles, emphasizing the elegance of numerous flowers (up to 50 pieces). But it’s not only the beauty of gramophone flowers that is fascinating, but also the surprisingly soft smell of the gloxinia leaves themselves.
Gloxinia is a tuberous plant with a long daylight hours and requires very bright diffused lighting. It grows well on the east and west windows, on the north - the sockets will be pulled out, and on the south - shading is necessary (especially on hot sunny days).
Landing gloxinia:
Gloxinia tubers after winter dormancy begin to germinate in January-February. Until the roots appear, you need to transplant them into fresh soil with a deepening up flush with the ground.
Before planting gloxinia, it is advisable to soak (for 30 minutes) in a weak solution of potassium permanganate.
Gloxinia prefers wide, but not very deep containers. In a cramped container, it begins to bloom earlier. Place the pots on the windowsills and, as the earth dries up, moderately water the flower with warm water (slightly above room temperature), without hitting the growth point.
The soil mixture for planting gloxinia is prepared from leafy and soddy soil, humus, peat, sand (4:2:2:1) and a little sphagnum moss is added. Drainage is definitely needed, since the likelihood of root rot when overflowing with water is high.
Gloxinia care:
Gloxinia belongs to heat-loving plants. For normal development, she needs a temperature of 18-22 degrees. Air humidity - not higher than 50%.
Gloxinia feels great in the kitchen, where there is always high humidity, on a glazed balcony.
From April to early August, gloxinia is fed once a week with fertilizers for flowering houseplants (Belvito, Kemira Lux), which contain more potassium and phosphorus than nitrogen. The solution is prepared two to three times lower concentration than indicated in the instructions.
Reproduction of gloxinia:
Reproduction by leaf cuttings
Gloxinia leaf propagation is one of the easiest and most affordable ways.
Take young leaves only during the budding of the plant. The length of the petiole of the leaf is three to four centimeters. If the leaf is wilted, dip it in water - it will gain elasticity.
1 way

For the first time, "isolate" the cutting from the outside world.

2 way

Reproduction by part of a leaf

How to divide the tuber?
Well, now let's talk about the reproduction of tubers. This method is quite risky. Divided plants get sick for a long time. But it happens that there is no way out, and you have to share. How to do it right? How to care for planted delenok?

We propagate with peduncles
To propagate especially valuable varieties of gloxinia, you can also use faded flower stalks. The rooting technique is the same as for leaf cuttings. I note that simple gloxinia take root in this way without difficulty. But terry often rot. Therefore, their cuttings in this way require increased attention.
Mistakes in breeding gloxinia
It happens that when trying to propagate gloxinia at home, difficulties arise.
The most common problem is rotten rooted leaves. If 2-3 leaves are missing, it's not scary. But if all or most of it rots, then it's your faults.
- When planting the cutting, you pressed hard on it. You can't do this. It is better to make a hole in the soil with a stick, put a cutting in it and carefully compress the earth around it.
- The sun's rays fall on the greenhouse with rooted plants. Urgently protect the cuttings from them.
- Plants have little light. Amplify the lighting by moving the stalk closer to the window, or turn on the backlight.

Sunlight for germinated plants is very useful.
- The cuts are made with a poorly sanitized blade or simply broken off from the mother plant.
- Very hot or, conversely, very cold.
- Old leaves were taken for rooting. It is better to take leaves during the budding or flowering of the plant.
Storage of gloxinia tubers:
There are many ways to store gloxinia tubers:
- you can fill the go-shock with sand from above, do not pour, store in a dark place at a temperature of 10-12 degrees;
- clean the tubers from the ground, sprinkle with dry sand or shavings, store in the refrigerator in containers for vegetables;
- put pots with tubers in a dark, cool place, for example, under a bath, water 1-2 times a month, avoiding overwetting and drying out.
In order for gloxinia to be comfortable, good lighting, high air humidity, a properly selected soil mixture, shading (if necessary), moderate watering with warm water and top dressing, timely replanting, lowering the temperature during dormancy, keeping the plants clean.
Not so long ago, you could go into any house and see these unpretentious flowers on the window - gloxinia, or "glasses", as they are called by the people. And now these "charms" are quite popular among flower growers. How to make reproduction of gloxinia at home accessible even to a novice grower? I will try to tell you what methods of reproduction will help you with this.
These babies do not require increased attention for themselves.
Gloxinia breeding methods
There are several ways to propagate gloxinia:
- Leaf cuttings.
- Part of a sheet.
- seed reproduction.
- Tuber division.
- Rooting of the peduncle.
Let's consider each of these methods in more detail.
Reproduction by leaf cuttings
Gloxinia leaf propagation is one of the easiest and most affordable ways.
Take young leaves only during the budding of the plant. The length of the petiole of the leaf is three to four centimeters. If the leaf is wilted, dip it in water - it will gain elasticity.
1 way
2 way

Reproduction by part of a leaf

 If you are seriously thinking about, then this article is for you. Read useful information about various ways breeding begonias, choose the most suitable for you.
A flower that brings happiness to your home. How to grow dracaena at home without any problems, see.
seed propagation
This method is rather laborious. Care for seedlings requires especially careful. But the strongest and most viable can be called gloxinia grown from seeds.
You can buy seeds in the store, or you can collect from your plants. To do this, you need to pollinate a gloxinia flower with pollen from another flower and wait until the seeds ripen. So, the seeds are ready. Let's start sowing.

How to divide the tuber?
Well, now let's talk about the reproduction of tubers. This method is quite risky. Divided plants get sick for a long time. But it happens that there is no way out, and you have to share. How to do it right? How to care for planted delenok?
 find out Interesting Facts Oh, briefly and clearly about difficult processes.
We decided to replenish the aquarium, then for you. How to breed snails, what conditions need to be created for this.
An exotic plant - yucca - is quite possible to grow in an apartment. Enough self-confidence, a little skill and flower propagation.
We propagate with peduncles
To propagate especially valuable varieties of gloxinia, you can also use faded flower stalks. The rooting technique is the same as for leaf cuttings. I note that simple gloxinia take root in this way without difficulty. But terry often rot. Therefore, their cuttings in this way require increased attention.
Mistakes in breeding gloxinia
It happens that when trying to propagate gloxinia at home, difficulties arise.
The most common problem is rotten rooted leaves. If 2-3 leaves are missing, it's not scary. But if all or most of it rots, then it's your faults.
- When planting the cutting, you pressed hard on it. You can't do this. It is better to make a hole in the soil with a stick, put a cutting in it and carefully compress the earth around it.
- The sun's rays fall on the greenhouse with rooted plants. Urgently protect the cuttings from them.
- Plants have little light. Amplify the lighting by moving the stalk closer to the window, or turn on the backlight.
Sunlight for germinated plants is very useful.
- The cuts are made with a poorly sanitized blade or simply broken off from the mother plant.
- Very hot or, conversely, very cold.
- Old leaves were taken for rooting. It is better to take leaves during the budding or flowering of the plant.

For landing it is necessary to take the best of the best.
- Soil waterlogging. Gloxinia do not tolerate high humidity.
Flower growers about the reproduction of "glasses"
Gloxinia lovers speak differently about the methods of propagation of these cute flowers.
One grower writes:
“I tried to divide gloxinia tubers. As a result, all delenki rotted. It’s good that I managed to root the leaves, otherwise I would have lost my favorite varieties.
Another lover echoes him:
"Most reliable way quickly and efficiently propagate your favorite variety - cut the leaves with cuttings and put them in water. When sowing seeds, I received a lot of re-sorting.
Let's summarize. Gloxinia can be propagated in different ways.
The main thing is to follow the necessary conditions: heat, bright diffused light, use of mini-greenhouses. And then bright beautiful gramophones will delight both you and your friends.
More recently, these unpretentious "glasses" stood on the windows of most houses. Soft pubescent leaves and the "gramophone" opening one after another made the house very cozy. It was difficult to get seeds in those near times, therefore, the propagation of gloxinia at home was predominantly vegetative - leaves.
Gloxinia in our house
Gloxinia can be considered unpretentious plant. It is a tuberous plant of the Gesneriaceae family. It has soft hairy leaves, a shortened stem and velvety funnel-shaped flowers, the color of the flowers is from white to almost black, with or without a border, speckled or solid.
Gloxinia loves bright diffused light, but under the direct rays of the sun it can get a leaf burn, so we put it on a table near the window or on the east or west windowsill. one more good option for gloxinia, artificial light is illuminated - in this case, the plant develops well and will definitely not get burned. With a sufficient amount of light, the leaves of the gloxinia are dark green in color, arranged horizontally.
But in summer, with a day length of 14 hours or more, an excess of light is also possible, then the leaves of the flower turn yellow and fall down, arching towards the ground, and the flower stalks shorten.
For growing gloxinia optimum temperature it is considered 20 degrees of heat, and the flower itself shows whether it is hot or cold. When overheated, it lifts the leaves up to reduce the evaporation of moisture from the leaves, and when it gets cold or lacks watering, the leaves fall down.
Gloxinia should be watered with warm water, after the topsoil has dried, from above or from the pallet, but without getting on the leaves and flowers. For the same reason, gloxinia is not sprayed; it feels good in the dry air of the apartment.
Gloxinia blooms from March to October, sheds leaves in autumn, watering is stopped and the tuber is laid for “rest” until February in dry room with a temperature of about 10 degrees.
Variety of colors in the photo
Funnel-shaped flowers of gloxinia can be red with a white border. Modern hybrids with double flowers are very beautiful. 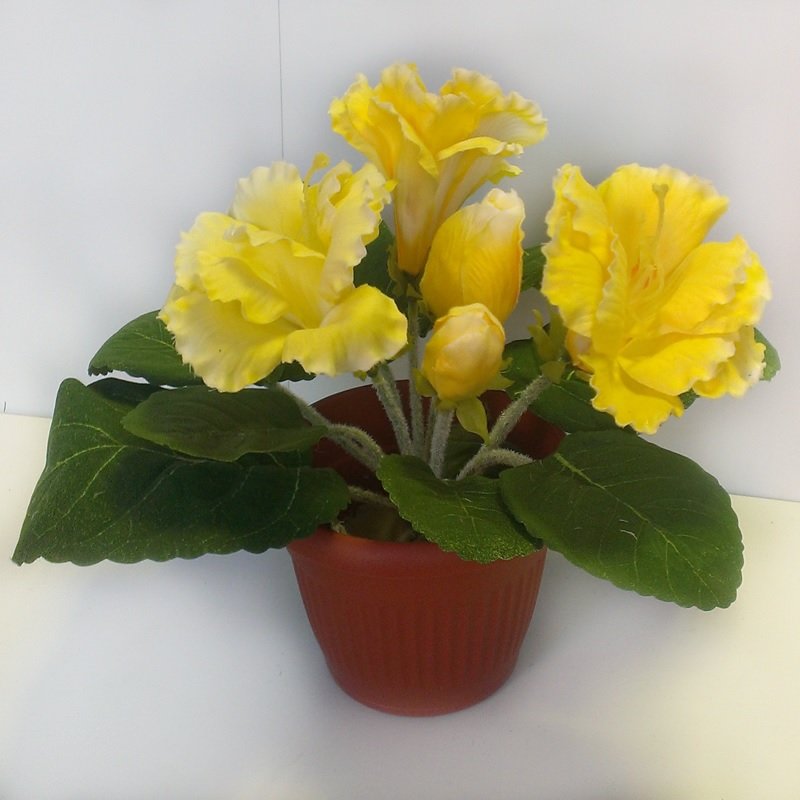 Yellow gloxinia are quite rare on our windows.
  Dark purple velvety flowers just want to touch
 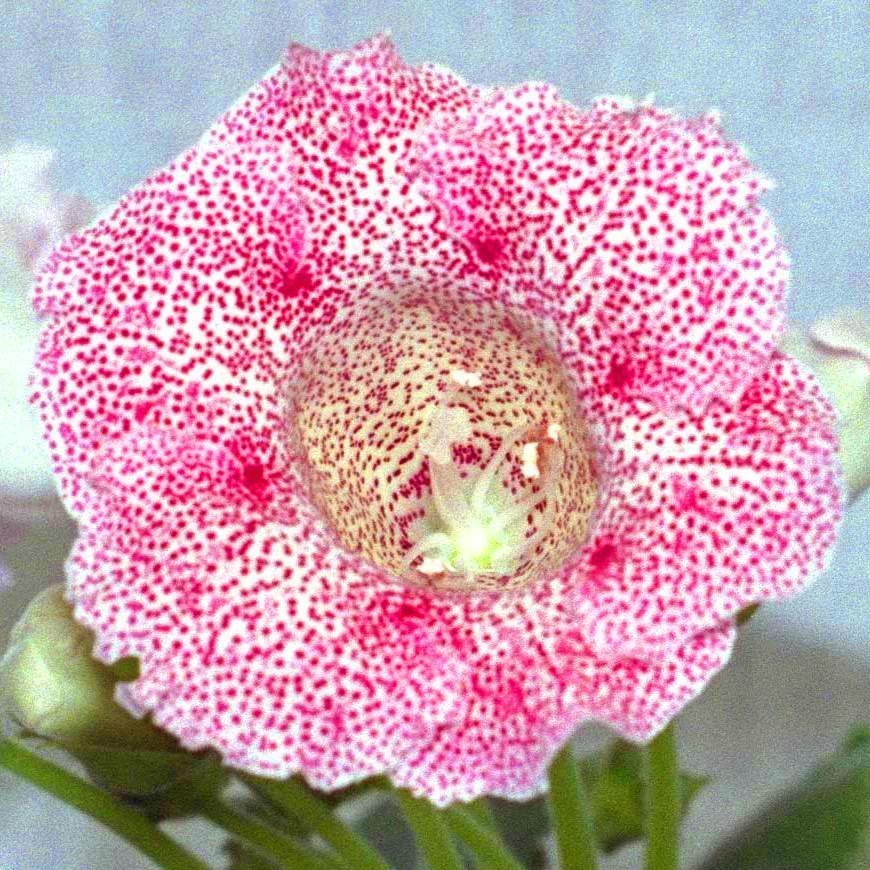 You can often find varieties of gloxinia with spots
Reproduction of gloxinia at home
Gloxinia perfectly reproduces by seeds and vegetatively - by a whole leaf or part of it, stem cuttings, peduncles or tuber division. Let's consider them all.
How to propagate by leaf cuttings or part of a leaf
The most common method of propagation of gloxinia is the rooting of a leaf cutting (leaf). Young gloxinia leaves that appear in spring and early summer have great vitality and take root more easily, so it is important to take them.
Spring and early summer are considered the best time for rooting, as the plant needs time to form a tuber and prepare for winter.
Leaf rooting can occur in water or soil. Professionals often use rooting in the soil, because it reduces the time to care for seedlings (no need to transplant from water to soil), in addition, plants immediately begin to receive food from the ground and develop faster.
Rooting in the ground
- FROM mother plant we cut the leaf with a sharp disinfected razor, the length of the petiole should be about two centimeters.
- Pour into a transparent plastic cup with drainage holes. ready soil for violets; can be rooted in pure vermiculite, but after the formation of roots, gloxinia will have to be transplanted into nutrient soil.
- We moisten the substrate, powder the cut with Kornevin powdered root stimulator and place the sheet there at an angle of 45 degrees. It is important to powder the planting material to a height of no more than 1 cm from the cut.
- You can stick it in a peat tablet, previously soaked in water.
- The stalk in a cup is placed in a mini-greenhouse or in a transparent bag to maintain humidity.
- Place the greenhouse on a bright, warm window sill, but not in direct sunlight. Soil temperature should not fall below 16-18 degrees. Once a day, the greenhouse is ventilated, and when the soil dries up, it is watered a little.
- After 1.5–2 months, a baby is formed at the leaf. If pieces of a leaf were used, then children can appear anywhere, they must be carefully cut and placed for rooting in a separate pot.
- Cuttings planted in perlite or vermiculite should be transplanted into soil for gloxinia or violets (saintpaulia).
- When a rooted leaf begins to interfere with the development of young shoots, it is cut off by treating the cut with charcoal.
We cut the cuttings from the leaf if we need to get a lot of kids. Each such piece will take root and give a baby.
Rooting leaves in water
- Cut a leaf from the mother plant.
- We divide the large sheet into several parts, as in the photo.
- Pour chilled boiled water into small transparent plastic cups and place pieces of leaves there. Make sure that only the bottom of the cutting is in the water.
- We cover plastic bag and put in warm place with a temperature of 20-25 degrees. We air once a day, opening the greenhouse for 2-3 minutes. If necessary, add water to a glass with a handle.
- After 1-2 weeks, the first roots will appear, and when they reach 1 cm, transplant into the ground.
- In small pots with holes we place drainage (very fine expanded clay) and nutrient soil mixture - loose, air and water permeable. You can use soil for violets.
- We water the soil and make a hole with a pencil about 1 centimeter deep.
- Gently place the roots of the petiole in the ground, sprinkle with earth.
- We cover the finished planted gloxinia with a bag, put it in a bright place and wait for the children to appear.
Further care for young plants comes down to regular watering, plants should be fed no earlier than a month after planting in the ground, provided that the seedling is well developed.
How to plant with seeds
If there is no plant for vegetative propagation, then you can plant gloxinia with seeds, especially since stores offer a huge number of hybrids of very different colors.
To obtain good seedlings by autumn, gloxinia seeds are sown in January - February.
- For better germination, take disposable tableware with a lid that will be a greenhouse for young plants.
- We prepare the soil for sowing: for 1 liter of peat-based soil, add 1 tablespoon of vermiculite or perlite and 1 glass of washed sand.
- Mix the seeds with sand and sow on the surface of the soil. Purchased seeds are usually coated, they are simply laid out without deepening.
- Spray with water from a spray bottle.
- Cover with glass, foil or lid.
- Put in a warm bright place. The air temperature must be at least 23 degrees.
- Periodically spray the soil and ventilate the greenhouse.
- Shoots appear for a long time, after 3-4 weeks.
- Do not remove the greenhouse for about a month, during which time the young gloxinia will get stronger and release several pairs of leaves. It is useful to transplant these small seedlings into individual cups.
- A week after the first transplant, you can gradually accustom the seedlings to indoor dry air, starting with airing the greenhouse for one to two hours a day and increasing air baths up to a day. If the plants do not wither, then you can safely remove the cover, but watering should be slightly increased, as moisture will evaporate faster.
- For the first six months of the life of seedlings, it is recommended to carry out at least 4 transplants to develop a powerful root system.
- After 8 months, the first buds may appear, they must be pinched off in order for the gloxinia bush to become more lush.
Getting Your Own Seeds
If you grow varietal gloxinia, and not a hybrid, then you can get your own seeds.

Seed setting weakens the flowering of gloxinia, so if you do not plan to receive seeds, then remove the faded buds.
How to propagate with a peduncle: photo lesson
In order not to throw away faded "gramophones", and at the same time increase the number of gloxinia, flower stalks can be rooted.
However, not all varieties and hybrids give 100% rooting in this way. Simple gloxinias take root best of all, and from terry - the Carousel variety, as well as pollinated flower stalks.

How to grow new flowers from tubers
Gloxinia can be propagated by cutting the tuber into several parts, each of which must have a growth bud. However, if this method fails, you may lose the entire plant.
- Take a healthy large tuber about 6 cm in diameter, it should have several sprouts, preferably grown by 1–2 cm.
- With a sharp, disinfected blade or knife, divide the tuber into 2 or more parts, with each part containing a sprout or bud.
- Slices anoint with a solution of brilliant green or sprinkle with charcoal. Air dry.
- Coat the dried cut hermetically with garden pitch.
- To prevent gloxinia tubers from rotting, it is necessary to lay 2–3 centimeters of expanded clay drainage on the bottom of the pots, then fill in light soil based on peat with the addition of sand and vermiculite (1 glass of washed sand and 1 tablespoon of vermiculite are taken for 1 liter of soil). It is better to take pots transparent, so that it is more convenient to follow the young roots.
- Moisten the soil and plant the cut tubers. The bud or emerging sprout should be level with the ground.
- Water rarely, through a pan or by immersing the pot in water to the middle. It is possible to transplant into large pots only after braiding the roots of the entire earthen coma.
Video - breeding gloxinia with leaf cuttings
Video - reproduction of gloxinia with a peduncle and leaf pieces
Features of reproduction of gloxinia in autumn and winter
Since adult plants hibernate and shed their leaves at the end of autumn, young plants can also fall asleep or dry out. In order for rooting in the autumn-winter season to be successful, you need to create summer conditions for the cuttings:
- Daylight hours up to 12–14 hours with the help of supplementary lighting
- The heat of the ambient air is 20–25 degrees - put in a greenhouse
- Minimal temperature fluctuations and protection from drafts
Breeding problems
Usually gloxinia take root very well, and if only one out of 10 has not taken root, this is a good indicator. But sometimes all the cuttings die due to improper care.
Decay of the cutting
- most common problem at vegetative reproduction gloxinia is the rotting of cuttings, both in water and in soil. Therefore, process the planting material for 1–2 minutes in a solution of chlorine: 1 part of whiteness and 10 parts warm water. After the procedure, rinse the leaves in running water and dry a little, then plant in the ground.
- Pressing the petiole when planting also causes rotting, so use a pencil when making holes in the ground or peat tablets when rooting gloxinia.
- Rotting from excess or lack of light - when exposed to direct sunlight or vice versa, when rooted in a dark room, seedlings rot.
- Infection - when cutting a cutting, a knife or blade must always be disinfected; it is absolutely impossible to break off the cuttings.
- Violation of the thermal regime - cuttings rot from too low and very high air and soil temperatures. Do not place the cuttings on a hot southern window or near the stove.
- Wrong planting material - sometimes leaves are taken as planting material, which are not a pity - old or diseased. Such cuttings will not take root. The best offspring will give only best cutting- young, healthy, cut during the period of budding and flowering of gloxinia.
- Wrong season - in spring and summer, gloxinia takes root more easily than in autumn or winter.
Rooted leaves wither
In a very large rooted leaf, evaporation is very intense, so often such a stalk withers. To avoid this, you need to initially plant small pieces of the leaf. But sometimes they also wither, there can be several reasons.
- Lack of moisture due to strong evaporation from sheet plate. Put the sprouts away from the sun and be sure to make a greenhouse out of a transparent plastic bag.
- Poor quality, too wet soil due to overflow.
- Damage to the roots after transplanting gloxinia, due to which the remaining roots cannot cope with the nutrition of the whole plant. Try to transplant very carefully.
- Excessive evaporation of moisture due to the large size of the sheet - cut off upper part leaf blade to reduce evaporation.
We also recommend
 The longest war in the history of mankind: history, interesting facts Theories of the origin of wars
 Chewing candies ROSHEN Crazy bee
 Picodi: All discounts in one place!
 What is important for an accountant to know about a special assessment of jobs?
 P \ 'five-year plans in the USSR All five-year plans of the USSR
 Scary statistics from the besieged Leningrad