What crafts can be made from wax. How to make a wax souvenir with your own hands? We make candles from wax or paraffin ourselves
In the old days, candles were cast in the so-called "watering cans" - molds made of tin or tin. Belarusian peasants used forms made of wood and tree bark. Siberians, on the other hand, used the hollow stems of local umbrella plants as molds for casting candles: angelica and cow parsnip. The stems of these plants were cut in autumn, when the ground parts of them were already dying off. Ukrainian peasants used hollow stems of hemlock for the same purpose.
Candles were poured from lard or natural beeswax. Now instead of natural wax, paraffin or ceresin is used. These waxy substances are called mineral wax. For casting figured candles, you can use household paraffin candles, stubs of used candles.
Candles are cast in metal, wood or plaster moulds. Metal (steel, brass, tin) is used if you need to cast a candle in the form of a cylinder, cone, pyramid or prism. The inner surfaces of metal molds must be well polished.
Only in this case, the finished candles will be easily removed from the mold, and their surface will become even, with matt gloss. Attach metal molds to wooden coasters. The manufacture of candles in metal molds is shown in figures a - d.
But the possibilities of metal molds are limited, only in plaster molds can wax casting of complex configuration be performed.
A plaster mold is made according to a plasticine, clay or wooden model, which is an exact copy of the future casting. Suppose you decide to use a wooden model.
Choose for it well-dried, homogeneous and without pronounced annual layers of wood.
Linden, beech, birch, aspen, alder are suitable for the model. If you will grind the model on lathe sand it down immediately with sandpaper.
The reliefs on it are cut with a joint knife, straight and semicircular chisels, and cranberries. Depending on the pattern of the relief, its size and configuration, the type of wood is selected. If it is supposed to apply a relief with large details to the model, then they use softwood linden, aspen or alder.
For small reliefs with fine details, only hard and homogeneous wood is suitable: birch, beech, etc.

The finished model must be made moisture resistant. After heating the model over the fire, soak it several times with hot drying oil. After about a day, you can cover it with shellac varnish. (Instead of shellac varnish, you can use oil and nitrocellulose varnish.) Screw a small screw into the end of the model, screw the wire to it, bend the free end of the wire with a hook.
Pour varnish into glass jar and lower the model into it. The varnish should flow easily from the model. (Thick varnish is diluted with a thinner.) Remove the model from the varnish and hang it over the jar so that excess varnish can drain into it. The dried varnish will cover the model with a thin, durable film. Once again dip the model in varnish, let it dry.
This operation is repeated until the surface of the model becomes smooth and shiny. The casting mold is made in a flask - a box with four walls and a bottom (Fig. 1).
Two end walls are tightly connected to the bottom with spikes and glue. Along the edges, grooves are made in them for thin side walls made of plexiglass or plastic. (You can also use thin plywood or cardboard impregnated with linseed oil.)
On one of the end walls, fix the model with a screw, insert the side walls into the grooves, then lubricate the model and the inner parts of the flask with a release agent or petroleum jelly - the gypsum dried after molding will not stick to the model and the flask walls.
A lubricant can be prepared from two parts by weight of stearin, melted in a water bath, and five parts by weight of kerosene. The mixture is thoroughly stirred until a homogeneous mass is formed. Lubrication is applied to the model and the walls of the flask with a brush or a rag swab.
Having finished with the model and the flask, you can start preparing the gypsum mortar. It is desirable to dilute it in rubber or plastic elastic dishes. From such a container, dried gypsum is easily removed, you just need to press on its wall. Pour into a container, or, as they say, plaster, clean water room temperature and start slowly, stirring constantly, pour gypsum into it until a thick solution is obtained.
The gypsum mortar sets quickly, therefore, after stirring the solution for about 1.5-2 minutes, pour it into the flask. Moreover, so that it fills the flask only halfway (Fig. 2). In this case, the lower half of the model will be in plaster. After about 8-10 minutes, the gypsum will harden, but not completely, it can still be processed with cutting tools.
Take advantage of this and with the tip of a scalpel, cut out halves of three or four conical indentations at the corners of the plaster. When pouring the second half of the mold, these recesses are filled with plaster and protrusions are formed on the upper half of the mold. You get a kind of lock that allows you to accurately connect the two halves. Shake off the resulting crumbs with a wide brush.
Now grease the top half of the mold with release agent. cook again required amount solution: it will take about the same amount as you used when pouring the bottom half of the mold. Pour the flask to the top (Fig. 3) after about 20 minutes, when the gypsum has completely hardened, disassemble the flask, separate the mold, free it from the wooden model (Fig. 4).
If the shape of the candle you have conceived is not very complicated and you only need to make two or three castings, then you can not strengthen the internal cavity of the plaster mold. But before pouring, it must be saturated with water. Then your new casting will easily separate from the wet mold. If you decide to make a lot of candles, you will have to cover the inside of the mold with several layers of natural drying oil. Gypsum will immediately absorb the first layer of drying oil.
Cover the form with two or three more layers of drying oil until a stable soft sheen appears on the surface of the plaster. Drying oil hardens during the day.
Cover the primed surfaces of the form with several layers of varnish - they will become smooth and even more shiny. Now the wax casting will easily separate from the plaster mold.
Before pouring the melted wax, insert a wick into the mold: fasten one end to a twig, tie the other in a knot.
It is best to use a thick linen or hemp thread for it, but you can also get by with bobbin cotton threads, twisting them together, depending on the thickness of 8-16 threads.
Tie the halves of the form with a rope (Fig. 5). Both artificial and natural wax melt at a relatively low temperature, such as hot water brought to a boil. Therefore, a conventional glue cooker is used to melt the wax (Fig. a). The wax is melted in a ladle dipped in a bowl of boiling water.
Remember: wax cannot be melted on an open fire. Firstly, its properties deteriorate from this, and secondly, it can catch fire!
The use of beeswax can be found in many areas, because it is not just a material from which honeycombs are built in beehives and from which candles are made.
Wax is an alternative to modern electric lighting. This article will tell you what it is, where it is used, and also about where it can be applied independently.
History and reasons for the application
People began to pay attention to the numerous properties of this product even when there was no mention of any professional beekeeping was out of the question. The priests of ancient Rome often used it during processes sacrifices. The Greeks used it as multi-million dollar the number of candles for the time of the majestic holidays dedicated to the gods.
In addition, it was used in writing - wax tablets, on which ancient people wrote before the invention of paper. This product adapted wherever possible: in business, at home, and even during sacred sacraments.
represents a truly extraordinary amazing a product that is a real storehouse of useful properties. Formed by young bees processing the nutrients they consume in their wax glands.
Its composition is unique: it contains at least 300 compounds. The structure is so complex that trying for a long time scientists have never managed to create wax artificially. However, the composition is not always the same: it depends on location bees and their habitats. Its hue ranges from pure white to dark yellow.
The more vitamin A it contains, the more yellow it has. This substance is necessary for bees to defend honeycombs, for the future raising offspring. It is also used by bees as a place to store the collected flower nectar. There are plenty of useful properties of bee material, because it is no coincidence that the scope of its exploitation is so wide. Main useful properties:
- is a natural preservative;
- contains antibacterial substances;
- helps with poisoning due to the fact that it is able to adsorb some toxic substances;
- has a special structure that allows you to give it any shape;
- It has a large number of useful substances that are not lost even when exposed to high temperatures.
Current usage
Nowadays given material obtained as a result of processing by bees nutrients, used in metallurgy, paint and varnish industry, leather production, medicine, printing, cosmetology and even in the aviation industry, not to mention the simple manufacture of candles.
 The osk was used in folk medicine as early as Hippocrates. Today it is used both in traditional medicine and in the medical industry. It allows you to heal skin diseases, calluses, microdamages skin .
It is added to ointments and medicated creams, shampoos, destined to improve hair, create medical patches.
Cosmetic corporations use product of bee production as an ingredient in a variety of products. It is added to all kinds of creams, anti-aging masks, styling products, sunscreens.
Cosmetic products with wax content it can be very different: rejuvenating, moisturizing, nourishing, softening, and also quite often wax is used in lip balms, lipsticks, foot and hand creams.
In the manufacture of creams, destined for protection and nutrition, manufacturers add wax for a reason, because the described ingredient is able to improve the skin not only visually, but also positively affect it, creating a layer that protects against harmful factors: radiation, pollution, and contributes to the conservation of moisture , thereby preventing aging .
How to use beeswax on your own?
This product can make various masks or add to cosmetics. It is recommended to use a wax containing a large number of vitamin A, which should indicate a shade. The more yellow it is, the better.
In the manufacture of various masks, it is necessary to take into account the type of skin in order to select additional components that improve the skin structure. So, for the fatty type as an additional component to the cream it is recommended to add lemon juice, and when dry - olive oil.

This miracle of nature, rich in useful substances, can improve the structure of nails: it must be applied to a previously cleaned nail plate, for example, by making thimbles from wax, or rubbed in, while affecting the cuticle. Dip your fingers in the melted wax and walk with it as long as possible. Thanks to this method, you will notice how the nail plate will improve and minor damage to the skin around will heal.
As for contraindications, there are none as such. However, an allergic reaction may occur.
DIY wax crafts
The use of wax in needlework - phenomena widespread. Here you can give free rein to your imagination: make all kinds of decorative candles, various figurines, Christmas decorations, flowers, decor elements.
Wax candles were made thousands of years ago. This is a necessary attribute in everyday life, an excellent souvenir that makes the atmosphere of any holiday magical. They can make a winter evening cozier, a date more romantic, and a significant date more solemn. This little thing can be not only a nice souvenir or an attribute used on special occasions.

And also to be a decorating object that perfectly complements the interior, making a modest setting richer, and also emphasizing the tone. Options with the addition of essential oils can be a truly miraculous remedy that has therapeutic, wellness and relaxation effect. With the right scent considered the subject can replace expensive relaxing procedures. In addition, a hand-made candle will be a wonderful gift for a loved one.
Every day, the popularity of such a type of needlework as the manufacture of all kinds of figurines of wax. It is especially pleasant to do this kind of art in winter. The material due to its unique properties allows you to give it any shape. In order to create a real masterpiece, which experienced craftsmen do, you will have to make a considerable amount of effort, however, everyone can do something cute, but at the same time original. For example , it can be flowers .

Flowers can be an excellent decorative element in the house, a wonderful decoration used for gift wrapping. There are many simple and difficult ways their creations. You can make a small composition or a large masterpiece, which includes big number fantasy plants.
How to make a wax candle at home
Do you want to present close person exclusive gift? Try to do DIY candles. Original products will not only become pleasant surprise, but also create a romantic atmosphere in the evening.
We make candles from wax or paraffin ourselves.
The easiest way to make a candle is from paraffin, since wax is a rather capricious material. You can buy paraffin for candles through online stores wholesale or retail.
In addition to the main raw materials, you will need:
- Wick (cotton thread).
- Weight for the wick (metal bolt or screw).
- Dishes for melting and creating a water bath.
- Candle mold.
- Essential oils.
- Dye.
- Decorative elements (dry herbs, flowers, ribbons, beads, etc.).

Paraffin must be cut into small pieces and melted in a water bath. Prepare the mold while the raw material is melting. You can take an iron beer can, baby molds or other containers with a smooth surface. To make the candle easy to pull out, the container is lubricated with vegetable oil.
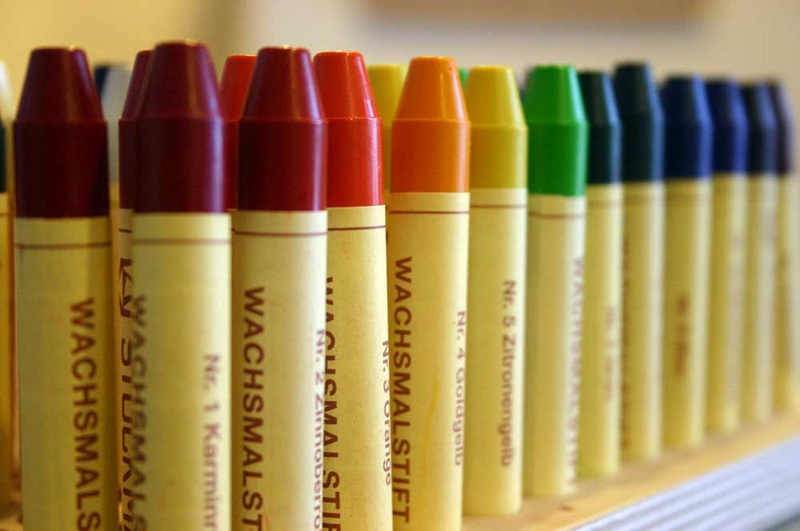
The wick is impregnated with molten paraffin and fixed in the center. Before pouring the melted paraffin, the mold must be heated. As a dye, it is allowed to use wax pencils, turmeric or artificial dyes. They are added to melted paraffin along with essential oils. Combining color, smell and shape, you can make orange, lavender and any other candle.
The candle should harden well, if it is difficult to pull out of the mold, warm it up a little or put it in the freezer for a short time.
The finished product is decorated with any decorative items. Do not forget to fantasize, decorate the candle so that there is no doubt that there is no such candle on store shelves.

Candles from cinders - quickly and profitably
If you need to make a gift with your own hands in a short time, use candle ends or new candles bought at a hardware store. Remove the wick and melt the raw material in a water bath. For a pearlescent candle, add eyeshadow and essential oil for a pleasant scent.
The further stages of work are the same as in the manufacture of candles from paraffin.
Carefully thought-out decor will hide any flaws in the product and give it an exclusive look. Candles handmade- Valuable to family and friends.
The candle has been a source of illumination since the 3rd millennium BC. At that time, only wealthy families could afford a candle. Today, this decor element can be found in any apartment. However, not every person knows that you can not only buy a candle, but also create it yourself. Let's get started!
To make a candle you will need:
wax or paraffin - (you can use household candles, cotton thread, a saucepan, a container for melting, various forms for candles, wooden sticks).
IMPORTANT! Wax hardens in 15 minutes, you need to work at a pace.
Master Class

- Put cotton thread in the center of the candle mold. On the wooden stick fasten the top end of the thread.
- Prepare a water bath and melt the wax over low heat.
- Pour wax into the bottom of the mold. Wait a minute for the thread to take hold.
- Fill in the rest of the mold with wax.
- Leave the candle for a day, then adjust the length of the wick.
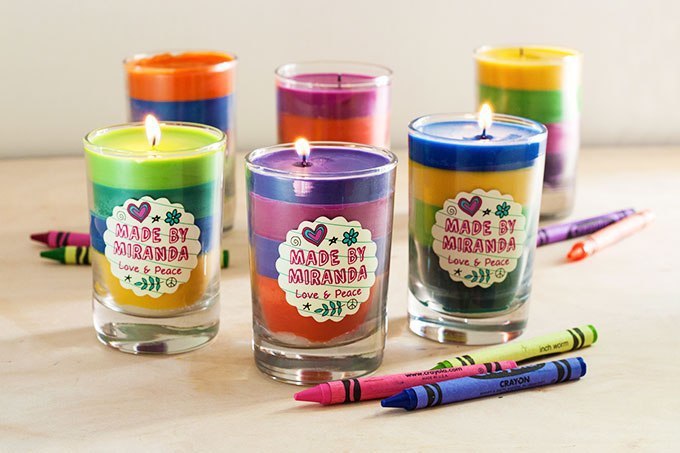
Multicolored scented candles
You can create such a multi-colored candle using the same technology as the wax one, only you need to add pieces of wax pencils before melting in a water bath. You can create a rainbow candle - for this, successively fill in the multi-colored layers.
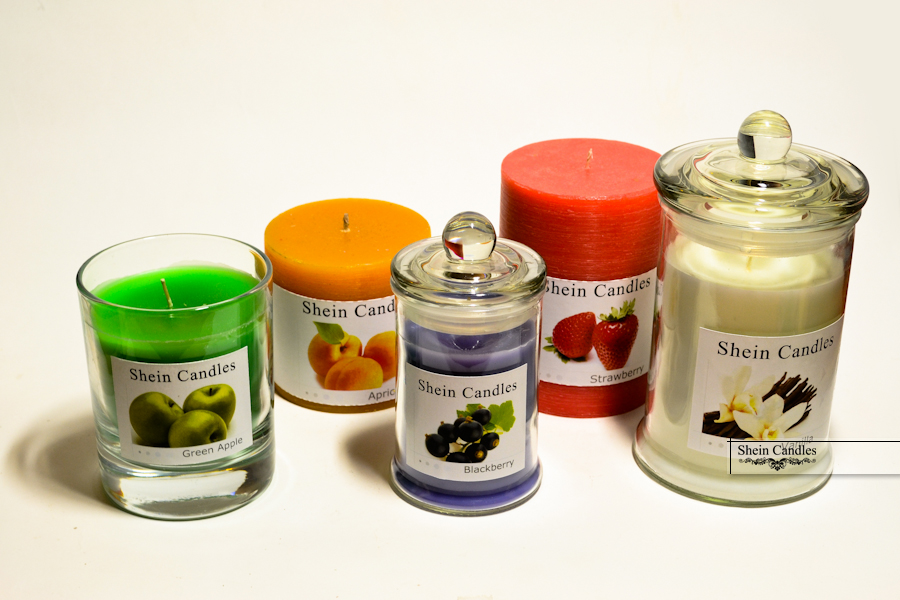
To make a scented candle, you will need essential oils. Add a few drops of oil before melting the wax.
To relax, use bergamot or lavender oil. An invigorating mood will give clove and orange oil. Perfectly relieves stress oil of cedar and lemon.
Clear gel candles

Manufacturing technology gel candle does not differ from the creation of wax. Only instead of wax you will need a special gel for candles (it is absolutely transparent). Thanks to the gel, you can create the unthinkable beautiful candles. Before pouring the gel, it is necessary to heat the candle shape to avoid lumps. The form must be transparent! At the bottom of the form, you can place beads, beads, shells, flowers and much more ... To get the effect of "hanging", add parts of jewelry (half) to the filled form (or on the surface of the gel candle).
fruit candles

You will need:
- wax or paraffin;
- four wicks;
- pot;
- melting container;
- two lemons;
- purple food coloring;
- lavender essential oil;
- dried flowers.
Master Class
- Cut the lemons lengthwise into two parts. Remove the pulp.
- Melt the wax. Add flowers, oil and dye.
- Attach the wick to the center of the lemon half. Fill with wax.
- Put the candle in a cool place for a day.
coffee candles
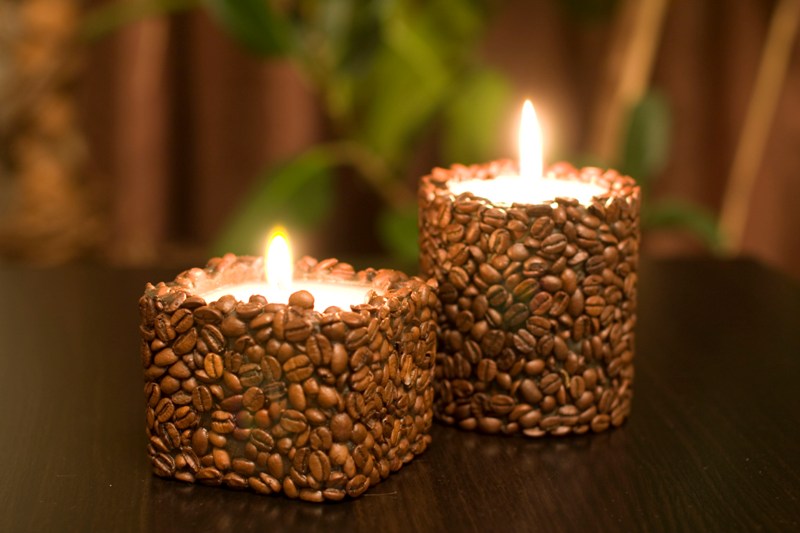
First option
To create an invigorating candle, you need to add coffee beans to the wax. Next, see the master class on making a wax candle.
Second option
You will need a ready-made candle, it remains only to decorate it with grains. You can stick them with glue or hot wax.
Third option
Take a candle and place it in a transparent wide container. Fill the space between the candle and the glass with coffee beans.
Fourth option
To create the most fragrant candle, add ground coffee to the melted wax, then see the master class described above.
Finished candle decoration

To decorate the finished candle, we need a photograph. Print the photo in such a way that the image is reflected on the tracing paper. Then separate the tracing paper from the paper. Cut out the image and wrap the candle tightly. Wrap wax paper over the top of the candle. Heat up the image with a hair dryer until it is crisp. Remove the wax paper and enjoy your decorated candle with a picture.
A handmade candle will always be a good gift which will be appreciated by your relatives, friends or colleagues.
We wish you success in creating a masterpiece that will decorate the interior and create comfort in your home!
We also recommend
 Smartphone xperia z5 premium black
 Download toilet paper business plan
 Description Nokia X2 dual sim on the Android platform, powerful processor and support for two sim cards
 Is it possible to open a hostel in an apartment?
 Services to the public: the most promising business ideas
 How to start farming?