Drawings nature conservation fire assistance puts out the fire. Draw a fire truck
April 30 is the professional holiday of firefighters. If you have friends in this profession, then a good gift can become a children's drawing of a firefighter, which you can do with your child. But how to draw a fireman?
Draw a fireman step by step
We will depict a firefighter at the moment of extinguishing a fire from a hose (a special hose for fire extinguishing).
- First you need to outline all the main parts of the firefighter's body, observing their proportions. This is the hardest part, so give this step more time. We outline a large head and body frame. We indicate the joints with dots, and the palms with ovals. We draw a horizontal line (in the future it will become a hose) through one of the palms.
- Departing from the skeleton of the body, we finish the necessary clothes: a jacket, pants, a helmet and shoes. Watch for proportions. The hose needs to be made more voluminous.
- We smooth the lines and give them smoothness. If necessary, remove the extra lines with an eraser. Draw a mask and add a balloon to the fireman's back.
- Using multi-colored pencils, draw reflective lines on the fireman's uniform.
- To give the image liveliness, draw the eyes and eyebrows under the mask. We add the necessary details to the helmet and balloon. We draw the relief of the air outlet tube. Add some folds to the clothes to make the image dynamic.
- Now our drawing is ready to be rendered in color.
Look online for fire uniforms and let your child apply the color. Such a drawing is best painted with colored pencils because of the many small details. Now you know how to draw a fireman step by step. Don't forget to frame your drawing.
Fire engines are specialized motor vehicles having on board the necessary equipment, both for extinguishing fires and for other assistance in emergency situations. These include: ladders, extinguishing vehicles, car lifts, cisterns and many others. A bright red color, a flashing beacon and a siren are designed to attract the attention of road users.
In this lesson we will look at how to draw fire engine different ways, ranging from the simplest for children, and ending with more complex, professional ones.
| Transport with stairs |
 tank truck |
 For kids |
 Rescue equipment |
 Putting out the fire |
Transport with stairs
Learning to portray a specialized vehicle equipped with a ladder is not as difficult as it might seem at first glance. To do this, you only need to follow the proposed sequence, which explains how to draw a fire truck in stages.
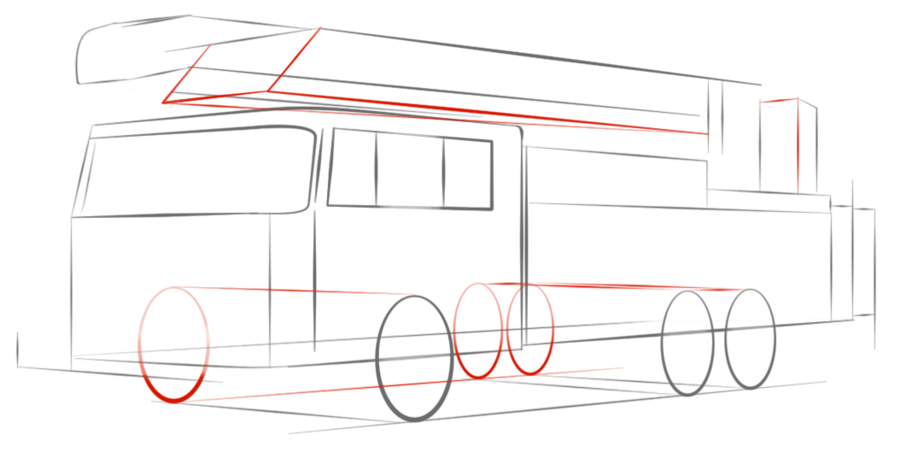
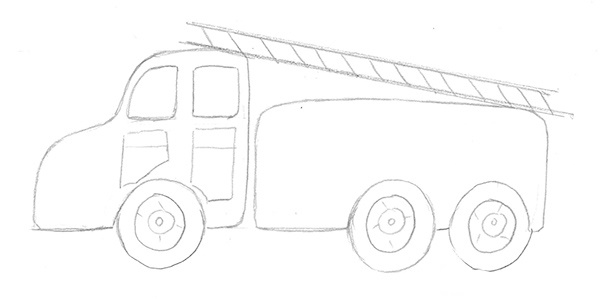
Stage 1
The shape of the car is like a rectangle. Therefore, we will prepare the main outline just like that. Immediately draw three visible left wheels: one under the cab and two under the body.

Top part rectangular box sketch - the future staircase, folded, located on the roof. With a few lines we will separate it from the main part.
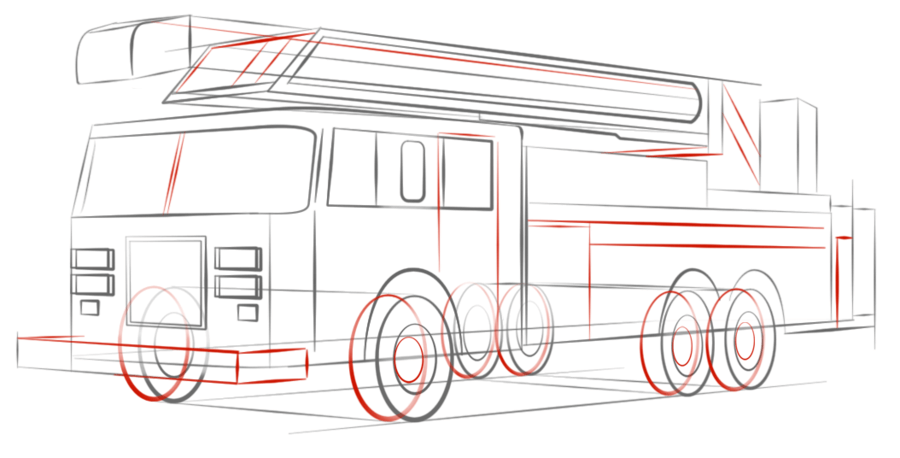
Stage 2
More accurately depict the cabin. To do this, we will separate it from the body part, add the windshield and side windows.
Little by little we will refine the stairs, add the right wheels and fenders, headlights. The main parts are drawn and now it's time to move on to the details.

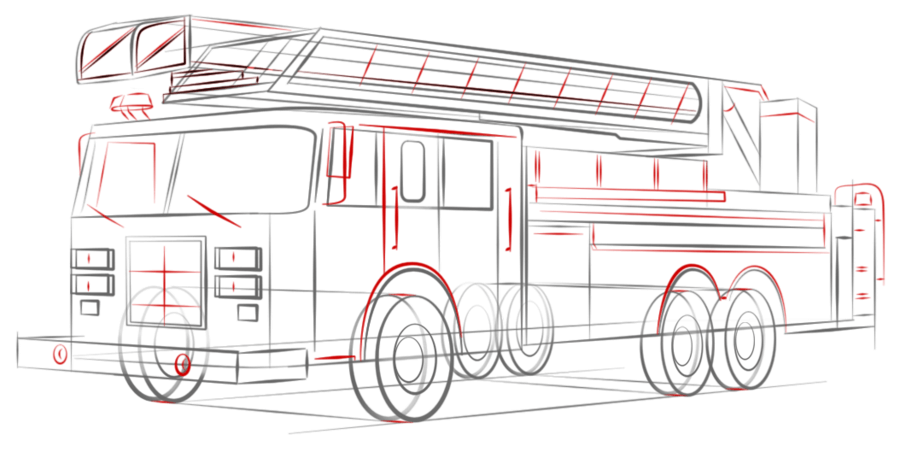
Stage 3
We are working on smaller details of the cabin: bumper, radiator grille, brushes, rear-view mirrors and door handles. Add the thickness of the wheels, the rungs of the stairs and lifting mechanism. The more details in the picture correspond to reality, the more it looks like a real car.
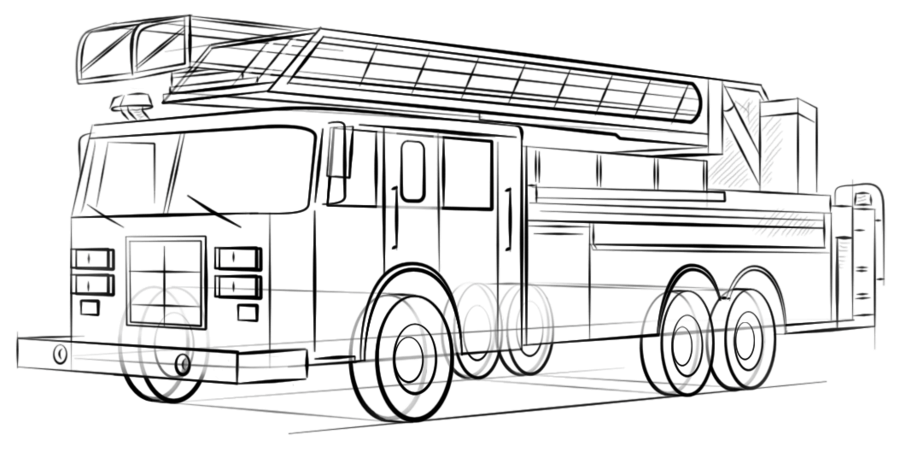
Stage 4
The drawing is ready. It completes the removal of auxiliary lines and the addition of shadows for volume.
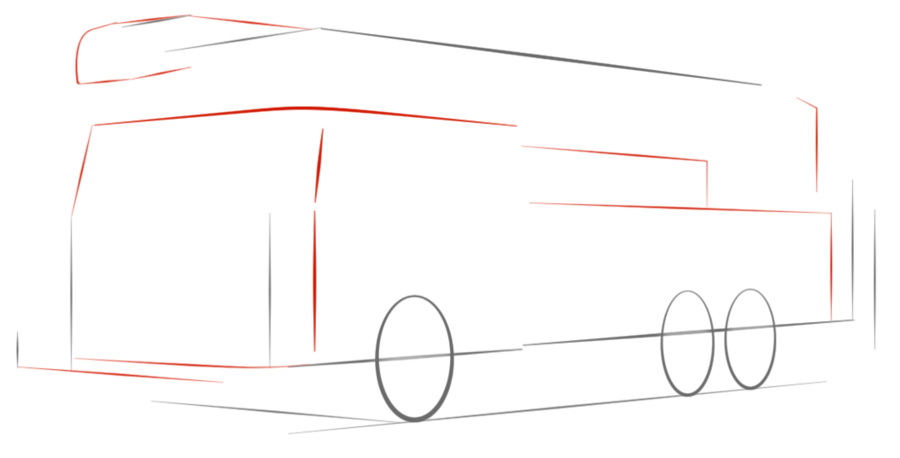
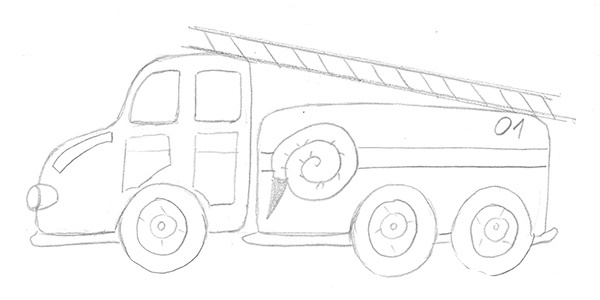
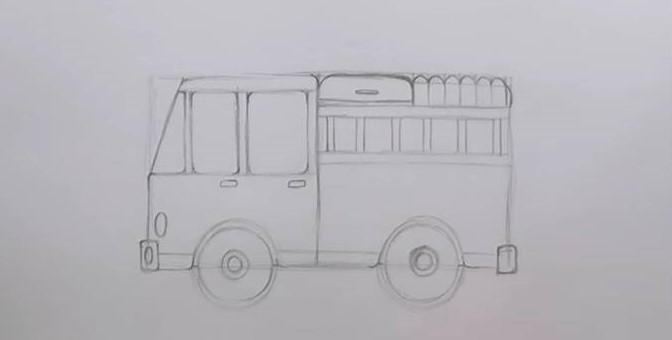
tank truck
Below is a way to draw a fire truck with a pencil using the example of a tank truck. Such transport is quite common, it is equipped with water-and-foam communications, a ladder and a cabin for moving the brigade.
Let's make a simple sketch first, as shown below.
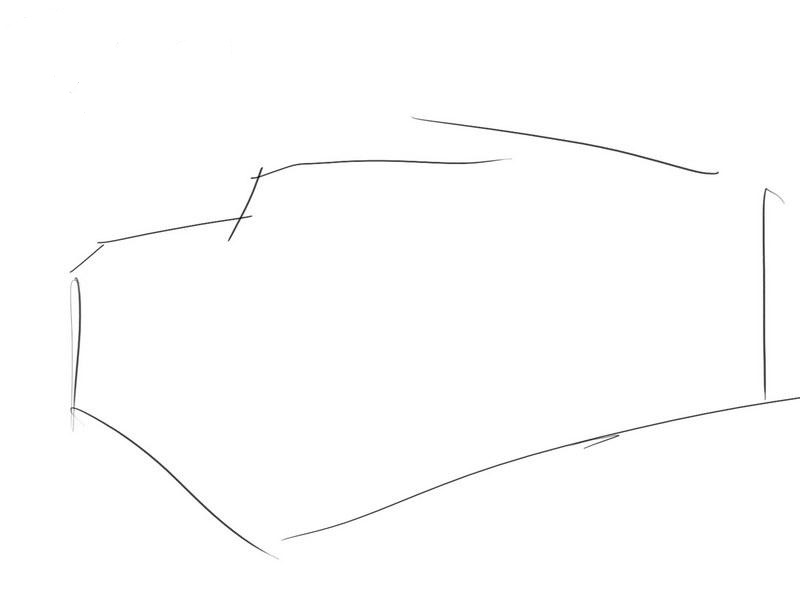
This sketch with the help of several lines becomes like a car. Adding wheels.

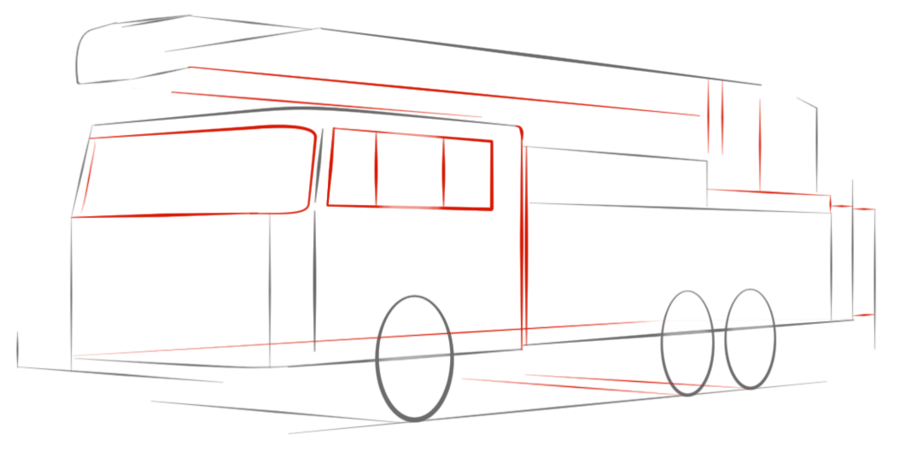
Let's refine the picture even more. We divide the cabin into parts for the driver and the rescue team. We circle the bumper, hood and grille with softer rounded lines. We mark the wheels with perpendicular lines for further actions.
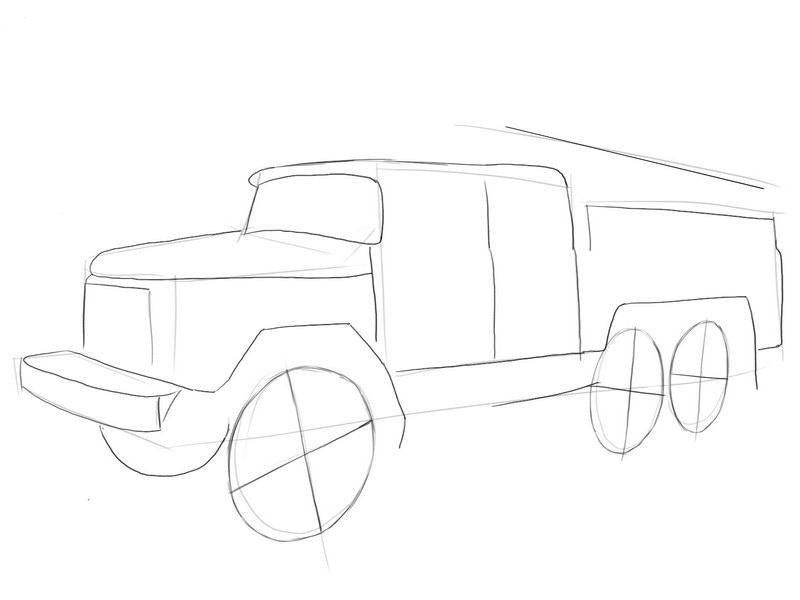
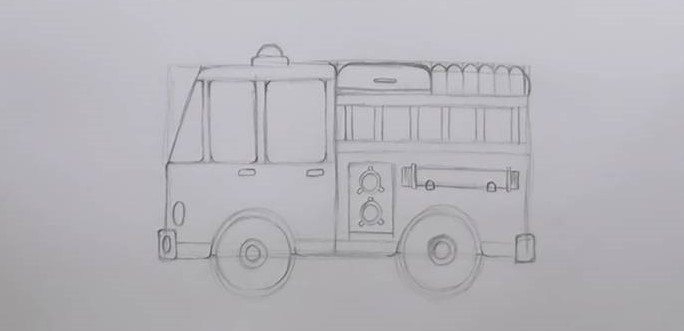
We add smaller details: steps, fenders, headlights, side windows.
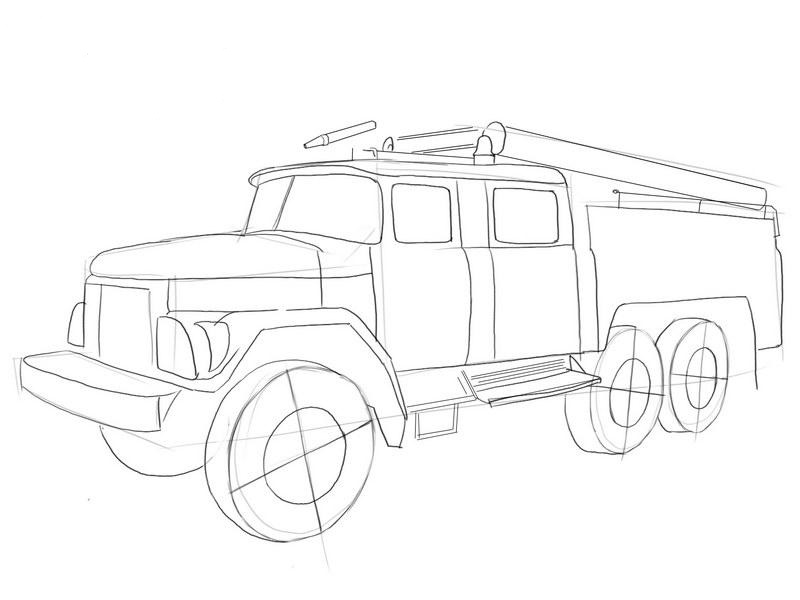
At the end we draw a ladder on the roof and a cistern. It remains to color or apply shadows for the bulk of the black and white picture.
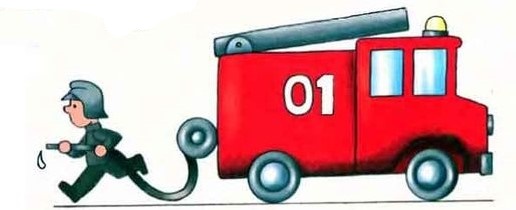
For kids
It is easy to explain how to draw a fire truck to a child using this sequence, which is quite simple for beginner artists.
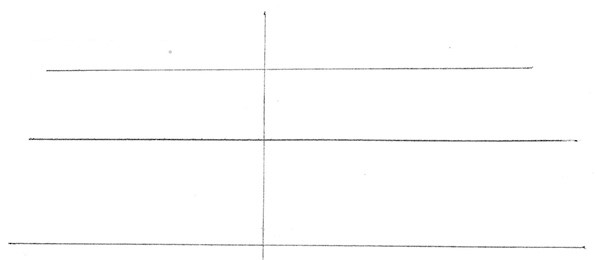
You should start with markings using three parallel horizontal lines and one vertical line dividing the sheet in half.

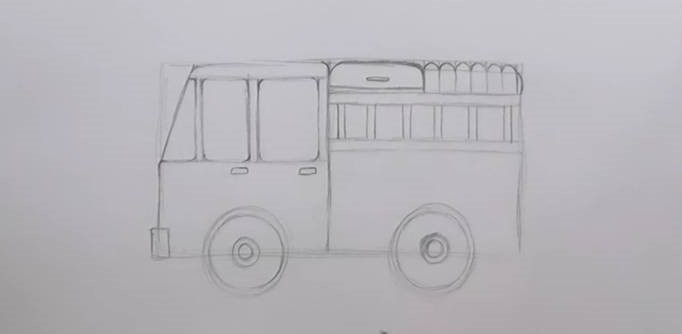
We draw wheels. We also mark the two right cab doors. On the roof of the tank we depict a ladder.
It remains to add headlights and a fire hose on the side surface.
The car can be painted or left in black and white.
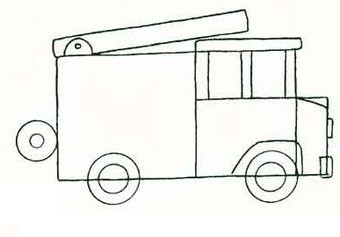
Universal rescue equipment
An interesting option on how to draw a fire truck with a pencil is proposed in stages below using the example of universal special equipment.
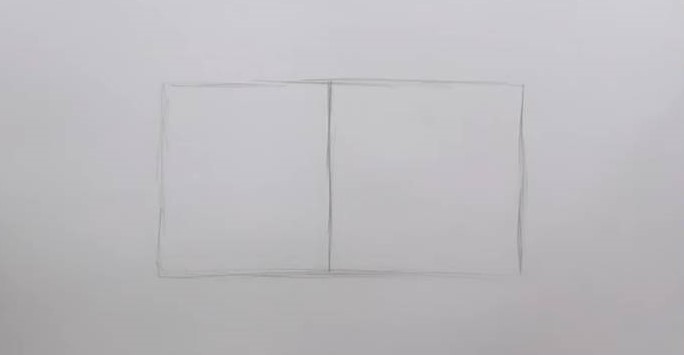
The sketch for this drawing will be in the form of a rectangle divided in half.
In its left part we draw a cabin.

On the right - special equipment for extinguishing fires: a ladder, a cistern, a fire hose.


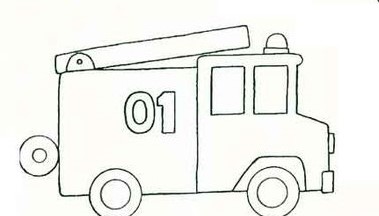
We put a flashing beacon on the roof of the cab.

The remaining equipment is drawn on the side of the machine.

We outline the contours with a felt-tip pen or pen, remove the pencil lines with an eraser. The drawing is ready and now it can be filled with color.
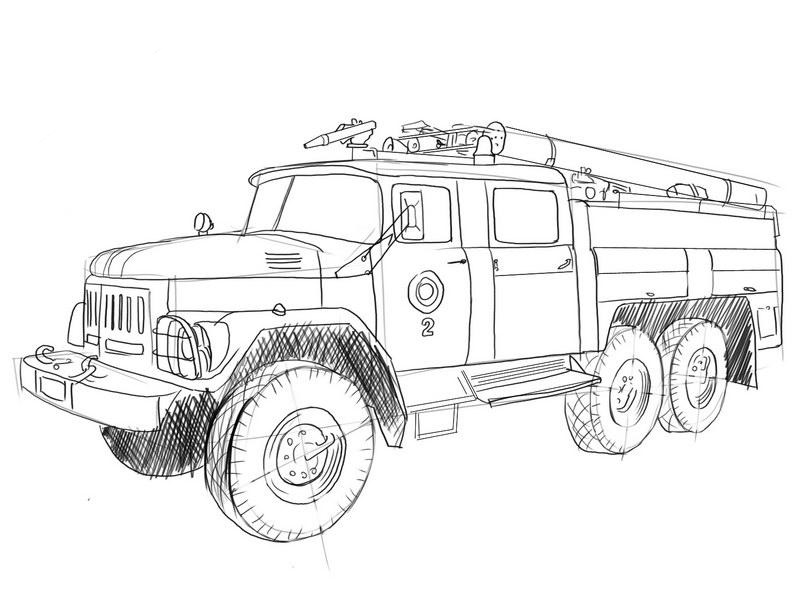
Putting out the fire
In order to learn how to draw a fire truck that puts out a fire, we recommend using the option below. It will definitely appeal to young rescuers and artists.
The car can be drawn in any of the proposed ways. Here is the simplest option for children. First, a sketch is prepared.

Then wheels and a ladder, a flashing beacon and cockpit windows are added. Behind - a device for the sleeve (winch).
Auxiliary and extra lines are removed and the machine is ready for coloring.
From the winch, a fire hose is drawn, which the rescuer in a helmet directs to the fire. The firefighter in this version turned out to be simple.
More complex and interesting option, with an oxygen tank on his back, a protective mask and a suit, it could be like that.

A fireman is such a super fighter, providing strong resistance to terrifying fiery outbreaks in the city. But usually this is done by a whole gang of trained specialists.
Let me give you some facts before how to draw a fireman.
A couple of useful numbers:
- Interestingly, do you all remember how, if necessary, to call for help these fearless guys? Just in case, let me remind you: 01 for home and 112 for mobile. These are the numbers where the duty officer should answer you, you call at least at three in the morning.
- The professional holiday of firefighters is April 30.
- In our capital, the first firefighting team was created a bunch of years ago. It was already 1504. Apparently, before that, “the whole world, the whole village” coped with fires.
Jokes about fires:
- In Russia, it was believed that if a house caught fire from lightning, then it should be extinguished with milk. Like, lightning is divine fire. Here, after all, how much milk they had!
- In America, at one time, they burned a carload of silent films to make room for new ones. This is how they ruthlessly dealt with the cultural heritage.
- There was a long time ago the tsar - Alexei Mikhailovich. So he said that the death penalty awaits smokers. Now that would be introduced.
And now let's get to work.
How to draw a fireman with a pencil step by step
Step one
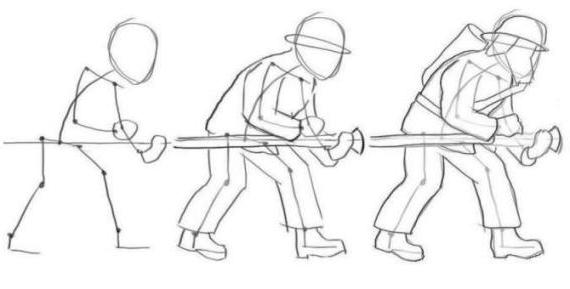
The essence of our drawing is a person in a special form, who is in motion. First, we outline all the main parts of the body: a large head, the skeleton of the body, we will show the joints with dots, and the palms with ovals. Let's draw a horizontal line passing through one of the palms. Later, it should turn into a special fire extinguishing hose.
step two
We dress a person in clothes: pants, jacket, shoes, helmet. Let's show the width of the hose.
Step Three
Now we will try to give the whole drawing smooth lines. We will also define the outline of the mask. Behind the back of the fireman is a balloon.
Step Four
Let's draw the uniform. There are many decorative luminous lines on both trousers and jacket. Let's show the mask in detail. He has gloves on his hands. Let's not forget the shoes.
Step five
Through the mask we see the person's face. Let's draw an eye, an eyebrow. Let's finish the helmet and balloon. We will show the relief on the air tube. And on the clothes there are many, many folds that will give liveliness to our drawing. Perhaps it's ready.

How are you? Happened?
See also how to draw.
April 30 is the professional holiday of firefighters. If you have friends of this profession, then a children's drawing of a fireman, which you can make with your child, can be a good gift. But how to draw a fireman?
Draw a fireman step by step
We will depict a firefighter at the moment of extinguishing a fire from a hose (a special hose for fire extinguishing).
- First you need to outline all the main parts of the firefighter's body, observing their proportions. This is the hardest part, so give this step more time. We outline a large head and body frame. We indicate the joints with dots, and the palms with ovals. We draw a horizontal line (in the future it will become a hose) through one of the palms.
- Departing from the skeleton of the body, we finish the necessary clothes: a jacket, pants, a helmet and shoes. Watch for proportions. The hose needs to be made more voluminous.
- We smooth the lines and give them smoothness. If necessary, remove the extra lines with an eraser. Draw a mask and add a balloon to the fireman's back.
- Using multi-colored pencils, draw reflective lines on the fireman's uniform.
- To give the image liveliness, draw the eyes and eyebrows under the mask. We add the necessary details to the helmet and balloon. We draw the relief of the air outlet tube. Add some folds to the clothes to make the image dynamic.
- Now our drawing is ready to be rendered in color.
Look online for fire uniforms and let your child apply the color. Such a drawing is best painted with colored pencils because of the many small details. Now you know how to draw a fireman step by step. Don't forget to frame your drawing.
Figure fireman puts out the fire video recipe - step by step
Below you will find step by step video recipe to help you prepare.
Looking at the tips for drawing a fireman puts out a fire, you can easily cook this dish at home, having all the necessary ingredients.
This is enough difficult lesson, so it may take a lot of effort for you to repeat it. If the first time it was not possible to draw a fire truck - do not despair and try again. Try your best to complete this lesson. If, however, it still doesn’t work out, you can try to complete the lesson “”. But I believe that you will succeed.
What you need
In order to draw a fire truck, we may need:
- Paper. It is better to take medium-grained special paper: it will be much more pleasant for novice artists to draw on this particular paper.
- Sharpened pencils. I advise you to take several degrees of hardness, each must be used for different purposes.
- Eraser.
- Stick for rubbing hatching. You can use plain paper rolled into a cone. She will rub the shading, turning it into a monotonous color.
- A little patience.
- Good mood.
Step by step lesson
Drawing a fire truck is difficult, like any difficult vehicle in order to function it must be designed in a certain way. In order not to break design features It's better to see what it looks like live. If this is not possible, look at the available photos on the Internet.
By the way, in addition to this lesson, I advise you to turn your attention to the lesson "". It will help improve your mastery or just give you a little pleasure.
All complex drawings must be created with forward thinking and vision. The subject should not only be a form on a sheet. You must draw it in volume, that is, creating it from simple geometric bodies as if they are on top of each other: here is a ball on a cube, and here are two balls side by side. All living and non-living things on earth consist of these primitive forms.
Tip: sketch with as light strokes as possible. The thicker the strokes of the sketch are, the more difficult it will be to erase them later.
The first step, or rather zero, is always to mark a sheet of paper. This will give you an idea of where exactly the drawing will be. If you place the drawing on half of the sheet, you can use the second half for another drawing. Here is an example of a sheet layout in the center:
Step one. Let's start small, select the area for the picture geometric figure as in the picture below.
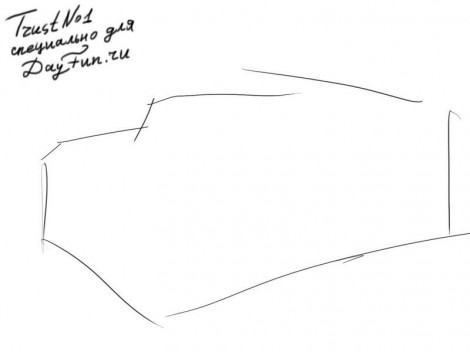
Step two. We sculpt the shape of the car, add three wheels in circles. Top short horizontal line make room for the water gun.
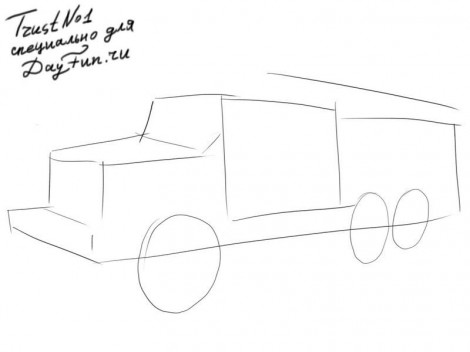
Step three. Round the shapes, make softer transitions. Determine the centers of the wheels by drawing perpendicular lines.

Step four. The main form is ready, now we just add all the accessories and elements: headlights, bumpers, doors, windows.
![]()
Step five. Darken the bottom of the car short lines around the wheels we will create an image of tires and finish adding various lotions.

I sincerely hope that you enjoyed the lesson on how to draw a fire engine and I hope that you were able to repeat the lesson. Now you can pay attention to the lesson "" - it is just as interesting and exciting. Share the lesson social networks and show your results to your friends.
We also recommend
 How to make a healthy banana smoothie
 Harvesting asparagus for the winter recipes for cooking at home
 Chicken pie with zucchini and cottage cheese Dukan's recipes zucchini pie with cottage cheese
 Gingerbread with icing
 How to cook a salad with crab sticks and carrots
 Cabbage salad with bell pepper - the best recipes