What do you hang a chandelier on? Fixing the chandelier to the ceiling with a mounting plate
Each owner is well aware that the choice of ways to illuminate the premises allows you to give an effective look to the room, emphasize the individual preferences of the owner, and create a favorable atmosphere in the home.
The original ways of lighting the apartment characterize the image of the owner as a person with design taste, able to form positive emotions and good mood among guests.
Being independently engaged in design, the master uses various types of lamps:
- chandeliers;
- point sources of local lighting;
- decorative lighting strips and garlands.
Features of fastening the first two types of lighting fixtures are disclosed in this article. For attaching sconces and garlands, they are also well suited.
How to install a chandelier on the ceiling
Before starting any work on the wiring, always check on it. This will eliminate the possibility of creating short circuits, preserve your health, and ensure safety at work.
The method of installation depends on many factors. His choice is influenced by:
- weight, dimensions and design of the lamp;
- material and type of ceiling;
- the presence of fasteners mounted during construction.
Fixing a chandelier to a concrete ceiling
Almost all apartments inside multi-storey buildings now have ceilings made of reinforced concrete floor slabs. During their installation, builders install special hooks near the outlets for wires for fixtures or remove steel wire tied to the fittings.
Old-fashioned way to hang a chandelier
In older houses, fastening wire is most often used, which can be bent in the right direction. It is able to withstand quite a lot of weight, but, to check the strength of the fastening, it is recommended to pull it with a certain force.

It is convenient to place light plastic chandeliers on such fasteners. An adapter terminal block is used to connect electrical wires.
The fastening element of the chandelier and the connecting wires are hidden inside the decorative cover.
Modern fastening methods
Chandelier hooks
The main element that perceives the mechanical loads of the chandelier is the hook, which can have a different design.
For fastening inside reinforced concrete ceilings, hooks are produced:
- equipped at the opposite end with a threaded self-tapping screw screwed into a plastic dowel fixed in a drilled hole;
- having a swivel mechanism with stops.
The second method can be used:
- movable paws with a locking mechanism;
- washer with or without a slit;
- rotary plate;
- movable stops.

This method requires the creation of a through hole through the floor slab with a diameter that allows passage of the pivot mechanism, but securely supports the total weight of the luminaire.
Varieties of such hooks are fasteners made in the form of plates that can be pushed into flat slots drilled with thin drills.

Mounting brackets
These mounting fixtures do not require through holes in the slab. For them, it is enough to knock out sockets for installing dowels with a puncher in the ceiling and then screw the screws through the bracket.
The mounting plate itself can be made:
- the shape of the plate with slots for fixing in different convenient places;
- or in the form of a crosshair of two plates.

With the second method, you can create a larger number of attachment points for self-tapping screws in the ceiling. Therefore, heavier chandeliers are attached to the cross plate.
Threaded studs are screwed onto all these brackets before they are mounted on the ceiling to secure the base of the chandelier body with screw nuts.

Before installing the lamp, pay attention to the state of the dielectric layer of the wires. When it is weakened, it is strengthened by winding insulating tape. However, now there are more efficient heat shrink tubing on the market, which are easily put on the place to be insulated, and then, under the heat of the flame of an industrial hair dryer, lighter or even matches, are tightly deposited on the surfaces to be joined.
Fixing a chandelier to a wooden ceiling
Here, the main means of fastening are the simplest hooks, made at the end with a sharp self-tapping screw, which is simply screwed into the wood.

So that the wood does not crack, and the screw is screwed in without undue effort, it is recommended to pre-drill the hole with a drill bit smaller than the inner diameter of the thread on the self-tapping screw.
The place of attachment must be chosen so that the hook is held not only in the boards with which the ceiling is sheathed, but also with a significant part of it securely enters the beam.
Fixing a chandelier through a suspended structure
Now home masters in the interior of rooms widely use various types of stretch ceilings:
- on a film and cloth basis from synthetic fabrics of various colors:
- suspended structure based on drywall and similar dense materials.

Realization of the desire of the owner to have a beautiful chandelier to illuminate such a room requires the creation of a mounting adapter, the thickness of which is chosen according to the size of the gap between the canvas of the suspended structure and the concrete base.
The adapter itself is attached to the concrete in advance, before the installation of the suspended canvas, and then the decorative ceiling is mounted and a chandelier is hung on the mounting adapter through it.

Through the drywall coating, you can simply screw in the screws. When stretch ceilings are used, adapters with glued rings are mounted in them, inside which an incision is made in the fabric of the canvas.
Wires are pulled through this slot and the chandelier suspension unit is mounted on the adapter.
Luminaire suspension fixtures
After the hook for hanging the chandelier is installed, you will need to raise the lighting device to the ceiling and connect electrical wires at a height. Such work requires the simultaneous execution of two actions:
- secure fixation of the lamp on the ceiling;
- wiring installation.
Therefore, the master does not have enough hands and an assistant is required. For frequent performance of such work, you can make a simple fixture, consisting of:
- hook for hanging the chandelier for fixing the ceiling;
- cable made of dielectric material;
- tip with a swivel mechanism inserted into the hole of the lamp.

The principle of its work is explained by pictures.
The swivel mount works on the same principle as the fisherman's cuckoo. It is inserted into any hole on the body, and the chandelier hangs freely on a cable. The master has free hands, can connect the wiring. When the swivel mechanism is disengaged, the hook is removed and a lamp is hung in its place.
Such a device facilitates installation. It is made for constant work of the same type. But, when a single installation of a chandelier is performed, it can simply be tied with a strong cord.
How to mount a spotlight on a suspended ceiling
Drywall constructions
This material has fairly good strength and is available in sheets with different thicknesses. It is customary to install spotlights directly in drywall.

To do this, perform work in the following order:
- wiring is mounted on the base ceiling with a small margin in length to connect the cartridge;
- install a drywall construction;
- special drills drill holes for the lamp;
- wires out;
- connect the cartridge;
- compress the mounting plates;
- the lamp is inserted into the hole until the springs are released to fix the housing.
A protective decorative cover closes the cut hole in the plasterboard.
Stretch ceiling
For fixing spotlights, the same principle is used as for a chandelier - the use of an additional mounting adapter.

They are usually made at the factory with the ability to adjust the height of the gap between the stretched fabric and the base surface. For this purpose, the stationary part is attached to the main ceiling, and the position of the adjusting brackets is set with screw clamps.
A fastening ring is also glued onto the fabric of the canvas, as for a chandelier, and a cut is made inside it to pull the wires and install the lamp. Between the body of the light source and the tension material, a transparent protective thermal ring is placed, which provides thermal protection of the material.
Constructions from PVC boards
In these ceilings, the installation of spotlights is carried out using the same technology as for plasterboard slabs. PVC boards have good strength characteristics and are able to securely hold light spotlights.

Due to the fact that when replacing burnt out light bulbs, increased mechanical loads can be created, mounting adapters are also used for fastening. They are conveniently made from perforated tin strips with a galvanized surface.
Such structures are easy to create, withstand loads well, and are designed for long-term operation.
After fixing the chandelier to the ceiling, wires must be connected to it and the switch. This topic is presented
We offer you to watch a video on installing a chandelier.
If you know other ways of fixing lamps, then tell us about them in the comments.
Fixing a chandelier to the ceiling
When buying a new chandelier, the issue of its correct and reliable fastening to the ceiling surface, as well as a safe and correct connection to the home's electrical network, becomes relevant. You can do this without outside help, so arm yourself with the necessary installation tool, read our instructions and proceed with the installation.
This article will discuss how to fix the chandelier to the ceiling with your own hands.
Fixing the chandelier with a mounting plate
As a rule, chandeliers are of two types:
- Equipped with mounting bracket. The bar is mounted on the ceiling, and then the chandelier is attached directly to it.
- Mounted on a ceiling hook screwed securely into the ceiling. We will try to cover in more detail how to attach a chandelier to a ceiling surface using each of these methods.
Advice! Before mounting the chandelier to the ceiling, remove the shades and other decorative elements of the chandelier. This will protect them from accidental damage, reduce the weight of the chandelier and make installation more convenient.
Mounting the mounting plate
Fixing the ceiling chandelier begins with mounting the mounting plate to the surface:
- To begin with, try on the chandelier to the place where its future fasteners are supposed. The decorative element of the chandelier, covering the place of attachment and wires, must fit snugly, without gaps and play, against the ceiling.
- If there is a hook from an old lamp at the installation site, it is bent to the ceiling so that it does not interfere. Cutting off the old hook is not recommended, because your next chandelier may be attached with it, and you will need to re-mount this type of fastener, which is impractical.
- Perform markings for fastening the mounting plate and install fasteners for the chandelier on the surface. To do this, the bar is applied to the ceiling in such a way that it does not interfere with the wiring connection, and with a pencil mark the place of attachment. Next, holes are drilled and dowels are driven into them. Then fasten the bar to the ceiling using screws.(read on).

Wiring connection
Before attaching the chandelier to the ceiling surface, it is necessary to connect the power wires provided in it to the power system of the house. Before connecting the chandelier, it is imperative to de-energize the home wiring and make sure that there is no voltage using the indicator.
The rules for connecting a chandelier to the mains are as follows:
- In the presence of a single-gang switch, the ceiling wiring under the chandelier usually consists of two or three wires - phase, zero, and optionally a ground wire. The presence of a ground wire often depends on the time the house was built - in Soviet times, such a wire was provided extremely rarely.
- It is necessary to determine the purpose of each wire, both among the ceiling and among those available in the chandelier. The phase wire is usually hidden in black, brown or red insulation, the neutral wire is in blue, and the ground wire is in yellow-green.

- Regardless of the presence of colored or other markings on the wires in the ceiling, they should be tested with an indicator screwdriver. To do this, you need to turn on the power supply for a while. You should alternately touch the bare part of the wires and fix the indicator indicator. The lit indicator will point to the phase wire, if the indicator does not light up, then the wire is zero.
Advice! Do not forget to press the light on switch on the switch before checking the wires with an indicator.
- Wires of the same type are connected through the terminals, and if there is a “no pair” wire (grounding), it is isolated and pushed aside. After that, you can continue to further mount the chandelier to the ceiling.
- A two-gang switch assumes the presence of two-phase wires in the ceiling (see). Their connection is carried out, respectively, to the phase wires of the chandelier of the 1st and 2nd groups (if any). Zero and ground wire are connected in the same way as in the first case.
Fixing the chandelier to the mounting plate

You can do this in the following way:
- The closing decorative element of the chandelier is attached to the bar and their connecting holes are compared.
- Screw decorative nuts into the holes, thereby attaching the lighting fixture to the ceiling completely.
- Mount lamps, shades and other decorative elements in their original place.
Fixing the chandelier to the ceiling surface in this way can be considered finished.
Fixing a chandelier with a ceiling hook
Such a fixture for a ceiling chandelier, like a hook, is often installed at the stage of building a house, and if you have one, you should check it for strength. Checking the hook is to try to tear it off. To do this, you can pull or hang a load for it, comparable in mass or exceeding the weight of the chandelier, and let it hang for a while.
If the hook is fixed "tightly", you can mount the chandelier to the concrete ceiling.
If it fell out or is simply not provided for on the ceiling, you will need to mount it yourself:

- Drill a hole under it.
- Prepare and screw a metal anchor into the hole. It must be selected with such a diameter that it fits snugly against the walls of the hole during the screwing process.
- For installation in a wooden ceiling, you can use a self-tapping hook.
- When mounting the chandelier on a plasterboard ceiling, the hook must be attached to the ceiling. The distance between the main and plasterboard ceilings is bridged by hanging a chain on a hook equal to the length of the gap between the ceilings. It is to the chain that the ceiling chandelier is attached later.
Advice! The metal hook must be carefully insulated for safety reasons.
We can assume that we figured out how to mount chandeliers of various types. We hope that our instructions turned out to be understandable, and with an eye on it, you will be able to install the chandelier with your own hands without any problems.
For those who have not fully understood all the intricacies of the installation process, we recommend that you familiarize yourself with the video presented on our portal - how to fix the chandelier to the ceiling.
It would seem that it can be difficult to hang a chandelier from the ceiling? From distant childhood, I recall a metal hook sticking out in the middle of the ceiling, and wires with remnants of electrical tape. All the lamps were of the same type, and fixing them was quite simple: hang them on a hook and connect the wires with a twist. However, with today's variety of lighting fixtures, everything has become a little more complicated - the design and method of attachment can vary greatly. All ways to securely fasten a chandelier to a concrete ceiling are described in this article.
Chandeliers and lamps: types of fixtures
The design of modern lamps can be different, from a tight-fitting ceiling to a multi-track chandelier on a long rod. At the same time, their weight, as well as the load on the ceiling, also differ.
The most common mounting methods:
- a hook fixed in the ceiling and a suspension on the lamp;
- mounting plate in the form of a bent metal strip with two holes for mounting to the ceiling and fixed screws or studs for mounting the ceiling;
- cruciform mounting plate - it differs in the number of attachment points and is suitable for massive lamps.
You usually don’t have to choose the mounting method - it depends on the purchased chandelier and is specified in the data sheet for the device. But the correct and reliable fastening of the lamp depends on you.

Wiring: how not to get tangled in wires
Old houses cannot boast of modern color-coded wiring. There are usually two or three wires sticking out of a hole in the ceiling slab, all in identical, battered insulation. If the wiring is new and laid in compliance with the requirements of the PUE, then the individual cable cores have a different color, by which you can easily determine their purpose.
Basic requirements of the PUE for the electrical wiring of residential buildings. Download file.
Old-style chandeliers and inexpensive modern fixtures may have wires of the same color, which will also have to ring for proper connection. In modern chandeliers, this rule is more often observed, and all outgoing wires in color marking are assembled on the block, in addition, the connection is described in detail in the passport.
The color designation of wires is carried out according to certain rules and can be easily determined from the table.
Table. Wire marking according to the color of the insulation.
Before starting work on fixing the chandelier, you need to determine the purpose of all wires both in the wiring and in the lamp. If both the wiring and the chandelier are new, then the connection will not be difficult, it is enough to connect conductors with the same marking on the block.
Chandelier prices

If you cannot determine the purpose of the wires by their color, you will have to do this with the help of devices. It is not difficult to do this, the main thing is to observe safety measures and strictly follow the instructions.
Wiring phasing
To recognize wires that do not have color markings, you will need phase indicator- a device showing the presence of a phase at the ends of the wire. In appearance, it looks like a screwdriver and consists of several parts: a body made of insulating material, a conductive metal tip, a signal LED or electronic display, and a metal terminal on the end of the device or a button.

The presence of voltage using the indicator is determined as follows: the device is clamped between the thumb and middle fingers of the right hand, and the index is placed on the metal terminal. The sting touches all the wires in turn; when touching a phase wire on which there is voltage, the LED lights up or an icon appears on the electronic display.
Important! Checking the presence of voltage and searching for a phase with an indicator is carried out with one hand! It is forbidden to touch the insulation of the wire or indicator with the other hand at this time! In the event of an insulation breakdown, electric shock is possible, and when it passes along the hand-to-hand path, a sudden contraction of the heart may occur.
Step 1. The first step is to de-energize the room, usually for this it is enough to turn off the machine in the shield or unscrew the plugs. The chandelier switch is also turned off. They remove the old lamp or lamp, if they were removed earlier, and the ends are insulated - they are freed from electrical tape. Using the indicator, one by one check the absence of a phase on all wires. If necessary, the insulation is cleaned, freeing about 1 cm of the metal core. All wires are spread apart so that they do not touch each other.
Step 2 Turn on the machine or screw in the plugs. Turn on the light switch. The indicator touches the bare part of the cores, determining the phase and neutral wires. For convenience, the neutral conductor is marked with a marker, electrical tape, or simply bent.
If three wires come out of the ceiling, and a two-key switch is installed on the wall, they act in the following sequence: first turn on both keys and find the neutral and two phase wires, mark them. They turn off one key and check that the phase has disappeared on one wire. Then they turn off the other key and make sure that the voltage has also disappeared on the second wire. In this case, you can connect the chandelier in a two-stage scheme.

In the absence of an indicator, you can determine the neutral and phase wires using a multimeter by switching it to AC voltage measurement mode.
Step 3 Determine the place where the wires pass in the ceiling. They do this in order not to accidentally damage the wiring when attaching the chandelier mounting plate. Only an electronic indicator is suitable for non-contact phase detection. It is clamped in the hand and, with the switch on, is carried out at a small distance from the ceiling in the place where it is planned to fix the bar.
When passing by the phase wire, the indicator shows the phase icon on the display. The device is driven back and forth several times, marking the boundaries where it finds the phase. This determines the direction of the cable and finds out the place where it is impossible to drill. Turn off the switch and the machine in the shield. You can proceed to further preparation.

If the wires leading to the terminal are of the same color or their marking does not meet the standard, it is better to ring them for the correct connection of the chandelier. This can be done using a conventional multimeter, included in the continuity mode. Before the start of the ringing, the light bulbs are unscrewed from the lamp.
Step 1. If the body of the chandelier contains conductive metal elements, and there are three or more wires, one of them can be grounding. They find it out like this: put one probe of the device on the conductive part of the case, the second one sequentially touches the bare ends of the wires or the contacts of the connecting block. The appearance of a sound means that the ground wire has been found.
Step 2 The neutral wire is determined as follows: put one of the tester probes on the side contact of any chandelier cartridge. Successively touch the unmarked wires until a sound appears. Mark the neutral wire. The remaining wires are phase.
Step 3 In a multi-track chandelier with two lighting stages, one or more cartridges are connected to each phase wire. If you need to determine them, for example, in order to correlate with the desired key on the switch, then proceed as follows: the probe of the device is attached to one of the phase wires and sequentially touches the central contacts on the bottom of the cartridges. The sound signal determines the cartridges connected to this wire. Do the same with the other phase wire.
Prices for spotlights
Spotlights

If the lamp has several stages of illumination, and there is one phase wire in the wiring, all cartridges must be connected to it. To do this, the phase wires coming out of the chandelier must be combined into a twist or with a jumper on the block. After preparing the wiring and the chandelier, you can begin to fix it on the ceiling.
Step-by-step instructions for attaching a chandelier to a concrete ceiling
Before installing the chandelier, you need to finish the fine finishing of the ceiling. If the hole in the ceiling from which the wires come out is larger than the decorative bowl of the chandelier, it must be sealed with gypsum-based putty, cleaned and painted in the color of the main finish.
Required fixtures and tools:
- a stable stepladder or stool;
- indicator and multimeter;
- wiring tools: screwdrivers, pliers with insulated handles;
- mounting knife or wire stripper;
- drill or perforator;
- fasteners: dowels and hooks or screws, anchors;
- a hammer;
- electrical tape, terminals or PPE-type caps.
If the length of the wires coming out of the wall does not allow them to be fixed in the luminaire terminals without tension, the wires must be extended using a piece of cable or installation wire.

Note! Copper and aluminum wires must not be twisted together! They will quickly begin to corrode and become covered with a green coating, due to which the contact will deteriorate. Constant heating can lead to melting of the insulation, and then to a short circuit. Connect copper and aluminum wires only using a terminal block.
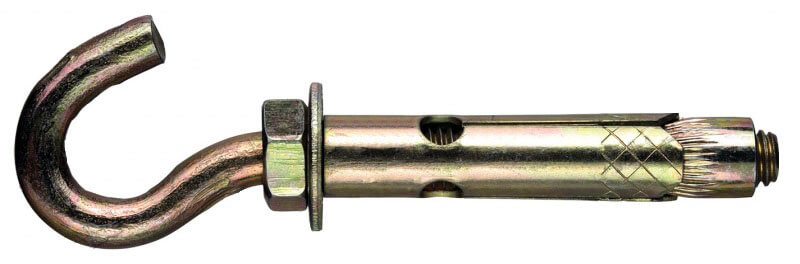
Heavy lamps or chandeliers on a long rod are attached to the hook. They have a special loop for hanging on a hook, which is subsequently closed with a decorative glass or bowl. The hook may already be present on your ceiling, but sometimes you have to install it yourself.
The process of hanging a chandelier is quite simple, but the hook attachment is worth considering in more detail. For light chandeliers weighing no more than 5 kg, you can use a regular hook paired with a plastic dowel. For heavy fixtures, it is better to use hooks on anchors - the latter are firmly fixed in concrete and are able to withstand heavy loads. The hook must be tried on to the decorative bowl - it must fully enter into it together with the connecting block.
Prices for ceiling lights
ceiling lamps

Step 1. Work is carried out with the switch turned off, the machine and the plugs unscrewed. Choose a place to attach the hook. It is important to ensure that wires do not pass through the thickness of the concrete - if they are damaged, you will have to completely shift the wiring. How to do this is described above.
Step 2 The place for attaching the hook is marked with a marker or construction pencil. It should be close to the wires, and both the hook and the wiring should be completely covered by the decorative bowl of the chandelier.
Step 3 Drill a hole in the ceiling of the desired diameter and depth using a drill or puncher. Insert the dowel or drive in the anchor until it stops, after which the hook is twisted.
Note! So that when drilling, concrete chips do not fly into the eyes, and the ceiling does not get dirty with dust, you can put a cardboard glass or half a tennis ball on the drill.

Step 4 Breakable parts and light bulbs are removed from the chandelier to avoid breakage. They hang it on a ready-made or fixed hook and connect the wires to the block. In the absence of the latter, a twist connection or PPE caps is allowed. Unused ground wires must be insulated.
Step 5 Carefully lay the wires inside the decorative bowl and fix it so that the gap between its edges and the ceiling is minimal. A rubber/plastic seal or a small screw is usually used to secure the bowl to the stem.
Step 6 Screw in the light bulbs and put on the shades. They turn on the machine in the shield and the switch in the room to check the performance of the chandelier.
Mounting on a mounting plate or bracket is used for most fixtures adjacent to the ceiling, as well as for some chandeliers on the rod. The installation of such a lamp consists of two stages: fixing the bar and installing the chandelier or ceiling lamp on it. As with the hook, you need to turn off the electricity in the apartment.
If the chandelier is attached to the place where the hook is already fixed, then it must be unscrewed, and if it is impossible to bend or cut it off. The hole from the hook is covered with putty.

Step 1. They disassemble the lamp and twist the mounting plate from it, as well as remove fragile elements and unscrew the light bulbs. The screws on the mounting plate, intended for fixing the ceiling, are tightly tightened onto the locknuts, otherwise it will be difficult to fix the lamp itself later.
Step 2 Attach the bar to the ceiling and mark the attachment points with a marker. It is important that they are located away from the cable laid in the ceiling. The ceiling is drilled with a puncher or impact drill to the desired depth, inserted into the dowel holes. Attach the bar to the ceiling and fix it with screws.
Prices for LED chandeliers
chandelier led
Note! The dowels can be additionally fixed with cement-based glue. To do this, a small amount of mixed glue is introduced into the drilled hole, after which the dowels are inserted and the bar is fixed.
Step 3 Attach the ceiling or luminaire to the mounting plate using the screws installed on it. To do this, combine the holes with the screws, put on the lamp and fix the nuts for several turns.
Step 4 Connect the wires coming out of the ceiling to the lamp block, after which the nuts are fully tightened and the chandelier is fixed. If the screws are short and do not allow you to connect the wires while hanging the lamp, you will need an assistant to hold it until it is fastened. You can also use a strong nylon cord, on which the lamp is temporarily suspended from the mounting plate.
Step 5 They put on the shades and screw in the light bulbs, after which they check the operability of the lamp using the switch.

A chandelier with a cruciform mounting plate is attached in the same way, only there are not two, but four attachment points to the ceiling, and in the case of a massive lamp there can be eight.

Fixing a chandelier to a concrete ceiling is not difficult, and it is important to follow the rules of electrical safety. If you are not confident in your electrical installation skills - do not take risks, entrust the connection to a professional, as improper installation can damage the lamp or wires.
This also applies to complex chandeliers with multi-stage switching and complex logic. As a rule, an unprofessional connection will void the warranty on the device, and if the chandelier fails, you will have to repair the chandelier at your own expense.
To better understand the intricacies of connecting a chandelier, we recommend watching the video.
Video - How to hang and connect a chandelier to a concrete ceiling
Last update: 26-02-2018
In the kitchen I had the following option- two wires from the chandelier and three wires from the ceiling.

As described above, I found where the phase is, the yellow-green wire is ground, the blue wire is zero. We do not need the yellow-green wire, we connect the remaining two wires to two wires from the chandelier, for reliability I used a special block.
Another option - 4 wires come out of the ceiling, and 6 pairs of wires come out of the chandelier.
Again, we find where we have a phase, now these are two wires, we leave yellow-green, blue is zero.

The figure below shows, that the red wires are interconnected by a jumper, and the white wires are connected in three pieces. Now we connect each phase to a separate group of white wires, and connect zero to the red wires.
Eventually, when one button is turned on, three lights are on, when the second button is turned on, three more lights are on.
As you can see, hanging and connecting a chandelier in an apartment on your own is not so difficult. The cost of all materials is cheap compared to calling a specialist at home.
So, you needed to replace or hang a chandelier from scratch on the ceiling in the house. At first glance, this event causes little concern and seems difficult for a novice electrician. But everything is much simpler than you think, because installation work lasts no more than half an hour and no special efforts are required.
In order to hang a chandelier to the ceiling with your own hands, you must:
- familiarize yourself with safety precautions;
- prepare tools and materials;
- choose the right mounting method;
- install the product
- check if the connection is correct.
Now let's take a closer look at each of the stages.
Safety
Any electrical work is not safe, because a person is dealing with high voltage current. So that when you connect you are not shocked, and you yourself do not fail after a while, we recommend that you consider the following rules and tips:
- Before you hang the lamp on the ceiling, turn off the electricity in the network (it is enough to turn it off in the shield).
- Make sure there is no electricity in the room by turning the lights on/off.
- Use an indicator screwdriver to check the voltage on the wires coming from the ceiling. If there is no current, get to work.
- Carry out with terminal blocks. "Grandfather" twisting with insulation is not safe.
- Do not purchase low quality Chinese products, because. More often than not, they are the ones that fail.
- Take care of quality.
If you follow these safety measures, you can fix the chandelier on the ceiling quickly and without any problems.
Tools and materials
In order to carry out the installation, you will need the following tools:
- electric drill or puncher;
- ladder;
- screwdriver or screwdriver;
- indicator screwdriver;
- pliers.
From the materials you need to prepare:
- connecting blocks either (they are not always included, especially if the product is cheap);
- fastener (hook or anchor);
- self-tapping screws with dowels.
As for the latter, it should be clarified here. If the chandelier will be fixed to a concrete ceiling, it is necessary to purchase anchors, they are better installed in the wall. In order to hang the case on a wooden ceiling, you can do without a hook, use wood screws (if the lamp is light). To drywall can only be fixed if you get on the frame of the profiles using metal screws.
Installation methods
In order to independently hang the chandelier from the ceiling in the house, you can use one of three methods, each of which is predetermined by the manufacturer. If the product is not heavy, it can be hung on a hook. For weights over 5 kg, anchor bolts must be used. The design of some chandeliers requires the installation of a special bar (bracket). Well, the last way is to fix the back cover of the lamp directly to the ceiling or wall. Now we will consider in detail each of the above methods.
Hook
To install a light chandelier, you can buy an inexpensive hook with a dowel (as shown in the picture) and screw it into the ceiling, then hang the loop on the hook, provided for by the design of the lamp.

Please note that this method is only suitable if the ceiling is wooden or concrete, because. then you can drill a hole in it and insert the dowel. If the sheathing is drywall, this type of installation is prohibited, because the hook will simply rip out after hanging the lamp.
If the chandelier is large and heavy, you can hang it on an anchor hook. Its design is shown in the photo:
All that is needed is to drill a hole of the required diameter in the ceiling, and then screw in the hook. The anchor will “break open”, which will create a reliable fastening of the product of even greater weight.
Such a connection can spoil the interior of the room, so it is recommended to buy lamps that have a decorative bowl, which will hide all fasteners.
bracket
If the manufacturer has provided a plank mount, it will be necessary to spend a little more time on installation.

The kit includes a metal bar and 2 screws with nuts. All that is needed is to fix the bar (bracket), and then hang the chandelier tightly to the ceiling yourself.
This option is more time consuming, but at the same time it is not difficult at all. The main thing is to correctly adjust the distance between the screws (it must correspond to the distances between the holes in the luminaire body itself).
Back cover
If you want to hang a chandelier on the ceiling without drilling with a perforator, you must choose a special type of lamp, the ceiling of which can be fastened with self-tapping screws. In this case, you just need to screw a few self-tapping screws through the holes in the back cover. Most often, this method of fastening is used if the product is light and is installed on the wall (as shown in the picture).


Connection
So, in order for you to understand each of the connection methods, we will provide the appropriate step-by-step instructions for dummies.
If you use a hook, it is enough to drill a hole in the ceiling with a drill, drive a dowel (or anchor) into it, and then screw the hook itself. Next, you need to connect the wires between the body and the supply wires, carefully insulate them (if required) and only after that hang the chandelier on a hook. We need to dwell on this in more detail so that you know how to properly connect the chandelier to the ceiling.
If the design of the luminaire does not provide for grounding, two wires must be connected to the housing - phase and zero. As a rule, metal lamps provide additional grounding, so in this case you will be dealing with three wires - phase, zero and ground. Each core must be connected in the terminal block according to the color marking of the wires, as well as the symbols. If 4 wires come out of the lamp housing, then it means a chandelier for two light bulbs and it must be connected by analogy with two lamps.
Video lesson on connection
If you are installing electrical wiring from scratch, then you need more. You can get acquainted with the technology by simply clicking on the link.
In order to hang the chandelier evenly on the bracket, you must first set the screws at a suitable distance. Then fix the bracket using dowel-nails. Next, you need to thread the body through the studs, and with the help of decorative nuts, securely fix the product on the bar. As in the previous case, the wire connection must be done in advance.
We also draw your attention to a very important point. When connecting a chandelier, the cores must be correctly connected: phase to phase, zero to zero, and ground to ground. If you mix up the contacts, it will happen. To prevent this from happening, we recommend that you familiarize yourself with.
Well, the last way is to mount the back cover directly to the ceiling. In this case, the design of the product has several holes on the back cover, which are simply fixed with self-tapping screws. There is nothing complicated, the only advice I would like to give is that it is not necessary to use all the holes. If the lamp is light, but 4-5 holes are provided, then three self-tapping screws may be enough to hang the case.

Connecting a socket, switch and light bulb in a junction box
Control check
When you complete the electrical connection, you need to check all the work. First, visually - so that the wires are not visible (hide the cores in the case). After that, you need to shake the lamp to make sure that the fastening is secure. Well, in the end, turn on the machine and if it does not knock out, and the lamp itself does not sparkle, then everything is done correctly! As you can see, one person and even a woman can easily hang a chandelier from the ceiling! The main thing is to follow all the rules that we told you about!
Non-standard situations
Above, we have provided you with instructions for installing a chandelier in the most standard conditions - when the ceiling is even and without defects. At the same time, sometimes you have to carry out fastening in non-standard conditions, which we will discuss briefly.
To hang the chandelier on a stretch ceiling, you can use the bar, as shown in the photo below. In this case, fastening can be carried out even if the ceiling is already stretched and, moreover, the replacement of the luminaire can be done without the risk of damaging the film coating. 
If you decide to hang the product on a sloping ceiling, then it is best to use a hanging chain. When for some reason you have to change the location of the chandelier in the apartment, the main thing is not to get into the wiring when drilling a new hole in the ceiling. To do this, it is recommended to use, which will show where the wires go.
If there is already a hole in the ceiling, be sure to use it so as not to re-drill the hole with a puncher. Too large a hole can be hidden with a special plaster cover, which is sold in most hardware stores.
If three wires of the same color come out of the hole, then in order to find the phase, zero and ground, you will have to use a multimeter. Things are easier with two-wire electrical wiring - you can find the phase and zero with an ordinary indicator screwdriver (when you touch the phase, the light will light up).
Liked the article? Add "" to bookmarks and we will delight you with new available instructions with visual video examples, as well as electrical diagrams. We hope you understand how to hang a chandelier on a plasterboard, concrete or wood ceiling!
Related content:
We also recommend
 Smartphone xperia z5 premium black
 Download toilet paper business plan
 Description Nokia X2 dual sim on the Android platform, powerful processor and support for two sim cards
 Is it possible to open a hostel in an apartment?
 Services to the public: the most promising business ideas
 How to start farming?