Beautiful flowers from foamiran with their own hands. DIY crafts from foamiran for beginners: photo, video
Foamiran is an ideal material for making artificial flowers. They can be used for interior decoration, wedding floristry, creating unique accessories for women. This article will teach you how to make flowers from foamiran with your own hands.


open foma
In order to create any flower from foma, you will need:
- Foamiran of various shades;
- Scissors, both regular and curly;
- Glue (hot glue, moment or second glue);
- Iron;
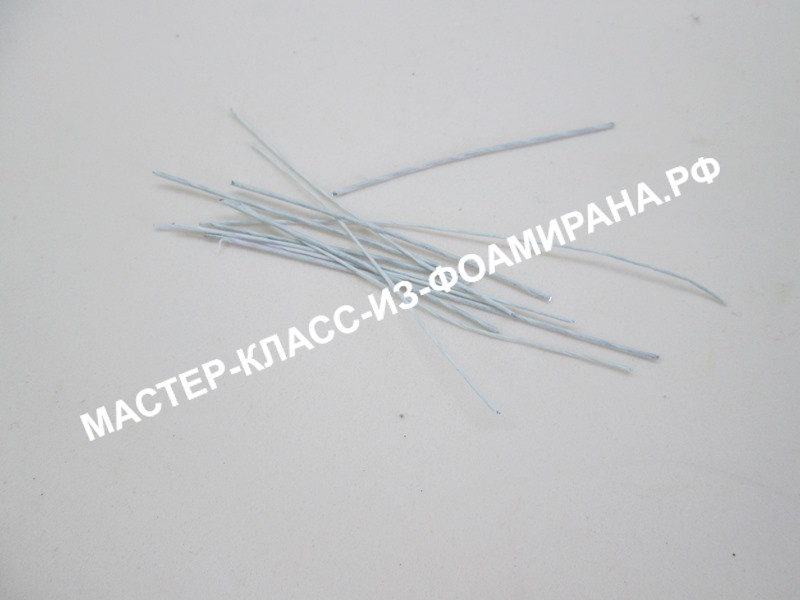
- Wire or wooden toothpick;
- Foil;
- Any paint for tinting products (acrylic, oil, pastel);
- Tool for applying paint (brush, sponge);
- Molds (to create a realistic flower texture);
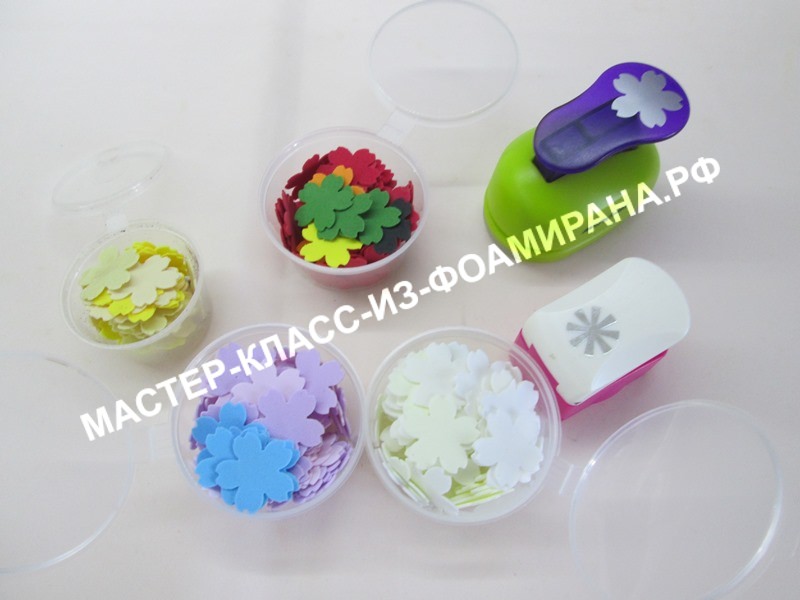
- Accessories (beads, rhinestones, stamens).
The photo shows all the materials needed to work with foamiran:

These tools and materials can be easily purchased at almost any craft store.
To create more complex flowers, such as ranunculus, peony and orchid, in addition to materials, you will need patterns. A pattern is a schematic representation of parts of a future product, made of paper, cardboard and other materials. To create realistic products, needlewomen take real flowers and circle them on cardboard or paper, thus obtaining a unique pattern. It looks like this:

Each needlewoman will have such a scheme, because any flower that nature has created is unique. If there is no time to do botany, the easiest way is to resort to the experience of other needlewomen and use ready-made patterns to create your own product. Even if you use the same patterns all the time in creating a particular flower, it will still be unique. Because when processing foamiran, it is impossible to give all products the same shape, these are the features of this wonderful material. To use ready-made patterns in your work, you just need to transfer them to thick paper or cardboard and cut them out. It is very convenient to store cardboard blanks in signed envelopes. To transfer the pattern to foamiran, simply circle the patterns with a toothpick. Next, cut out the details, and you can start working.
Below are a few schemes for creating different colors:


Simple Options
After selecting the scheme and preparing the material, you can proceed directly to work. Making flowers from foma consists of the following steps:
- Transferring the pattern to foamiran;
- Cutting details;
- Toning parts of a flower with various types of paint;
- Processing parts with an iron and hands, as well as molds;
- Direct assembly of the product.
It is worth starting work with simpler flowers, such as dandelion, aster, crocus. To create them, you do not need certain skills, it is enough to have the necessary material at hand.
How to make simple flowers from foamiran, you can see in the selection of video tutorials below:
We make marin root
Let us consider in more detail the described work with foamiran using the example of creating a terry peony flower.
Tools and materials for work: light pink and green foamiran, glue, scissors, dry pastel, toothpick, hair straightener.
Pattern:

Transfer the pattern to cardboard, then with a toothpick to foamiran. The easiest way to do this is to cut the fom into strips of the required height. Tint the petals of the first and second row on both sides with dry pastel (using a sponge or a damp cloth) as shown in the photo:

The petals of the third and fourth rows must be tinted by 2/3:

For the petals of the fifth row, tinting is needed only 1/3. We make the core more saturated:

We circle the green leaves according to the template and draw the veins with a toothpick:

After the tinting stage, it is necessary to cut out all the details:

In this MK, foamiran is processed with a hair straightener. Heat the petals until their edges begin to curl inward. Fold the petal in a spiral, unfold, and then carefully, so as not to tear the material, make a boat-shaped recess in the middle. Repeat this operation with all the petals:


The leaves also need to be heated on an iron and twisted between your fingers, so they will take on a more natural look:

The preparatory stage is over, you can start assembling the pion. In the middle of the part in the form of an asterisk, apply a drop of glue and fold it as shown in the photo:

Glue the first three petals (petals of the first row):

All subsequent petals are glued so that the petals of the next row are in the gaps between the petals of the previous row. In the second and third rows, 4 petals. Further, as indicated on the pattern. You get such a terry peony:

Stick on green leaves:

Recently, a hobby for needlework, crafts from various materials, including foamiran, has become popular and fashionable. Master classes are held on making various flowers, dolls and decorations from this material.
Such products are used to decorate hairpins, headbands, clothes and shoes, and they also use foamiran flowers to decorate interiors in the form of various panels and bouquets placed in vases.
What is foamiran?
Master classes for making flowers from foamiran for beginners can be easily found on the Internet.Foamiran is a soft decorative foamy sheet synthetic material., which is one of the types of suede fabric, also known as revelure, foam, plastic suede, foam rubber, EVA fom.
Due to a large palette of 20 to 24 tones and malleable properties, structure, it is often used in needlework in the manufacture of various toy figures, jewelry, artificial flowers, bouquets, and clothing ornaments.
Foamiran consists of porous rubber, which is foamed using a special technology, and because of this it is very well subjected to various treatments and manipulations with it. The main property of foamiran is compliance when exposed to even a slight elevated temperature. It becomes elastic and you can give it any desired shape and shape.
Plastic suede is another name for foamiran.
Chinese and Iranian foamiran is especially popular among needlewomen, it is inexpensive, of good quality and with unique properties.
Foamiran properties:
- under the influence of the heat of the hands takes the desired shape;
- when using an iron it becomes voluminous;
- retains the shape that was given to it after complete cooling;
- you can easily cut or cut out small parts with scissors;
- can be painted in any color, both with acrylic paints and pastel crayons;
- cut down with a composter or hole punch;
- parts are connected with glue of strong and medium fixation.
When choosing foamiran, you need to know that there are several varieties of it.
The most popular and frequently used types:
- Iranian foam, which is produced using a special foaming technology, is produced in sheets of 60/60 cm, the thickness of the edges is uneven up to 1 mm;
- Turkish revelure, of uniform thickness and is available both in rolls and in sheets;
- Korean foamiran, a material of good quality, retains its shape well, with a thickness of 0.6 to 1 mm.
For making floral arrangements or individual flowers, thin silk foam or glitter revelour with glitter is best suited. Marshmallow foam is excellent for making petals because of its airiness, softness, suppleness, which does not require heating and is well dyed in the desired colors.
Foam is widely used in artificial floristry. This material is perfect for making a variety of colors and composing compositions from them.
Tools and materials for work
To learn how to work with foamian, they conduct master classes on making flowers for beginners with step-by-step instructions.
For this you will need: 
- foamiran, several sheets of various colors;
- patterns and diagrams;
- curly scissors;
- for the manufacture of small parts hole punch;
- glue gun for gluing parts;
- to shape the petals and create three-dimensional and curved surfaces - iron;
- small decorative elements;
- molds and viners to give the blanks the desired shape and naturalness;
- brushes and sponges for applying paint;
- floristic wire for stems;
- tape tape.
For the manufacture of flowers, it is best to take marshmallow or Iranian foamiran.
Master class step by step for beginners
To make snowdrop flowers from foamiran, you need:
- white sheet foam;
- olive-colored revel;
- green teip tape;
- stem wire;
- scissors;
- hot glue gun;
- acrylic paints and pastel crayons;
- iron.
A step-by-step instruction for creating a snowdrop consists of 3 stages: cutting, gluing and decorating.
Cutting
Instruction:
- We draw on a white sheet of foam with a toothpick the outlines of flower petals, 3 large and 2 small.
- Cut out the resulting snowdrop petals along the contour.
- From the inside, we tint the petals with green paint, pre-drawn hearts and painted over with chalk.
- You need to lean a petal against the heated sole of the iron. It will stick at first, but as it heats up, it will begin to fall behind. Use your fingers to give the desired shape to the petal until it has cooled. Repeat the procedure with all blanks.
- We make the middle of the snowdrop from the purchased finished stamen, which is attached with glue to the wire-stem.
gluing
Instruction:
- First, small petals are attached to the wire with a stamen glued to it using a glue gun.
- On top of the stamen and small petals already gathered together, large petals are glued.
- It turned out a half-opened snowdrop
Decor
Instruction:
- To create the effect of an opened snowdrop, you need to bend the larger petals back and apply a little hot glue to their base. When the glue dries, the petal will remain in a bent position.
- We make a stem from teip tape. We tear off the tape of the desired length and cut into 2 ribbons. We wrap them around the wire from the bottom towards the bud in a spiral.
- Create leaves from olive colored foam sheet. Cut out 1 small, 2 large oblong leaves. On large leaves, paint over the middle with green chalk. Then, with the help of your fingers, give them the desired shape.
- To make the snowdrop look natural, you need to bend the leaves, and glue them together at the bend.
- First glue one leaf to the bottom of the stem, and then the following leaves.
- We make the last inspection of the snowdrop and correct visible flaws with our fingers.
Master class (instruction) for creating flowers
To create each flower of a different type from foamiran, step-by-step instructions and master classes for making flowers are provided. The principle of manufacturing different colors is the same, only the difference lies in the complexity of execution and the number of parts during assembly.
Lily
To create a lily from elastic foamiran, you will need:

Step-by-step instructions for making a lily:
- We make a template from cardboard and cut out a petal 60 mm long.
- We cut out 6 pieces of petals from white sheet foam according to the pattern obtained.
- We tint the petals with a pink-lilac tint using acrylic paints.
- To give volume to the petals, we heat them with an iron, and draw the veins with a toothpick.
- To make the ends of the petals wavy, they are also heat-treated with an iron.
- From the bottom of the petals with a brown felt-tip pen, we put dots to make the lily petals look natural.
- On the prepared wire pieces 5 mm long, glue the stamens and small rhombuses of foam, painted black.
- Cut out the leaves from the green leaf.
- To give figure, heat the leaves on the iron.
- Glue a row of 3 petals to the base with stamens and pestle.
- In the order of chess, the second row of petals is glued.
- Leaves are glued from below in random order.
Chamomile
To make chamomile flowers from foamiran, you need:
- a sheet of white foam;
- cardboard sheet;
- glue gun;
- pastel crayons;
- compass;
- iron.
Process of making chamomile: 
- On a sheet of foam, using a compass, make 3 circles with a diameter of 90 mm, cut them out.
- We cut a strip 270 mm long with a width of 20 mm from the revel and paint it with yellow paint. This is a blank for the core of chamomile.
- We fold the yellow strip in the middle, glue the edges and cut into thin strips from the side of the fold to make a fringe.
- We twist the base, having previously glued it, in the form of a spiral.
- We cut out a circle with a diameter of 90 mm from cardboard and, using the conveyor, draw the places for cutting the petals.
- A cardboard template is needed to cut out the chamomile petals.
- Without cutting 0.2 cm to the center, carefully cut the circles into petals.
- Using an iron, we round the chamomile petals, giving a natural look.
- We put the workpiece on the core and glue it.
- We make the next 2 layers of petals in a similar way, gluing them together.
Poppy
Creating a poppy flower from foam is not as difficult as it seems at first glance, for this you need:
- a sheet of red foam;
- sheet of green revelure;
- wire;
- a bead with a diameter of 20 mm;
- cardboard sheet;
- black threads;
- glue;
- toothpick;
- scissors for cutting parts;
- iron.
Instructions for creating a poppy: 
- Draw a poppy petal on a sheet of cardboard and cut out the blank.
- Cut out a circle with a diameter of 60 mm from green foamiran.
- We stretch the wire through the bead and twist it, we form the stem.
- We heat the workpiece on the iron so that it becomes elastic, and we wrap the bead with it, fastening the edges near the wire.
- We fix the green foam on the bead with threads to make intersections.
- We make stamens from black threads and fasten them at the base with glue.
- Using a toothpick and a workpiece, we make petals from red velor and cut them out.
- First, we fold the leaves in the form of an accordion, then twist them with our fingers.
- We straighten the petals, this is done to give them naturalness.
- We glue the petals to the base in two rows.
- Cut out 2 leaves from the green foam, cut them along the edges, repeat the twisting.
- From below, under the petals, we attach the sheets with glue and cut off the excess wire.
Rose
One of the flowers that is made from foamiran is a rose.
A master class for making roses provides for the following materials:

How to create a rose:
- We cut out 2 blanks of petals from cardboard, one is larger, the other is smaller.
- We place patterns on a pink sheet, and draw around with a toothpick, then cut it out with scissors.
- We lean the petals alternately against a hot iron so that the edges become curved.
- We roll a ball from a piece of foil and wrap it cone-shaped with a small petal and glue it.
- Next, glue the small petals to form a bud.
- We attach large petals in rows to the bud blank and fix it with glue.
- From the green foam cut out 6 pieces of sheets.
- We heat the leaves with an iron so that their edges become curved and fasten them with glue to the flower.
Sunflower
To create a flower from foamiran, you need:
- revelure white sheet;
- a sheet of cardboard;
- glue gun;
- curly scissors, awl;
- teip tape green;
- toothpick;
- paints;
- iron.
 The process of creating a flower step by step:
- On cardboard we draw rectangular figures of different sizes, 4 types and cut out patterns of petals.
- We wrap a large toothpick with green teip tape, this will be the stem.
- We circle all 4 types of petals 12 times on a white sheet of revelure with an awl, then cut it out.
- We paint all the petals yellow in such a way that the color is more saturated by the beginning of the petal.
- Draw and cut out 4 sunflower leaves and paint green on both sides.
- From the sheet foam we cut out a strip of a meter length and 20 mm wide.
- We paint the strip black and cut with scissors so that we get a fringe.
- We twist the fringe into a roll on the prepared stem and fix it with glue, we get the core of a sunflower.
- We heat the petals with an iron, giving them a curvature.
- We fix the smaller petals with glue, and then the large ones.
- Glue the leaves on the underside of the flower.
Hydrangea
Artificial inflorescences of this flower are often used as decorative decorations for holiday rooms.
You can create a hydrangea from foamiran, for this you need:

Master class (process) of creating hydrangeas:
- We divide the peach-colored foam sheet into squares measuring 20 by 20 mm. Cut out with scissors.
- On each square, we make cuts from the middle of each side to the center, not reaching 1.5 mm. It turns out a flower of 4 petals, with the help of scissors we round the edges of the petals.
- We tint with green pastel on both sides each core of the flowers.
- We heat each flower petal with an iron and apply it to the mold to get natural veins.
- After that, we tint the flowers with pink pastel.
- In each flower we make a hole in the center, and insert the purchased stamen and fix it with glue.
- When the flowers are ready, we collect the hydrangea inflorescence, consisting of 5 pieces.
- We attach small flowers to the wire wrapped with teip tape with glue, giving the inflorescence a natural shape.
- Cut out leaves from green foam. With the help of an iron and mold, we give them naturalness.
- We cut off several pieces of wire 5 mm long and glue a sheet on it.
- Then we glue the finished sheets to the hydrangea inflorescence.
Orchid
A natural orchid is a very capricious flower and often does not take root at home. But you can make this beautiful flower from foamiran yourself.
For this you will need:

Step-by-step instructions for making an orchid:
- We make a template from cardboard, consisting of 3 parts: a core and 2-petal and 3-petal parts.
- Using a toothpick, make the core of a flower from a sheet of purple foam and cut it out.
- We cut out the petals from the white foamiran according to the blanks.
- With the help of fingers we give the petals a shape, stretch them a little.
- We cut the wire into pieces 17 cm long and string the beads and twist.
- We make a hole in the core with an awl and string it on the wire.
- We bring the core on a wire with a bead to a burning candle. When the core begins to curl inward, remove from the heat source.
- The petals pierced with an awl in the center are fastened to the structure of the core and beads, gluing them to the wire.
- Using a ballpoint pen, draw veins on the petals.
- On a long wire at the top we make a ball of foil and fasten it with glue.
- We cut out small petals from a sheet of green foam and close the ball with them to make a bud.
- We wrap the entire length of the floristic wire with green teip tape, we get a stem.
- We attach ready-made flowers to the stem, and we get a whole orchid.
Peony
Peonies are very beautiful flowers, but they fade quickly. You can make a similar artificial flower so that it pleases at any time of the year.
To create a peony you will need:
- foamiran sheets of white, pink and dark pink;
- cardboard;
- wire;
- wooden bead, 15 mm in diameter;
- glue;
- scissors;
- iron.
Master class on manufacturing peony: 
- From different colors of foam, cut out strips 5 cm wide.
- We make patterns of petals of arbitrary sizes from cardboard.
- According to the template, circle with a toothpick on the strips of foam with a toothpick and cut out the petals. You should have about 70 petals.
- Petals should be: small - dark pink; medium - pink and large white petals.
- We heat each petal with an iron and give it a waviness, stretching the still warm petal with your fingers.
- We give the petals the shape of boats, a little of them, bending inward.
- We take a bead and wire to make the base of the peony - the stem and the core.
- We begin to collect the flower, first gluing dark pink and then pink petals to the bead. Large white petals are glued last.
- When gluing the petals, it is necessary that some randomness be observed, this gives the peony a natural look.
- When the bud becomes voluminous and it is inconvenient to glue the petals, they turn it over and begin to glue it from below.
- Dry the flower with a hairdryer and cut off the excess wire.
Decorating with foamiran
Foamiran is used in many types of needlework, in master classes for making flowers and dolls, toys and jewelry.
Most often it is used in such cases:
- when decorating photo frames and photo albums;
- to create wedding bouquets, boutonnieres;
- making women's jewelry - necklaces and earrings;
- create panels and paintings from flowers for decorating an apartment;
- make various hair clips and headbands;
- decorate clothes and shoes;
- used for children's crafts;
- production of New Year's toys;
- drawing up flower arrangements for decorating rooms for special occasions;
- execution of decorative postcards and invitations;
- production of fridge magnets;
- the creation of small figures to decorate the interior of the apartment;
- used in scrapbooking.
Having a little imagination and being able to handle foamiran, you can create unique author's products that will delight your loved ones and friends with their originality and beauty, because a piece of the author's soul remains in every handmade fake.
Video master classes on making flowers for beginners from foamiran
How to create roses from foamiran, find out in the video clip:
An easy way to create flowers from foamiran:
Making flowers and decorations from foamiran with your own hands has become a hobby of many talented needlewomen. Today, almost any kind of needlework is available, thanks to the many specialty stores where you can buy anything. In this article I will try to talk about the principles of making flowers from various types of foamiran and show examples of master classes with step-by-step photos.
How to make flowers from foamiran at home with your own hands?
So, what flowers can be made from foamiran? This question can be answered simply. Any! Foamiran is a rather malleable universal material from which you can make any flower from a giant protea to small wild flowers. However, the most popular flowers are classic roses, peonies, orchids, chrysanthemums, lilies and callas. Some of them I will show how to do in this MK, and you can find other types of flowers and plants in other needlework lessons on my website. As for the colors. They can also be anything: yellow, red, blue, etc. Initially, you can choose the material to match the future flower, but in the process, you still need a slight tinting of the petals to give them a more natural look. About the stages of making a flower in more detail ...
Steps for making a flower from foamiran yourself:
- Pattern or scheme of a flower : they can be found on the Internet or made with your own hands by crushing a living flower and circling each petal;
- Foamiran flower templates : then we cut the blanks of petals and leaves for the flower in the required quantity and prepare all the auxiliary materials for manufacturing.
- Tinted petals and leaves : almost any flower requires tinting. To do this, you need dry or oil pastels or acrylic paints. Beautiful shading of dry pastels is best done with wet wipes, oil pastels with a sponge, acrylic paint with wet wipes.
- Shaping : the shape of the petals and leaves is given by rubbing them in the fingers. stretching, heating and other manipulations (more details in the master class). Molds are used to apply veins and give a natural texture. If there are none, then the vein pattern can be carefully applied with an orange stick.
- flower assembly : a very important stage at which to decide how your finished flower from foamiran will ultimately look. The assembly process can be seen in a photo or in the form of a master class, or again, look at the example of a living flower. Petals, as a rule, are glued with “petal circles”. In master classes, it is usually indicated in which petal circle, how many petals.
- How to fix flowers from foamiran to hairpins, elastic band or brooch, headband. Fastening for jewelry at the beginning we process with a satin ribbon or foamiran itself. We take foamiran in the same color from which the decoration is made, then we begin to glue the leaves and flowers in turn, in general we collect the decoration itself.
More experienced foamiran masters can make charming flowers without an iron and without molds. But this skill is not developed the first time.
Flowers can be made from different types of foamiran:
- from Iranian;
- from marshmallow;
- from Chinese;
- from Korean;
- from silk;
- from glitter.
Now every day new varieties of foamiran appear. Depending on the source material, the end result also changes. Thicker Chinese, Korean foamirana is suitable for daisies, gerberas and other simple flowers. Marshmallow, the thinnest silk, allows you to make very realistic flowers. It is suitable for complex buds and plants. Iranian is good for making leaves and all kinds of flowers. And from glitter make decorations with flowers.
Master class for beginners in making flowers: step by step photo
You can make many different colors from foamiran. Let's start with the example of a simple flower - mallow. This master class is designed for beginners. Further MK will be more complex.

Here we will make such a branch of mallow at the master class.
To create a mallow from marshmallow foamiran, you will need:
- pink, white marshmallow foamiran, green Iranian foamiran;
- glue second;
- scissors;
- wire No. 28-30 and 1.2 mm;
- dry pastel light green and green;
- dyed semolina or phlox powder;
- bulba;
- mold cattleya;
- teip tape olive color.
Templates for mallow

From pink marshmallow foamiran we cut out 5 * 5 cm squares for one flower 6 pieces. Cut out a strip of 2 * 5 cm and 0.5 * 3 cm from white marshmallow.

We take the wire and make a loop at the tip and wind a strip of foamiran 2 * 5 cm tightly onto the wire in the form of a roll, applying it to the iron and pressing it.

The ends of the roll are rounded on both sides.

Strips of 0.5 * 3 cm are laid out on paper and smoothed with an iron with a steamer on both sides.

We cut the worn strip into a thin fringe.

Glue the cut fringe to the roll, stepping back 1.5 cm.

We take the colored semolina, grease the pestle with glue and dip it in semolina and leave to dry.

We take the squares cut out of pink, heat the squares on the iron and quickly apply cattleya to the mold.

From the processed squares, according to the contour of the mold, we cut out the petals.

We stretch the edges of the petals, make waves.

We process the bottom of the petal on a bulb, make a recess.

We take light green and green dry pastels and tint the bottom of the petal on both sides.

We process the wire at the pestle with tape cut into 2 parts.

Apply glue to the tip of the petal from the wrong side and glue the petal immediately after the fringe. So glue all 6 petals in a circle.

And then we begin to glue the petals dotted overlapping each other forming a cup.

Here is such a cup of an open flower turned out.

We take a green foamiran Iranian 2 * 2 square and cut out the sepal in the form of an asterisk. We grind the sepals between the fingers and straighten. We make a hole in the middle and put it on the stem and glue it to the flower.

We take the foil and form a ball for the base of the bud. We cut out the sepals for the bud from their green foamiran. Square 3 * 3 cm cut out a four-leaf 2 pieces and grind between the fingers.

We attach the base of the bud to the wire and glue the base with sepals so that the foil is not visible. We process the wire with foamiran or teip tape several layers.

We take a bud and attach a flower to the stem of the bud. Fasten with a strip of foamiran.

We fix the rest of the mallow flowers in a checkerboard pattern.

This is the branch we got. We use this branch for bouquets. By making mallow smaller, you can decorate headbands and bracelets, wreaths.
Master class flowers from foamiran: Roses

To create a rose you will need:
- yellow marshmallow foamiran and green Iranian foamiran;
- pink dry pastel and wet wipe;
- olive, pink and yellow oil pastels;
- iron;
- glue second or hot gun;
- lighter;
- wire No. 26-28 and 1.2 mm;
- molds are universal for leaves;
- scissors;
- teip green tape.
We will make a rose without a separate pattern.

We take yellow marshmallow foamiran and lay it out between office paper and iron it with the effect of a steamer. After allowing the foamiran to cool, remove from the paper.

From the processed foamiran we cut out squares 5.5 * 5.5 cm - 12-14 pieces and 4 * 4 cm. 13-16 pieces.

From the squares we cut out the petals in the form of droplets with a figured top.

We lay out the cut petals on corrugated paper and iron with an iron.

We tint all the petals with pink dry pastel, highlighting the veins formed when ironing through corrugated paper. We apply tinting on both sides.

We heat the edge of the petals and twist, heat the middle of the petal and make a recess in the middle of the petal. So we process all the petals.

Pointwise heat the edge of the petals and make waves, as if stretching the petal.

From the foil we make the base for the rose in the form of a droplet and glue the base onto the wire.

We take two petals and glue a drop of foil, glue the petals one against the other, closing the foil.

We take small petals and glue them in a circle at the same level in height, slightly overlapping.
 So glue all the small petals.

So we glue all the petals at the same level on the reverse side of the rose it looks like this, we glue the petals not tight to the wire.

Then we glue the petals for more, we also glue them at the same level in a circle, overlapping.

Glue the petals tightly to the wire.

Here is a rose we have collected.

From green foamiran we cut out squares 4 * 4 cm in size and cut out leaves for a rose at the corner. Then cut out the teeth on the petals.

We process the leaves on the iron at a temperature of silk-wool and squeeze them well on a universal mold.

We take oil pastels of pink, yellow and olive color and tint the leaves along the edges, slightly touching the middle. If desired, you can cover the leaves with acrylic varnish.
 We take a thin wire No. 28-30, cut it into 8-6 cm, and glue the leaves.

We take three leaves and form a branch, connect the leaves of the teip with tape.

From the green foamiran we cut out the sepals according to the size of the resulting rose. We tint the sepals on one side with olive and pink pastels. Put all the petals together and rub between your fingers, then straighten.

We make a hole in the middle of the sepal and put it on the wire. Then glue each sepal petal.

We process the stem with teip tape, wrap the stem several times thickening it.

When processing the stem with teip tape, we simultaneously fasten the leaves.

Here we have such a rose from marshmallow foamiran.
Master class flowers from foamiran: Peonies

To make a peony from marshmallow foamiran, you will need the following materials:
- red and yellow marshmallow foamiran, green Iranian foamiran;
- glue second;
- scissors;
- bulb;
- wire No. 28-30 and 1.2 mm;
- oil pastel olive and pink;
- newspaper tube;
- yellow stamens;
- teip green tape.
We will make a peony from marshmallow foamiran without a separate pattern.

From the thinned red marshmallow foamiran we cut out triangles of three sizes. Marshmallow foamiran is thinned by ironing the foamiran with an iron with a steamer through office paper. The first triangles are 32 pieces 5 cm high and with a base 4 cm. The second size of the triangles is 5 cm, the width of the base of the triangles is 6 cm - 24 pieces. And 10 pieces of triangles 6 cm high with a base width of 8 cm.

From blanks, triangles we cut out petals of various shapes.

We fold all the petals with an accordion and slightly grind the top of the petals, stretch and make a recess.

We take a strip of yellow marshmallow foamiran 2.5 * 15 cm, and taking into account the properties of marshmallow foamiran when gluing is heated, we fold and heat and form ovals.

We heat one side of the ovals and connect them together. So they stuck.

Take the wire and place it between the ovals.

Glue two more ovals on top of the wire.

We take a pink oil pastel and tint the tips of the middle.

We take a bunch of yellow stamens and glue them just above the middle in a circle.

We take small petals of 32 pieces and begin to glue the petals slightly overlapping in a circle.

Glue the next row of small petals in a checkerboard pattern between the petals of the first row.

We also glue the petals of the next size overlapping in a circle.

So we collect and glue all the peony petals.

We take squares of foamiran 10 * 10 cm. We heat it on an iron and pull it onto something round. I am using a light bulb.

Then we cut out the processed squares in the form of droplets and fold the edges with an accordion and grind between the fingers.

Glue the prepared large petals overlapping in a circle.

We take a twisted tube from a newspaper and put it on a wire and glue it to the base of the peony.

We take the teip tape, cut it in half and process the stem in one layer.

According to the pattern of leaves and sepals, we cut them out of green Iranian foamiran.

On the cut leaves from the dark green Iranian foamiran we apply the texture with a shelf.

We take an oil pastel of olive and pink color. Then we fold the leaves and sepals with an accordion and grind between the fingers, straighten and stretch. We glue the leaves on lithons along the entire length of the leaves.

We take a sepal and make a hole in the middle and put it on the stem and glue it to the flower.

We take a teip tape and process the stem, and when processing the stem, we attach the leaves in a checkerboard pattern.

Here we have such a peony from marshmallow foamiran.
How to make flowers from marshmallow foamiran: MK with step by step photo
From marshmallow foamiran, I decided to make a rare flower - terry hippeastrum "Aphrodite".

Finished: photo of hippeastrum.
To make terry hippeastrum flowers, you will need the following materials:
- red marshmallow foamiran;
- olive Iranian foamiran;
- glue hot gun;
- scissors;
- wire 1.2 mm;
- corrugated paper;
- red, yellow, green acrylic paint and a thin brush.
We make flowers without a pattern.

Cut out rectangles from red marshmallow foamiran:
- 2 pieces size 4.5*2 cm.,
- 3 pieces size 5.5*2.5cm,
- 4 pieces 6*4 cm in size,
- 5 pieces 6*4.5 cm,
- and from green foamiran square 5 * 5 cm.

We cut out the petals in the form of droplets, the first 2 petals with rounded edges, 3 petals with pointed tips, 4 and 5 petals also with pointed tips. Cut out the sepals from the green foamiran.

All petals are processed through corrugated paper. We spread the petals on corrugated paper and cover with corrugated paper and iron it with a hot iron on both sides, let it cool and remove the petals.

We heat the silk-wool on the iron at a temperature and rub it between the fingers and straighten it.

2 petals we heat the edges of the petals on the edge of the iron and make waves, with a movement as if we want to break the petal. Then we heat the top of the petal and clamp it.
 3 petals we heat the edges of the petals on the edge of the iron and make waves, with a movement as if we want to break the petal. Then we heat the top of the petal and twist them on both sides.

4 petals we heat the edges of the petals on the edge of the iron and make waves, with a movement as if we want to break the petal. Then we heat the top of the petal and twist it on both sides, heat the very tip again and clamp it.

5 petals will be processed using processing sequence 3 and 4.

Apply red acrylic paint with a brush with rays to the bottom of the petals.

On 3 petals, we apply rays to the bottom of the petal with acrylic red paint and also tint the tips with red acrylic paint.

On 4 petals, we apply rays to the bottom of the petal with acrylic red paint and also tint the top of the petals with strokes of red acrylic paint.

On 5 petals, we apply rays to the bottom of the petal and tint the top of the petals with acrylic red paint in different ways, as we tint the petals 2-3-4.

We take yellow and green acrylic paint, mix and apply rays on the back of the petals and a few rays on the front side of the petals.

3 petals are tinted as the first 2.

We tint 4 petals as the first 2.

5 petals from the wrong side we apply rays to the bottom of the petal, and from the front side we apply rays and one of them almost to the middle of the petal.

We take a wire of 1.2 mm. we make a loop and apply glue in the middle of the petal and twist it, glue the wire into the petal. The second is glued opposite the first.

We apply one petal out of three to the junction of the petals, apply glue to the bottom of the petal and pinch it a little, so that the petal is slightly moving away from the stem. So glue three petals in a circle.

Glue 4 petals a little lower and also apply glue to the bottom of the petal and pinch. Glue the petals between the petals 2 rows.

5 petals below 3 rows and between the petals 3 rows and also glue and pinch.

The hippeastrum is ready.

We put the sepal on the stem and glue it to the flower.

We take a strip of green foamiran 0.5 cm wide, rub it between the fingers and process the stem.

Hippeastrum can be used for interior compositions and bouquets.
Small flowers from the remains of foamiran
When we do there are a lot of leftovers that can be used in different ways, I suggest you make small flowers. Such flowers can complement any decoration - a headband, a hairpin, and a bouquet will be a good addition.
 These bouquets can be made from scraps of foamiran.
To create flowers from scraps of foamiran, you will need:
- foamiran trimmings;
- punchers;
- glue second;
- scissors;
- wire No. 28-30 and 1.2 cm;
- stamens;
- teip tape white.
From scraps of foamiran we cut petal circles for hole punchers. You can use absolutely any hole punches and various trimmings. If there are no hole punches or trimming, small enough petal circles can be cut out simply with scissors.

Then, holding the petal circle with a toothpick, heat it on an iron at a silk-wool temperature and then help with your fingers to bend a little to form a cup.
We cut the wire 6-7 cm.

We take cotton swabs and cut off half of the head from them.

Glue the cut heads onto the wire.

We put a petal circle on the wire and glue the base. Then through one petal. So we formed a bud. You can tint it using dry or oil pastels.

We take a stamen and two petal circles and form a flower. We dress the petal circle on the stamen and glue it. We put the second petal circle on the back and glue it to the base of the first. This is such an interesting flower. You can collect such flowers in different ways. You can twist the petal circle and glue it on the wire, collecting it in the middle, and only then glue the second one. Fantasize.

We will also make a single flower by gluing one petal circle to the stamen.

We take 3 buds, place them at different levels and fasten the teip tape together. We attach 3 more single flowers to them and also fix the teip with tape. And then we fix 5 double flowers. Here is such a branch turned out, which can be used to decorate and complement any composition.

If you do not have a hole puncher or the trimmings do not fit the hole puncher, then cut into squares. You can 1 * 1 or 1.5 * 1.5, depending on what kind of trim you have. Cut the squares into 4 parts, but not completely. We round off the tips or make them sharp, as if cutting out the petals. We process on the iron and also collect different types of flowers. You can use different types of stamens. These flowers can be made without a hole punch.

These are the inflorescences and bouquets we made from scraps of foamiran.
Flowers from foamiran: photo collection
Here are samples of photos of the most beautiful and completely different colors from foamiran.
- Large and small flowers

little flowers

large buds
- Flowers by season

spring

Summer

autumn

Winter
- Flowers of different shades

purple

Blue

Yellow and orange

Red

Pink

Greens

White

Brown

black
- Popular types of flowers


Aster

White orchid

pink orchid


Lily

eustoma


Wildflowers, daisies
- Flowers from foamiran in the interior

in a vase

In pots or planters

- Wedding flowers (bouquets)

wedding bouquets


Artificial jewelry is widely used in the design of holidays, in interior decor and in the creation of women's jewelry. Foamiran flowers are especially popular, the manufacturing master class of which does not require special experience. Such floral decorations are very similar to natural ones, therefore they are very popular with needlewomen. Foamiran is called plastic rubber or suede, but let's see what this material really is.
What is foamiran and where to buy it
Foamiran is a new synthetic Iranian material, recently brought to Russia. Its name comes from the name of the issuing company "FoamIran". Foam is a popular material, because its rich color range allows you to create very realistic compositions and toys. The material easily takes any shape, and the volume of the workpiece is given by light heating with an iron. Foamiran is environmentally friendly, and you can buy it in needlework stores. At an affordable price, plastic suede is sold in online stores that deliver to any region of Russia.
How to make flowers from foamiran
Plastic suede is a malleable material, so even novice needlewomen can make flowers from foamiran using a master class as a step-by-step instruction. Any crafts will be distinguished by accuracy and realism. With the help of our master classes, you will learn how to make foamiran hairpins, stencils of flowers and leaves, patterns from which it will be easy to create works of art later. So, let's make different flowers from foamiran, and master classes with photos will help you.
Lily making master class
To make a flower, we need:
- leaf of green and white foamiran;
- stamens;
- acrylic paints;
- cardboard;
- felt-tip pen;
- thermal gun;
- wire;
- toothpick;
- iron;
- scissors.

Preparation method:
- Make a 6 cm cardboard blank of a lily petal, cut it out.
- Using this template, cut out 6 petals on white foam.
- Toned them on both sides with a pink-lilac color.
- To make the petals textured, heat them on the iron, drawing veins with a toothpick.
- Heat the edge of the petal too, giving it a waviness.
- With a brown felt-tip pen, make a few dots at the bottom of each petal, giving the flower a natural look.
- For the pistil and stamen, prepare a 0.3 mm wire, stamens and small diamond-shaped pieces of plastic suede, dyed black.
- Glue them to the wire.
- Before assembling the flower, cut out the leaves on the green foamiran (foam).
- Give the leaves texture by heating on the iron.
- Glue the first row of petals (3 pcs) around the glued stamens to the pistil.
- Glue the second row in a checkerboard pattern.
- Glue the leaves as you like at the bottom of the lily.
Do-it-yourself poppy
Bright flowers from foamiran are very beautiful, and a master class in creating a red poppy will help you make sure of this. Poppies have long won love and attention for themselves, thanks to their simplicity, beauty and brightness, and absolutely anyone can handle their production, even if they pick up plastic suede for the first time. For the manufacture we need:
- red and green foam;
- cardboard;
- bead 2 cm;
- black threads;
- toothpick;
- glue gun;
- scissors;
- wire 20 cm.

Preparation method:
- Draw a petal template on cardboard and cut it out.
- Cut out a 6 cm circle of green foam.
- Thread the wire into the bead, twist it, forming a leg.
- Heat the green circle and wrap the bead around it, connecting the edges on the wire.
- Fix the foam with black threads with an intersection point in the center.
- Using a toothpick, circle the cardboard templates on red foam, cut out with scissors.
- Fold the petals like an accordion, then twist them tightly with your fingers and straighten them - they will acquire a wavy texture.
- Glue the petals in two rows to the base of the balloon.
- Cut out two green leaves and score all around the edge, then twist and flatten for texture.
- On the back of the bud, glue the leaves by cutting the wire.
MK chamomile
The modest wild flower is recognized as a symbol of the family, which is why "chamomile" weddings with artificial daisies have become popular. We will tell you how to make these beautiful foamiran flowers on your own in a master class. To create a flower we need:
- white foamiran;
- cardboard;
- oil pastel;
- ruler;
- glue;
- pencil;
- protractor.

Preparation method:
- On the foam with a compass, apply the contours of circles (3 pcs) in 9 cm, cut out.
- Then cut a strip 2 cm wide and 27 cm long to create the center, paint it yellow.
- Fold the strip in half, glue along the edge, cut the fringe from the side of the fold.
- Twist the core with a spiral, smearing it with glue.
- Cut out a 9 cm cardboard circle, then use a protractor to draw cuts for the petals.
- Use the resulting pattern to cut out the white petals.
- Cut the petals, not reaching 2 mm to the core.
- Heat the tips of the petals with an iron, round off, like a real chamomile.
- Put the workpiece in the middle, glue it.
- Make 2 more rows of petals in the same way, fixing with glue.
Rose
You will need:
- 2 sheets of foam (green and pink);
- glue;
- foil;
- patterns.

Preparation method:
- Cut out two cardboard patterns of different sizes, but the same shape of a rose petal.
- Trace 5 large and 5 small petals with a toothpick on the foam, cut out.
- Place all the petals against the iron, and pull the edge to make them wavy.
- Roll up a ball of foil, wrap the first small petal around it into a cone, fix with glue.
- Make a bud from the rest of the small petals, and glue the large ones on top, making the edges wavy with an iron.
- Cut out 6 leaves from green foam, attach to the iron, then glue to the rose.
Ranunculus
You will need:
- a sheet of blue foam;
- toothpick;
- scissors;
- glue.

Preparation method:
- Make 18 pcs. petals of various shapes and one strip measuring 2x10 cm.
- Cut a small fringe on the edge of the strip with scissors.
- Glue the fringe to the toothpick to make a roll.
- On the overlapping roll, glue the larger petals first, and the smaller ones last.
- Make the gluing with white foam so that you can paint over it with a pale blue color.
hydrangea and sunflower
Hydrangea, made at home with the help of foamiran, looks amazing. Working on its creation is very similar to creating a sunflower, but the difference is only in the color of the foam. For hydrangea, pale blue material is taken, and for sunflower - white, which is then tinted in several shades of yellow. We will give one master class on making a sunflower, and make a hydrangea under the same conditions.
You will need:
- white sheet of foam;
- cardboard or thick paper;
- paints;
- floral green tape.

Preparation method:
- Draw rectangles on the cardboard in 4 different sizes, cut out the petals.
- To create a stem, wrap a long toothpick with tape.
- Circle the petals of each size 12 times on white foam with an awl, cut out.
- Paint over with yellow of a different shade (darker from the edge).
- Draw and cut out 4 leaves, paint over with green paint.
- Cut 1 meter strip, 2 cm wide.
- Paint it black, turning the edge into a fringe.
- Twist the black strip into a roll based on the stem, and glue the end - this is the middle of the sunflower.
- Heat the yellow petals with an iron and twist, and then paste over the black roll, first small, then large.
- Also form the leaves by attaching them to the underside of the bud.
Master class hairpins and headbands from foamiran

On the basis of roses, sunflowers, peonies, chrysanthemums and other flowers, women's jewelry is made: headbands, hairpins and pendants. Books, handbags and fridge magnets are decorated with such realistic floral decorations. How to make a flower, you learned from the previous master classes. And to get a hairpin, brooch or headband, you need to stick one strip of porous foam, 1 cm wide, on the base of the flower, and make a loop. Then it remains to fix a pin, hairpin or headband on it, and the stylish decoration is ready.
How to make a topiary

Topiary is a tree of happiness. When it is made with the help of foamiran, it looks very stylish, elegant and beautiful, creating comfort in any interior. This is an excellent choice for those who do not like to take care of indoor plants, and the combination of many bright colors in the composition adds originality to the floristry. To create a do-it-yourself topiary, you will need a bouquet of ready-made flowers, flower pots and any decor that you need to fill the flower pots, securing the stems of the future tree.
Flowers from foamiran using figured hole punches for a wreath
MK gerbera brooch
Sooner or later, every needlewoman faces the choice of the ideal material for her work. For example, those who are engaged in the manufacture of flowers love to make them from faomiran - or, as it is also called foma, or revelure. The technique for making various elegant crafts from shiny glitter foamiran is not very complicated, especially since plastic liquid foam is often used now, the details of which are self-adhesive and self-hardening, and a master class is easy to find on the Internet. We’ll talk about this material, what can be made of it, how to use it, you can see the video from microns at the end of the article, and what can be replaced if necessary.
needlewomen are familiar with many materials that can be used to create real masterpieces with their own hands. One of the most popular materials is foamiran, an innovative material that can be heated and manipulated against the background of heat treatment. The material itself is characterized by high plasticity, which makes it possible to make the most unusual and real products from it. No wonder it is called "plastic suede". The history of the emergence of needlework leads to Iranian masters.
One of the most popular materials is foamiran.
Foamiran refers to decorative materials that are successfully used in various areas of needlework. It is its special structure, reminiscent of loose soft rubber, that allows it to be used for the manufacture of various crafts.
The qualitative characteristics of the material make it possible to classify it as a fabric, but rather dense and at the same time elastic.
The innovative material belongs to environmentally friendly types, it does not emit harmful fumes into the atmosphere, it is easy to clean and process. It lends itself well to processing with sharp objects, so you can outline the details with a toothpick or a pointed wooden stick.
Do-it-yourself foamiran roses (video)
What glue is better for foamiran
Working with foamiran often requires not only processing parts, cutting them and applying a pattern, but also gluing the parts together.
Experienced needlewomen argue that not every adhesive is suitable for gluing parts from this fabric together, moreover, when using certain types of glue, the exposure period should be increased to firmly fasten the parts to each other.
- The ideal option is to use a glue gun when fastening elements and parts together. This method makes it possible to fasten parts as quickly and efficiently as possible.
- To fasten parts, you can also use powerful adhesives: Moment or Super glue. It should be taken into account the fact that these materials dry for a long time and therefore, for the full bonding of parts, the product must not be touched for at least a day.

Working with foamiran often requires not only processing parts, cutting them and applying a pattern, but also gluing the parts together
It will not work to fasten parts with simple adhesive sticks or glue, since the porous structure and surface features of the material do not allow the parts to be firmly connected to each other.
Applications from foamiran: ideas
Aesthetically advantageous and especially elegant look on the wall voluminous panels and paintings. Such products are made by hand using various materials: fabric, leather, clay and foamiran. Applications from the latter are available to both children and adults. You can engage in a pleasant craft for parents together with the kids, along the way consolidating the knowledge of children about the world around them.

Aesthetically advantageous and especially elegant look on the wall voluminous panels and paintings
For joint creativity of kids and adults, materials should be prepared:
- several shades of foamiran;
- adhesive for foam rubber or porous structures;
- toothpicks, scissors.
In order to make a panel “Seasons. Autumn "prepare foamiran of brown, yellow and orange colors.
- Leaves of arbitrary shape are cut out of layers of yellow and orange shades, with the help of a toothpick, a characteristic leaf pattern is drawn on them.
- The barrel is made from brown foam. It is better to make it uneven in shape, so it will look more natural.
- The trunk and leaves are glued onto the yellow sheet, creating additional volume by superimposing the parts one on top of the other.
The finished panel can be placed on the wall of the living room or nursery. Kids will be pleased to understand that they were directly involved in creating a cozy interior for their home.
How to work with marshmallow foamiran
A variety of plastic foam called marshmallow foamiran differs from its analogue in some qualities and in that it should be worked with a little differently. This material is fragile and tender, with strong stretching it can easily tear.
Before you start working with it, you should properly prepare it.
- It is recommended to make a sheet of such a thickness that is necessary for subsequent work with a simple iron and a pair of paper sheets. The paper is applied on both sides of the sheet and ironed until the sheet is thinned to the desired size.
- The marshmallow material cools down in the same paper in which it was brought to the desired size.
- This type of foamiran is processed with any paint: pastel or oil. You can also mix views to create different color palettes and tint ranges.
- The shape of the petal is formed using the procedure of gradual heating on the surface of the iron and the subsequent drawing of the elements of the part.

A variety of plastic foam called marshmallow foamiran differs from its analogue in some qualities
It is necessary to work with such plastic material carefully, the craftswomen say that it is necessary to “make friends” with it and understand it. The finished product is sure to thank with amazingly even details and translucent shapes.
What can be done from foamiran, except for flowers
If kids grow up in the house, they can be involved in work by making crafts and toys from plastic material, in addition to flowers, using scrapbooking material. For the New Year and Christmas holidays, you can make Christmas tree decorations and garlands; dolls are made from foam for girls.
For funny foam dolls you need a set:
- foam blanks of the ball and pyramid;
- multi-colored sheets of foamiran;
- wire.

Foam dolls are made for girls
The material is prepared for work in a standard way. The foam is thinned to the required state with the help of heating, and after that they begin to make the toy.
- Foam blanks are covered with a circle and a semicircle, cut out of prepared foamiran, fixed with glue.
- The joints are masked with hair, which is also made from thin strips of elastic material in golden or brown, black shades.
- Clothes for toys can be made from any fabric, as well as from the foam itself, having painted and painted the material at your discretion.
It is better to decorate toys together with the child. Such a doll will be especially dear to girls, as it was made together with mom or dad.
Where is foamiran sold
Innovative material is sold mainly in online stores. The whole wide color palette of the material, its diversity is also presented there, since the foam is terry, marshmallow and ordinary.
- When choosing material for subsequent creativity, you should decide not only on the color, but also on the thickness of the sheet. In the assortment, it is presented in the range from 0.6 to 2 millimeters.
- For making flowers, a thin sheet of foam is better; for dolls, garlands and Christmas tree decorations, thicker sheets should be purchased.
- The shades and colors of the material are very diverse, but it should also be remembered that foamiran is easily tinted and tinted.
Butterfly from foamiran (video)
In order to purchase plastic and soft material, you can contact any online store. As a rule, the delivery of the foam will not take much time, it will also be accompanied by an instruction manual. It is difficult to say which store to use, it is important that the assortment contains exactly the material that is needed for future products.
We also recommend
 DIY crafts from foamiran for beginners: photo, video
 Flowers from foamiran master class with video
 How to make a cutting board out of wood: ideas, choice of material, manufacturing
 "Fair Masters": customer reviews Fair Masters marketplace
-
"Fair Masters": customer reviews
 The structure of a bee is an example of a complex organism