Installation of fixtures in the pvc panel. Choosing and installing a mounting box for a socket with your own hands Installing sockets in plastic panels
Installing electrical outlets (sockets and switches) in plastic slopes is a safe and useful solution, of course, subject to all installation stages, the OKNA MEDIA portal reports.
Modern window sills are much wider than their predecessors and therefore many people use them to install electrical appliances: kettles, microwave ovens, air humidifiers and others. It is also convenient to put a mobile phone on the windowsill while charging, so that it is at hand. In such a situation, there is a problem with the power source, especially if there are several electrical appliances. Installing sockets in slopes is an excellent solution in this situation. For convenience, experts recommend integrating not only sockets, but also switches into window slopes.
A logical question that many will ask themselves is how safe it is, whether it will close, because condensate can collect under the slope, and so on.
According to experts, water does not conduct electricity, it is conducted by salt, which is dissolved in water. Condensation that may form on the contacts does not conduct electricity, as it is in fact distilled water. In addition, condensation is formed under the influence of temperature differences, and the temperature inside under the slope is exactly the same as in the room. Therefore, the probability of condensation on metal contacts is negligible. 
The rain won't wash them either. Since if rain enters the apartment, then the sash is open, but it opens to the slope, that is, it completely protects the outlet. And rain is also distilled water, therefore, according to professional builder Alexei Zemskov, even if the rain floods the apartment to the ceiling, there will be no short circuit.
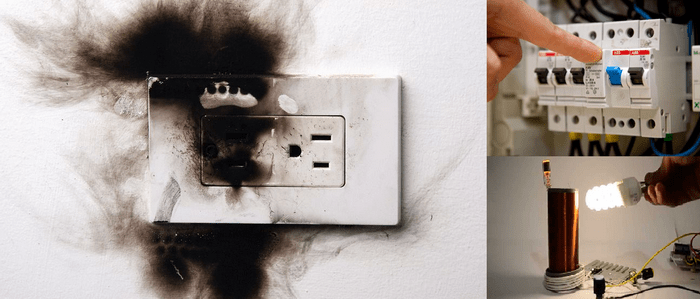
In the same way, there is no need to be afraid that the sockets will heat up and the slope will light up. Any modern electrician is made in such a way that the machine will turn off much earlier than the cable and contacts from this outlet heat up. If the entire apartment has old wiring and two machines, then for general safety it must either be repaired or replaced. 
To carry out the installation of electrical wiring in slopes is surprisingly simple, logical and fast. First of all, behind the false wall, a power cable is laid in advance, even at the stage of its assembly, which simply hangs from the old slope. Next, drywall is installed on this frame, puttied, glued with wallpaper for painting and painted. 
Window slopes are installed at the very end. To begin with, the plastic slope should be cut and tried on, and then removed and applied with foam on its back. When the mounting foam hardens slightly, the slope must be tried on again. If the foam prevents you from pressing it tightly, then it is crushed or cut. 
After that, it is necessary to cut holes in the slope panel for future electrical points (sockets and switches), and pull the cable through them. Then you should apply a little fresh mounting foam to the already dried foam so that the slope is securely glued to the window opening. And only after that the panel is fixed.
This is a very important step that should never be ignored. The panel must be glued to the slope so that when you pull the plug out of the socket, the slope does not bend, deform the foam joint and tear off the sealant located along the sill. 
The most important thing: to fix the box, you do not need any foam or alabaster, you need a special box for drywall. It differs from the usual ones by the presence of special paws that clamp the panel very well. The main task of the master is to correctly and correctly install the slope, as well as securely fix the panel. The sockets will keep automatically. OKNA MEDIA recommends watching, as always, a dynamic and interesting video about the installation of electric outlets in plastic slopes with the participation of the inimitable Alexei Zemskov.
Having minimal experience in working with electricians and knowledge in the field of repair and construction work, it is quite simple to mount spotlights in PVC ceiling and wall panels.
Note. The luminaires are fastened using a special adapter - a protective thermoring, which is attached to the main ceiling, and most often to plastic panels with glue.
Using plastic panels for decoration, you should think in advance about the location of the places where the fixtures will be installed in the PVC panel. Since, if you do not take care of this issue in advance, you will have to remove part of the panels in order to make electrical wiring and make holes for the lamps or prepare holes on the fly, and run the wires through the cable channels mounted on top of the panels.
The choice of fixtures for PVC panels
When choosing fixtures for pvc, it should be borne in mind that plastic begins to melt under the influence of high temperatures. Therefore, before buying, you should consult in a specialized store and select lamps with a maximum power not exceeding 40 watts. Additionally, a thermal ring can save the panel from overheating. The best option is to use low-voltage light diodes.
Note. The use of lighting devices with a housing protection degree less than IP44 is not recommended. When choosing lamps and chandeliers in a room with a static level of humidity that does not exceed the norm, you can ignore the moisture resistance indicator. When choosing fixtures for the bathroom, kitchen and bathroom, the moisture resistance parameter should not be ignored.
Order of installation of sockets
Installation of sockets on a PVC plate is as follows:
- On the panel on the wrong side, there is a place for a tie-in. If the plastic plates are already fixed on the wall, you can cut holes in the panel already fixed on the wall with a construction knife;
- In place, behind the outlet, fix a square piece of plywood, equal in size or slightly larger than the size of the outlet;
- It is necessary to fasten the socket box to a sheet of plywood using self-tapping screws.

If there is practically no space between the wall and the back of the panel, the socket is attached directly to the PVC plate, but with a little secret: small plastic sheets must be placed in the place where the screws will be screwed in, through which the socket is fastened over the plate. After the socket has been securely fixed, you can proceed to mounting the plastic panel on the wall.
Rules for mounting fixtures
When installing spotlights in the bathroom, it is not recommended to place lighting fixtures above the shower cabin. The same rule applies to the installation of fixtures above the sink and bidet. Considering that in most cases the bathroom in houses does not exceed 6-8 m2, it is enough to install several lamps in the ceiling plate with a swivel mechanism.
Panel preparation
What is a plastic panel? The market is full of models that can look like long plastic boards or rectangular or square sheets of various shapes. The main thing is that the installation of pvc panels on the ceiling is carried out according to the principle of snapping locks: regardless of the model, each pvc plate is equipped with grooves for assembly.
Note. Don't forget to label the panels as well. This is necessary in order not to forget in the process which part goes into which place. This is especially indispensable when arranging lamps in a checkerboard pattern.

In order to drill a hole in plastic or drywall panels, special crowns are used. Alternatively, you can use crowns for working with wood. The remaining burrs can be removed with a file or sandpaper (it is acceptable to use emery, with weak pressure).
You can approach the installation of lighting devices only after completing all the steps for fixing PVC plates. Similar to the installation work for installing fixtures in drywall sheets, the installation process on plastic layers looks identical.
life— hack for marking and making holes for installing spotlights without using a drill:
- the place of the proposed hole for the equipment is marked with a compass;
- then you need to use a clerical or construction knife, with which a hole is made along the contour of the marked line for cable routing;
- now it's the turn of the electric jigsaw, with which the hole is given its final shape.
Thus, if there was no drill at hand, or there is simply no desire to go to the store for expensive cutters, an ordinary compass, a stationery knife and a jigsaw powered by electricity will come to the rescue. The method is really good, it allows you to significantly save the financial component of the project. But there is also a minus: the time that needs to be spent working with a jigsaw exceeds the time that would be spent drilling with a drill.
Note. As a rule, plastic products are sensitive to mechanical stress. Therefore, when cutting out parts, you must be as accurate as possible. Otherwise, the board may crack or sag, which automatically sends it to the scrap.
Installation of spotlights in PVC panels
You can install the overhead light according to the following scheme:
- detach the top of the lamp from the base;
- turn off electricity using terminals;
- connect the lamp;
- check the operability of the connected lamp;
- using special clips, install the lamp in place;
- fix the decorative trim;
- fasten the heat-insulating ring on the bottom of the luminaire.
At the end, it remains only to attach the plastic plate back.
The sequence of work on installing a spotlight:
- On the body of the lamp there is a pair of clamping "lugs" that need to be bent;
- A hole is prepared in the slab according to the size of the lamp;
- The light device is inserted into the hole made and machined. If you do not get rid of the burrs after making a hole, the work will look generally sloppy. In addition, there is a high chance of being damaged by raw edges when mounting a lighting device;
- Strip the wire on the device if the manufacturer has not taken care of this in advance;
- Strip the wire on the ceiling. It is necessary to remove the insulating layer no more than 10-12 mm;
- Connect the wire on the ceiling to the wire of the luminaire using a screw clamp.
Distance between light sources
The minimum voltage and the small illumination angle must be taken into account. As a rule, illumination begins to scatter at an angle greater than 30 degrees. Therefore, it is necessary to think over the location of the fixtures so that the light fluxes intersect each other, which automatically allows you to fill the ceiling space as much as possible and scatter light evenly over the ceiling surface.
Example. The standard ceiling height in residential buildings varies between 2.4-2.5 meters. Therefore, the maximum distance between light sources should not exceed more than 1 meter, and it is necessary to step back from the walls by at least half a meter.
For clarity, on the ceiling, you can make a preliminary marking of the location of the light sources. You can do it with electrical tape:
- cut equal strips from electrical tape in the amount of 2 pieces;
- stick on each other in the form of a cross.
Thus, it is possible to mark the future location of the fixtures and think about how to place them on the ceiling surface.
Video
This type of repair work, such as installing electrical outlets and switches, often causes difficulties for a person who has never dealt with them. However, such a need, though not often, but still arises. Electrical sockets and switches are installed in a new room, or if it is necessary to replace old and worn out ones with new ones.
The electrical socket is designed to safely connect electrical appliances to the power supply.
Distinguish overhead or external sockets and internal. Recently, indoor outlets have become more popular, as they have a more aesthetic and modern look.
The switch is designed to interrupt and connect the electrical circuit, to turn on and off various devices. Basically, switches are used to control electric lighting in a room. Often, switches are used to control other household appliances, such as a water heater, a heating system circulation pump, kitchen hoods, and so on.
The specifics of the installation of sockets and switches largely depends on the material from which the walls in the room are built or lined.
The most common wall materials are concrete, brick and facing material in the form of plastic panels, drywall.
Installation of sockets and switches in a brick wall.
To install sockets and switches in a brick or concrete wall, you will need an impact drill with a special nozzle for drilling large diameter holes, a screwdriver and pliers.

Using an impact drill, a socket for an appropriately sized socket is prepared. The socket is disassembled with a screwdriver. The output cable is connected to the socket or switch according to the instructions for them. Then the socket sits in its place and is fixed with the help of specially provided clamps.

After that, the socket is going back.
Installation of sockets and switches in a plastic wall.
Installing sockets in lined walls is a little simpler than the previous one, but it also requires little effort and caution. To make holes in plastic panels and drywall, you can use a clerical knife or an electric jigsaw. For plastic or drywall, special nozzles are available for sawing large diameter holes in it. You also need to buy a special installation box.

When choosing a place for sockets, it should be borne in mind that there is a metal profile behind the facing material, which may interfere with installation. To determine the location of the profile, you can press down the wall with your hand in several places. By the way the wall springs, you can determine the approximate location of the profile.
As in the case of a brick wall, the socket is disassembled, connected to the output cable and mounted in its seat. After that, she's going.
The socket box is a metal, and more often a plastic cup, into which a socket or switch is installed during electrical work. Installation of this product is not difficult, but for each of the wall materials (brick, concrete, gypsum or wood), installation will have its own nuances. Next, we will tell you how to install a socket in a concrete, brick, wooden and plasterboard wall, providing visual photo examples, video instructions and a brief description of each technology.
What to pay attention to before installation
Before you decide to install the product in the wall, you need to choose the right type of socket. To date, the following varieties of so-called glasses for sockets and switches are on sale:
Having chosen the appropriate product option, you can proceed to the preparatory work, which we will talk about now!
Insertion preparation
So, in order to install a socket box with your own hands, you must first prepare the following set of materials and tools:
- Perforator or electric drill;
- A crown on gypsum, brick or concrete (depending on which wall will be chased) or a drill bit;
- Building level;
- Marker;
- Spatula and gypsum putty (if drywall or wood, then no need);
- Chisel and hammer.
Having prepared all the materials, you can proceed to the installation of the socket in the wall. Now we will briefly look at how to insert and secure a glass under the outlet in each of the existing wall options.
Mounting technologies
In concrete and brick
If you need to install a socket in a concrete or brick wall, then you need to proceed as follows:
- Make markings on the surface using a building level and a marker in accordance with the wiring diagram in the house. can be chosen at its own discretion, the norms of SNiP and GOST are not specified at the moment. All you need is to put a cross in a suitable place (the center of the future hole), lean the socket in the center and circle it with a marker.

- Using a perforator and a suitable bit, drill the strobe 4-5 mm deeper than the height of the glass you are about to install. If there is no special cutter at hand, simply drill a group of holes with a drill with a drill bit in a circle and knock out the core with a chisel and hammer. Another way is to carefully make a square hole with a grinder with a diamond disc.


- When you manage to make a round strobe, clean it from the inside, and then try on the socket so that it fits well into the seat and there are no further difficulties with installation. Immediately cut a hole in it for the wire entry and bring the wires inside.


- Dilute the solution in order to smear the socket in a concrete or brick wall. A good solution can be obtained from gypsum putty, alabaster and water.

- Moisten the hole and use a spatula to pour the solution inside, as shown in the photo. After that, carefully fix the glass flush with the wall, while ensuring that the screws on the sides are strictly parallel to the floor (otherwise the socket cannot be installed evenly).

- Seal the edges and remove any excess mortar so that the glass is clean and ready for further electrical work after the putty has set.


In such a simple way, you can independently install a socket box in a wall made of brick, concrete, foam block or even aerated concrete. Be sure to watch the video instructions provided below to see clearly the whole essence of the installation.
Video tutorial on fixing a block of glasses in a monolith
in drywall
Mounting the socket box in a drywall partition is an order of magnitude easier. Here it is no longer necessary to dilute the solution and knock out the core of the strobe with a chisel. As we said earlier, there is a special glass with presser feet that easily fix the socket in drywall. 
In order to install a glass in a plaster wall yourself, you need to follow these steps:
- Apply markings on the surface by analogy with the previous technology. We examined in detail the layout of the drywall wall when we talked about.
- Cut a hole in the bottom for the wires and insert the product inside the strobe.
- Tighten the screws on the sides until the box is firmly fixed inside.
How to mount a socket in drywall
That's all you need to do to install a socket box in a drywall wall with your own hands. As you can see, everything is very simple and even a beginner in electrics can install the product. We draw your attention to the fact that if the gypsum partition is additionally tiled, you need to act a little differently. The video below shows the technology for attaching a glass under ceramic tiles.
How to install on tiles
The second way to make a block of sockets in a tile
The rooms of our apartments and houses have hidden electrical wiring and everything sockets and switches are installed inside the wall. In order to hide the entire mechanism, and so that only the cover or keys remain on top, it is necessary to smear or install mounting plastic boxes under them (often called socket boxes), which serve to fix sockets and switches in them and isolate wires and contacts from the wall.
Please note that this work must be done simultaneously with the electrical wiring before the walls are finished.
The installation process of the sockets is quite simple. and you can easily do it yourself. Depending on the type of building material, it is necessary to choose one of two principles for installing mounting boxes:
- For walls made of wood, drywall, PVC, MDF panels, etc., it is necessary to cut a hole with a special crown and then insert the socket into it and press it against the wall using self-tapping screws with paws.
- And in brick, concrete, silicate walls, the boxes are fixed on a quick-drying solution of gypsum, alabaster, gypsum plaster, etc.
Installation of a box for an outlet in concrete, brick, gas silicate.
It is necessary to make a hole under it with a puncher or drill and a special crown (in the figure below).
Recommend to buy crown with a diameter of 68 mm. Or 70 millimeters, designed for SDS-plus concrete. It is suitable for all types of walls, unlike a brick hole saw, which is designed only for drilling in non-solid building materials.
Marking must be done before drilling using a tape measure and a pencil, I simply mark the center for the crown drill throughout the apartment at the same distance from the floor, if it is even.

Remember that when drilling with a crown, rotary hammer or impact drill must be switched to drilling mode only, and not combined with slotting.
If you need to smear one or more boxes, then you can do without crowns and drill holes under them with a drill and knock out a niche of the required size along the outlined contour. In this case, the markup is made by outlining the contour of the socket box with a small margin. And on the sides of the knocked-out holes, in all rooms at the same distance from the floor, I draw the center of sockets or switches along the level. I am guided by these marks in the subsequent smearing of mounting boxes.
If you need to install not a single socket, but for example a block consisting of 2, 3 or 4 electrical sockets or in combination with telephone, TV or computer, then you need to buy a specially designed one-piece double, triple or quadruple block of boxes (examples in the picture below. )

I use single junction boxes most of the time at work.(top left in the picture), which can be made into blocks by inserting one into the grooves of the other. But for those who are not professional electricians, I do not recommend doing this, because without experience it is very difficult to smear such blocks, because they bend. Take a solid block for several places, believe me, this greatly simplifies the process and allows you to quickly and evenly smear!
After the hole is ready, we check that the mounting box fits freely into it, hiding flush with the wall. We knock out a hole on the side or on the back wall and put a cable or wires into it.
We take and dilute a gypsum or alabaster mixture on several places of application or one block, because these mixtures dry quickly. I am in my practice when it is required to cover a large number of boxes I spread tile adhesive or ROTBAND gypsum plaster in a bucket(Rotband), which do not dry up to an hour. And this allows you to smear more than a dozen socket boxes in one batch.
Before filling the hole with mortar, moisten it with water. Then a box is pressed into the filled hole, which should rise to the level of the wall.

The main thing to consider here is that it is better to drown her a little deeper than if it stuck out even a millimeter. It is important to observe this so that the socket fits snugly against the wall during installation. In addition, make sure that the holes for self-tapping screws or places for sliding legs, with which the socket or switch is attached, are at a vertical or horizontal level, otherwise they will become crooked during subsequent installation. A small skew is easily leveled, but a large one is not.
We also recommend
 Switching power supply: repair and refinement
 Remote control of light
 Swimming lessons for preschool children
 Notes for the master - home household alarms
 Clock propeller on Atmega8
 Device and relay application examples, how to choose and connect a relay correctly Microcontroller and relay simple switching circuits