Wallpaper without plinth. How to cut wallpaper for a ceiling plinth
Starting repair work in the house, many owners are lost. At the initial stage and during the process itself, many questions arise, especially during the period of internal finishing work. To facilitate work and streamline all actions, a plan should be developed in which each stage is clearly distributed. It will help not to make mistakes, save time, nerves and money.

Finishing steps
So, starting the decoration of the premises, it is worth familiarizing yourself with the sequence in which the work should be done. As mentioned earlier, such an approach will help to quickly complete the repair and avoid various shortcomings, and, consequently, their correction.

The main stages of finishing:
- The main direction of work is from top to bottom. In other words, they usually finish the ceiling at the beginning, then the walls and at the end of the floor. Such an unusual principle serves to preserve the already finished parts of the room from damage during the processing and installation of other areas.
- If a floor screed is required before laying a fine floor covering, then it is done first. A screed is an intermediate layer that serves as a base for a floor covering, adding rigidity to it, and hiding communications. The better it is made, the longer the coating will last. Screeds differ in composition, method of adhesion and laying, as well as purpose.
- You can level the walls with plaster. Depending on the initial state of the walls, one or more layers may be needed. Before plastering, the walls must be primed to improve the condition of the surface and subsequently the paint adheres better.
- Finally, at the end of the preparation of the walls, they are puttied. All irregularities and places of breeding communications are carefully sealed. The walls are being prepared for finishing.


- Installation of door frames. The door can be installed immediately and closed with dense polyethylene to protect it from dirt and mechanical damage.
- Paste the walls with wallpaper;
- Laying a fine floor covering (laminate, linoleum, parquet).
- Fastening of ceiling plinths, decorative elements, switches, sockets and platbands.


Repair work should begin from the farthest rooms and move towards the exit. Finishing the corridor and hallway is carried out at the very end. All this will prevent dirt and dust from entering the finished rooms, as well as damage to fresh coatings.
Having finished one room, the door leading to it is closed and curtained with thick plastic wrap. This will protect clean finishing materials from dirt, dust, paint or plaster.


FAQ
Some of the most frequently asked questions regarding interior decorating.
What comes first doors or wallpaper?
You can install interior doors both before wallpapering and after them. The main thing is not to combine these two works and not to carry them out simultaneously. When wallpaper is glued, moisture is collected in the room and remains at a high level for up to three days.
Cloths, door frame, decorative strip swell and increase by about five centimeters. Simultaneous installation of the door will lead to the fact that subsequently after drying there will be a large gap between the canvas and the box. The door lock is also likely to break.

Interior door installation
- Good: the dust generated during the installation of the door will not settle on top of the wallpaper.
- Badly: you will have to spend time and carefully trim, and then tuck the edges of the canvas behind the decorative strip (platband).
- Good: during the installation of the door, you can hide all the errors of plastering.
- Badly: if the dimensions of the doorway are not maintained, and at the time of pasting the wallpaper was cut along the opening, then the platband may not close the resulting gaps.


When to glue the ceiling plinth?
A ceiling plinth is a decorative element that serves to delimit and hide the seams between the ceiling and walls.
Ceiling skirting boards include:
- baguettes;
- cornices;
- borders;
- fillets.
Their task is not only to hide the seams and transitions between the wall and the ceiling, but also to prevent the formation of cracks.


You can glue skirting boards before and after wallpapering. However, it would be more appropriate to attach them to the wallpaper.
All surfaces must be leveled with putty. When the fillet is planned to be painted over, this is done immediately after painting the ceiling, until it is dry. Otherwise, there will be traces between them.
Without staining the skirting boards, after waiting for the ceiling to dry completely, you should close the joints with tape, which will protect the ceiling from glue, and fix the skirting boards. Only then are the walls painted or pasted over, adjusting the edges of the canvas. If you later need to change the wallpaper without touching the baseboard, they can be easily removed. Therefore, it is correct to stick the ceiling plinth first.
If the plinth is glued on top of the wallpaper, then in this case you will have to painstakingly cut everything off or completely change it, along with the plinth.


When is the best time to stretch the ceiling?
Stretch ceilings are a specific product, which makes it possible to mount them already at the final stage of finishing work. During pulling, there is practically no dirt and the likelihood of damaging the finished wall and floor covering is very small. However, experts advise hiring craftsmen to get a quick and high-quality result.
In this case, the top-down principle does not work. It is intended for predominantly standard and general repair work.

Ceiling tiles or wallpaper first?
It is best to stick the ceiling tiles in the beginning. In order not to stain or damage the wallpaper in the future, since paint, whitewash, glue and similar substances leave almost indelible marks on them.

Floor or wallpaper: which comes first?
Training. It is necessary to prepare the walls only after the floor. Debris is removed and should be ready for the final flooring to be laid. It fits at the end of the repair work. Prior to this, the base is covered with a film, then to calmly remove traces of plaster.
Laying. All wallpapers are glued before linoleum is laid, the wooden floor should also be sanded at the end. However, some masters believe that they are engaged in wallpaper after laying the floor and attaching the skirting boards. This is due to the fact that the wall decoration can be replaced at any time without touching the baseboards.


What's next decorative stone or wallpaper?
It also does not matter what to glue first. Basically, it all depends on the professionalism of the performer.
If you stick a decorative stone at the beginning, then the wallpaper is simply adjusted and cut off in the overlapping areas on the stone. Even if there is an excess raw canvas left, it will dry out and the junction will be invisible. The wallpaper is cut with a painting clerical knife with a thin blade. They are pressed tightly against the stone with a spatula and cut along its edge with a knife. The spatula holds wet wallpaper and prevents it from tearing.
You can also stick a decorative stone over the wallpaper. However, you need to work carefully so as not to stain them with glue. To prevent this, you can pre-mark the boundaries of the future fastening, and stick masking tape on the wallpaper. At the end, the tape is removed and the canvas remains clean.


When is air conditioning installed?
It is more correct to start the installation of the air conditioner before pasting the walls or covering them with plasterboard. Communications connecting two blocks (internal and external) are hidden in the walls. At the same time, the outdoor unit is installed, thereby completing the dirtiest part of the job.
At the end of the interior decoration, the indoor unit is mounted. Its installation takes about an hour, and then a test run and check of the operation of the air conditioner are carried out.


Wall mural or wallpaper first?
Initially, it is better to paste the wallpaper, then, having joined them, paste the photo wallpaper and again the wallpaper strips. However, in order for the drawing to lie flat and not beveled anywhere, it is necessary to mark the vertical. The vertical is the standard against which the wall is aligned. It is useful for uneven and bumpy walls. This is not necessary, but will help keep the pattern even.

Examples in the interior
In order to accurately understand the progress of the work, we will consider them using the example of finishing the kitchen.
It is necessary to decide on the layout of the room and the interior. You can come up with the interior yourself or choose from ready-made works available on the Internet.
Next, the so-called "zones" are designed, to which the necessary materials are already selected. The kitchen should have two "zones" - this is the working one, where food is prepared and the dining room. They are usually separated by different facing materials. The working area is tiled, and the dining area is tiled, thus creating a cozy atmosphere. Of course, this is an exemplary standardized solution.

Skirting boards when decorating walls with wallpaper in apartments today are often mounted not only at the bottom, near the floor, but also at the top - along the ceiling line. Making out the premises in this way, of course, you need to follow certain technologies. For example, many apartment owners who decide to make repairs with their own hands are interested in what to glue first - wallpaper or a ceiling plinth.
Unfortunately, there is no single answer to this question. The procedure for decorating walls with wallpaper using ceiling plinths depends on the variety of the latter. Also, when performing such work, the type of material from which the wallpaper itself is made is also taken into account.
Types of ceiling plinths
Baguettes can be glued along the wall line:
foam;
flexible polyurethane;
wooden;
plastic;
stone.
When decorating walls with wallpaper, only plastic ceiling plinths cannot be installed. Such decorative elements are mounted exclusively when used for decorating a room with PVC panels. All the rest, when used for wall decoration, wallpaper can be glued.
What to glue first - wallpaper or ceiling plinth?
All types of baguettes available today can be divided into two large groups: light and heavy. It is believed that the first type can also be glued on top of the wallpaper. Heavy wooden or stone baguettes are mounted with such a wall finish exclusively end-to-end.
It is believed that foam can be glued to wallpaper. The weight of such elements is small. Accordingly, even not very strong wallpapers, when a foam plastic decorative element is glued on top of them, will not subsequently move away from the wall.

Polyurethane ceiling plinths can only be glued on top of sufficiently dense wallpaper, for example, vinyl. Paper decorative trim of this type on the walls is fixed with such baguettes exclusively end-to-end.
Wooden and stone skirting boards, since such elements are expensive, apartment owners usually entrust the installation to professionals. In this case, the question of what to glue first - wallpaper or ceiling plinth before the masters is not worth it at all. Such baguettes are always fixed on the wall at the initial stage of its design. Skirting boards of this type are mounted using not only glue, but also various kinds of steel fasteners. After installing such baguettes, the walls are pasted over with wallpaper with an exact fit to their lower edge.
The choice of glue for foam plinth
So, we found out what to glue first - a ceiling plinth or wallpaper. The sequence of the procedure in this case will depend on the material of manufacture of the finish and baguette. But of course, in order for the walls in the room to look neat in the future, skirting boards of any kind must also be properly mounted.
As already mentioned, with their own hands, property owners usually install only foam or polyurethane flexible lightweight baguettes on the walls. The first kind of skirting boards is attached to the wall using a very simple technique. To install baguettes of this type, the same glue is usually used that was used when installing wallpaper. You can also use liquid nails for attaching such decorative elements.

Technology of installation of foam baguettes
After gluing the wallpaper on the top of the wall, if the ceiling is not too even, make a horizontal marking under the plinth using a simple pencil. Next, two strips of glue are applied to the foam baguette along the edges and pressed tightly against the wall. The skirting boards at the end of the row, if necessary, are cut to the desired length. When installing a baguette, excess glue is immediately removed with a dry, clean cloth.
At the end of the installation, wait for the glue to dry and seal the joints between the elements with acrylic-based putty. If necessary, such a tool is tinted to match the color of the plinth before use.
How to properly mount a flexible polyurethane baguette
As we found out, the answer to the question of whether to glue such a ceiling plinth before or after the wallpaper depends on the material of manufacture of the latter. Polyurethane baguettes are mounted using approximately the same technology as foam ones. The only thing, in this case, you should take a closer look at the choice of glue. Solvent-based compounds are not suitable for mounting polyurethane skirting boards. When installing such a baguette, it is necessary to lubricate with glue, including at the joints between the elements.
Since the polyurethane plinth weighs more than the foam one, it will take longer to hold it with your hands until it is glued to the wall or thick wallpaper. In those places where such a baguette does not stick to the surface due to the unevenness of the wall, it can be temporarily fixed with carnations. Also, experienced craftsmen are advised to nail the planks and their upper corners at the joints during installation. After the baguette is securely glued to the wall surface, the carnations will need to be pulled out of it.

Excess glue protruding from under the planks during installation of the polyurethane plinth is removed with a wet sponge. In some cases, after installing a flexible baguette in place, gaps may remain between its elements. It will not be difficult to close up such gaps, for example, with silicone sealant or acrylic putty.
Finishing at the final stage
No matter how the owner of the apartment decides to glue the ceiling plinth - before or after the wallpaper - at the final stage, he will most likely also have to paint this decorative element.
Wooden baguettes of the master after installation are usually covered with special oils, wax or varnish. Stone plinths are beautiful in themselves, and after installation they are not additionally finished. Foam and polyurethane baguettes at the final stage, in most cases, are painted using water-dispersion agents.
Coloring technology
The owners of apartments choose water-dispersion paints for the final decoration of skirting boards, since they, in comparison with many other similar products, have the following advantages:
- ease of application;
- aesthetics;
- low cost.
It is allowed to use for the final finishing of foam and polyurethane elements, including inexpensive water-dispersion dyes intended for decorating ceilings. Such paints are cheaper than wall paints and do not adhere so firmly to surfaces. But baguettes during operation, for obvious reasons, are usually not subjected to any serious mechanical stress. Accordingly, even not too wear-resistant paint can hold out on them for a long time.

How to glue corners with skirting boards
We have the answer to the question of what to do first - wallpaper or ceiling plinth to glue on the walls. The technology for mounting decorative elements of this type, made of plastic or polyurethane, can in any case be considered extremely simple. With a sufficient degree of accuracy, even a person who does not have much experience in finishing work can stick such decorative elements. The only difficulty that a home master may face when installing light baguettes is pasting the corners.
In such places, plinths have to be cut. And to do this, of course, should be correct. Manually trimming their 45-degree corners is relatively difficult. Due to the slightest inaccuracy, the baguette in the corners will look extremely sloppy. Therefore, even foam or polyurethane skirting boards are cut when glued to walls, usually using a carpentry tool of a special design - a miter box.

So, we hope that we have answered in sufficient detail the question of what to glue first - a ceiling plinth or wallpaper. Below you will find some useful tips from experienced craftsmen, following which you can mount the baguette as quickly and accurately as possible:
- Experts advise buying a plinth with a small margin. This is especially true in cases where there is no miter box at hand. Trimming baguettes in the corners is actually a very complicated procedure. And if it is not possible to carefully cut it out the first time, its ends are simply cut off. Then the procedure starts over. As a result, of course, the skirting board consumption increases.
- Experienced craftsmen recommend painting the baguette only after it is installed in place. In advance, before gluing, this procedure should not be performed. Otherwise, spots of glue will remain visible on the baseboard in the future.

Mounting the ceiling plinth on the wallpaper and painting it after that, the walls, unfortunately, can be very easy to get dirty. To prevent this from happening, experienced craftsmen recommend using a clean rag and a long spatula when installing baguettes. Experienced craftsmen advise setting this tool along the bottom edge of the baseboards when painting them. This will prevent paint stains from appearing on the wallpaper.
Of course, you should not apply too much glue to the strips when fixing them. It should not protrude from under the plinth when pressed. Drops of glue, if they appear on the wallpaper, should be removed with a rag immediately - until they are frozen.
Ceiling plinths for wallpaper are soft and hard, depending on the material from which they are made. The material can be wood, gypsum, plastic and even stone, it all depends on the flight of designer imagination and financial capabilities.
Only light elements can be glued on top of the wallpaper, since they will not create an extra load. When using heavy ones, you should first attach them to the wall, and then glue the wallpaper.
Due to the different curvature of the wall and the plinth, a gap may occur between them. If the ceiling plinth is soft, it can be pressed against the wallpaper. When using hard, putty is first carried out. It is impossible to perform this operation well on top of the wallpaper, since the putty will spoil the appearance, will not hold securely on the wall and will create an additional load on the wallpaper.
Types of ceiling plinths
Usually finishing ends with wallpapering and installing a ceiling plinth. After that, the premises are considered fully habitable.
Ceiling plinths are divided according to the materials used for their manufacture, and there are:

Before starting installation, you need to carefully mark the corner elements and cut. Corner elements are best cut with a miter box, which will ensure a perfect fit. At the same time, it is worth leaving a small margin of length of 2-3 cm, which will allow the most accurate fitting of the joints during installation. After installation in place, you can carefully trim the excess. Depending on the material, you can cut the parts with a clerical knife, a hacksaw with fine teeth or a hacksaw for metal. In this way, heavy elements are first attached, and then the wallpaper will be glued.

The method of attaching the skirting board also depends on the material.
- fastening of a wooden plinth is carried out with glue and nails, in some cases they are glued without the use of nails;
- gypsum is glued to a gypsum mortar containing from 1 to 3% PVC glue. For the most durable fastening, dowel nails are additionally used. The holes for them are pre-drilled in detail, and at the end of the work, with the help of gypsum putty, the mounting holes are hidden.
- plastic and foam skirting boards are planted on glue. This method of fastening is sufficient for reliable fixation, since the weight of the elements is relatively small.
In some cases, ceiling plinths are sold with corner elements, which greatly simplify the fastening and fitting of elements, hide the edges.

You can glue the wallpaper first or after installing the baguette. Each of the methods has its own advantages and disadvantages. With any method, installation should begin from the most visible angle.
Installation before wallpapering
When installing a ceiling plinth on a wall before wallpapering, you must first level the surface. If it was not possible to perfectly align the wall, and the plinth is already being mounted, you just need to carefully putty all the gaps between the wall and the plinth.
This method is most often used when installing heavy fillets with low plasticity, made of gypsum, stone or wood.
It is more difficult to glue the wallpaper after installing the skirting board, since it requires careful marking of the sheets, but at the same time, the skirting board fits snugly against the wall, which eliminates gaps that spoil the appearance.

It is advisable to prepare sheets of wallpaper in advance and leave a margin of length of 2-3 cm in order to better fit the pattern. Excess length that falls on the baguette can be carefully trimmed with a spatula and a clerical knife. To do this, press the sheet with a spatula close to the ceiling plinth and cut along it. This method allows you to cut the edges of the wallpaper very evenly close to the baseboard.

Another advantage of this method is that if it is necessary to replace the wallpaper, the baguette can be left in its place.
Installation over wallpaper
The use of light and flexible ceiling plinths, after gluing, allows you to hide the uneven cutting of wallpaper sheets. The main disadvantage of this method is the need to remove the baguette when replacing wallpaper, which most often leads to damage and replacement. In addition, you should very carefully apply glue to two planes at once, glued to the ceiling and wall. When installing, hold each element pressed until the glue sets.
If the adhesive has squeezed out onto the wall or ceiling, it must be removed immediately with a dry cloth.
When painting, mounting tape is first glued next to the ceiling plinth, and only after that painting is performed. Masking tape avoids the loss of decorative qualities of wallpaper.
Installation with stretch ceilings
If there are stretch ceilings in the room, the technology for gluing wallpaper and skirting boards changes slightly. The latter should be used only special ones designed for such ceilings. They have a wider shelf so that they can be securely glued to the wall. In no case should they be glued to the ceiling, as this may cause damage to the canvas.

Below is a video that will tell you how to mount the ceiling plinth - first or after wallpapering:
What to glue first: ceiling plinth or wallpaper? This question is asked by both the novice specialist and the owner of the living space. Decorative finishing in the room gives the interior comfort and creates a certain style, and the right frame for the ceiling can both narrow and expand the room, make it emphatically official or homely. The article will tell you how to glue the ceiling plinth on the wallpaper and on the wall.
Types and features of baguettes
(frieze, fillets, baguette) is used for interior decoration of houses and apartments. At the same time, it goes well with various types of wallpaper, ceiling tiles and ordinary painting.
Tip: When decorating a room in a high-tech style, you should not use a frieze.
When purchasing a baguette, it is necessary to take into account the height of the ceiling and the size of the room. The larger they are, the larger the plinth should be.
By installing a baguette, you can:
- Hide defects that occur when puttying or wallpapering between the ceiling and the wall;
- Hide uneven cutting wallpaper;
- Decorate the room;
- Emphasize its outline;

- Give the finish a finished look.
A fairly diverse range of these products, when the owner decides to use them in decor, allows you to choose the best option for the interior. Fillets differ in size, shape and material of manufacture.
Baguettes can be made from different materials, but we will only touch on the most popular options:

- Foam, decorative. Such skirting boards for ceilings are used most often, which is explained by:
- low cost;
- beautiful appearance;
- small weight;
- ease of installation of elements;
- they do not absorb moisture;
- do not rot;
- easy to cut with a regular sharp knife;
The disadvantages include:
- low fire resistance;
- great fragility;
- sloppy joints due to the graininess of the material.

- . Such fillets can only be worked with even walls and ceilings, since the material is not flexible. They allow you to turn a modest room into a real palace. Products are fireproof, but, like all gypsum products, they are quite hygroscopic.
Material disadvantages:
- big weight;
- installation complexity.

- . It has all the advantages of foam plastic and more accurate joints, which is associated with an increased density of the material. But the price is slightly higher.

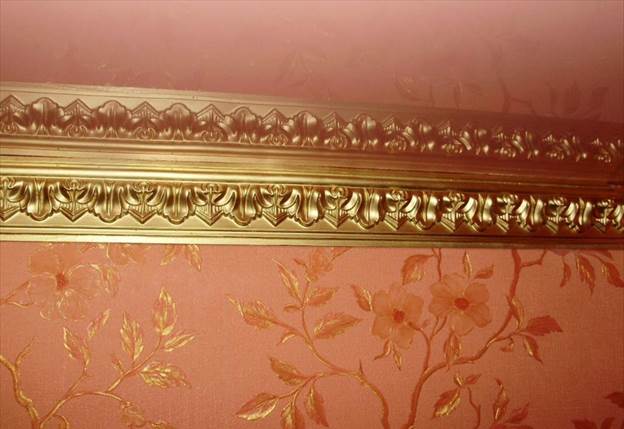
- . These products are used for rooms made in a classic style. Due to the rich appearance, as seen in the photo below, and the high cost, they belong to the elite baguettes. They are made from expensive hardwoods:
- oak;
- ash;
- mahogany.
Lack of material - absorbs moisture, which may cause deformation and even mold over time.

The most popular are baguettes made of polystyrene foam and modern polystyrene foam.
The procedure for the repair of the premises
So, what to glue first, ceiling plinth or wallpaper? The quality of doing the work with your own hands depends on this.
However, in any case, the instructions for the preparatory work are as follows:

- All dismantling works are carried out in the premises;
- Garbage is taken out;
- Windows, radiators, all joinery are being replaced;
- If necessary, change the electrical wiring;
- Slopes are made;
- The walls are leveled.

And then the finishing begins. Let's say right away that you can glue the ceiling plinth on the wallpaper. Moreover, many people do this to save time on trimming the wallpaper, which must be done when pasting exactly on the baseboard. However, this solution has several disadvantages:

- It's no secret that the walls in our apartments are often far from smooth. When gluing a skirting board on such a wall without wallpaper, it is always possible to seal all the cracks that form with gypsum putty or sealant. The result is neat connections, and the skirting board holds much better. When sticking on wallpaper, such a focus cannot be turned.
- Farther. If you glued the plinth to the wallpaper, then when finishing it, you run a great risk of staining the walls - you can smear glue with an awkward movement or drip paint when whitewashing.
- Well, and the last nuance - if you want to replace the wallpaper with new ones, you will have to cut through the old ones with a knife so as not to tear off the baguettes.
How is the ceiling plinth glued
Now let's take a closer look at the work itself.
To complete the work you will need:

- A carpenter's miter box and a hacksaw with a small tooth;

- Stationery knife;

- Roulette and pencil;

- For wooden and other hard skirting boards (except gypsum), it is better to purchase a miter saw.
Tip: Before gluing the ceiling plinth to the wallpaper, you should accurately calculate its quantity and purchase one extra piece in case of marriage when cutting.
Preparatory work - we determine the installation scheme
First you need to make a simple drawing. To do this, take a piece of paper and a pencil. The scale can be taken as 1 m = 1 cm. Thus, one plank of the ceiling plinth in the drawing will take 2 cm. Draw the perimeter of the room on the sheet. After that, place the plinth on the diagram so that you get the minimum amount of waste, that is, so that you have to cut the elements to a minimum.
Since the profile is not symmetrical, it is necessary to decide which side to glue it. It is often recommended to fasten the wide side of the fillet so as to cover surface flaws as much as possible. That is, if you glue the plinth over the wallpaper, then it is better to glue the wide side on the wall. If the ceiling surface is uneven and has some flaws in the corners, then the wide side is mounted to the ceiling.
How to fix a baguette over wallpaper
The order of operations is as follows:
- Marking is made on the ceiling and walls. In this case, a chopping thread or a long rule is used to align the baguette.
- For trimming the plinth, when joining the material in the corners, a miter box is used.

- A baguette is glued: first into the corners, then around the entire perimeter, but if there is a markup, the sequence of work does not matter. Liquid nails are used as glue. This glue is applied in a thin strip to the edge of the fillet on the reverse side, after which it is pressed against the wall. Excess glue squeezed out quickly, before it has time to dry, is wiped off with a damp sponge or rag.
- The gaps formed between the wall and the plinth, the joints, especially at the corners, are very carefully smeared with silicone. It is necessary to ensure that the excess does not fall on the wallpaper and floor.

Even precisely fitted parts do not interfere with smearing at the joints first of all
Advice! There is a way to do this as cleanly as possible, with virtually no risk of staining the wallpaper. Before sticking the plinth along the intended line from below, masking tape is glued, which will need to be removed after all work is completed.
- The frieze is painted with two brushes - one larger for the main part, the other small for neat whitening of the edges.
The sequence of work on sticking the frieze to sticking the wallpaper is practically the same, except that the baguettes can be processed much more carefully, with grinding the joints and other delights.
There are other benefits too:

It is very convenient to glue on putty, pay attention to this first of all
- Finishing putty can be used as glue - this solution is more justified, since the plinth becomes almost monolithic with the wall.
- Walls do not need to be covered with masking tape before painting.
The density and properties of the materials from which the ceiling plinths are made affect the sequence of gluing them and wallpaper. Therefore, we can conclude: flexible and light friezes are glued to the wallpaper, heavy and hard ones are attached only to the wall.
What comes first, wallpaper or ceiling plinth? This question, we think, has been answered. The video attached to the article will reveal the topic in more detail.
Mounting the skirting board before wallpapering
In this case, the fillet is installed before finishing the walls with wallpaper. This method is used by professionals, as it allows you to seal all the cracks and joints even in the process of applying putty. The wallpaper is aligned under the already installed plinth. But in its complexity, this method is not much different from the previous one. It takes a little practice and even an amateur will do it no worse than a professional.
Ceiling plinths allow you to smooth the transition from walls to ceiling, in addition, they hide irregularities. But for this you need to correctly install these elements. Taking into account the information on how to install the skirting board - before pasting the wallpaper and after, you can decide which option is more suitable for you.
On the question of what to glue first: wallpaper or ceiling plinth, opinions differ. Fillets - - are needed in order to hide the gaps between the ceiling and wallpaper or other finishing materials on the wall. And yes, they look very impressive. But there are some nuances in their installation.
For gluing to the ceiling, vinyl wallpaper and wallpaper for painting are usually used.
In order to decide how to be in this situation, it is necessary to consider the advantages and disadvantages of the options.
If you glue the fillets before the wallpaper, it will be easier to putty the joints of the plinth and paint it, and it will also not be scary to stain the wallpaper. But then it becomes difficult to fit the upper edge of the wallpaper to the ceiling plinth. This must be done very carefully so that there are no gaps.
On the other hand, if the wallpaper is already pasted, there will be difficulties with the installation of the skirting board. At least a day should pass after the wallpaper glue dries. Then the wallpaper will need to be sealed with masking tape and glued, and then the baseboard will be painted.
First, the ceiling plinth is glued

The cutting angles on both skirting boards, both right and left, must be the same, i.e. their profiles must be identical.
As with any type of repair, you first need to take measurements, calculate the number of strips needed. These bars are 2 meters long. The perimeter of the room is rounded up and divided by 2.
The width of the skirting boards is different, so the choice should depend on the size of the room. If the room is small, then you need to take narrow ones, since wide ones will look bulky.
Tools and materials for installation:
- ceiling plinth;
- liquid Nails;
- putty or sealant for filling joints;
- pencil;
- roulette;
- rubber spatula;
- miter box and stationery knife for trimming;
- glue gun.
To the wall with putty or liquid nails. If glued on putty, then it will fill the existing gaps and you will only need to remove its remnants.
Before gluing the fillets, it is necessary to carry out preparatory work, namely the walls in the place where the plinth will be glued, then putty it.

For gluing, a special glue is used, which is applied in a strip on the sides of the plinth adjacent to the wall and ceiling.
Now there is a wide variety of ceiling plinths, you can buy a narrow one, it is more flexible, repeats the relief of the walls. In the finished version, this will not be very noticeable, of course, if the wall defects are small.
Theoretically, the corners of the rooms should be 90 degrees, but in practice this is not always the case. Therefore, we cut the corners of the plinth first at 45 degrees using a miter box, and then we adjust it in place. The ceiling plinth, made of foam, is very well cut with a clerical knife. You can join one plinth to another on the spot and cut it off.
After you cut it off, you need, and then just glue it.
The joints must be sanded with a fine-grained sandpaper. The glued baseboard can be left as is, or it can be painted with water-based paint in the same shade as the ceiling.
Back to index
How to paste wallpaper
When pasting walls with wallpaper, as with any other undertaking, certain skills are required. As a rule, professionals are not involved in this process, but they manage on their own. The final result depends on how the walls are prepared for pasting, what wallpaper is chosen, what glue will be used - how the walls will look.
Wallpapering tools:

For gluing, you can use two ladders that will be connected by a board with a width of at least 40-50 cm, or tables lined up in a row of the same height.
- pencil;
- scissors;
- roulette;
- spatula and painting knife;
- roller for joints and fleecy;
- bath for glue;
- a bucket for diluting glue;
- soft cloth;
- plumb line with thread;
- table, stool or stepladder.
Before starting work, you must carefully study the instructions, since different types of wallpaper have their own rules.
The first thing to do is to calculate the number of rolls. Now there are calculation tables, but they have large errors, so it is better to use the old method. An old roll of wallpaper is taken with the width with which it is planned to glue new wallpaper, and a tape measure. Then, along the perimeter from corner to corner, a measurement is made, for walls with door and window openings, similarly. From one roll 10.05 m long, 4 strips will be obtained with a wall height of up to 2.5 m. This calculation is applicable for wallpaper without joining the pattern, and with joining, 3 whole strips will come out, the rest will be used over doors and windows.

A sponge or soft cloth will help smooth out the wallpaper and expel air bubbles.
If necessary, the walls are leveled with putty, then a primer is applied. It is needed so that the glue is not absorbed by the walls and you can easily combine the pattern on the canvases by moving the stripes. Instead of a special primer, wallpaper glue diluted to a more liquid consistency can be used.
When cutting wallpaper, a small margin is made, they are carefully cut with a clerical knife on the floor. If you need to adjust the pattern, then you need to look at the instructions, where the offset step is indicated, but it happens when this step does not match. Therefore, you first need to test it on the floor.
Wallpaper glue is selected according to the type of wallpaper. For places near windows and doors, you can use a composition based on PVA. Dilute the glue in a bucket of cold water according to the instructions, stirring quickly with a brush or stick. Let the glue set.

Excess wallpaper is pressed with a spatula and trimmed with a sharp knife.
When wallpapering, the windows must be closed, the sockets must be de-energized. Wallpaper pasted in a joint, you can start gluing from any wall. For training, it is better to start with the one that will be covered by furniture.
The vertical is marked when gluing the first strip with a rope with a load. This strip is glued from the corner to another wall 1.5-2 centimeters. After the strip is smeared with glue, it must be folded in half for impregnation. At this time, the wall is smeared with glue and a strip is attached to it. The collected air is dispersed with a clean cloth or rubber roller.
The ceiling plinth is not immediately glued to the glued wallpaper, as they need time to dry, they are easy to damage. Fillets are glued according to the technology described above.


