Which ceiling is suitable for the kitchen. Ways to decorate the ceiling in the kitchen and do-it-yourself installation
Choosing a ceiling for the kitchen is an extremely responsible matter. We spend a lot of time in the kitchen, there is always a lot of activity here, and I want the walls, appliances, stools with a table, and the ceiling to be the most beautiful. But moisture, grease, soot and endless drafts will sooner or later get to the most resistant coating, so there should simply be no trifles during kitchen repairs. It is easy to get confused in the varieties of materials for construction purposes, so many people are tormented by the question - how to make a ceiling in a brand new kitchen?
The kitchen in the average apartment is a high-risk room.
When choosing which ceiling in the kitchen to give preference to, you need to consider several factors at once:
- Moisture resistance. Along with the bathroom, the dining room is the place where there is always water vapor, in addition, these two rooms are most often flooded with "good" neighbors. Therefore, the coating must easily withstand water tests.
- Easy cleaning. Soot and grease from soups and delicious pancakes is a common occurrence in the house, so it is important that the ceiling can always be safely washed and cleaned.
- The ability to hide the flaws of the old ceiling - stains from former floods, cracks, bumps, ugly ventilation grilles.
- Wear resistance - any ceiling is not mounted for a year or even for 5 years, so the coating must endure harsh kitchen conditions well and not lose its presentation.
- Environmental friendliness and safety for the health of all family members.
- Beauty and interior fit. If you have a sophisticated Art Nouveau dining room, cheap styrofoam tiles will be out of place, and soft Provence will not appreciate the multi-level ceilings of flashy shades.
To date, there are more than a dozen different types of ceiling for kitchens, and each of them has its own advantages and disadvantages. Consider the most popular and practical options.
Plastering
When deciding which ceiling in the kitchen is the best, most of the renovations still prefer the good old classic - a white plastered surface. Such a coating has many advantages, but there are also some nuances.
Pros:
- environmental friendliness: putty and plaster are quite safe for health, they do not emit any toxins and toxic fumes. For allergy sufferers in the kitchen - the best way out;
- beauty and severity - in the process of surface treatment, all bulges, cracks and pits disappear - the output is a perfectly even, uniform coating;
- when plastering, the room does not lose height - for apartments with very low ceilings and small kitchenettes, this factor is especially important;
- if desired, such a surface can be decorated with moisture-resistant wallpaper for painting, which will allow you to adapt to almost any interior style.
Of the minuses:
- this is a very time-consuming work in several stages: the surface must be leveled, primed, covered with putty, and only then - with plaster;
- if you live in a new building, you need to make allowances for the fact that at first the house will “walk” - cracks and crevices may occur on a fresh coating due to shrinkage;
- plaster can hardly be called practical, it is very sensitive to dirt: if stains appear on the ceiling (or traces of water after a slight flood), the repair will have to be repeated.

Painting
Paint on the kitchen ceiling is a great option if the surface is reasonably even. The main thing is to buy a quality washable repair product.
Pros:
- moisture-resistant coating can be easily washed;
- it is really possible to choose paint for the kitchen in different shades - for a different style;
- this type of repair is quite durable;
- the painting process itself will take no more than 2-3 hours, and in a day the ceiling will be completely ready.
Of the minuses:
- if the coating is uneven, you will have to spend time leveling and puttying;
- it is important to follow the painting technology and apply 3 layers in different directions so as not to end up with stains on the new ceiling.
- with improperly selected paint, cracks may appear due to temperature changes.

Wallpaper
Washable wallpaper for kitchen ceilings is a fairly budget option and an opportunity to implement various ceiling design ideas. Today, this option for the kitchen is chosen more and more often.
Pros:
- simpler technology in comparison with staining and whitewashing;
- variety of textures and shades;
- easy to wash and clean (if you choose the right wallpaper);
- will help to hide the unevenness of the ceiling, in particular when shrinking a new house.
Of the minuses:
There are practically none, problems will arise only if you buy ordinary paper wallpapers for the ceiling: with high humidity and drafts, they can peel off at the top.

Styrofoam tiles
Inexpensive and cute styrofoam tiles have already experienced the peak of fashion, but many still stop at this option when deciding which ceiling to make in the main room itself.
From the pros:
- this tile is the cheapest option: sq. a meter of coverage will cost 50-70 rubles;
- decorating the ceiling with polystyrene foam tiles is a quite simple task that the most inexperienced repairman can handle;
- expanded polystyrene is able to hide the most terrible defects - if there is neither the possibility nor the desire to level the surface, this is an ideal option.
Of the minuses:
- unpretentious ceilings made of expanded polystyrene have limited design use: such a ceiling covering looks harmonious, for example, in the style of "classic" or "retro";
- an inexpensive ceiling easily clings to dirt and grease: if you try to whitewash the tiles, the pattern will no longer be so elegant and bright.

Rack and plastic ceilings
Coating of rails and PVC panels are almost the most popular types of ceiling for a dining room today. These materials have a lot of advantages and practically no disadvantages.
Pros:
- a huge selection of colors and textures for different designs and for every master's taste;
- easy installation:
- the ability to hide not only serious ceiling defects, but also various communications;
- you can arrange interesting soft ceiling lighting - lamps are easily built in here;
- this is a very practical ceiling option - any dirt can be removed with a damp cloth;
- In its original form, such a coating will last at least 10 years.
Of the minuses:
- plastic ceilings reduce the height of the room by 10 centimeters - for small kitchens this can be a serious problem;
- classic white panels can give a cozy kitchenette a bit of an official look.

Today in stores you can find a rather unusual material for ceiling repairs: tiles of various types: pressed, extruded, laminated, injection.
Pros:
- simple installation;
- different design and texture, which allow you to mount a solid ceiling without visible boundaries between the tiles;
- a significant run-up in price, allowing you to choose both budget and elite options.
Of the minuses:
- some types of tiles cannot be painted and whitewashed when dirty;
- in order for the material to lie tightly, the surface must be leveled.

Drywall
Plasterboard (or hemmed) ceilings are most often made by those people who dream of implementing the most daring interior ceiling ideas in the dining area.
Pros:
- under drywall, you can hide any ceiling "jambs", vents, wires;
- the most complex structures can be assembled from this material: two-, three-level, curvilinear, drywall is also ideal for creating the most unusual ceiling lighting: light can fall up, down, sideways, at various angles;
- plasterboard coating requires mandatory coverage: wallpaper, plaster, paint - this will also give the ceiling the most unusual look.
Of the minuses:
- complex installation and materials for "plasterboard" repairs can cost a pretty penny;
- both multi-stage and conventional plasterboard ceilings significantly reduce the height of the kitchen.

Stretch ceiling
Stretch ceilings in the kitchen - the choice of those who want to get the most spectacular and unique kitchen. This coating is at the peak of fashion today, and every year there are more and more supporters of stretch kitchen ceilings.
Pros:
- stretch coating - these are limitless ideas for decorating the ceiling: matte and glossy, mirror and classic, plain or with a spectacular pattern - you can choose anything;
- such a ceiling coating is resistant to temperature extremes, any dirt, dust and water: it will withstand even a terrible flood from neighbors from above;
- tension materials are completely harmless, do not emit any hazardous substances into your kitchen;
- you can not level the ceiling, calmly hide the wires and all communications;
- the service life of a stretch miracle is at least 10-15 years.
Of the minuses:
- high price;
- instability to mechanical damage: if the coating is torn or hooked with something sharp, it will have to be changed entirely;
- the height of the room will decrease by 10-15 centimeters.

The modern repair market offers all kinds of ceiling coverings for any buyer. It remains to evaluate the financial possibilities, decide what qualities of the future ceiling are most important to you, decide on the design - and it will not be difficult to choose the ideal material for the future shelf.
When choosing a good ceiling covering for the kitchen, the technical and aesthetic characteristics of the room are considered, because the ideal kitchen is not only modern appliances and a new set, but also beautiful ceilings. The ceiling in the kitchen is the first to take on all the soot, humidity and fumes. Therefore, special attention is paid to what material it is made of.
Surface material
Before choosing, it is necessary to study the various properties of the selected surface. The coating in the room must have the following characteristics:
- Increased moisture resistance and wear resistance.
- Ease of use.
- The ability to hide small irregularities.
- Environmental friendliness.
- Attractiveness and reasonable price.
Keep in mind that the humidity in this room is not less than in the bathroom. When cooking, steam is not removed immediately. And all the negative factors are reflected in the ceiling.
In the kitchen, the formation of burning and fat cannot be avoided, even if effective ventilation is installed or. Cooking on gas increases the amount of soot.
Pre-activated ventilation above the stove during cooking will make the heating of the ceiling surface even, and the air will be cleaner.
Plastered ceiling: advantages and disadvantages
Plaster is an economical surface option. The material is not subject to strong changes in humidity and temperature. Its advantages:
- Ecological raw materials.
- Fire resistance.
- Elimination of irregularities and defects in the ceiling.
- Financial benefit.
With all its advantages, plaster has negative points:
- Labor intensive process.
- Difficulty in operation - it is problematic to remove dirt and soot.
The plastered ceiling is used in further work: painting or whitewashing the surface.
Whitewashing and painting
Whitewashing is a simple and inexpensive type of ceiling surface finish. Chalk is used - whiteness and freshness, or lime (bactericidal properties).
Advantages of application - cheapness and ease of repair. Necessary tools: bucket, brush, newspapers or film to protect furniture and floors.
The disadvantages are various factors:
- The frequency of re-whitewashing - the dirt from this ceiling is not washed off.
- Uniform appearance.
- Sagging of material over time - the whitewash is removed again along with the plaster, which leads to a large amount of work.
If the kitchen ceiling is fairly even, then it can be painted with water-based paint. It will give a nice matte finish.

How to paint the ceiling.
The surface is easy to care for, the paint is washable. Due to the thin layer of material, the formation of sagging will not occur soon.
When painting the ceiling, a roller is used, not a brush. The surface will be smoother.
Wallpaper
Often the ceiling in the kitchen is covered with wallpaper. The surface is preliminarily leveled, joints are sealed. The undoubted advantage of the material:
- Ease of operation.
- Hiding minor defects.

Wallpaper on the ceiling is an inexpensive way to transform the kitchen.
With all the positive aspects of the stretch ceiling, there are also disadvantages:
- The height of the kitchen is reduced by 10 cm.
- High price compared to other materials.
- In case of damage, the entire system is replaced.
- Installation requires special equipment.
For the kitchen, a matte canvas is used. It does not show any fat stains.
Plasterboard ceiling: pros and cons
Drywall is a versatile material, applicable for various finishing works. With its help, a single-level (hard) ceiling or a multi-level (floating) suspended surface is made. Used for painting.
Pros of using:
- Alignment of the ceiling due to drywall sheets. You can not remove the old whitewash.
- Effective masking of communications.
- Application of any type of lamp.
- Ease of installation and dismantling.
Drywall is a plastic material. From it perform any form of surface.

Given all the features and competent installation (on a special crate) of the structure, drywall will become a durable and functional ceiling covering.
Disadvantages of drywall:
- Slight moisture resistance - when installing the material in the kitchen, you need a powerful hood.
- Failure to retain water - when wet, the ceiling is completely replaced.
- Reducing the height of the room by 15 cm.
- Deformation of the substance, color fading.
- Not suitable for new buildings - the building will shrink over time, the ceiling surface will begin to crack.
Acrylic paint is used for coloring the material, not emulsion. This will remove grease from the surface with detergents.
Two-tier, make hanging
Two-level structures are carried out by the tension method and are made of drywall. Installation from sheets is easier than installing a vinyl sheet.

A multi-level ceiling highlights different zones, focuses attention on parts of the room.
The surface has its advantages:
- Style and aesthetics.
- Masking - the composition will hide the communication.
- Use any image and background - from a plant to your own photo.
- High sound insulation.
- Visual increase in area.
- Fast installation.
When installing a stretch two-level ceiling, perfect plastering is not required. The canvas will create a flat surface. There is a choice of many different shades.
The ceiling is easy to maintain and easy to install. With the help of a ceiling in several levels, you can hide the ventilation or electrical wiring in the kitchen.
For more information about this, see the video instructions:
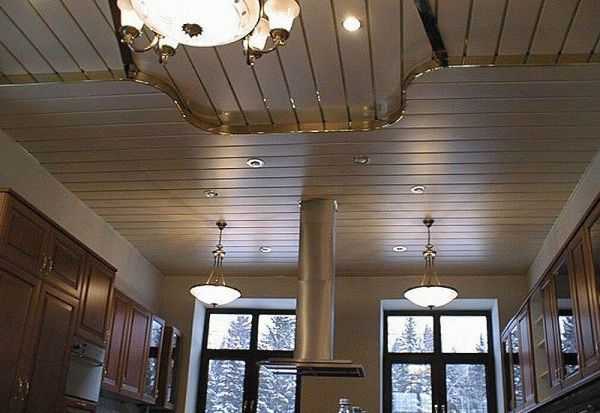
Slatted ceilings look stunning. The kitchen will be completely transformed
Rack surfaces are of three types:
- Open type - there are gaps between the lines. Mounted in rooms with high walls.
- Closed type - without inserts, the surface is flat.
- Seamless panels - a surface with a minimum joint size, a feeling of a one-piece fabric is created.
The slats are great for the kitchen. They have a number of advantages:
- Durability and ease of care.
- The panels are antistatic.
- Not subject to temperature changes.
- Hide the flaws of the ceiling.
- Fire resistance.
- Environmental friendliness.
The only drawback is that the panels significantly steal the height of the room.
In any case, when choosing a material for the ceiling in the kitchen, the nuances of the room for cooking are taken into account: the presence of a ventilation system, the height of the walls, the area of the room.
A few decades ago, such questions could not even arise. There were only two ways to decorate the ceiling - whitewashing and painting with water-based paint. Today, everything is much more complicated. There are several ways to design the ceiling and a wide variety of materials. To answer the question: “Which ceiling is better to make in the kitchen?”, You need to know about all the disadvantages and advantages of certain coatings. We will study them in our article.
Perfect ceiling
Remodeling your home needs to be taken very seriously. This is especially true for such a complex room as the kitchen. To choose the right finishing material, you need to know what characteristics the ideal kitchen ceiling has. It should be:

It is not easy to find a material that meets all these requirements, but it is possible. To date, there are several ways to decorate the ceiling in the kitchen. Customer reviews indicate that it is quite possible to make a high-quality and modern ceiling from modern materials. These include:
- plasterboard ceilings;
- stretch ceiling;
- structures made of expanded polystyrene boards;
- ceilings covered with wallpaper;
- painted.
Slatted ceilings
They are collected from individual rails. The design can be open and closed. In the second case, narrow inserts are used that close the gaps between the rails; in the first case, the ceiling is mounted without them. Reiki is produced in lengths of 3 and 4 meters. Their width can be different - from 9 to 20 cm. But the most popular are slats 10 cm wide.

The advantages of the ceiling from the rails
- Moisture resistance.
- Attractive appearance.
- Suspended structures (you can hide communications).
disadvantages
- Decreasing the height of the room by 10 cm.
- Impossibility of partial dismantling.
Plastic ceilings in the kitchen
Such a solution to the “ceiling” issue has many opponents, but there are also many supporters. Using plastic panels on the ceiling in the kitchen, you can create a very original interior of the room. Feedback from apartment owners suggests that this is a very affordable method. The material for it is inexpensive, and installation is quite fast.

This design has very significant drawbacks, from which it is impossible to simply brush aside. As many designers note, “visual coldness” emanates from such a ceiling - what looks good in an office is not always suitable for an apartment.
An even more serious drawback is the short service life. Kitchen fumes and soot quickly spoil the glossy beauty.
Stretch ceiling in the kitchen
The production technology of such a model consists in stretching a PVC film on a metal frame. Stretch ceiling in the kitchen is just a godsend for designers. It has great aesthetic potential. It can be completely smooth or be a whole cascade consisting of several levels. Provided that it is properly installed, this design has no life limit. Stretch ceiling is not afraid of leaks.

Such designs are divided into two categories: standard (having seams) and seamless. The last option is a new type of ceiling made of synthetic fabric (polyester), which has a very high strength. In this case, the material can be impregnated with polyurethane on both sides. Seamless stretch fabrics have a width of up to five meters.
Like any design, this type of ceiling has disadvantages:
- Difficulty of installation. It will not be possible to make such a ceiling with your own hands - special equipment and certain skills in this work are required.
- Restrictions on the type and power of luminaires that are built into the ceiling - these must be halogen luminaires with a power of no more than 35 watts.
- The complexity of care - fat is removed from the surface of the ceiling is quite difficult.
According to the owners, they are quite satisfied with stretch ceilings. The photo (for a kitchen with high ceilings) clearly demonstrates that they can become a real work of art.
painted ceilings
If you are haunted by the question: “What is the best ceiling to make in the kitchen?”, Then you should know that painted ceilings are still relevant. Designers recommend making such a ceiling if the height of the room is small. Painting is recommended if the surface is flat and smooth, and also if the intended design does not include suspended structures.

The advantages of such a ceiling include, first of all, ease of manufacture. Modern interior paints are easy to apply, do not have an unpleasant, pungent odor, so they are easy to work with.
It is impossible not to note the hygienic properties of such a ceiling - covered with high-quality water-based paint, it “breathes”. If the base surface is prepared perfectly, then at the end of the work you will get a beautiful and neat surface.
Plaster and whitewash
There is no cheaper way to quickly and efficiently update the ceiling. All you need is a bucket, brush, water and some lime. True, in this case, it must be borne in mind that the ceiling will often have to be whitewashed. Soot and grease cannot be washed off from such a ceiling. Over time, lime deposits form, which will have to be cleaned off.

ceiling wallpaper
When choosing which ceiling is best done in the kitchen, this option should also be considered. More recently, this method of decorating the ceiling has been very popular. Of course, we mean washable wallpapers - ordinary paper samples will lose their attractive appearance after only two to three months.

Such a finish is quite easy to work with and is inexpensive, besides, dense wallpaper can hide minor surface imperfections. Keep in mind that light, monochromatic samples can only be used on a perfectly flat surface. If you need to hide some small defects, choose a wallpaper with a contrasting pattern. It is desirable that there are no symmetrical elements on it.
Vinyl wallpapers wash well with soapy water. However, with the obvious advantages of such ceilings, there are also serious drawbacks. Washable wallpaper - the material is quite heavy. Even when using very high-quality glue, over time they begin to move away, especially where hot vapors rise up.
Ceiling tiles
Thinking about the question: “What is the best ceiling to make in the kitchen?” You should not discard such a recently popular method as using polystyrene tiles. Today, this method is gradually becoming a thing of the past, although it is still popular due to its very affordable price. Tiles can hide quite significant defects in the ceiling.

The disadvantages of this coating include the porosity of the material, therefore, it is not easy to wash it. Many people think that the appearance of such a tile does not meet modern requirements.
We use drywall
This material, beloved by many, helps to avoid complex plaster work. It is enough to cover the base ceiling with drywall, putty it and paint it with a good water-based paint. Everything, beautiful and high-quality ready!

Many believe that the disadvantage of this material lies in the complexity of installation (compared to rack or plastic options). In one day, a drywall construction cannot be made. Therefore, it is better in this case to seek help from professionals. People with experience in such work will create an original ceiling design in the kitchen that will look very modern.
How much is the ceiling
At the beginning of the article, we talked about the fact that its cost can become a weighty argument in favor of a particular coverage. This is really important, so we will give you average prices (in Moscow) for the most popular ceiling coverings and their installation.

So, polystyrene ceiling tiles cost from 15 to 25 rubles / m 2, its installation - 130 rubles / m 2.
PVC panels will cost an average of 180-200 rubles / m 2, and the work of installing them - 300 rubles / m 2.
The rack ceiling will cost a little more: material - 280-300 rubles / m 2, and work - 300 rubles.
Almost the same amount will be required to make plasterboard ceilings in the kitchen - 200 rubles / m 2 (material) and 485 rubles / m 2 (work).
The ceiling, covered with wallpaper for painting, will cost 452 rubles / m 2 (material) and 570 rubles (work).
Oddly enough, but the stretch ceiling will be cheaper. The cost of the material, which includes the cost of installation, is 840 rubles / m 2.
As you can see, these are average figures. You can choose a material more expensive, and a team of craftsmen, highly appreciating their professionalism, will name a higher price. But the overall picture is clear, and you can focus on a certain type of coverage.
Ceilings for the kitchen: reviews
According to the latest surveys, which are regularly conducted by large building supermarkets, most of the buyers want to see stretch ceilings in the kitchen. Their reviews confirm this. In addition, an interesting trend has emerged - stretch ceilings are completely suitable for consumers aged 30 to 35 years. The older generation prefers drywall, considering it a reliable and proven material that has been used for many years. The most senior buyers still vote for polystyrene tiles, believing that they can be used to inexpensively update the kitchen ceiling.

If gaps form between the plates in your house, choose a suspended ceiling, and if you choose a plasterboard option, then it must be pasted over with fiberglass or glass wallpaper.
New settlers who begin repairs in a newly commissioned house should take into account that the new building is undergoing a shrinkage process, therefore, fiberglass and sickle should be used when puttying.
For the kitchen ceiling, it is necessary to purchase paint from well-known manufacturers, preferably washable.
If you want to make cosmetic repairs to a ceiling that has turned yellow from tobacco smoke or after a leak, then first prime it with a matte alkyd paint. If this is not done, then yellow spots may appear on the surface.
If you are planning to make side lighting of the ceiling, then the finishing work must be of very high quality.
If you want to make repairs in a retro style, using stucco molding, then it can be successfully replaced by an imitation of foam or polyurethane.

If a crack has appeared on the kitchen ceiling, then it would be more appropriate to putty and paint the entire ceiling. Otherwise, you're wasting your time and money.
Well, that's, perhaps, all that I would like to say about kitchen ceilings. Probably, someone is waiting for us to say at the end of the article what the ceiling should be in your kitchen. This won't happen. You, only you, can make this choice, which depends on your preferences and financial capabilities.
The kitchen is a very special place in the apartment, which has its own microclimate. The latter is constantly changing (from humid to hot), which means that the ceiling of this room must have appropriate resistance. The developments of past years and new technical finds offer a variety of options for kitchen ceiling coverings. Each of them has its own advantages and disadvantages.
Whitewash
The most traditional and budget option. Simple work is carried out in the sequence below.
Step 1. The kitchen is maximally unloaded from furnishings, and what remains is well packed in a strong plastic film.
Step 2 The ceiling is gradually, in sections, wetted with soapy water.
Step 3 From wetted areas, the old layer of whitewash is successively removed with a spatula.
Step 4 The cleaned surface is completely washed off with a soapy solution.
Step 5 The ceiling is covered with an aqueous suspension containing chalk, blue and wood glue or slaked lime, salt and aluminum alum.

Table number 1. Advantages and disadvantages of whitewashing the ceiling.
| Advantages | disadvantages |
|---|---|
| Cheapness. | Instability to high humidity and temperature extremes. |
| The finely porous coating gives a "breathable" layer with good air exchange. | Can't be washed. To eliminate the resulting stains and sooty spots, it is necessary to whitewash the ceiling every time. |
| The ultimate simplicity of technology that does not require special qualifications from the performer. | Whitewash does not hide, but reveals defects. Preliminary careful alignment of the working plane is necessary. |
| Minimum financial costs. | Fragility - cracks and shedding appear quickly enough. |

Whitewash prices
Coloring
The cost of water-based painting depends on the price of consumables. As it most often happens, the most expensive coloring compositions with silicone give the highest quality layer - they form a film permeable to water vapor, which tightens small irregularities and allows washing with non-abrasive products.
In general terms, the sequence of work is as follows:

Important! In this case, the last layer of paint is parallel to the main stream of light from the window in the kitchen.
Table number 2. Advantages and disadvantages of painting the ceiling.
| Advantages | disadvantages |
|---|---|
| Moisture resistance - unlike bleached, the painted ceiling can be washed. | Fragility - cracks and delaminations appear soon enough. |
| A simple technology of work that does not require third-party qualified assistance. | Color fading, yellowing of the white coating. |
| The ability to obtain a variety of, not only white, colors by adding coloring pigments. | Peeling of paint when moisture seeps from rooms located above. |
| Absence of toxic components and pungent smell. | Careful leveling of the working area is necessary before painting. |
Wallpapering
Relatively inexpensive way to decorate. For the kitchen, washable (vinyl) wallpaper with a dense texture is best suited.
 Ceiling wallpaper
 Wallpapering the lamp
  Ceiling covered with wallpaper
To paste over the ceiling with them, you need:
- clean the surface, putty existing defects and cracks, and then prime it;
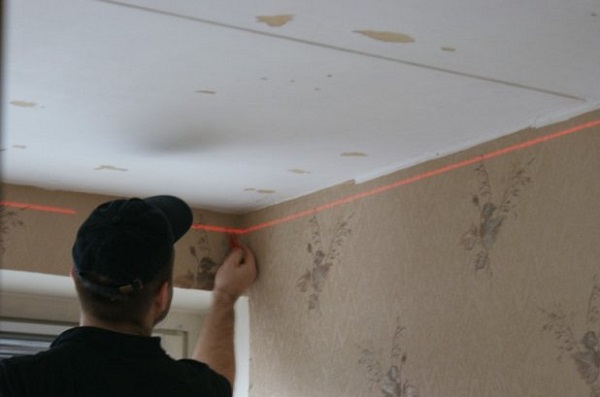
- apply markings so that the stripes of wallpaper run strictly parallel to the walls;
- covering both the ceiling and wallpaper with glue, place the strips end-to-end, carefully leveling them with a soft roller.
Table number 3. Advantages and disadvantages of wallpapering the ceiling.
| Advantages | disadvantages |
|---|---|
| Not the highest cost, the possibility of repairing individual sections. | Difficulties in fixing dense and fairly heavy wallpaper, additionally covered with thick glue. |
| Masking of surface defects. | Evaporation and currents of hot air, as a rule, lead to deformation of the wallpaper and their divergence at the joints. |
| Wash resistance (with appropriate texture). | Leakage from above irreversibly spoils the ceiling wallpaper. |
Styrofoam tiles (expanded polystyrene)
Such a coating refers to quite budgetary and hygienic options. The highest quality, reliable and durable it is obtained with proper preparation.

- The surface is cleaned to concrete, treated with an antiseptic, covered with a penetrating primer, puttied to eliminate large irregularities, and then marked out.
- The tile is glued with any universal adhesive (most often PVA) in accordance with the applied markings.
ceiling tiles prices
ceiling tiles

Table number 4. Advantages and disadvantages of finishing the ceiling with foam tiles.
| Advantages | disadvantages |
|---|---|
| Low cost. | Rustic, monotonous and somewhat old-fashioned appearance of the finished coating. |
| No need for particularly careful leveling of the working area. | The porous surface of cheap foam blocks cannot be washed clean. More expensive laminated tiles do not have this drawback. |
| Foamed polymer tiles provide additional heat and sound insulation. | Fire hazard - at least in some varieties. Information about resistance to high heat and open flame is indicated on the packaging. |
| The possibility of washing and resistance to the penetration of moisture from the premises located above. | From prolonged exposure to bright light, the tiles gradually turn yellow, burn out and lose strength. |
| Possibility of local repair. | The abundance of joints, visually crushing a flat plane. This visual defect has been fixed for seamless tiles, which have a higher cost. |
How to glue tiles on the ceiling?
In you will find not only step-by-step instructions and useful tips, but also a comparative analysis of possible finishing materials. It is important to approach this moment with all possible attention, because the tile must meet the requirements of the owner both in terms of external qualities and material characteristics.
Plastic panels
This material is in the middle price range. Its most popular type is “lining”, that is, long strips about 10 cm wide made of polyvinyl chloride material.

During installation, minimal preparation is performed - old layers of wallpaper, tiles are removed, crumbling plaster is removed.
- Then, the line of the future frame is marked along the perimeter (at a distance of 5 cm from the lowest corner, although the figure can be increased depending on how the space between the base and new ceilings will be used).
- On the lines drawn, every 50-100 millimeters mark holes drilled with a puncher. After that, dowels are inserted into them. Through the holes drilled in the wall with self-tapping screws (for example, a 6x40 mm self-tapping screw), the main frame, made of their UD-27 profile, is attached with a cover to the wall. In this case, you need to use a level and make sure that the frame elements are located strictly horizontally.

- Then, with the help of hangers and the CD-60 profile, guide rails are created, to which plastic panels will be attached. The optimal distance between them is 500 millimeters.
- The frame is checked several times for horizontality and the absence of a difference in height - the future ceiling of plastic panels must be perfectly even.

- Next, you should proceed with the installation of electrical wiring (if you plan to make ceiling lights). It is advisable to lay it in a corrugated plastic sleeve that will protect the wiring from moisture.
- To begin with, the installation profile is mounted. Its large "shelf" is attached to the guide rails with self-tapping screws. The profile can be installed both around the entire perimeter of the room, and in the places where the start and finish panels are attached.
- Now it is necessary to cut the panels according to the previously developed plan and the applied markings. At the same time, many experts advise making the length of the sheet a little less than the width of the room, since PVC can expand even at low temperatures, which means that the “back-to-back” installation can lead to future deformations of the false ceiling. If you plan to make recessed lighting for a false ceiling, it's time to make cutouts for fixtures in the panels.
- Once the material is fully prepared, you can begin to attach the first (or start) panel. To do this, you need to insert the launch panel into the installation profile from the side of the mounting shelf, and then fix it with self-tapping screws on the rails. At the same time, care must be taken that they do not go too deep into the PVC, otherwise there will be a risk that the screws will damage the sheet.

- The next panel is joined with the starting shelf using a mounting shelf and fixed in the same way. The panels must fit snugly together. If necessary, you can make a "fit" with the help of gentle blows of a rubber mallet. The rest of the panels are attached in the same way.
Table number 5. Advantages and disadvantages of finishing the ceiling with plastic panels.
| Advantages | disadvantages |
|---|---|
| Irregularities do not matter: the panel system hides the laid wires and pipes, allows the placement of heat and sound insulating fillers. | The hinged structure reduces the overall height of the kitchen by 10-15 cm. |
| Not too complicated installation that does not require special skills and equipment | Instability to the ultraviolet part of the spectrum - in the light, the color gradually fades, and the white panels turn yellow. |
| High moisture resistance. The panels do not lose their shape and flawless appearance even with strong leakage from the upper rooms. | Synthetic material of cheaper panels can release harmful impurities into the air. |
| Ease of care - surface dirt is easily removed. | Under the action of an open flame, the plastic melts and emits acrid smoke. |
| The possibility of local repair with the replacement of the desired panel without dismantling the entire structure. | Low mechanical strength - during installation, sufficient care must be taken. |
rack systems
This type of coating is plastic and aluminum. The latter option is more reliable, but at the same time more expensive. Due to the design features, it is mounted with a larger or smaller gap between the rails. Only slotless installation is suitable for the kitchen. Rack systems come to the distribution network fully equipped with the necessary fasteners.
Installation takes place in the following sequence.
Step 1. Markings are applied to the walls at the points of attachment of the corner guide profile.
Step 2 The cross bars are mounted to which the rails will be attached. Here you will also need suspensions that are fixed in the ceiling.
Step 3 Sequentially, one after another, slats are installed with openings for light sources pre-cut in the necessary places.
Step 4 The perimeter is made out with a complete plinth.

Advantages
- The design hides defects in the ceiling surface, as well as wiring, allows you to insulate the kitchen, isolate it from noise from above.
- Durability and ease of care - the slats are easy to clean, do not absorb dirt.
- Fire safety (inherent to aluminum).
- Aluminum rails do not accumulate static electricity.
- Resistant to high humidity and temperature changes.
- It is quite possible to assemble the rack system on your own - it is sold in modular kits, reminiscent of a designer kit.
disadvantages
- The system requires a suspended structure that reduces the height of the room.
- You cannot quickly replace one rail - you will definitely need a partial dismantling of the system.
Drywall
A suspended kitchen ceiling made of quite budgetary moisture-resistant drywall allows you to implement multi-level combined structures with a variety of lighting and decor options. Preparation for such a finish is minimal - you just need to remove crumbling plaster. Then proceed to the installation.

Step 1. Perform markings on the walls, focusing on the lowest point.
Drywall prices
drywall

Step 2 According to the markup, a guide profile (UD) is fixed, on the entire plane, carrier profiles (CD) are fixed with mounting strips and dowel-nails, forming a suspension frame.

Frame assembly
Step 3 Plasterboard sheets are fixed on the assembled frame with screws with a distance between the attachment points of not more than 20 cm.

Step 4 The sheathed frame is successively puttied - first the seams are sealed, pasted over with a serpentine tape, then both the seams and the entire surface are puttied again.
Step 5 After complete drying, the sealed smooth ceiling is painted or covered with wallpaper.
Table number 6. Advantages and disadvantages of finishing the ceiling with plasterboard sheets.
| Advantages | disadvantages |
|---|---|
| The ability to hide defects, wiring and other communications. | Installing a suspended frame reduces the height of the room by at least 7 cm. |
| Ecological cleanliness - the material is non-combustible, does not emit harmful volatile impurities. | Even moisture-resistant drywall does not withstand prolonged direct exposure to water. Serious leaks from neighbors from above hopelessly spoil it. |
| Design features that allow you to create multi-level systems with perfectly flat planes and smooth contours. | Low strength - the material is easy to break through by hitting hard with your hand. Care must be taken during installation. |
| During installation, you can additionally insulate and soundproof the kitchen. | Instability to deformation - drywall sheets should be stored exclusively in a horizontal position, and only in dry rooms. |
| Resistance to high humidity and temperature changes (only for special grades of drywall). | The need for further painting work after installation - masking the seams, painting, wallpapering. |
| The drywall base can be updated - repainted, glued fresh wallpaper. | A quality installation requires certain skills and the help of a partner. |
Tension coatings
Not cheap, but, subject to the right conditions, the most durable option. This is the only reliable way to protect the entire home environment in the event of a “flood” from above. The synthetic film does not break through, but only sags under the pressure of accumulating water. After the accident is eliminated, this moisture is carefully drained with a hose, and in order to rinse the film, dry it and stretch it again, the help of specialists will be required. In the event that technical water from the heating system seeped through the ceilings, a complete replacement of the film will be required.
Stretch ceiling prices
stretch ceiling

When installing the tension system around the perimeter, a closed wall profile is attached, ceiling lights are dismantled. Then the canvas is hung to the profile, warmed up with a heat gun, refueled, first of all, in the corners, then on all sides, starting from their middles.

In the places where the fixtures are attached, reinforcing rings are glued, the canvas inside them is cut out, the wiring is removed and lighting fixtures are installed. At the very end, the bottom groove of the profile is completely, along the entire perimeter, closed with a plug - a dense PVC tape. The whole process requires special skills.
Table number 7. Advantages and disadvantages of stretch ceilings in the kitchen
| Advantages | disadvantages |
|---|---|
| Quick installation - all work takes from 3 hours. | Installation requires special professional equipment and the mandatory involvement of qualified specialists. |
| Defect masking. | Reducing the height of the kitchen by at least 4 cm. |
| Particular resistance to distributed loads - with a thickness of only 2 mm, a square meter of tension coating holds, without breaking through, up to 100 liters of water flowing from above. | In a thin film, punctures and cuts are easily formed, which can be difficult to eliminate. |
| An exceptional variety of colors, textures and patterns. | It is not possible to move chandeliers and ceiling lights, as the holes for them are made only once during installation. |
| Fire safety - the material does not ignite and does not support combustion. | Limited luminaire power - up to 60 watts for incandescent lamps and up to 35 watts for halogen lamps. Intense local heating can melt the film. |
| Durability - up to 20 years, subject to the necessary operating conditions. | Unsuitability for unheated premises - for a country kitchen, for example. |
| Resistance to corrosion, rotting, lack of condensate. | Cheap films can release harmful volatile substances for a long time. |
When deciding which ceiling will be the best for the kitchen, you need to determine the main priority and take into account the condition of the surface. For really flat ceilings, budget options for whitewashing and painting are suitable. Pasting with washable wallpaper allows minor flaws. Inexpensive tiles are able to mask more significant, but not too sharp elevation changes. Suspension systems are guaranteed to hide all the irregularities, as well as communications. The cheapest of them are drywall, more expensive are plastic and aluminum. For those who are especially concerned about the safety of kitchen furniture and equipment in the event of a "flood disaster" from the neighbors from above, stretch polymer sheets will be the best and only option. In addition, it is quite acceptable to combine different types of coatings in one kitchen.
Video - Ceiling for the kitchen: which one is better? Practical Tips
In order to decide which ceiling is better to make in the kitchen, you should carefully understand the properties of each of the materials, find out all the pros and cons of its use. At the moment, there are many materials suitable for finishing the kitchen ceiling. This is wood, and the so popular PVC, and drywall and even metal. It is especially worth paying attention to the combustibility of the materials used and their resistance to humidity, as well as to temperature extremes - these are the most common conditions in kitchens. The service life plays a significant role - it depends on it how long this or that coating will last.
One of the cheapest and most proven options for finishing ceilings in the kitchen is plaster. Making the ceiling in the kitchen with plaster helps to prevent damage to the coating due to changes in humidity. Among the additional advantages of this finish, it is worth highlighting:
- Plaster is not afraid of temperature changes - severe frosts, as well as suffocating heat, do not affect the coating in any way.
- The plastered ceiling in the kitchen can be washed countless times - this will not bring the slightest harm to the surface.
- The low cost of this coating is also quite a significant advantage.
 Plaster - the most affordable and common option for finishing the ceiling surface
 However, plaster, with a fairly large number of advantages, has many disadvantages, in particular:
- The plaster gets very dirty, it also has the ability to absorb fat, so you will have to wash such ceilings in the kitchen quite often.
- It does not protect against flooding from above, from which even a small flood will result in stains on the kitchen ceiling, or even worse - peeling plaster.
- Another, quite significant minus - such a finish strongly absorbs odors.
Plaster is a good budget option for decorating the ceiling in the kitchen. Cheap, reliable, effortless - this option looks pretty decent. However, if you plan to make the ceilings in the kitchen more aesthetic and practical, it is better to give preference not to ordinary, but to decorative plasters.

Drywall
Plasterboard finishing is an excellent solution to the question of how to finish the ceiling in the kitchen, provided that it has an exhaust hood. One of the main advantages is the ability to create multi-level structures, thanks to which you can emphasize the overall design of the room. Also, due to the design features of the plasterboard ceilings in the kitchen, the surface does not need to be leveled, which can significantly reduce costs.
 Multi-level plasterboard ceilings - affordable and beautiful
 Such a kitchen ceiling also has disadvantages - it cannot be washed, and in the absence of an exhaust hood in the room, it will quickly lose its appearance. This option is very popular due to its aesthetics, comparative budget, as well as the ability to significantly diversify the design.
Finishing PVC panels is a fairly popular option due to the variety of textures, as well as ease of installation. Such a ceiling finish in the kitchen has many advantages, in particular:
- low cost;
- water resistance;
- durability;
- ease of care.
 Plastic panels - a budget option for finishing kitchen ceilings
 Moreover, this type of finish can be easily replaced if damaged. Moreover, the damaged area is replaced, and not the entire coating, which significantly reduces the cost of repairs.
The ceiling in the kitchen made of plastic has its drawbacks. One of them is high sensitivity to damage. Any, even a slight blow, can break the coating. In addition, plastic is easily combustible, and in the process of combustion it releases toxic gas, which is especially important for such a fire-hazardous room as a kitchen.
When deciding which finish to apply, we must not forget about the metal ceilings in the kitchen. They are quite popular due to their high strength, as well as low cost. In this case, there are various versions, in particular from aluminum or other metal. Among the additional advantages of such a ceiling, it is worth highlighting:
- long service life;
- the coating is not afraid of humidity and temperature changes;
- such a kitchen ceiling is easy to clean;
- the material is not subject to combustion;
- not afraid of floods.
It is worth noting that the last point is applicable exclusively for finishing - water will not affect it in any way. But it will get into the room, so the metal ceiling will not be able to protect the interior from the consequences of flooding.
 Metal panels - a practical option for finishing the ceiling in the kitchen
This choice of ceiling in the kitchen is really reliable and practical. Metal or aluminum finishes do their job well, are easy to clean, and absolutely unaffected by time. However, it is rather difficult to call this type of ceiling covering environmentally friendly.
When choosing a ceiling for the kitchen, tension structures are in great demand - and for good reason. Their appearance can be safely called impeccable, and the cost has long passed into the category of affordable. The design consists of a decorative profile to which a fabric or film is attached. Which material to choose is up to you. We will take a closer look at each type.
Fabric ceilings in the kitchen are initially considered more durable than film ones. Among the features of fabric options, it is worth highlighting:
- High resistance to mechanical damage.
- Partial transmission of water during flooding.
- The need for a complete replacement of the canvas during the forced dismantling of the ceilings in the kitchen.

The film version has the following characteristics:
- Subject to mechanical stress, easily torn from contact with a sharp object.
- Retains water, so you can not be afraid of leaks when flooded from above.
- Can be removed and stretched many times without changing the material (for example, to drain water and dry).
In addition, both film and fabric stretch options can be matte or glossy, satin or transparent. This ceiling finish in the kitchen has many advantages:
- resistance to changes in humidity;
- ease of installation;
- the possibility of installing spot lighting;
- the possibility of combining with other designs;
- easy care.

Stretch ceilings have their drawbacks:
- the design cannot be installed independently;
- the material is exposed to sharp objects;
- heating contributes to the deformation of the ceilings, including sagging, which is especially important for the kitchen, where temperature changes are common;
- if the structure is severely deformed, it must be completely replaced, just applying a patch will not work.
Ceiling painting
Many types of ceilings in the kitchen, including plaster or plasterboard, need to be painted. That is why the question of how to paint the ceiling in the kitchen is also quite relevant when decorating this room. You can answer it based on the requirements that are being put forward. If you are not threatened by flooding, ordinary water-based paint will do. Such a ceiling covering is easy to clean and, if necessary, simply refresh by applying a layer of paint. But experts advise using more stable facade coloring compounds for kitchens, which can easily withstand constant temperature changes and even a small flood.
 Paint for kitchen ceilings must withstand temperature extremes and wet cleaning
 Other finishes
There are quite a few options for finishing the ceiling at the moment. In addition to the common ones listed above, there are also exotic designs - including laminate. However, such a ceiling in the kitchen is susceptible to moisture, fungus and mold and is created more to impress than for practical reasons. At the same time, such options are quite expensive and often do not justify their cost.
It is also worth noting whitewash, as a finishing option, and foam. But such materials can hardly boast of special aesthetic properties. The reliability and duration of operation of such a design is also small, which makes them not very popular, but, nevertheless, a very affordable option. Their use can be justified if you need a temporary finish before carrying out larger repairs.
The choice of ceiling for the kitchen should be made based on the characteristics of the room, the requirements put forward to it, and, of course, the budget. To date, there are quite a few design options for kitchen ceilings that meet both aesthetic and practical requirements, while not requiring high costs. However, it is worth remembering that for the best quality of the installed finish, it is better to entrust its installation to professionals who will also tell you how to finish the ceiling in the kitchen in your case in the most optimal way.
We also recommend
 Switching power supply: repair and refinement
 Remote control of light
 Swimming lessons for preschool children
 Notes for the master - home household alarms
 Clock propeller on Atmega8
 Device and relay application examples, how to choose and connect a relay correctly Microcontroller and relay simple switching circuits