What pictures can be drawn on a purple background. How to draw pictures
Welcome to the site ! We present to your attention a photo master class about. Anyone can create such a simple picture. We will depict a red heart in the picture, so you can give such a picture to your loved one, as well as congratulate you on your birthday, Valentine's Day, March 8.
To draw a picture for beginners, we need the following materials:

- Whatman;
- photo frame;
- watercolor paints;
- gouache red, white and black;
- black marker;
- ruler;
- simple pencil;
- pony tassel No. 1, No. 3;
- water container;
- buttons.
How to draw a picture for beginners?
To begin with, we stretch the drawing paper onto the substrate from the frame in order to get a flat surface. We put the substrate on whatman paper and circle it with a pencil, then with the help of a ruler we make indents, measuring 3 cm on each side and cut it out.

Now we wet the sheet with water, you can do it with a brush, or you can do it under a tap (we make a small pressure of water and wet one side of the sheet). We put the stretcher on the side with the markup (the one that was wetted) and begin to bend the edges one by one and fix them with buttons.

Turn over and wait for complete drying. At first, the paper will be wavy, but in the process of drying, its fibers will tighten, the paper will smooth out and you will get an absolutely flat surface.

Now we will use a special stencil. Here's one:

Next, we transfer the stencil to the workpiece, for this you can use carbon paper. But it will be easier at the beginning of work to reduce the drawing from the computer to the cut out sheet of drawing paper and only then the substrate will be covered.

We begin to paint the frame of the future picture with watercolors. First, wet the surface with water using a brush (No. 3), and then apply a light layer of paint. We dry.

We apply another layer of paint and dry it too. Now we liberally pick up brown paint on the brush and paint over the pattern on the frame.

We paint curls with black gouache (brush number 1).

We paint the heart with red gouache.

Most likely, many of you are familiar with the all-consuming feeling that leads to the desire to create and create amazing things with your own hands.
At such moments, you try to express yourself, to demonstrate your individuality and uniqueness through creativity. However, very often the realization that there are no skills and abilities stops and extinguishes all creative impulses.
In this article, we want to introduce you to simple master classes in drawing unusual paintings that even a novice artist can handle.
So, we encourage you to be creative and express yourself! Create! Surprise your loved ones with your creative works! And perhaps, after a very short time, one of you will become an outstanding artist.
How to draw with masking tape?

At first glance, before you is a picture of a professional abstract artist. But in fact, you can make a similar picture with your own hands!

First of all, you will need to cover the canvas with multi-colored paints. You can do it randomly or follow any pattern. In any case, it's only up to your imagination.


When the canvas is fully painted. Give it time to dry well.

Now, using masking tape, create a pattern on the canvas. Paint the voids that are not covered with adhesive tape with paint in a contrasting color. Carefully remove the tape.

We congratulate you on becoming an abstract artist!
How to draw a picture using openwork napkins?

Do you like soft and romantic shapes? Then use the most ordinary openwork napkins in your work.

Apply napkins to the canvas and draw patterns on the napkin with a brush. Napkins will act as an unusual stencil.
Ready-made paintings will be a great gift!
How to draw a picture with a sheet of cardboard?

Surely you have an unnecessary empty cardboard box, for example, from shoes. Cut out a small sheet of cardboard from it and get to work.

Squeeze paints of different colors onto the canvas (make original color paths), and then use a sheet of cardboard to smear the paints on the canvas. You will definitely get an unusual pattern that will be very difficult for anyone to repeat.


You can use a piece of foil as a decoration. Apply liquid glue to the canvas with a brush and sprinkle it with finely chopped foil.
How to draw a picture with soap bubbles?

Remember childhood? What about your favorite childhood pastime - blowing soap bubbles? Did you know that you can draw amazing pictures by blowing soap bubbles?
Dilute gouache, dishwashing detergent and water in separate containers.
In order to get magical drawings, you will need to use straws to inflate bubbles in containers with multi-colored liquid, and then apply a snow-white canvas to the bubbles. Bursting bubbles will leave patterns of amazing beauty on the canvas.
How to draw a picture with drops of paint?

This option for creating an artistic picture is the easiest. You just dip the brush into the paint you need, and then with sharp movements you need to blurt it out onto the canvas, where a drop forms.

Drops must be dried with a hair dryer so that no beautiful streaks remain.
How to draw a picture with wax pencils?

Glue the wax crayons to the canvas in the desired order. Then, using the most ordinary hair dryer, start heating the wax pencils. Under the influence of temperature, they will melt and spread over the canvas, creating unusual patterns.

Looking at the paintings of famous artists, you involuntarily admire their creativity, the ability to depict the world around us in bright colors. Each of us can also try to master the art of drawing and make this hobby our favorite pastime. Here are beautiful gouache drawings for beginners, they will allow you to test your talent in painting and master the technique of drawing with paints.
To master the gouache painting technique for beginners, you must have for work:
- A set of gouache paints of twelve colors.

- Paper.

- A pair of flat hog bristle brushes.

- Palette and dishes with water.

The aroma of gouache paints is familiar to everyone since childhood. How to draw with gouache is not difficult to understand, the technique of such drawing is quite simple. It is necessary to draw, starting with a sketch of a drawing with a pencil.
A palette knife is used to apply paint and mix it. With it, you can apply paint with even strokes.

From an early age, we draw in gouache in the album a simple, unpretentious landscape. But, you can draw patterns, flowers, mountains, and even city buildings with such paints. For beginners, working with gouache is just an ideal option.
Drawing a sketch with a pencil, you can avoid mistakes and do the job neatly. If you smear and mix paints directly on the canvas, you will get just dirt in the picture. Therefore, you can add a little water to gouache and it will turn into watercolor.
To learn how to learn how to draw beautifully with gouache, you need to get acquainted with the step-by-step technique. This technique lies in the fact that in the course of drawing gouache is applied only horizontally.
First of all, let's draw the dark fragments of the picture, and only then we depict the highlights with a light color. As a result, we get the desired color without traces of dirt.

Gouache painting techniques
Among the gouache painting techniques known to artists, the following are common:
- A wet layer of paint on a layer that has not yet dried. In this case, the paint lays down tightly and dries for a long time. This method is more suitable for watercolor painting.
- With a dry brush, gouache paints are applied to the dried layer.
- With the help of a sponge, a textured picture is created. This technique is ideal when we paint an autumn landscape, it is easy to depict the bright colors of golden autumn.
- A beginner will cheer up and help overcome the excitement of the technique of splashing paint on the canvas. It is enough to moisten the brush in paint and spray gouache on paper or canvas. It turns out a bright and beautiful painting. Be sure to learn this method of applying paint, which helps to train your hand.

Of course, we can't paint a picture without the right brush. It is advisable to choose brushes made of nylon, goat or pig hair.

On the video: how to beautifully draw the sky with gouache.
Types of gouache
Gouache is suitable for drawing on cardboard, paper, canvas and other surfaces. But not every gouache has such universal properties. Consider the main types of such paints:
- Suitable for application on surfaces intended for painting only. It is absorbed into the material and allows you to apply a second layer, making the colors in the picture more saturated and bright.

- It has a more saturated pigment and bright coloring abilities. She decorates theatrical scenery. Children's gouache contains PVA glue in its composition, so it dries quickly. It is convenient to work with such gouache on plywood, ceramics or canvas. But acrylic paint fits perfectly on any surface, and after drying it is not washed off and does not lose its original color.

- Fluorescent gouache. Amazing in its properties and quality. Under the influence of ultraviolet rays, it glows. The color is too bright, which gives the drawing a special beauty.
A step-by-step method helps to comprehend the basics of gouache drawing even for children. Such lessons will allow you to master this wonderful art and learn how to draw in a certain sequence, choose the right colors to reflect the real beauty of nature, representatives of the flora and fauna on canvas.
It is necessary to create pictures of nature, like drawings on any other topic, from a pencil sketch. The easiest way to draw is to start at the top of the canvas or paper. As a rule, the sky is at the top, which is painted blue along the pencil contours.
Clouds are painted with whitewash, brushing white highlights across the blue sky.

The mountains are depicted in brown colors, and the vegetation in green tones. The trees below are depicted in lighter or darker green gouache. The main thing is that the colors in the picture look like in reality. Paints can be mixed directly on the sheet, periodically changing the water. For the image of fine lines, you need to choose the right brush.
When using gouache, you must adhere to the following tips:
- You can buy gouache in tubes or in jars, everyone chooses the most convenient packaging for themselves.
- The colors you need to choose are those that will be needed to work on the picture.
- Samples need to be done on the palette, only picking up the right color, transfer it to the canvas.
- If the paint cracks, a little gum arabic is added to it and mixed thoroughly.
- To apply the next layer, you need to wait until the previous one dries.
- It is advisable to cover the picture with varnish after drying.
Having comprehended the technique of drawing, you can achieve success in artistic creativity. Moving step by step, from simple to complex, novice artists gradually master the technique of gouache painting. Below are video tutorials, the task of which is to help depict the selected plot on the canvas as accurately as possible. This step-by-step approach allows you to quickly learn how to work with paints such as gouache.
Gouache drawing lessons for beginners (2 videos)
More ideas for drawings (27 photos)


Having decided on the style, you can begin to select materials for the future work:
- Paint and canvas.
- Cardboard, designer paper, magazine clippings, old photos.
- Textile, leather, ribbons, braid.
- Glass or crystals.
- Buttons.
- Dried flowers, shells.
Advice! Do not throw away old children's drawings, shreds of fabric, magazines, decorations– all this can become part of the picture. Keep them in a separate box, periodically reviewing and arranging among themselves.
We draw with paints
The easiest way to create an original painting for the interior with your own hands is to paint it. The theme is limited only by the imagination of the creator. Even in the absence of artistic skills, a masterpiece can turn out: use abstract techniques, study master classes and photos of finished works.
Oil, watercolor, acrylic paints will become faithful assistants in creating a picture for the interior. As a basis, you can use both a professional canvas and plain thick paper or a primed board.
Advice! Inspiration can be drawn from nature if there are picturesque places near the house. If you are not lucky with the place or the weather, feel free to draw your household, pets, fruit compositions - whatever. The accuracy of reproducing reality does not play any role, the main thing is to approach the process with a soul.
Modular paintings are suitable for almost any room: from cuisine before living room, but it is important to select appropriate images. If you don’t have time at all to create a masterpiece with your own hands, then we have good news for you - today you can buy them in any specialized store!
Photo printing
The technical side of the issue is taken over by a photo workshop, which can print a suitable image on almost any basis: canvas, paper, ceramics, etc. These can be ordinary posters with the image of interesting places, people, ornaments.
Advice! The poster is not just a picture, it must carry a certain idea, match the interior, the theme of the room and the character of the owners of the house. Recently, pin-up and retro posters have gained particular popularity.
If the poster is large, you can divide the image into several segments and, when combined into a single canvas, beat the joints, making it look like a modular picture.
If there is a child in the house, then you can scan his drawings and, choosing the right ones in color, shape,. A photo of the artist himself can complement such a poster. It remains only to print the poster and place it in a frame that matches the color and style.
Collage of old and new family photos can be hung as a picture in the bedroom or living room, and posters with the image of the relevant paraphernalia, fruits, are suitable for the kitchen. Finally, it is worth noting that it is recommended to choose posters and panels for the kitchen in rich and bright colors, however, no one forbids you to go against the rules and create stylish ones.
Textile
From all kinds of shreds, fabrics with a beautiful ornament, ribbons, braid or lace, you can create real masterpieces in patchwork style with your own hands. Fabric paintings are most often made using the appliqué technique. Dense textiles with a discreet and inconspicuous ornament (stripes, polka dots, etc.) are taken as the basis, and the main elements are cut out of bright shreds.
Most often, kitchens and nurseries are decorated with textile works, since these rooms are characterized by a certain simplicity that is present in the application.
Advice! From felt, flannel and other fabrics that hold their shape well, you can cut fruits, animals, cars, houses. You can safely combine various textures and patterns on fabrics, use braid, decorative cord, buttons for decoration. For the living room, you can make a textile picture of wrinkled silk with abstract patterns.
From buttons
With their help, you can create original things by sewing or appliqué. Often this type of fittings is used to depict leaves on trees. Buttons can be originally glued inside any contour, for example, a silhouette butterflies or cats. In sewing stores, you can pick up details of various shapes, colors and materials and lay them out like a mosaic, according to a pre-prepared pattern. Such works of buttons will fit perfectly into the kitchen, however, they can be used for the living room and bedroom.
Advice! Buttons can be glued around the perimeter of the picture frame, giving it a personality.
Wallpaper and panels
Often, after repairs, large pieces of beautiful wallpaper remain, which will be useful for making unusual interior paintings.
- Framed wallpaper is the easiest option to create something like this. panel. A piece of the desired shape is cut out of the roll and placed in the frame. Moreover, the ornament may coincide with the pattern on the walls or differ from it. Such elements can go in a row of 2-3 pieces.
- Golden paint and a stencil or small black-and-white photos stylized antique will help to revive a boring canvas in a frame. Such pictures from the wallpaper will fit perfectly into
After reading the article, you will learn how to quickly draw art pictures, make panels; learn how children's painting is created with paints, glue, salt and potatoes.
art paintings
Art - translated from English "art". In our country, it is customary to call this word original paintings created without any frills. Even a novice artist can draw this.

To create it, use:
- plain paper, but thick or canvas;
- acrylic paint in white and other colors;
- construction tape;
- brush;
- scissors.
You can use the paints given in the example. If you wish, take your other favorite shades to work with with pleasure.

The paint should cover the entire canvas so that there are no white gaps between strokes. Let it dry well, and at this time cut a wide construction double-sided tape into identical rectangular pieces. It is better to use it, since the usual one has a high stickiness, when tearing it off the canvas, you can also remove part of the paint.
When the canvas dries, attach strips of tape to it, placing them diagonally.

After the whole picture is framed in this way, dipping the brush into white acrylic paint, cover the canvas with this layer directly on the adhesive tape. Let the work dry well. Then simply remove the strips of adhesive tape.

As a result, you will get a picture, which the art style helped to create.
If you want to paint a more restrained canvas, use just 2 colors of paint. Such a picture can be hung in the office or presented to the boss, employee at work.
To make this art picture, you will also need a minimum of time, and here's what else:
- canvas or thick paper;
- red and gray acrylic paint;
- thin rope or thread.

Such art paintings look great both in the meeting room and in the dining room. The canvas fits into the environment, skillfully complementing it.

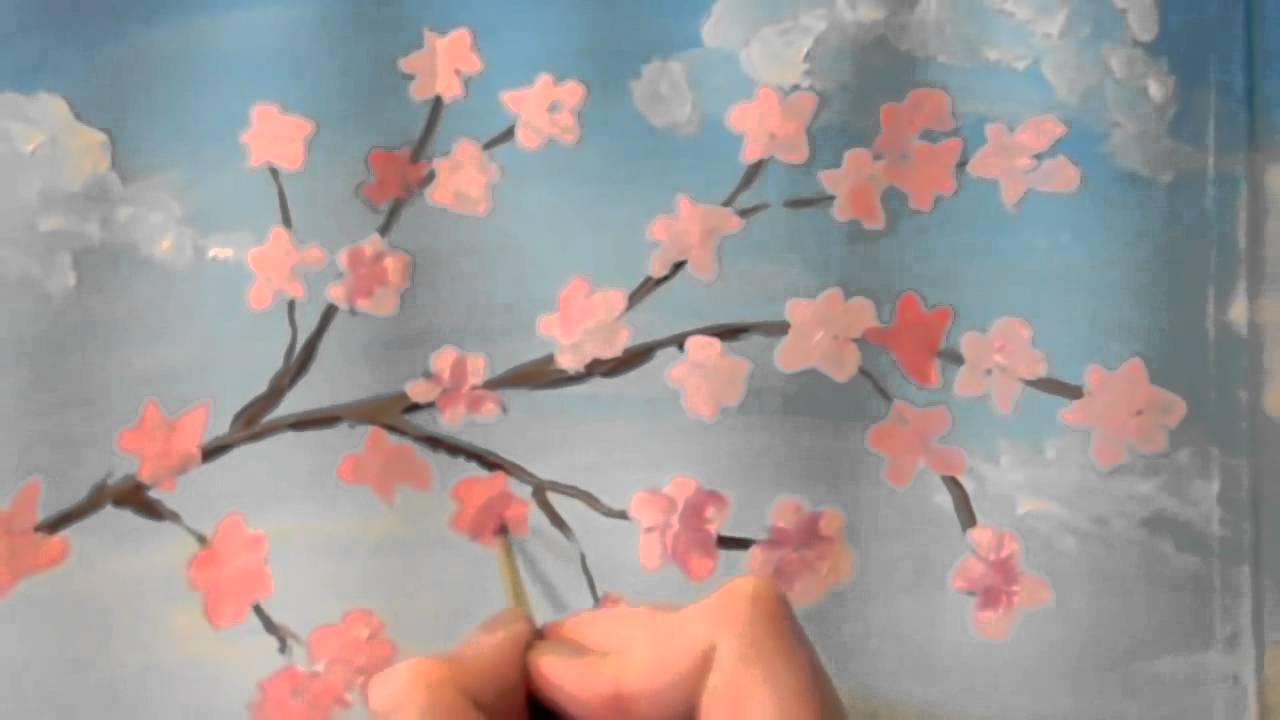
quick drawing
If you only have 5 minutes of your time and need to quickly make a gift with your own hands or paint a picture that will freshen up your home environment, then use the following idea.
To implement it, you will need:
- dye;
- plastic bottle;
- soup plate;
- paper.
Dip the bottom of the container in pink paint and print on and around the branches. When the paper dries, you can frame it and hang the picture on the wall.

But how to quickly draw these pictures.

You can create any of the presented in no more than 5 minutes, not counting the time for the paint to dry. Before you start creating, you should have at hand:
- canvas;
- a leaf from a tree;
- blue paint;
- brush;
- spray gold paint.

Then put the sheet in the center of the composition, cover the canvas with a spray from the sprayer.
When performing this stage of work, make sure that the sheet does not move under the pressure of the jet, otherwise the contours will be smeared. You can first stick it on double-sided paper tape, and peel it off at the end of the work.

When the spray paint dries, remove the sheet and enjoy how quickly you got such a picturesque drawing.
Original paintings can be created without even using paints. For this, all you need is old magazines. The design of the paintings will help to make the room modern and stylish.

Cut photos, posters of glossy magazines into strips of the same thickness. Then combine them several times, trim them so that they become the same length.
Grease a rectangle of thick cardboard with glue, attach strips to it.

Now take a sheet of black cardboard, draw a picture on it. Cut along the contours with a clerical knife.

Glue a sheet of cardboard with a cut out pattern on a panel of paper.
Magazines can be replaced with fabric by cutting strips out of it. Take canvases of bright colors, when gluing the stripes, wrap the edges inward so that they do not fray and look good.

It remains to enclose the canvas in a frame and you can make a few more to hone your skills and give your friends and acquaintances a picture made by yourself for the holiday.

The next decorative panel will be a vivid memory of a trip to the sea. Even if you did not manage to get out to the southern regions, if you wish, you will still be the owners of such a three-dimensional picture. After all, shells can be bought, and the rest can be found at home.
Marine panel

Here is a list of what you should have on hand to make a panel:
- cardboard box;
- cardboard to make partitions;
- brush;
- acrylic paints;
- beads;
- shells;
- glue;
- pearl bead;
- small sea pebbles;
- sand;
- threads.
Cut the strips so wide that they are 2 cm wider than the sides of the box. Make even cuts on each in two places. Connect them crosswise. Bend the long side of the strips by 2 cm, apply glue, attach the dividers to the bottom of the container.
Paint the box blue. Let it dry, put the shells in the resulting pockets to figure out how best to place them.

Lubricate one cell with glue, sprinkle with sand, glue a small shell here. Glue a pearl bead into an open shell, place it in another pocket. In the third, glue a small skein of yellow thread, and on it - a shell.

The next cell will be filled with sea pebbles, also put them on the glue. Using the same material, fill in the gaps between them by placing small beads here.
Coat the sinks and stones with varnish to make them look wet. If desired, highlight the upper edges of the partitions with white paint to give the product a contrast.

The work is completed, now you can hang the panel on the wall.
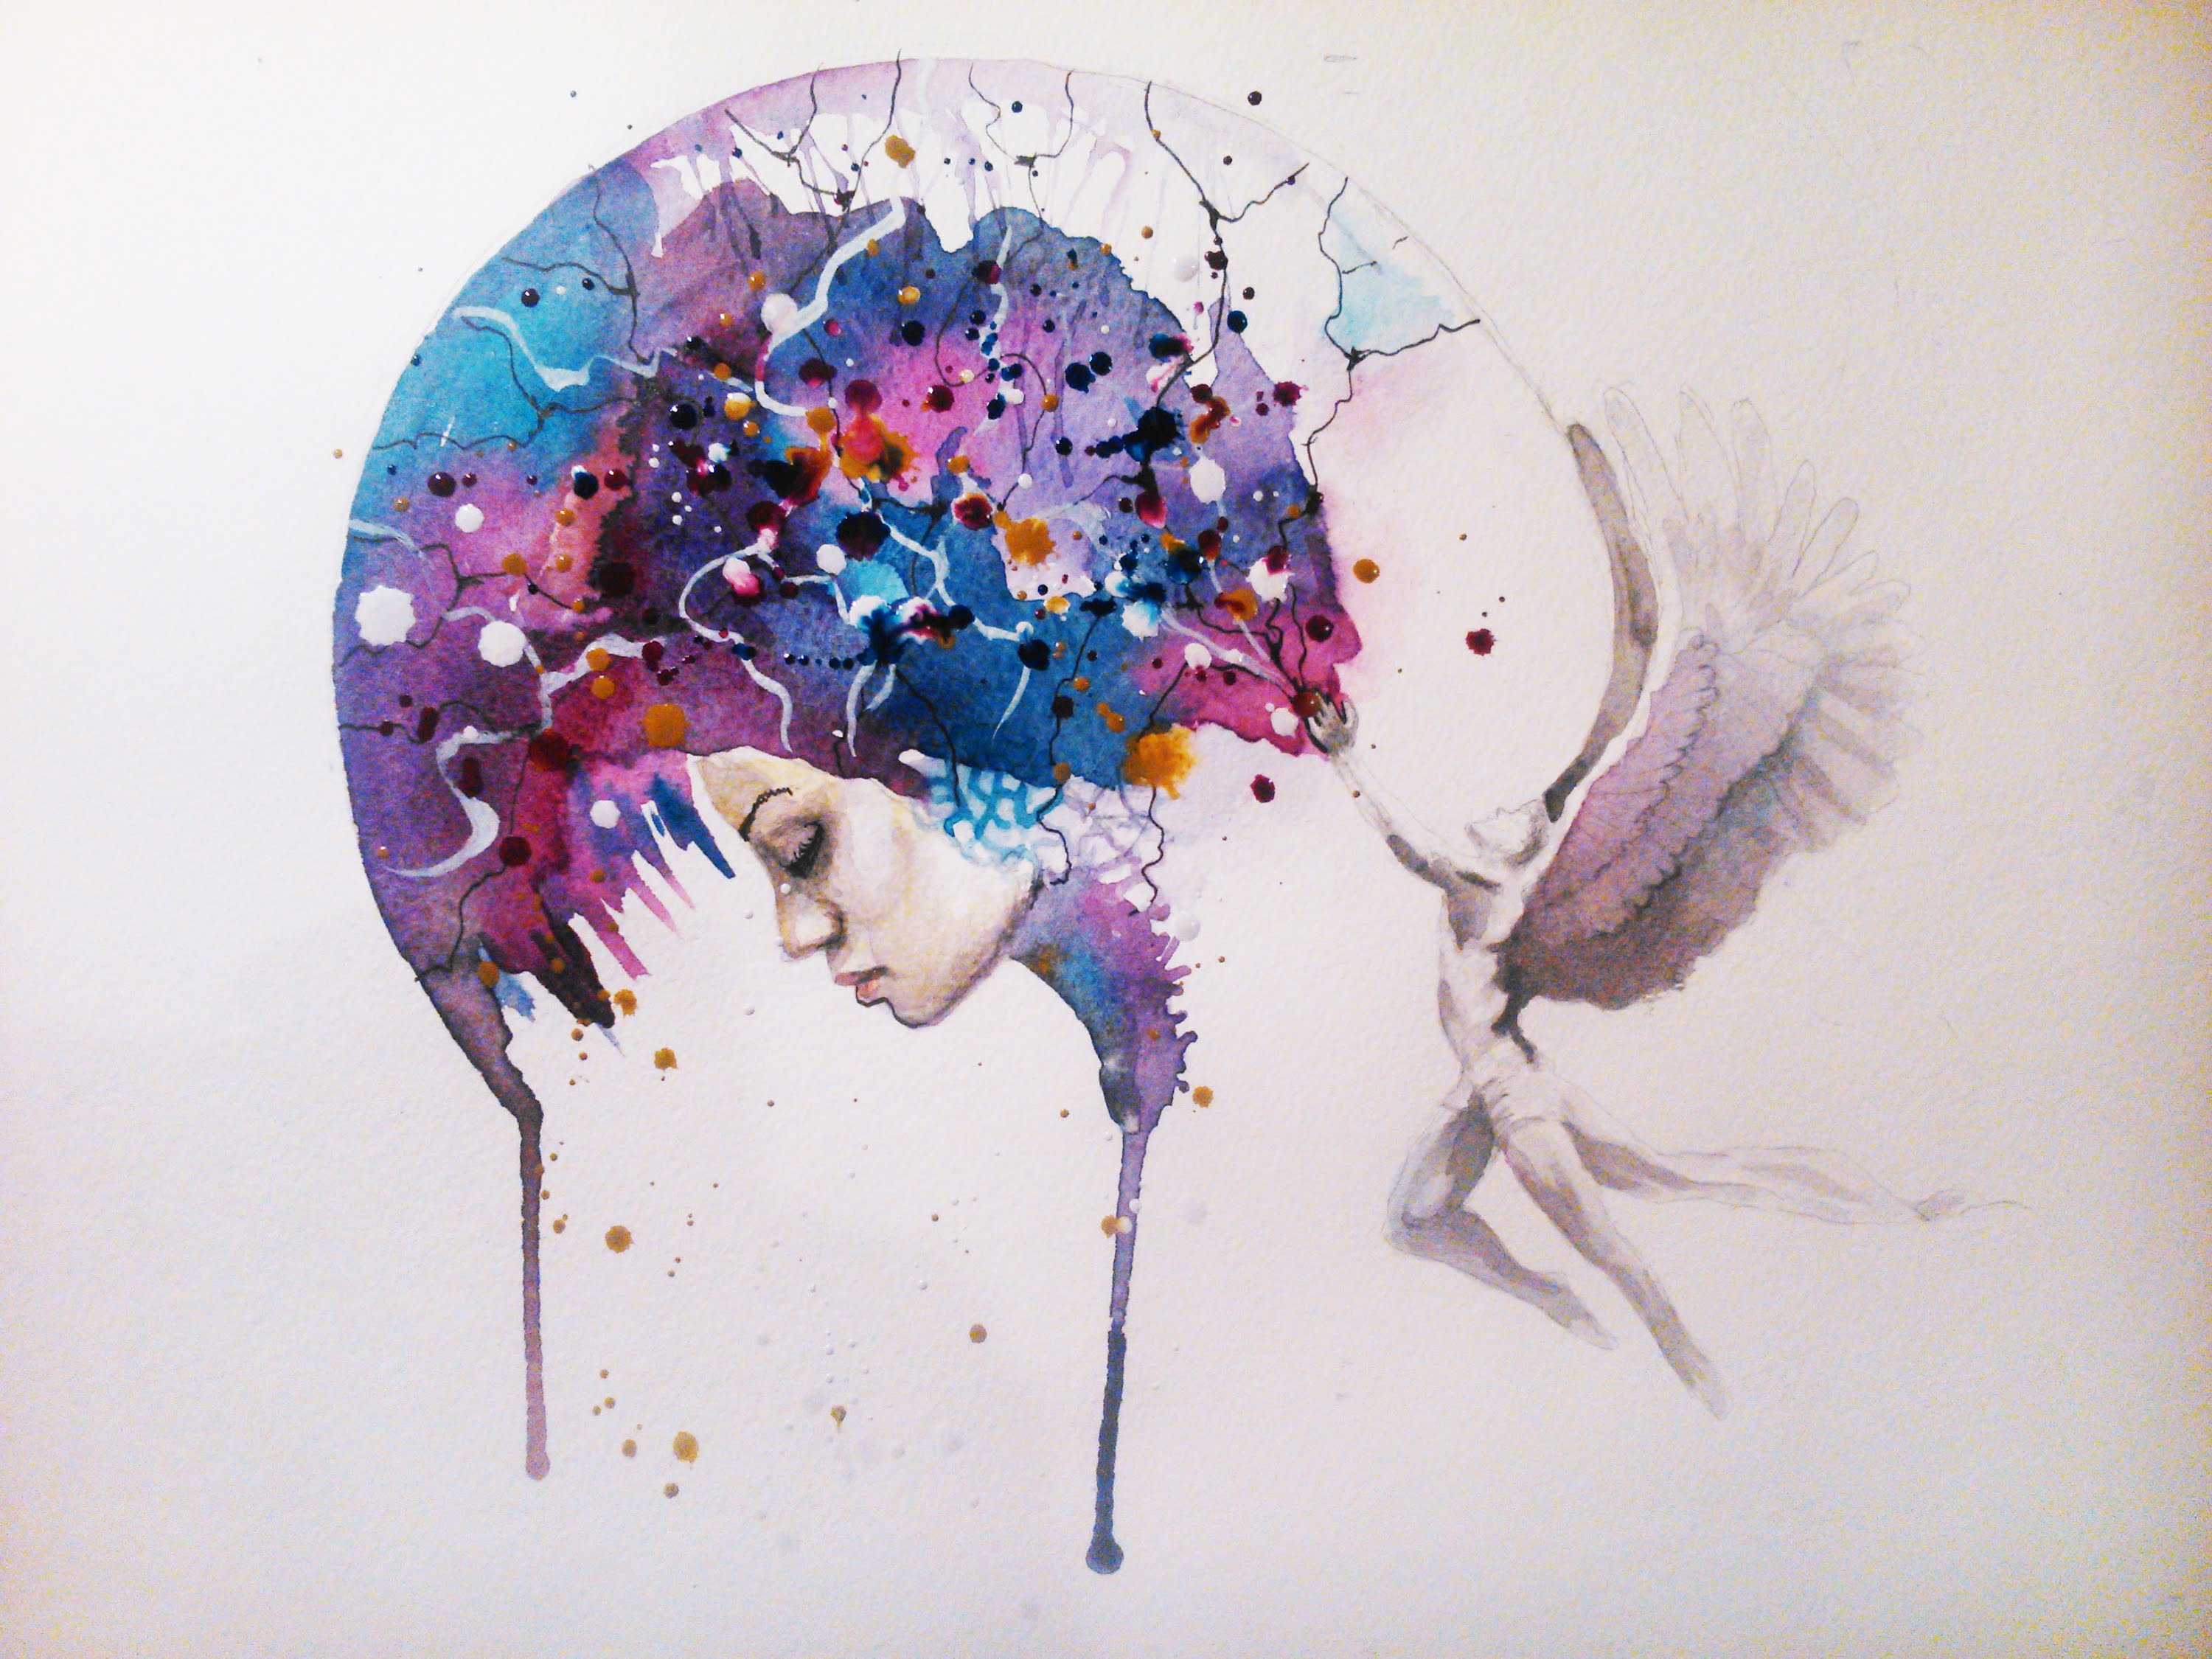
Art painting in watercolor - an easy way

To create such original paintings will help:
- canvas;
- watercolor paints;
- glue;
- rock salt.

When dry, it absorbs the pigment from the paint and thus creates a very interesting effect. Here are some beautiful pictures as a result. Children will feel like real creators when they work in such a technique.

Let them make a frame for their creation. Help them with this.
How to make a frame for a picture?
For her, you need to prepare:
- thick cardboard;
- stationery knife;
- salty dough;
- toothpick;
- plastic knife for plasticine.
Salt Dough Recipe:
- wheat flour - 1 cup;
- water - 1 glass;
- fine salt - 2 cups;
- dry glue for wallpaper - 1 tbsp. l.
- wheat flour - 2 cups;
- water -3/4 cup;
- fine salt - 1 cup.
The dough must be kneaded very well, then it will become elastic, will not stick to your hands and tear in the process. Do not store salt dough for a long time, otherwise it will acquire a grayish tint.
Roll it into a rectangle 5–7 mm thick, attach it to the frame, cut off the excess with a knife. From the rest, let the child form a “sausage”, giving it an oval shape, then cut blanks 8 mm thick from it, give them the shape of leaves. Then, using a plastic knife or toothpick, draw veins on them.
You need to cover the picture with a salt dough frame, and then moisten the contact points with water and stick the made leaves here, and on top - flowers made of the same material.

It remains to dry the elements of the frame and you can put a picture in it.

Children's painting
Talent can and should be developed in children from an early age. Here is a picture painted by a girl who is only 2 years and 7 months old.

And children 3-4 years old will be able to create this one on this topic.

The technology for making detailed paintings is very interesting. First prepare the following materials with your child:
- sheet of A3 paper;
- palette;
- gouache;
- a jar of water;
- saucer;
- poke from foam rubber;
- brushes No. 5–8;
- potatoes;
- paint brush;
- a rag;
- glass of such size that there is more than a sheet of paper.

Let's get down to some interesting stuff. Here's how to draw a picture in an original way. Moisten the glass with water, let the kid cover it with a brush with strokes of white and blue gouache, while mixing the colors a little. Until they are dry, cover the glass with a sheet of paper, press it over the entire surface, and then separate and lay gouache up.

Now you need to draw black branches on which the bullfinches will sit. You can make this activity even more interesting. Toddlers will enjoy drawing such childish pictures if they play catch-up with mom at this stage.
Let one of the elders paint one branch with paint, and the child, as if catching up with the brush of adults, will follow his own path and learn to draw a tree and branches.

The next step on the way of drawing a children's picture will be no less interesting. Take small and large potatoes, cut each in half. Pour red gouache into a saucer. Let the child dip the root crop into it cut down and make prints on the sheet. In this case, a large potato will help create the body of a bird, and a small one - its head.
Do not remove the root crops from the sheet, now let the kid draw the backs and tails of the bullfinches with blue paint. The child will not go beyond the inner boundaries, as the lying potatoes block this path, so the head and chest of the birds will remain red.

Now you need to draw black paws for bullfinches, and depict snow with a poke. Dipping it in white paint, you need to leave light prints on the sheet with dotted movements.

Here's how to draw some quick and fun kids pictures that you can then frame with salt dough and hang in a prominent place in the house.
If you put your palm in the paint, and then make an imprint on paper, you get a tree trunk. Have an adult do it using brown. Then the kids will be able to turn their palms into leaves, forming a crown out of them. Such children's pictures will unite people of different generations if they create together. The frame can be made of any material, including puff pastry.

If you want to visually see how to do them, watch the video:
The second one will tell you how to draw a picture in just 1 minute!
We also recommend
 How to make a healthy banana smoothie
 Harvesting asparagus for the winter recipes for cooking at home
 Chicken pie with zucchini and cottage cheese Dukan's recipes zucchini pie with cottage cheese
 Gingerbread with icing
 How to cook a salad with crab sticks and carrots
 Cabbage salad with bell pepper - the best recipes