Cheap small kitchen renovation. Kitchen renovation real photo examples
How to renovate a kitchen? Where to begin? This question is asked by many owners who have decided to take such a serious step.
Without a clear plan, renovation work in even a tiny kitchen will turn into a disaster. Properly organize the process - and after a while you will admiringly examine the cozy, beautiful room, renovated with your own hands.
The sequence of work: where should the repair of the kitchen in the apartment begin
Often the owners violate the first rule of repair - do not start work without a finished design project. The habit of doing everything "by eye" can play a cruel joke with unfortunate repairmen.
Either there are not enough materials, or the layout is not suitable for a particular room, or it does not fit into the overall concept .. The consequences of negligence can be very serious.
The sequence of work does not change depending on the size of the kitchen or the materials you choose. Finishing work always moves from top to bottom:
- Ceiling.
- Walls.
Violating the order of actions is not worth it, and cannot be the final step. Consequences: The new flooring will be splattered with paint stains or contaminated with plaster residue from the walls. Film or newspapers laid on the floor are self-deception, these protective coatings do not save the situation.
Construction and finishing works are carried out in the following order:
- Exemption of the premises from furniture, textiles, accessories. should be empty.
- Dismantling of the old coating on the walls, ceiling. The last to remove the damaged floor covering.
- Collection and removal of all construction debris.
- Wiring of new electrical wiring, installation of sockets and switches at prepared places.
- Conclusion of wires for arranging lighting.
- Installation of new plumbing fixtures.
- Ceiling repair.
- Alignment and decoration of walls.
- Floor covering.
Wiring, sockets
Hire a qualified electrician. Leave electrical work to a professional. If necessary, the master will replace worn-out wires with new ones made of higher quality material.
Decide where the household appliances will be placed. Consider the required number of outlets in advance. It is problematic to add new electrical outlets after the repair work is completed. You can read about stone sinks in.
In most apartments and houses, the kitchen has a standard set of household appliances and electrical appliances. The main positions of lighting the working area:
- fridge;
- microwave;
- hood;
- electric stove;
- general lighting;
- television.
Sewerage
When installing new equipment, reconstructing the water supply and sanitation system, follow the procedure:
- Draw a sewer layout plan. Mark the location of the pipes, their slopes and the length of the sections.
- Consider where the sink, washing machine and dishwasher will be located in the kitchen.
- Check the condition of the old sewer system.
- Calculate the required footage of new pipes, the number of connecting elements. Make a list, buy everything on the list.
- Lay the system on the floor, mount the necessary parts.
- Dismantle old pipes and fittings.
- Mount new pipelines, seal the joints.
- Plug in a sink.
- Check the joints for leaks after the sealant has cured.
Wall repair
After installing a modern one or painting an old one, you can begin to bring the walls "into a divine form." Remember what style will be in your kitchen. Based on the direction, choose the right materials for decorating the walls of the kitchen. Suitable for walls in the kitchen:
- non-woven and;
- bamboo cover;
- cullet;
- stone;
- artistic plaster;
- waterproof types of paint;
- tile;
- Wall panels.
Prepare the walls:
- Remove the old coating, repair holes and cracks, prime.
- Wait until everything is dry.
- Align the walls, cover them again with a layer of soil.
- After drying, putty the surface with a fine-grained finishing putty. Dry the walls.
- Sand the surface with sandpaper, apply a layer of primer again.
- After the surface has dried, you can decorate the walls in the kitchen with the selected material.
Floor
The arrangement of a new floor is similar to the procedure for other types of work:
- purchase of new flooring;
- ground preparation;
- installation of a new floor.
There is one but. Immediately lay linoleum or lay tiles will not work.
A flat floor is the dream of many owners. During repairs, it is often found that the surface is so skewed that it needs to be leveled.
Peculiarities:
- Deviations up to 20 mm. Suitable leveling compound. Excellent composition, but quite expensive. With large distortions, this option will be overhead.

- Deviations over 20 mm. Arrangement of cement screed or raised floors. This option will cost less. The floor will be level. A laser level to control deviations will make the task much easier.
Coat the screed with a special water-binding mixture. The cement screed will dry faster. Do not forget to spend if you heat the kitchen in this way
You can arrange the decorative coating not in a month, but in five days.
How to make repairs with your own hands
Make the room cozy and comfortable within the power of any home master. Stick to the rules:
- imagine the kitchen of your dreams;
- draw a plan or create a 3D project with the specialists of the design studio;
- make a budget;
- calculate the amount of materials;
- buy everything you need;
- follow the plan;
- consider the advice of professionals.
Common Mistakes
Many owners step on the same rake. Don't repeat their mistakes. Unfortunately, the list of oversights and misunderstandings is quite extensive:
- The lack of a clear plan of action and an idea of the final form of the kitchen.
- Not enough outlets.
- Lack in the project of a place for an exhaust hood and a geyser.
- Incorrect calculation of the amount of materials.
- Placement of valves in hard-to-reach places. Some owners even brick the valves into the wall.
- Wrong procedure - the ceiling is painted after finishing the walls, etc.
- Laying on top of old floor tiles with new ones to save time.
- Laziness and inattentive attitude to work, the desire to finish everything as soon as possible.
- Insufficient coverage of surfaces to protect against dust and debris.
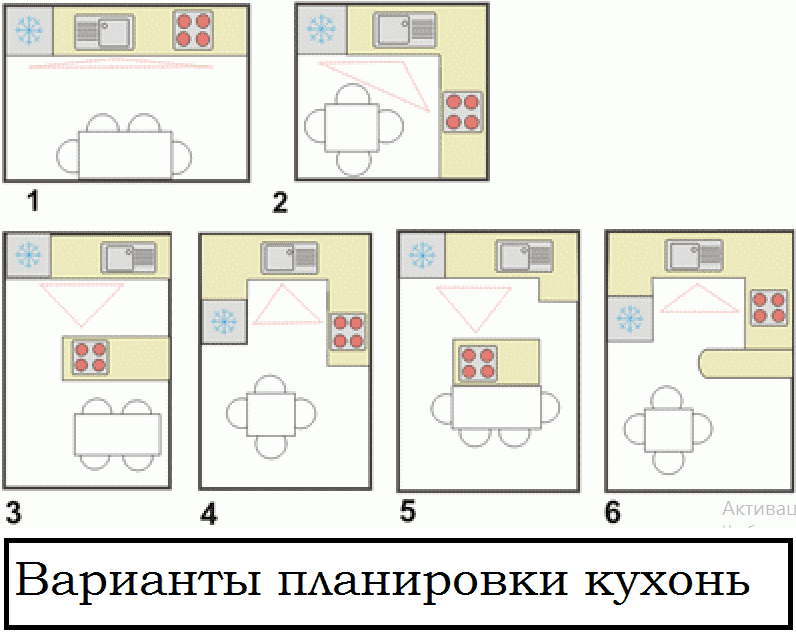
- Choosing the wrong layout for a kitchen of a certain size - a two-row arrangement of furniture and appliances in a narrow room, a peninsular layout in a small kitchen, etc.
- Laying laminate in the kitchen - in a room with high humidity. Leave this flooring for the living room and bedroom.
- Use of paper wallpaper. Grease, soot, dirt, water splashes inevitably settle on various surfaces. This material is not suitable for the kitchen.
- Purchase of household appliances after the arrangement of the kitchen. It is more correct to purchase all household appliances and customize furniture for them and.
- Insufficient extractor power. Weak exhaust system - money thrown to the wind. Grease and fumes will settle on expensive wallpaper and new furniture.
Picture from life. Buying a glass table is not always a joy. A fashionable, beautiful interior detail begins to annoy households who wake up every morning from the sound of a cup on the countertop. A trifle? Not really.
Ideas
A lot of useful information has been written about various styles. Each hostess will choose the appropriate kitchen design based on her preferences. 
- area and configuration of the room;
- how much time can you spend cleaning the kitchen;
- how many people gather at the table;
- how often do you cook. Perhaps you just run into the kitchen for a bite to eat while you live alone.
Do not be afraid of bold ideas, fantasize, but stick to a sense of style. Arrange not only original, but also comfortable space.
Use the game of shades and contrasting combinations. These trends are one of the most fashionable trends.
The geometric style looks interesting. Confident people can decorate the kitchen in high-tech, techno or loft style.
In a panel house
Such residential buildings with thin walls, poor sound insulation, tiny kitchens and bathrooms still exist not only in Russia, but also in neighboring countries. Can the performance of the premises be improved?
Repair features:
- insulate the walls of the house from the outside;
- coat the seams with special mastic or foam for this type of work;
- replace old windows with plastic ones with double-glazed windows;
- if possible, redevelop by connecting the kitchen and living room. Permission from special authorities is required.
In Khrushchev. Options
It is inconvenient to work in a tiny kitchen, the craftsmen have nowhere to turn around. The walls are crumbling, and the pipes are so rusty that it's scary to touch them.
A familiar picture? Do not worry! If you have a little experience, desire and a good helper, you can do the repair yourself.
Main stages:
- Removal of furniture household appliances.
- Dismantling of old plumbing.
- Careful removal of all finishing materials.
- Removing the old window.
The layout of the kitchen in Khrushchev can be:
- Single row.
- Angular.
- letter G.
- U-shaped.
Tips and secrets for the proper organization of space:
- Do not clutter up the room.
- Choose functional furniture that can be folded to free up some space.
- - a godsend for owners of small premises.
- Use hanging cabinets, shelves with spotlights.
- Connect the hob, sink and work surface with one worktop.
- Give preference to light glossy materials.
- Avoid dark tones and saturated colors over a large area.
- Stretch ceiling - ideal for a kitchen in Khrushchev.
Design of a small-sized (small) kitchen
More light, pleasant colors and lightness! This motto should be remembered by the owners of tiny premises.
How to "push" the walls and provide comfort in five or six square meters? Basic Rules:
- No frills. Clear lines, no unnecessary details: boxes, drawers, coasters, etc.
- Light glossy facades of a large area.
- An abundance of light. Place spotlights around the perimeter of the ceiling, hang original lamps above the table and work area.
- Delicate pastel colors visually enlarge the space. Accessories could be brighter.
- Mirror surfaces create an optical illusion and "expand" the walls.
- Avoid heavy curtains and curtains. Translucent material, Roman blinds or roller blinds are what you need.
- Think about redevelopment, view photos of kitchens combined with a balcony.
- Buy furniture with light glossy facades.
- Pick up built-in appliances.
- A great option to save space - folding tables and chairs.
Video instruction what and how to do
To learn the intricacies of repair work and the rules for finishing the kitchen with your own hands, a detailed video from the collection of videos about kitchen renovation will help. Listen to the advice of professionals. You can find out about the design of the living room kitchen by clicking on this.
Kitchens after renovation
If fantasy is dormant, look on the Internet. Surely among the many options presented on the site, you will find "your kitchen".
Now you know where to start renovating the kitchen. You can do many types of work with your own hands.
Repair is not the most pleasant occupation. But, the work done with the soul will definitely bring joy. The reward for your work will be a beautiful kitchen, which is a pleasure to be in. You can find out about the material for wall decoration at.
If you have free time and some money, and life has become too monotonous, you can do your own kitchen renovation. This will allow not only to save finances, but also to acquire useful skills and even improve health, because physical activity has never harmed anyone.
The chances of getting a result in which you are not afraid to invite people to your kitchen after your own repair will increase significantly if you use the advice of a specialist.
When deciding how to make repairs in the kitchen, it is necessary first of all to consider finishing materials, taking into account the cost of their purchase and the possibility of self-assembly.
Style selection
So that the kitchen does not stand out from the rest of the rooms, it is advisable to do everything in the same style.
When determining where to start renovating a kitchen, first of all choose a style. There are more than a dozen of them for finishing the kitchen, the most famous: classic, hi-tech, modern, minimalism, baroque - the implementation of many requires a lot of money.
In the classics, expensive natural materials are used - a wooden kitchen set, parquet on the floor. High-tech and modern require the presence of expensive plastic and glass materials and are more suitable for modern young people, baroque with carved furniture looks better in living rooms and bedrooms.
For established people, one of the options that is simple and affordable is to finish the Provence-style kitchen on your own, which allows you to create a beautiful, cozy interior that is distinguished by comfort and elegance.
Recently, Provence has been quite popular, it suggests the presence of light pastel colors in the decoration of the room and the furniture itself (finishing under natural wood of light species), the presence of plants and decorative elements. Provence excludes the presence of bulky interior items (heavy curtains, massive chandeliers), the kitchen should be light and a little romantic.

Provence will give your kitchen coziness and warmth, as it looks organic
Do-it-yourself repairs in the kitchen with a small budget in the Provence style are easy, it does not require a lot of building experience and a special expensive tool.
Ceiling
Most often in the kitchen, plasterboard ceilings are used, stretched, painted or wallpapered. You can also use a ceiling finish made of polystyrene foam or foam plastic ceiling tiles or PVC panels - do-it-yourself repairs are easy, although in the latter case, you will need to arrange a wooden or metal frame to attach the PVC panels.
Coloring

It is not difficult to paint the ceiling, it is enough to have a roller with a long handle
Usually the ceilings in the kitchen are painted with waterproof paints - acrylic latex, water-based. If the ceiling is fairly even and has been painted with waterproof paint, it will not be difficult to repaint it with a roller.
This must be done at least twice, the first time the staining occurs perpendicular to the direction of light from the window, the second time - along.
In some cases, it may be necessary to level the ceiling - for this it must be washed very well and cleaned to the floor slab, primed and putty applied, and after it dries, rub it with sandpaper.
Wallpaper

Wallpaper on the ceiling looks unusual, but it is advisable to buy a waterproof option
Sticking thick waterproof types of wallpaper on the ceiling will eliminate the need to level it and give it a more interesting aesthetic appearance than in the case of painting.
The choice of wallpaper for the ceiling is a budget option, besides, pasting the ceiling is a fairly simple job that even housewives can handle. It is advisable to prime the ceiling before sticking the wallpaper, the strips should be glued in the direction of the light.
Floor
Do-it-yourself Provence-style decoration requires a light wooden floor. Naturally, in a kitchen with high humidity, natural wood is expensive and impractical, it can be replaced with such common floor finishing materials as ceramic tiles, laminate or linoleum - all of which are available with a natural light wood finish.
Ceramic tile

Ceramic tile is a durable material with water-resistant properties, but requires careful handling of heavy objects.
Not the most suitable option for finishing the kitchen with your own hands; laying tiles on the kitchen floor will require a special tool (tile cutter, grinder) and the skills of a qualified tiler.
In almost all kitchens, due to the fact that the tile floor is rather cold, it is laid on an electric heating mat in the form of a wire about 5 mm thick. on the grid. This further complicates the task of laying tiles and requires the connection of a knock-out heater control unit to install the hole in the wall and the strobe for the electrical wire.
Considering that finishing a Provence-style kitchen on your own will require the involvement of specialists for laying tiles, and the work will be quite expensive, you can refuse this option.
Laminate

It is advisable to choose a waterproof laminate, as the kitchen has quite a lot of humidity, and there is a high probability of frequent water getting on the floor.
Conventional laminate is not a very suitable material for the kitchen due to its low water resistance, so you should use more expensive moisture resistant types with special surface treatment and interlocks. To repair the kitchen with your own hands, laying the laminate on the substrate, is quite simple, subject to a simple work technology.
Moisture-resistant types of laminate can withstand exposure to water for about 6 hours without consequences, while waterproof types are not afraid of its effects. Waterproof laminate is also made in the form of panels of various thicknesses or glued to the floor, its only drawback is its very high price.
Linoleum

If the linoleum is torn in one place, you will have to replace it throughout the room.
A budget option for laying on the kitchen floor, modern types have the widest range of colors and patterns, commercial brands are highly durable and wear resistant.
The disadvantages of linoleum when laying in the kitchen include its small thickness, which leads to different floor levels if a laminate is laid in the corridor. That is why many people prefer to lay out the floor in the kitchen from impractical ceramic tiles.
This problem has a simple solution - the floor in the kitchen is poured with a leveling self-leveling mixture to the required thickness (3 - 10 mm.) - this allows you not only to raise the level, but also to level the floor.
You can do the pouring yourself with a special toothed roller and a mixer for mixing the mortar (the self-leveler is sold in bags as a dry mix).

Before laying linoleum, it is necessary to make a perfectly flat floor so that there are no height differences.
A construction mixer can be replaced with a household drill by purchasing an inexpensive whisk for mixing the mortar, a roller with a metal comb with teeth (this option is very risky to use, the liquid self-leveler can spread poorly on the floor and it will be damaged).
You can repair the floor by laying linoleum on KS or PVA construction adhesive yourself, this is not a very difficult construction work.
Walls

Walls in the kitchen should also be practical and easy to clean.
Provence-style kitchen renovation implies light colors, MDF or PVC panels, ceramic tiles, painting, wallpapering are most often used for wall decoration, and often types of finishes are combined.
Nowadays, it is rare for anyone to finish the entire kitchen even to the middle of the walls with ceramic tiles, it is too expensive and out of fashion, mainly the working area is laid out with tiles.
MDF, fiberboard or PVC panels come in 2 types: from a single sheet (average size 1.2 m by 3 m) or type-setting, which are mounted on a wooden or metal frame.
In the latter case, the use of inlaid panels is impractical, as this significantly reduces the free space of the kitchen by the thickness of the frame and panel. In kitchens, it is better to use MDF panels covered with moisture-resistant PVC film or one of the types of fiberboard - laminated hardboard. Sheet panels have a thickness of about 3 mm. They are attached to the walls with glue.
Painting

Choose only waterproof paint that will not lose its appearance after washing
To paint the walls, it is necessary to prepare by leveling with puttying and rubbing, otherwise the light falling from the windows will highlight all the irregularities. The work is quite difficult for a non-specialist and will require additional financial costs, and the monochromatic painting of the walls looks rather boring and is unlikely to become an interior decoration.
It is well known that waterproof acrylic paints can be washed, but this statement is not entirely true. In the area of the working area, drops of food with fat often get on the wall, which are absorbed into the porous surface of the paint and are practically not washed off.
Wallpaper

3D wallpapers have an unusual texture that will help hide bumps
The most budget option is wallpapering the walls, the most practical way to do this is with glass wallpaper for painting or vinyl. The latter, due to their thickness, will hide irregularities on the walls, and all types of dirt, including grease, are perfectly removed from their smooth water-repellent surface.
Renovating a kitchen is not necessarily a costly undertaking. You can do everything quickly and inexpensively with conventional materials. If you use exactly what is suitable for difficult room conditions, the finish will not lose its attractive appearance for a decade or more. Along the way, issues with windows, doors, communications are being resolved. Outdated designs are replaced with new ones.
The whole process is carried out in stages, so as not to miss anything and not spoil what has already been done. Difficulties are caused by the arrangement of furniture and equipment in Khrushchev, where there is very little space. Proper selection of modern products will solve this problem.
Project work
Most kitchens, especially small ones, need to be redesigned to accommodate furniture and equipment. They begin with a careful measurement of the room - an accuracy of at least 5 mm. On a small area, inaccuracy leads to the accumulation of errors, and as a result it turns out that somewhere there is not enough space, something interferes. All data is recorded in order to then draw up a plan based on them. They determine not only the dimensions, but also the position of each object relative to the walls, floor, ceiling. Take indicators from the following elements:
- the entire room - length, width, height;
- door and window openings;
- mezzanine;
- sockets, switches, lamps;
- pipes - gas riser, sewerage, water supply;
- ventilation grill;
- finishes - cornices, stucco moldings, various ledges.
All data is transferred to a sheet of paper, as a result, a plan comes out. Now you should decide on the location of furniture and household appliances. If they are not updated, remain the same, then the dimensions are removed. But you probably want to update everything. It makes no sense to buy in advance - you will have to place it somewhere, in a small apartment the equipment will only interfere. It remains to choose the products you like in the store, find out the dimensions from the catalog provided by the seller.
Drawing their placement manually or using computer programs for a non-specialist is difficult and time-consuming. They do it easier - they take a sheet of cardboard and prepare a large-scale copy of the kitchen with walls, only without a ceiling, cut out windows and doors. Reduce by 5-10 times depending on the size of the room. From dense foam, models of cabinets, stoves, sinks and everything else are made, signed with a marker. Then they begin to play with cubes, moving them around the space until the optimal arrangement is found. On the walls are glued with pieces of plasticine.

If there is no desire to work with the project on a computer or the proposed method seems difficult, use another one. It will take quite a lot of cardboard, on which the life-size length and width of each element of the decor that will stand on the floor is applied. They are moved around the kitchen space in search of an acceptable solution. It is useful to make models of the rear walls in order to assess the location in height. The disadvantage of the method is that it is impossible to pre-plan, perhaps when all the furniture and household appliances are taken out.
General and particular features of the repair
The kitchen is a room with operating conditions that are fundamentally different from living rooms and even utility rooms. People spend a lot of time here, and cooking takes place, which greatly affects furniture and finishing materials. It must meet the increased sanitary and hygienic and operational requirements. Starting to repair, consider the following factors:
- temperature fluctuations constantly occur - from normal to elevated and vice versa;
- the presence of evaporation, leading to excess moisture;
- installed gas and electrical equipment requires special security measures;
- aggressive fat particles, soot deposited on the surface - should be easy to wash;
- enhanced operation of furniture, equipment can only withstand wear-resistant coatings.
These features must be taken into account when repairing, otherwise the money will be wasted. In addition to caring for beauty, care must be taken to preserve it in adverse conditions. This is facilitated by good ventilation. Before repair, they check it: they remove the grate and look where the channel leads. If the vertical shaft is good, you may only have to put a small exhaust fan to increase efficiency. When the direction is horizontal - worse, but can be corrected.
How to cover the floor, walls, ceiling?
A significant role in the durability of the kitchen is played by the choice of materials for decoration. The main thing is high functionality in special kitchen conditions. In terms of design, even the most traditional types can decorate a room if you pick them up with taste and skillfully use them.

Ceramic tiles are often used for flooring - they are resistant to moisture, physical stress, and pollution. The colors are so diverse that they imitate wood, parquet, marble and much more. A significant drawback is poor thermal insulation. A common budget material is linoleum. It is easy to fit with your own hands, not afraid of moisture - the virtues that make it popular. You can buy with varying degrees of thermal conductivity, with or without lining. It lasts a long time, but should be protected from punctures and cuts.
Some beautiful and fashionable materials for kitchen floors should not be used. This primarily applies to the laminate. It is easy to lay, durable, but is afraid of moisture, which is abundant in the kitchen. Getting between the joints, it gradually destroys the coating, which swells. The second undesirable material is parquet. Constant temperature fluctuations, high humidity are destructive.
In the kitchen, the walls get dirty to a greater extent than in other rooms. It is advisable to use coatings that are easy to clean. Washable wallpapers or painted non-woven wallpapers are suitable for such a case. With their help, the room acquires the desired shade, under them all defects disappear. Among the shortcomings - poor resistance to damage.
Coating with semi-gloss paint is cheap, but impractical. The surface is washed, quickly contaminated, flaws stand out, but if necessary, it is updated without problems. Everything will be hidden by decorative plaster, which is easy to clean. It looks great in any interior, but in the event of a subsequent repair, it is not easy to remove it. Ceramic tiles are usually trimmed only with an apron.

Sheathing with waterproof drywall is done quickly, it is inexpensive, the walls are perfectly aligned. It is not necessary to correct surface flaws - they will hide under the sheets. In a kitchen with a small area, the method is not very desirable - so the limited space will be reduced even more.

The suspended ceiling made of plastic panels hides flaws well, which is not afraid of steam, grease, and requires minimal maintenance. Next in terms of functionality is laminate, the wrong side of which is impregnated with PVA and MDF with a similar treatment. The use of moisture-resistant drywall for these purposes is also a good option, but as a last resort. Multi-level structures are created from it, but it is necessary to periodically update the whitewash, because even the highest quality paints do not last long. Reduces space in a small kitchen.
Cheaper ceiling decoration using polystyrene foam boards. All defects are hidden under them, they are easy to install and also replace. You should choose only laminated material, which is not very dirty, it is easy to wash. Nevertheless, despite the attractiveness of this option, the application is fraught with problems: the relief of the plates after six months begins to turn yellow and blacken.
Options for arranging a small room
Khrushchev and the panel house are distinguished by the extremely limited size of the kitchen. It is uncomfortable, cramped, the plaster is crumbling, the pipes are rusted. With proper planning, even such a "crumb" can be transformed.

To begin with, they take out all household appliances and furniture, otherwise there will simply be nowhere to turn around to carry out repairs. Old communications and finishing materials are mercilessly removed, a half-rotted window is removed. You can start work. After completion, an important moment comes - to place the equipment in a new way, so that it becomes as convenient as possible even in such a limited area. One of the following layouts is possible:
- single row;
- angular;
- L-shaped;
- the letter P.
To properly organize the space, place only the furniture that is really needed. Do not clutter up with things that you can do without. With all sorts of boxes, boxes, stands parted. Resolutely get rid of everything unnecessary, inconvenient, even if it is expensive as a memory. They make the most of the walls for hanging cabinets, shelves - the floor area is freed. Buy built-in appliances that take up little space. From furniture, preference is given to a folding table and the same chairs. One continuous countertop is installed on the hob, sink and work surface.
If not physically, then visually expand the space, creating a modern design, glossy surfaces in pastel colors. A lot of lamps - on the ceiling, shelves, above the table and work surface. There are no heavy curtains on the windows, the material is translucent or blinds. Several mirrors will further increase the space. Furniture is chosen with a glossy light-colored surface.
Kitchen equipment - what to improve, what to part with?
A complete renovation of an apartment is not only a new finish on walls, ceilings and floors, but also a replacement of pipes. They start with communications that are outdated, interfere, and look ugly. With a metal pipe that supplies gas to the stove, they part. Flexible hoses are now allowed, which are compact and the wall space can be used. It is forbidden to do this on your own, you will have to call specialists. If there is a gas water heater, they also remove it at the same time, having received permission, and transfer the new water heater to another place.

Water pipes are changed before repair. The most budgetary solution is polypropylene, which is not afraid of corrosion. For connection, a special welding machine is required - you can buy an inexpensive one or rent it. In order not to think about it, use metal-plastic. Installation is simple, it is carried out with a special mount. At the same time, the old mixer is also being replaced.

In Khrushchev, one socket was originally installed, located on the far wall, which in modern conditions does not meet the needs. A socket group is required, the place of which is above the desktop. It consumes a lot of electricity, so provide a separate power wiring. Instead of a regular junction box, a shield with automatic machines, an RCD for kitchen equipment, a washing machine, and a boiler are installed.

Ventilation is a weak point and needs to be improved so that odors, steam and grease do not spread throughout the apartment. Using a hood with a carbon filter is impractical - it requires frequent replacement and costs a lot. Install the usual one with an aluminum mesh filter. A separate vent is punched in the regular channel. If the system is not connected to the toilet and bathroom, it is made below the existing hole. The built-in fan will improve traction. At the same time, they get rid of the exhaust pipe, freeing up space on the wall.
The refrigerator is not installed next to the stove - heating increases electricity consumption. If possible, they take them out to a cool room - to a glazed balcony (with the exception of the sunny side in the south), to the hallway. But not every housewife will like to constantly run for groceries. The output is a small single-chamber unit without a freezer. In place of large equipment, space is freed up for a washing machine. A compact refrigerator is installed on top.

Under the window - a niche for a refrigerator
Replacing an old window with a plastic one is the best inexpensive solution. The material is resistant to temperature fluctuations, has good heat and noise insulation, and is easy to clean. The use of a wooden structure with double-glazed windows is preferable, but the cost of a natural product is higher than an artificial counterpart.

Don't leave the door unattended. The old chipboard frame is replaced with a new one - there are many attractive inexpensive options in stores. In a small apartment, the canvas is often simply removed. But a refurbished kitchen with a leftover box is unappealing. In its place, they arrange an arch. It will take quite a bit of drywall and water-based paint. The main thing is that such an opening organically fits into the interior, freeing up space.
Repair and finishing work - sequence of actions
When it became clear what was to be done, materials were purchased, the most crucial moment began - do-it-yourself kitchen renovation. It is important to do everything in stages, avoiding the mistakes that many who do it for the first time sin. If you ignore the design, then this happens much more often. Then it is difficult to accurately calculate the amount of materials needed, few sockets are installed, they forget about the hood and the like.
Violation of the sequence leads to unnecessary waste of time and money, already finished surfaces are contaminated. Work begins with communications: water supply, sewerage, electricity, ventilation. Next up are windows and doors. After them proceed to the room itself. First, prepare the base for the floor, rough finish the ceiling and walls. Then, in the same order, the finishing is done. Completes all installation of equipment and furniture.
Room preparation
After the room has been vacated, proceed to the surfaces. You should start from the ceiling. In houses with a bituminous roof, residents on the top floor often suffer from leaks. Partially saved by foaming rusts - tile joints, so that water flows into the adjacent bathroom, where the material is not afraid of moisture, there is less electrical equipment. Before that, the channels must be freed from the old wiring. Level check horizontality. If the difference exceeds 30 mm, alignment is impractical - expensive and difficult. The problem is solved with a false ceiling device.

Inspect the floor to determine its condition. Laying a new coating on the old flooring does not make sense. There are so many defects that it is better to remove completely before the screed. Its replacement is necessary if cracks with a width of more than two millimeters are found, especially those that intersect. Depressions and protrusions in good general condition can be leveled. They check the horizontal position - it should not exceed 3 mm, but ten diagonally, which is available for correction.
Use a building level at least a meter long. If small irregularities are found, in order not to deal with the screed device, marmoleum is used for flooring. This is actually linoleum from natural raw materials, brought to perfection. For the manufacture of tropical crops are used, which is why it is cheaper than laminate. The pressed cork layer makes it very warm. The material is not afraid of moisture, dirt, even spilled paint does not stick. This is an absolutely environmentally friendly product that lasts 20 years. It does not require any special tools or skills to install.
A screed with extensive holes or protrusions, skewed, should be repaired. The most acceptable solution for such a case is a self-leveling floor based on cement. It is raised 10 mm from the highest mound. The leveler is not too expensive in price, it will take a little for a small area. The finished floor is laid directly on it. Cracks in the old base do not need to be repaired, and a perfectly flat surface will create good conditions for further work, water will not flow into the depressions.
In the old kitchen, the walls have absorbed a lot of fumes, which sometimes penetrate to the base. Simple cleaning is useless - finishing materials do not stick. Pre-soak the coating - paint and plaster soaked in fat. Spray with water from a spray bottle, close windows, doors, stand for 2 hours. Then quickly remove the coating using a spatula or abrasive mesh. If it doesn't work the first time, repeat.
Oil, alkyd paints are removed using a composition designed to remove them. They work with a sponge, apply it to small areas so as not to spoil an expensive product in vain. Our drugs are cheaper than imported ones, but they take time to work. To protect the skin and respiratory organs from aggressive liquids, a respirator and rubber gloves are used. For ventilation, everything is wide open.

On bases soaked in grease, paint and plaster will not hold, and will begin to flake off. Therefore, everything is washed - the ceiling, walls, floor. Use any dish detergent, which is diluted with water 1:20, table vinegar is added. Their compatibility is checked first. If bubbles appear, a pungent odor, take another remedy. A metal sponge is used, which is often dipped into the solution, rubbed with pressure. Washed twice.
In conclusion, when the surfaces are dry, priming is carried out. Use means of deep penetration on concrete. Read the recipe carefully before buying. Biocidal additives are required. If thiuram is present, derivatives from it (thiram, arozone, fernazone) - the composition is not suitable for these purposes, choose another one. Impregnation is done twice with an interval of a day.
Ceiling sheathing, sheathing and electrical wiring under it
It has already been said that in the kitchen, in order of preference for the ceiling, they use:
- plastic lining;
- laminate impregnated from the inside with PVA emulsion;
- MDF with the same processing;
- green drywall - last.

The crate is made without crossbars, using wooden slats or metal profiles. The distance between the lags is 0.5 m, the fastening step is 0.4 m. They are set up along the stretched ropes, placing pieces of plywood for alignment.
It is convenient to mount the wiring in the false ceiling. In order not to make strobes, channels are cut out in the slats, where it is placed freely hanging. A flexible three-core cable with double insulation is used, with a cross section of at least 1.5 mm2, for a socket - 2.5 mm2. A parallel connection is used: from the shield one wire goes to the socket group, the second - to the main lamp, the third - to the spot ones (a cross section of 0.7 mm2 is allowed). This scheme guarantees increased safety, ease of repair.

A branch for sockets is also allowed under the ceiling. From the center where the lighting network ends, they turn to the wall at an angle of 90 °, laying is carried out in a strobe. In the same way, they make an eyeliner to the switches. The cable is fixed first with masking tape, then with alabaster. For spot lighting, a space of 8 cm is required. An additional crate of 20 × 40 mm is arranged on the central chandelier or ceiling. It is better to limit yourself to the main lighting on the ceiling, because extra holes are a path for evaporation to penetrate.

After laying electrical communications proceed to the sheathing. There is nothing special about the technology. Laminate and MDF panels are installed on a wooden crate using mounting glue, additionally small carnations in the corner of the groove. Plastic fastening is carried out on self-tapping screws. When buying, they check the entry of the tongue crest into the reciprocal groove - ideally, freely or without significant effort.
Drywall is mounted using conventional technology. Sheathing with panels, silicone sealant is squeezed out into the groove of the previous one before installation - it will become an obstacle to the penetration of fumes. Drips are immediately removed with a cloth soaked in vinegar.
Wall finishes and floor finishes
The tile in the kitchen does not fully comply with the rules of hygiene - dirt accumulates in the seams. For their cutting, the composition used in baths is used, adding 10% of an aqueous emulsion. Smooth over with a piece of cable with insulation with a diameter of 5 mm. If with a finger, even in a glove, irregularities remain invisible to the eye - an ideal place for the accumulation of dirt and the reproduction of microbes. It is recommended to use ceramic tiles only for the backsplash. As a budget option - plastic and MDF panels, thanks to the reliable connection of which the working area is protected from dirt and steam.
The best wall decoration in the kitchen is washable wallpaper. They do not accumulate odor, are able to serve for a long time. If you choose the right color, then for sure you won’t have to think about repairs for a few more years. White and bright ones are the least suitable, and light beige pastel shades with a medium-sized pattern do not lose their appearance for more than 10 years. Help is needed, then things will go faster - one person glues, the other combines.

Installing tiles on the floor is a laborious task, the cost is quite high. The cork is warm, but accumulates moisture. Linoleum is an opportunity to quickly make flooring at low cost. An even better option is marmoleum, a little-known natural material that is also inexpensive.

Kitchen with marmoleum on the floor
Finishing the finish with the installation of skirting boards. They are needed not only as a decorative element, but also serve to isolate joints from fumes along the perimeter. Fastening is carried out on liquid nails or silicone glue, spreading over the entire surface. Leaks are removed immediately. If you want to plant tightly, use self-tapping screws, the heads of which are sunk and covered.
On the ceiling, skirting boards will have to be additionally fixed with screws or small nails. Take phosphated black, which are less noticeable. Installed after about 0.5 m, the extreme ten centimeters from the corners. If they are afraid that the elements will be noticeable, they are smeared with liquid nails, choosing the right shade.
In the modern world, kitchen spaces often combine the functions of a kitchen and a dining room. It is in these rooms that the whole family gathers for breakfast and dinner. In addition, recreation areas are often arranged in the kitchens, where you can have a cup of coffee and chat with a friend or girlfriend.
In this regard, the question of where to start renovating the kitchen is very relevant. Indeed, in this multifunctional room it is necessary to rationally place a lot of useful things and at the same time maintain the comfort of the atmosphere.
To make all your dreams come true and imagine what the future kitchen will look like, you need to make a three-dimensional drawing. It should display all furniture, kitchen accessories and necessary household appliances with dimensions. Since the kitchen is a multifunctional room, a large number of electrical appliances are always installed in it.
Almost every room has:
- Stove for cooking;
- Hood;
- Microwave;
- Fridge;
- Television.
In addition, in the working area, it is necessary to provide lighting and connection of various household appliances, for example, a mixer, blender, meat grinder. To increase comfort, it is recommended to zone the kitchen room, and this, as a rule, is done using various lighting fixtures. In this regard, kitchen renovation should always begin with the organization of electrical communications, while the location of all outlets must be thought out very carefully. In parallel with the arrangement of electrical communications, it is possible to install double-glazed windows. It is also important to consider the location of the hood and how it is connected.
Can be used:
- Convector, when the air purified by the device will return back to the room;
- Connecting the device directly to ventilation.

Features of kitchen renovation
Having decided on the design of the kitchen and providing for the situation to the smallest detail, you can make a list of the necessary materials. Of course, it is important that the planned expenses correspond to your financial capabilities. It is advisable to purchase all the materials at once, and, if necessary, make adjustments to the design before the repair begins.
If you are planning to overhaul the kitchen, then it is necessary to completely empty the room before carrying out any repair activities. In addition, you need to remove all the old finishing layers. For example, whitewash must be washed off, and the old paint on the walls must be removed mechanically or using a special remover. We should not forget that, most likely, it will be necessary to replace the door or equip an arched opening instead. Therefore, it is also necessary to dismantle the old door.
You should prepare for the fact that with this approach to repair, there will be a lot of garbage. But you can’t do without it, and it is the process of preparing the kitchen for repairs that can be considered the answer to the question of where to start repairing the kitchen.
Finishing work
Upon completion of the arrangement of the electrical part and the organization of ventilation, you can proceed to the finishing work. They always need to start with the repair of the ceiling.
For this you can:
- Align the ceiling surface with special solutions and subsequently paint it;
- Install a special structure on the ceiling, on which drywall sheets are fixed, which are subsequently finished using any of the modern methods.
Both methods are quite laborious and require certain building skills. Therefore, if you are not confident in your abilities, then it is better to involve specialists. After the ceiling decoration is completed, it is necessary to proceed with the design of the walls. This event does not require high qualifications and all work can be done independently.
The most common finishes are:
- Wallpapering;
- Laying ceramic tiles;
- Painting of the plastered surface.

You can combine different types of finishes and thus zone the space of the room. Moreover, to finish the working kitchen area, it is better to use tiling or paint wall surfaces. But the dining area is better to accentuate with wallpaper. The best option is for painting, which can be coated with durable alkyd and acrylic paints. These materials are environmentally friendly and guarantee ease of maintenance of wall surfaces during operation.
Laying the floor is carried out at the final stage of the design of the kitchen. The floor in the kitchen should be practical and, in addition, fully comply with the interior being created.
The most common materials for flooring in the kitchen are:
- Laminate;
- Linoleum;
- Parquet board;
- Ceramic.
The choice of building materials depends entirely on taste preferences and financial capabilities. Arrangement of the floor is a complex process, therefore, if possible, work should be entrusted to specialists who will perform them efficiently and in a short time. Upon completion of the finishing work, the repair in the kitchen can be considered complete. After that, you can proceed to the arrangement of furniture, filling the kitchen with household appliances and various useful accessories.
Of course, it is optimal to order built-in kitchen furniture, during the development of which the designers will take into account all your requirements and wishes. But since this is an expensive pleasure, much more often, ready-made kitchen sets are purchased that are easy to install on your own. We should not forget about competent lighting, in the kitchen room there should be several separate lamps, lighting of the working area and overhead light. It is equally important to provide for the presence of beautiful curtains and other decorative elements.
If you know where to start your kitchen renovation and how to finish it, then you will be able to create a surprisingly comfortable room that fully meets your taste preferences.
We also recommend
 Switching power supply: repair and refinement
 Remote control of light
 Swimming lessons for preschool children
 Notes for the master - home household alarms
 Clock propeller on Atmega8
 Device and relay application examples, how to choose and connect a relay correctly Microcontroller and relay simple switching circuits