Leveling the walls in the apartment with your own hands in stages. How and how to align the walls under the wallpaper: materials and stages of work
We express our gratitude to the FORUMHOUSE participant for their help in preparing the material.
Probably, houses with initially even and straight walls never existed. One way or another, every homeowner has had or has yet to level the walls using "heavy plastering" and. Each of these methods has its advantages and disadvantages, supporters and sharp critics. Based on the experience of users of our portal, we will analyze in which cases it is better to use drywall, in which plaster, and how to do it correctly, and we will talk about tools that will help determine the degree of curvature.
How to measure the curvature of the walls
First of all, it is necessary to determine the degree of unevenness of the walls. For beginners, the so-called "dummies", it is easiest to measure the unevenness with a laser level, which can be "shoot for a day" from a friend.

Makinsk-KZ Member of FORUMHOUSE
The laser level is installed parallel to the wall, at the most protruding point. The beam of the level draws the lines of the future wall. If you are going to mount the GKL, then at least 30 mm must be retreated from the most protruding part (mound) of the wall, because. guide profile 28mm wide.
The traditional way to measure the curvature of a wall is with a long level (2-2.5 m) - "pass" the level vertically over the entire surface with an interval of about a meter and find the most protruding place. It is necessary to measure the curvature of the walls horizontally with a thread pulled over two self-tapping screws screwed into the wall at different ends of the room. The angle of the thread should be measured with a square.

Makinsk-KZ
You can take a short level, 50-70 cm, and attach it to a rule or a piece of profile with electrical tape.
How to measure the curvature of the walls with a plumb line
Another way to determine the curvature of the walls: using a plumb line or a nut tied to a strong thread.
 How to determine the curvature of a wall.
Just under the ceiling, in the corner of the room, a nail is driven in, which should stick out of the wall by about 3 cm. A plumb line is attached to the nail on a thread of such length that the load does not reach the floor quite a bit. When it stops swinging, the thread forms a straight line. Another nail is driven into the lower part of the wall, so that its head and thread are in line.

Such beacon nails, driven in along the entire perimeter of the wall, will give us complete information about the curvature of the wall. By pulling two threads, crosswise, from the upper right corner to the lower left and vice versa, we will make this information almost exhaustive.
Which wall alignment method to choose
Gypsum and cement mixtures for leveling walls are traditionally used with a slight deviation, and then drywall, but the experience of FORUMHOUSE participants shows that their possibilities are much wider. On our portal, the issue was considered from different angles. Each of the methods has both advantages and weaknesses.
Buryat FORUMHOUSE user
What do you dislike about ordinary plaster: one part of cement + loosened lime for plasticity + 3 parts of sand (conditionally)?
The following facts speak in favor of plaster: this method does not eat up the useful area of the room, it is cheaper, with the appropriate skill, the wall can be made even, “like the surface of a lake in calm weather”, plaster is a reliable and strong material; it is always possible to repair only part of the wall.
The disadvantages of this method are: laboriousness and dirt, the plaster dries for a long time and slows down further processes of puttying and painting, besides, without certain skills, the wall itself cannot be leveled with plaster, and most importantly:
Buryat
The cost of materials for plastering is highly dependent on the curvature of the walls.
Therefore, the raw method of leveling surfaces with gypsum or cement plaster is usually used when the walls are not particularly curved, and it is necessary to correct not at all catastrophic flaws. Otherwise, two problems are possible: too much material consumption (respectively, money) and the danger that an excessively thick layer of plaster will not hold on to a vertical surface.
Buryat
With deviations of 2-2.5 cm, you can safely apply plaster.
With deviations up to 4 cm - there is reason to think.
With completely uneven walls, you can still make plaster - if the considerations of operation outweigh.
The average thickness of the plaster layer is calculated depending on the unevenness of the structure.

Palych R34
We will determine the middle layer based on the minimum layer above the “belly” of 3 mm, and then add 3 mm to the thickness of the depressions.

Thus, if the depth of the largest depression is 10 mm, the layer of plaster above it will be 13 mm.

Palych R34
The reference layer is seen as 8 mm.
You can more accurately find out the size of the middle layer by evaluating which areas of the surface are larger: up to 6 mm (shallow) or more than 6 mm (deep). If small, subtract and accept the middle layer as 6-7 mm, if deep, then add, and the size of the middle layer will be 9-10 mm.
Depending on the size of the middle layer, we calculate the need for the mixture, taking into account the consumption of the dry mixture per 1 sq. m.
The "average layer of plaster" is different from the thickness of the layer that you apply in reality: its thickness will be different throughout the wall.
Buryat
If there is a bulge on the surface, the plaster in places is reduced to 3-4 mm. If, on the contrary, it is “convex”, then the thickness of the plaque increases to 3.5 cm. So, walls with deviations of up to 2 cm can be safely covered with plaster and not worry about increasing the thickness of the layer. A particularly healthy bulge can simply be hung up.
The dry method of leveling the walls is carried out mainly with the help of drywall sheets, which are either installed on a frame made of metal profiles, or simply glued to the surface. In the first option, centimeters of the area of \u200b\u200bthe house are lost, so it is used mainly in large rooms.
The advantages of drywall: it can be fixed with an adhesive mixture directly to the wall (if it is flat enough), this method does not require complex preparation, it is much easier for a non-professional to work with drywall than with plaster; there is no dirt. Another advantage of drywall: the ability to hide communications under it.
Disadvantages: "eaten up" living space. The conventional wisdom that drywall surfaces are not as strong and may not withstand the load of hanging cabinets, etc., is not true.

Makinsk-KZ
GKL walls can withstand even a water heater, even a hanging toilet, and even more so kitchen cabinets. It all depends on the correct installation.
And the most annoying minus of this material for FORUMHOUSE participants, oddly enough, is an unpleasant sound when tapped.
TOhow to level a wall with plaster
The wet leveling method begins with preparatory work: the walls, if necessary, are cleaned from crumbling traces of the previous finish, cracks are eliminated. The surface must be primed and dry well. Before starting the main work, it is necessary to protect the floor by covering it with something so as not to spoil the solution.
After that, we install beacon profiles.

AMC FORUMHOUSE user
To install the beacons, I used a thin-walled aluminum profile 25x50 mm 6 m long, cutting pieces 5-10 cm less than the height and width of the walls.
Now special beacons for plaster are sold in hardware stores.

Beacons are fixed at opposite ends of the wall with mortar, checking their vertical position by level. Then they pull a cord between them in three places at equal distances and, guided by it, install the remaining beacons. How many beacons should be depends on the size of the rule: it must fit between two beacons so that it rests on them.
Gypsum mixes are often chosen for plastering residential premises, for bathrooms, kitchens, etc. - mortars based on cement. But now there are gypsum mixtures suitable for important premises, just like cement-based plaster, they are used to level surfaces in residential premises.

Regulus FORUMHOUSE user
I would use cement-sand plaster because of the thermophysical properties of the resulting wall sandwich. The thermal conductivity coefficient is very high. The thermal inertia of the wall increases and the dew point does not approach, as is the case with air-cushioned drywall.
For self-preparation of such plaster, sand is mixed with cement (usually 6:1, but the proportions may be different 3:1, etc.) and diluted with water to the consistency of sour cream.
It will be quite uncomfortable to live in a house plastered with cement-sand mortar, then cement-lime plaster is preferable. Here is an example composition:
Buryat
For 100 cubes of solution:
- Lime building quicklime lump, grade 1 - 14 tons.
- Portland slag cement for general construction and special purposes grade 300 - 20.4 tons.
- Sand for construction work for plaster solutions of the finishing layer, natural, very fine - 110 m3.
- Water - 66 m3.
We pour gypsum plaster into water and knead in two stages with a construction mixer or a drill with a nozzle: first, just until a homogeneous mass, then repeat kneading after five minutes.

With a plaster falcon, we throw the mixture between the beacons and smooth it with the h-rule from the bottom up, evenly distributing the plaster over the surface, orienting the layer thickness along the beacons (and fill the resulting openings with mortar). A stucco square will help make the corners straight. The leveled surface is dried and primed, after the primer has dried.
How to level the surface with drywall
The surface that can be leveled with drywall can be very uneven - an old brick wall. But if the differences on the surface do not exceed 40 mm, then you can use special glue to it
Aligning walls with your own hands is not an easy process that even a beginner can handle with diligence. First you need to decide on the desired result and method of work. There are several ways to level the walls with your own hands, in each case there is an optimal option.

Types of alignment
According to the technology of work and material, dry and wet alignment are distinguished. Dry leveling is advisable to use in rooms with large surface errors, in wooden houses. Wet alignment is used for both minor deviations and noticeable ones. Let's take a closer look at how to properly align the walls for each technology.
Dry leveling
Dry leveling, also known as frame leveling, significantly saves costs compared to plastering a falling wall - this is an important advantage.

To start work, the necessary material is calculated:
- the guide profile is purchased in double the size of the perimeter;
- rack profile - the quantity is equal to the ratio of the perimeter of the room to the width of the drywall (standard 1 m 20 cm), multiplied by two, plus 4 corner;
- anchor wedges or dowel-nails - divide the perimeter by 50 cm and multiply by 2;
- self-tapping screws for metal - the number of rack-mount profiles is multiplied by 4;
- GCR - divide the perimeter by 1 m 20 cm;
- self-tapping screws on the GKL - divide the perimeter of one sheet by 60 cm and multiply by the total number of sheets;
- sickle - the number of rack profiles is multiplied by their height;
- deep penetration primer - 150 ml per 1 sq. m.;
- putty for joints - depending on the manufacturer, the consumption is different;
- putty on GKL.

Frame alignment allows you to create the perfect geometry of the room, it is suitable for any type of finish.
With the help of a laser level, the frame of the structure is marked, the guide profiles are fastened with anchors or dowels along the lined marks on the ceiling and floor.
Rack profiles are cut at the ends, petals are created through which self-tapping screws are screwed. They are inserted into the guides and fastened at a distance of 60 cm from each other.
Sheets of drywall are screwed to the finished frame, in steps of 0.6 m, the caps of the self-tapping screws are sunk.
The seams are rubbed with a special putty, it is more elastic. In order to avoid the appearance of cracks, a sickle is embedded in the putty.

Putty is used to finish the surface leveling: a mixture is prepared, which is smeared over the entire surface. In order to save time on processing and on the cost of the finishing layer, GKL should be chosen with beveled edges, then the difference in height will be insignificant. You can cut the edges yourself.
In addition to drywall, other materials can be used for frame leveling: fiberboard, chipboard, pvc panels, plywood, lining and a more modern OSB board.
Advice! The choice of alignment method depends on personal preferences and financial capabilities. Therefore, before starting repairs, it is worthwhile to paint all possible types of finishes, their cost, and then make a decision.
Wet leveling
Leveling the walls with a mixture is a more time-consuming and dirty process. But it allows you to save space, and in some cases finances - with minor deviations, the consumption of the mixture will be less. The method of alignment depends on the requirements for the final result.

There are two ways to do work: by beacons and by rule. Perfect alignment of wall corners is impossible without beacons and corner elements. Such a laborious process is relevant for the bathroom, for the kitchen. Here the geometry of the room is very important, when installing furniture of the correct form, minor errors become noticeable. Leveling tips from the pros:
In practice, two methods are often combined: walls with windows and doors are aligned with beacons, and other walls are aligned according to the rule. Also, careful alignment with beacons requires rooms with external corners.

The choice of mixture for leveling the walls depends on the finish coating. It can be wallpaper, paint, decorative plaster.
Alignment of walls for wallpaper depends on their type:
- under a light thin coating you need a light base without the slightest error;
- glass and vinyl wallpapers of a dense texture can hide minor flaws in the base;
- liquid wallpaper, depending on the grain size, requires a perfectly flat plane or allows small flaws.

Aligning walls for painting always requires a perfectly flat surface. It involves several stages of puttying and the use of a quality mixture. The choice of polymer putty allows you to prepare the surface for painting in one stage of puttying without sanding and re-puttying.
Decorative coarse-grained plaster does not require wall puttying, plastering is enough for an even base, smoothness does not matter.
Important! Regardless of the number of layers and top coat, each stage ends with a primer. It is necessary for better adhesion of layers and material savings.
Difficult cases in alignment
How to level the walls in a wooden house? For this case, it is acceptable to use both methods of work, but the wireframe version is preferable. The technology of work is the same as described above.

An important point is the height of the sheathing material in a house that has not settled, it should be 5-10 cm less than the walls. Leveling with a mixture is a more laborious process: it requires careful treatment of the walls with an adhesive composition, attaching shingles or mesh to hold the plaster. The preliminary lining for plastering looks like this.

Even in modern new buildings, you can meet clay walls. This material is characterized by low cost, good hygroscopicity - ideal for use in residential areas. How can you level rare clay walls?
In fact, nothing complicated: leveling occurs by plastering and puttying with lighter or balanced mixtures. Gypsum or clay mixtures are suitable for this.
Aligning the outer corner of the wall with your own hands becomes much easier if you use a special perforated corner. It can be narrower and wider, depending on the need. The corner creates perfectly smooth sides, remains in the plaster. For puttying, it is convenient to use a special angular spatula, which will require a minimum of skills and effort.

Aligning the corners in a room of irregular geometric shape with your own hands is a very time-consuming process. Using drywall will steal more space than plastering, but will go faster. In any case, the corner elements are installed perpendicular to each other. Then, on the same line with them, beacons are attached to the alabaster along the wall. The laser level simplifies the process of aligning beacons and corner elements. The most crucial moment has been completed, it remains only to fill the space between the beacons with plaster.
Material selection
For high-quality finishing, its speed, convenience of work, material and tools are important. They are not worth saving.

Mixtures for leveling walls are available in different grain sizes and whiteness. The more expensive the mixture, the less trouble it will have. Ready-made compositions of plasters and fillers are especially convenient, which are ready for application without dilution with water. Such mixtures are distinguished by a long preservation of properties even when open, which is very important for beginners - after all, conventional solutions dry quickly and are inconvenient to apply. Ready formulations are sold in buckets, after use, leftovers can be stored in a bucket until the expiration date.
White putty saves painting costs, it is necessary for light wallpaper. Therefore, when choosing, it is worth clarifying the color of the mixture, if it is necessary to align the walls in the apartment under the wallpaper.

High-quality drywall does not crumble, does not have chips - its processing will be much faster. The presence of factory chamfers (image above) on the sheet saves the overall consumption of the finishing mixture and finishing time. The same applies to profiles - rigid profiles create a strong frame and are not subject to deformation during installation.
Advice! When choosing cheap material, you should not count on a quick repair, such savings will require more patience and skill in work.
It's nice to improve your home with your own hands, but the wrong approach can spoil the mood. Before starting repairs, you need to soberly assess your strengths, study the necessary information. You can always entrust the work to professionals.
The durability and appearance of the finishing of the walls largely depend on the quality and correctness of the preliminary leveling of the base. Therefore, it is very important to learn how to level the wall with your own hands in order to obtain a perfectly flat surface. Before proceeding with the decoration of the walls with tiles, wallpaper, paint and other materials, it is necessary to eliminate irregularities and any kind of surface defects. Even the slightest flaws will eventually lead to a noticeable deterioration in the appearance of the finish, and you will have to redo the repair.
Ways to level walls
The curvature of the walls can be leveled in two main ways, namely:
- wet, involving the use of various kinds of mixtures;
- dry, carried out by arranging plasterboard structures.
Both methods have many advantages and some disadvantages.

It is usually used to eliminate minor differences (up to 30-50 mm) in walls of a small area. If desired, of course, with the help of a plaster mixture, more significant defects in huge rooms can be eliminated, but this will lead to irrational financial and labor costs.
Building mixtures do not reduce free space, and this is their main advantage. However, wet leveling is inevitably accompanied by the formation of dust and dirt.

Drywall allows you to eliminate large drops and uneven surfaces.
The main advantage of drywall constructions is that there is no need to pre-level the base before installing the frame and the sheathing sheets directly. It is only important that there are no crumbling areas of finish.
In addition, the cells of the supporting structure can be filled with noise and heat insulation. If necessary, various kinds of communications are easily hidden in the plasterboard structure.
At the same time, the installation of the frame and sheets leads to some reduction in the usable space of the room.
On sale are simple and moisture-resistant modifications of drywall. Material with moisture-resistant properties is usually green, while simple drywall is gray.
| Thickness | Size | Square | Weight |
|---|---|---|---|
| 12.5mm | 1200x2500 mm | 3 sq.m | 28.9 kg |
| 12.5mm | 1200x2700 mm | 3.24 sq.m | 31.2 kg |
| 12.5mm | 1200x3000 mm | 3.6 sq.m | 34.7 kg |

Preparing walls for leveling
Before proceeding with the alignment of the walls, the surface must be properly prepared. In particular, the preparation of the base before plastering is important. In the case of arranging a drywall structure, preliminary preparation in most situations can be waived.

Preparation is reduced to the elimination of existing finishes and old plaster. Next, the surface is primed. Brushes and rollers can be used to apply the primer coat, but the best result is achieved when using a sprayer. Thanks to the primer, the quality of adhesion of the plaster to the surface of the base will be improved.

The primer dries in about 12 hours. After this time, you can start applying the plaster composition.

Leveling walls with plaster
Work begins with the installation of special beacon lines. They will allow you to apply the highest quality.

First step
Fix the beacons on different sides of the wall being processed. Check the verticality of the installation of the profiles with a plumb line.


Second step
Prepare about 10 liters of cement mortar (you simply won’t have time to use a larger amount until the mixture becomes unusable). Instead of cement plaster, other existing mixtures can be used.

Third step
Apply in large strokes to the surface between the beacon profiles.
Fourth step
Carefully align the applied mixture along the beacon profiles. For alignment, use a rule or a simple, even rail of a suitable length.

Add the mixture and spread it over the surface until the base is level with the beacons.

Carefully trim the corners with a spatula.
If you decide to use a factory dry mix, prepare and apply it according to the manufacturer's instructions. When choosing such a mixture, be sure to pay attention to the type of "binding" component.
So, gypsum-based mixtures are intended for use in living rooms, because. gypsum does not violate the normal microclimate in the room. Cement plasters are better suited for bathrooms, kitchens and other rooms with a high level of humidity.

Prices for popular types of plaster
Plaster
Leveling the base with drywall
If the dimensions of the base irregularities exceed 50 mm, it would be more rational to use the method of leveling the walls, which involves the arrangement of a plasterboard structure.
Any special - the main thing is that there are no crumbling fragments on the walls. Clean up such areas if found.

The frame for fastening the sheets is assembled from a galvanized profile specially designed for this. Several types of profiles are used.
The main UD profile is attached to the ceiling, floor and adjacent walls. Jumper functions are performed by the CD-profile.

First step. Attach the vertical profile to the previously listed surfaces. Use dowels to fix. As a result, you should get a reliable support frame.
The first profile must be installed directly next to the side wall. Attach the following profiles in increments of 60 cm. The second end profile must also be fixed close to the wall, even if the distance between it and the nearest profile is less than 60 cm.
The standard width of the sheathing sheet is 120 cm. With the mentioned profile spacing, the plasterboard panel will be fixed at the edges and in the center. In this case, measure the distance from the center of the profiles.

Second step. Proceed with the installation of jumpers from the CD-rails. Sheathing sheets will be attached to these profiles.
Fasten the profiles with their edges to the surface of the base, turning them with a wide edge into the room.
Use self-tapping screws to connect profiles.
To strengthen the structure, special suspensions must be included in its composition. Stiffening ribs are located in the center of the suspensions, the ends of the products are perforated.
The suspension must be bent in the form of the letter U and attached to the wall under each vertical profile. Place the fastener in the center of the suspension. Attach the "ears" of the hangers to the profiles.
Control the evenness of the installation of profiles.

Proceed with the installation of sheathing sheets. Use self-tapping screws for fastening. At this stage, you will need an electric screwdriver - with its help, the work will go easier and faster.


Embed the heads of the self-tapping screws into the material. Place self-tapping screws in increments of 100-150 mm. Fastening is carried out in the center of the sheet and along its perimeter. Typically, center lines are present on the face of drywall sheets to facilitate fixing.

If the length of the sheet is not enough to cover the entire height of the surface, add in the missing places. The sheet cutting technology is as follows: you cut the top paper layer, carefully break the sheet in the required place and cut the second paper layer.
Attach additional pieces to the jumpers from the CD-profile, fixed between the vertical posts.

After sheathing the entire frame, you just have to putty the joints of the sheets, treat the surface with a primer and finish with the selected material.

Read step-by-step instructions, as in our new article.
Successful work!
Prices for drywall and sheet materials
Drywall and sheet materials
Video - How to align the walls with your own hands
TOP-5 best wall drywall manufacturers
| Photo | Name | Rating | Price | |
|---|---|---|---|---|
| #1 |
|
Knauf |
⭐ 99 / 100 |
|
| #2 |
|
Gyproc |
⭐ 98 / 100 |
|
| #3 |
|
Lafarge |
⭐ 97 / 100 |
|
| #4 |
|
Volma |
⭐ 96 / 100 |
|
| #5 |
|
Rigips |
⭐ 95 / 100 |
|


Knauf
For the production of drywall, Knauf uses the most modern technologies, which confirms its high quality and maximum service life. The sheet standard is 2.5x1.2 m, there are other sizes. One sheet can weigh from 12 to 30 kg. The manufacturer produces material not only of European quality, there are also budget options that meet German quality standards.
- low coefficient of thermal expansion;
- flexibility within certain limits without damage;
- the presence of rounded edges;
- reinforcement of the material with fiberglass;
- easy to handle.
When starting to finish the walls with wallpaper, tiles, paints and varnishes and other types of decorative coatings in an apartment or house, you must first remove all the bumps and remove the flaws. Because even small defects can subsequently lead to noticeable damage to the finish. As a result, the deterioration of the appearance of the wall, and ultimately the re-repair. If you competently approach the decoration of the walls of the room, then first you need to do work to level the surface.
Depending on the level of humidity, on the type of room, on defects and many other features, you can level the walls with your own hands in various ways:
- plastering;
- puttying the wall;
- plasterboard surface finish.
Let's consider each method in more detail.
Leveling the wall with putty
Thanks to this finishing option, small flaws in the wall surface can be eliminated. This look is ideal before painting, before wallpapering, to hide visible defects.
Before you independently level this surface in an apartment or in other rooms, you must first treat the walls with a primer and only then proceed to puttying. This type is suitable for minor surface differences.

Wall putty tools:
- wide spatula;
- narrow spatula;
- cuvette with a flat bottom;
- container for mixing the solution;
- level;
- a stick (ideally a nozzle on a drill) for stirring the solution.
The mixture must be mixed until a cone is formed that retains its shape. Ready putty thickens quickly, so it is not necessary to direct the solution in large quantities. If thickening has already occurred, then it can be diluted to the required state with water or a primer.
Putty application technology
The required amount of the mixture is placed in a cuvette, and the rest is covered to save it from quick drying. Start the puttying process from the floor to the ceiling, applying a small amount of mortar with a spatula. Using a small spatula, apply the mixture to a large one and apply the latter to the wall with an acute angle. Then, up to a thickness of 1-2 mm, we begin to level the surface with vertical and horizontal strokes, from time to time applying a level.

Undoubtedly, the wider the spatula, the more even the surface of the wall will be, but, unfortunately, it will be harder to hold it.
After the mortar has hardened on the wall surface, it is necessary to remove various irregularities by washing with a primer. Then, after washing, wait for complete drying (usually at least a day) and then you can already start sanding to remove roughness. If necessary, you can apply a second layer of putty on the wall, having previously primed it (if this is not done, the surface may crack). It is very important to know that in no case should drafts be allowed in the room until the putty is completely dry, that is, at least three days. Aligning the walls in the manner discussed above is possible in various rooms, both in living rooms (in the kitchen, in bathrooms, etc.) and in technical rooms.
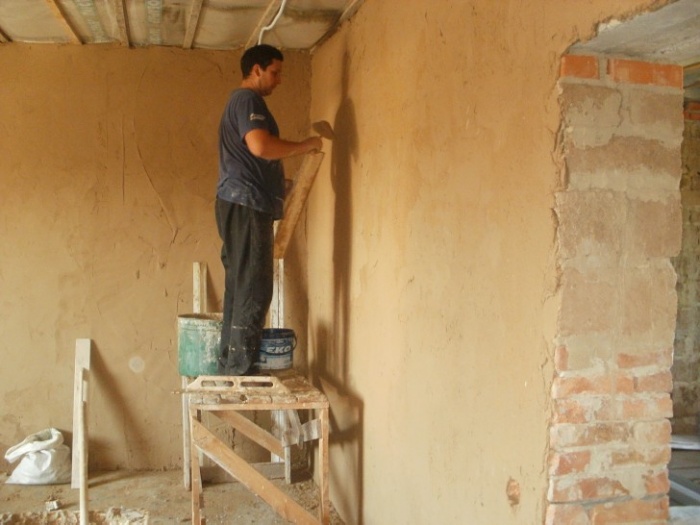
Wall plastering
To align the walls yourself in this way, you need to know that the work is quite laborious, but at the same time the walls look neat and aesthetically pleasing.
If for the first time you yourself have to work with plaster, then it is better to first try on a small section of the wall in order to understand the principle of work and “fill your hand”.

The plastering method is carried out not only in a private house, but is also used a lot in an apartment, because there are often uneven surfaces.
The following materials are needed:
- guide rails;
- level;
- drill for mixing the solution with a special nozzle;
- deep penetration primer;
- roller for priming the wall;
- tray;
- container for pointing the solution.
Padding
First, you should prepare the wall, cleaning it of dust and dirt, removing crumbling elements. Then prime the surface.
The soil mixture helps to prepare the wall covering, removes dust and moisturizes it, reduces porosity, prevents the appearance of fungi and mold, and, importantly, enhances the adhesion of the plaster.

The primer is applied with a roller, if there are irregularities in the wall and the recesses must be manually smeared with a brush.
After the properly prepared surface has dried, you can begin to install the beacons.
Installation of guide rails (beacons)
When plastering the surface, special beacons are set up to begin with. These are metal guides, they help to perfectly align the wall.
For lighthouses, you can use not only metal materials, but also wooden slats, plywood, etc.
But unfortunately, having saved on the profile, leveling the wall, not everyone will be able to make it perfectly even, especially if there is no experience in plastering walls. Ideally, a T-shaped beacon profile will serve for this. It is lightweight and durable, securely attached to surfaces.
Lighthouses should be fixed to the wall with a plaster solution in several places and leveled immediately, until the solution has hardened. The distance between the guides should be 1-1.5 m, but from the corner of the room it is not more than 30 cm.

Ways of fastening beacons:
- plaster. It is better to lay in a layer with a thickness of 15 to 30 mm, therefore, beacons must be set, taking into account these dimensions. If you apply a thicker layer, then the plaster may slide off the wall or simply fall off. When applying this method, let it dry for anywhere from 4 to 5 hours;
- using Ushastik devices and self-tapping screws. The distance between the rails is usually 1-1.5 m.
Getting to the main work - plastering
The wall primed in advance must be slightly moistened in order to improve the adhesion of the plaster. Now you should throw the solution on the wall surface with a layer, protruding from the guides from 3 to 4 mm, trying to completely fill the recesses in the wall.
After application, it is better to level immediately, without waiting for the solution applied to the wall to dry. Alignment is conveniently done by the rule starting from the bottom and leading up, and to the side, pressing down a little. If there is not enough plaster on the wall, you need to add it to achieve a smooth surface.
Such a wall dries up to 12 days. And only after this time it is possible to make the final decoration using modern materials.

Features of plastering depending on the surface
A huge role in the quality of these works is played by the material from which the wall is made:
- if the wall is brick, then it will require a mortar with a cement base or, if the room is with high humidity, then it is necessary to stop choosing a mixture with the addition of lime. If the walls are made of facing bricks, then a problem arises - the smooth surface of the brick, you have to additionally reinforce the wall with a special mesh so that the plaster does not slip. And already on such a wall to carry out work, but this process will be difficult, so if there is little experience, then you should contact the specialists or simply choose another leveling method;
- if the concrete surface of the wall. If it is smooth, it must be treated with a specialized soil mixture with quartz inclusions. This will help to roughen up the wall. To improve adhesion, it is worth adding gypsum powder to the cement solution for this surface. Lime-gypsum mixtures are also suitable;
- foam concrete walls. Gypsum and cement mortars are suitable for this surface. The primer should be used for deep penetration.
Aligning the walls in the apartment with your own hands in the manner discussed above is a rather “dirty” and time-consuming process that not everyone will succumb to the first time.

Do-it-yourself plasterboard wall decoration
This method is great for leveling in the presence of large differences in the wall surface, the installation itself is not laborious. It is not at all difficult to carry it out on your own, and, undoubtedly, its main advantage is that you can immediately proceed to the subsequent design of the wall immediately after sheathing.
There are two methods for attaching drywall to a surface:
- frame mounting;
- installation on the adhesive composition directly to the wall.
Wireframe method
The main disadvantage of this method is a decrease in the area of \u200b\u200bthe room by about 5 cm. But this method is quite reliable.
For the installation of drywall sheets, the installation of a solid frame is most often used. It is made from a galvanized profile.
Types of metal profiles:
- guide - PN (U-shaped)
- rack - PS.
Direct U-shaped suspensions are also additionally needed, it is better to fix them with dowel-nails in increments of 40 to 50 cm. They are necessary for more reliable fastening of the rack profile.
Required tools:
- perforator;
- screwdriver;
- metal scissors;
- level;
- roulette;
- knife for cutting drywall;
- dowel-nails;
- self-tapping screws.
Alignment of the wall with plasterboard sheets is carried out using additional markings. This is quite an important step. Because according to this markup, the frame will be attached. The standard width of drywall is 120 cm, so the distance between the racks must be 60 cm. Thus, the edges of the drywall will be in the middle of the metal profile and it will eventually fit into 3 racks. The height of the profile with the height of the room must match.
A guide profile must be attached along the entire perimeter of the wall, given that the length to the edge is at least 3.5 cm.
The profile is mounted according to the markup made. 
Profile installation steps:
- a guide profile is installed on the dowel-nails, holes are made with a puncher directly through the profile;
- attach a rack profile, inserting it into the guide, adjusting it according to the markings made, fastening it with self-tapping screws;
- with a step of no more than 80 cm, install direct suspensions and attach the racks to the suspensions with self-tapping screws. It is important that the racks are vertical, without bends.
Plasterboard sheets are attached to the existing frame using self-tapping screws, making a step of about 25 cm. The standard drywall height is 2.5 m and in higher rooms you have to additionally sew it on, while adding a horizontal profile between the racks in addition to the frame. Install additional sheets of drywall should be in a checkerboard pattern.
When sheathing a wall, it is necessary to leave room for a gap between sheets of 5 mm.
Seam sealing steps:
- careful priming of seams;
- using a self-adhesive sickle, close the seams;
- putty joints, then sand.
Installation of plasterboard sheets on the adhesive composition
To begin with, it is better to carefully remove the old wall finish, then the unevenness and flaws of the wall should be repaired with putty. After preliminary preparation of the surface, it must be primed.
The next step will be the preparation of drywall sheets for applying glue. First you need to cut the sheets for pasting, given that there should be gaps of about 5 cm above and below.
On the wall, you need to drill holes designed for dowel-nails. They will additionally support the drywall on the wall until the adhesive is completely dry. 
Glue is prepared from a special mixture and water. It dries almost immediately, so it should be cooked in small batches.
When everything is ready, glue should be applied to the back of the drywall. It is applied in longitudinal strips along the edge and in piles every 25-30 cm along the rest of the surface. Then, without leveling the glue, we apply the sheet to the wall, and evenly pressing it.
At the final stage of gluing drywall, it is required, as in the frame method, to seal the seams. Finishing the surface in this way is quite simple, almost everyone can do it.
It is important to know that in order to level the walls of rooms with high humidity (for example, in the kitchen), it is necessary to use moisture-resistant drywall near water supply communications.
Thus, having learned how to level the walls with your own hands, you can make high-quality repairs in the kitchen or in other rooms.
In new houses, the walls can be of quite acceptable quality. But modern design requires them to be perfectly even. Someone suits and another needs to get a high-quality surface.
How to make walls even and smooth
How and with what to align the walls? Options may be as follows:
- Application of plaster.
- Paneling.
- Combined method.
Most of the area of the premises consists of walls that are almost completely open, so all the defects are visible on them. The question of how to align the walls in an apartment usually arises when a major overhaul is done. Irregularities can be hidden under liquid wallpaper or decorative plaster. Smaller defects are well hidden under wallpaper with a chaotic pattern. This will be a partial solution to the problem, but due to it, the amount of remaining work can be significantly reduced.

How to flatten walls with drywall
If, when deciding how to align the walls, drywall is chosen, then here again it is necessary to determine in what way this should be done. There are two options. It is frameless and framed.
Frameless method
Installation of drywall sheets (gypsum plasterboard) is made on a special glue. If the irregularities do not exceed 7 mm, the composition is leveled on the wall with a notched trowel. With a curvature of up to 20 mm, the adhesive is applied in the form of cakes on a sheet with a small interval. It should be diluted in small portions, since hardening occurs in half an hour. Cakes are applied around the entire perimeter of the GKL, then two more rows vertically. The sheet is pressed against the wall and leveled with a level and a hammer made of wood or rubber. When laying, the evenness in the corners and at the joints is checked.

Wireframe method
When deciding how to align the walls in an apartment, it must be borne in mind that the frame method “eats up” a rather large volume of the room. It is used mostly in spacious rooms and when it is necessary to hide communications.
To mount the sheets, a frame of profiles or well-dried wooden bars is first attached. First, ceiling and floor are installed, and vertical racks are inserted into them at a distance of 40 and 60 cm. The latter are additionally fixed with suspensions that are nailed to the walls. Then, communications are laid inside the frame, after which they begin to fasten with GKL screws. All joints between them must pass along the profiles. During installation, fixtures, sockets and switches are inserted into the drywall. All electrical appliances from the walls under the plasterboard must be removed, and the bare ends of the wires are protected by insulation.
A primer is applied to the joints between the sheets, after which they are glued with a sickle, and then putty is applied to it.
building mix
When choosing how to level the walls, the first thing that comes to mind is the use of plaster as the most common method. But first of all, it is necessary to determine the curvature of the walls and calculate the required amount of building mixture. The question of how best to align the walls can be solved much easier if you think through all the details and make the right decision. The thickness of the plaster layer can be significantly reduced if the main protrusions are knocked down with a perforator. It is possible that after this the wall will simply need to be puttied, after which it will be perfectly flat.
If the irregularities on the wall cannot be removed, the required amount of primer and plaster should be purchased. Of the tools you will need a level and spatulas.
Such work is usually carried out with a complete replacement of electrical wiring. Even in new homes, it may turn out that it does not suit the owners in terms of power and location of lamps, switches and sockets. Working with electricity is no less laborious, as it may require wall chasing for wiring. In addition, all electrical appliances must be removed and the ends of the wires insulated.
First of all, the wall is covered with several layers of primer. It holds plaster better. The primer is applied with a roller or construction tools are also needed for hard-to-reach places, for example, in niches and corners.
After the primed surface has dried, the wall can be plastered. For small unevenness, one leveling layer is sufficient. Usually three layers of plaster are applied with a primer on each of them.
Rules for applying plaster
- The plaster is leveled on the wall in a circular motion with a wide spatula.
- The first layer is a draft, with its help the main recesses and bulges are eliminated.
- After applying all layers, the wall is finally leveled with putty.
Alignment of walls with cement-sand mortar
How to level the walls in the house? For many, the answer to this question is not a problem. The method of leveling the walls with a cement-sand mortar is considered the most common, cheap and simple. The skills of preparing and applying plaster are quickly acquired and always remain in demand.

The surface of the wall is first treated with a primer. Then, guide rails, called beacons, are installed on it at a distance of 1 m. They are fixed on the cement mortar and allowed to dry. Sand cement plaster is prepared according to the recipe indicated on the package. Then the mixture is applied with a trowel to the wall, which is pre-moistened. The layer should protrude 2-3 mm beyond the level of the beacons. After that, you should draw on them with the rule from the bottom up, so that the surface becomes even. In places where there are small indentations, you need to add the mortar with a spatula, and then level the wall again with the rule.
After the first layer is applied, it is allowed to set and dry, then the next one is applied. Thus, work continues until the entire wall is leveled. can be continued after 10 days, when the cement is completely dry.
How to align the walls in the bathroom
The bathroom is a small room, repairs in it can be done quickly and efficiently. How to align the walls in the bathroom? For this, a cement-sand mixture or gypsum is used, which, after hardening, are not afraid of water. Waterproof drywall is also suitable, but it takes up a lot of space. When deciding how to tile the walls, you need to weigh the pros and cons to make the right choice. The laying of the mortar is carried out according to special plaster beacons, which are not removed afterwards and thereby strengthen the applied layer. The solution is thrown onto the wall with a trowel, and the protruding parts are cut off and the resulting recesses are rubbed with them. Before finishing, the wall is primed. Then you can glue ceramic tiles on it.

How to align the walls under the wallpaper
Achieving an ideal wall surface in a large room is difficult. And often you have to think about how to align the walls under the wallpaper. The last step is the most important here. The rough finish is also of great importance, since the overall evenness of the surfaces depends on it. Brick walls must first be plastered. Old surfaces are carefully cleaned, all previous finishes must be removed from them. To level the surface under the wallpaper, as a rule, putty is most often used.
The solution is applied in several layers until the final leveling is achieved. Each time the surface of the wall should be dried and a layer of primer should be applied on top. The last layer of putty is sanded with sandpaper.
How to prepare solutions for leveling walls
Solutions can be ready-made or they have to be diluted independently. Fillers and plasters for leveling are mineral mixtures with special additives. As a binder, they use cement intended for use in wet rooms. If an adhesive base is used, then the composition is only suitable for dry rooms.

Gypsum plaster is widely used. It is able to regulate the humidity in the room, absorbing or releasing it, and is a good heat insulator.
The question of how to level the walls can be easily resolved if decorative plaster is applied. Its different types serve as a finishing coating or base for it. The textured surface hides irregularities and flaws well.
There is a large variety of leveling compounds for plastering a thin layer of even surfaces made of building materials. They do not hold well only on plastic and wooden bases. Special compositions for buildings are made.
Conditions for applying all wall coverings:
- the base must be clean and free from old coating;
- surfaces are pre-treated with a primer or lining emulsion.
When solving the problem of how to level the surface of the wall, the question of saving always arises. The cheapest are simple solutions. They are quite effective, you can cook them yourself. mixes up with sand in the ratio 1:5 and carefully mixes up. The mixture must be used on the same day so that it does not lose its properties. Cement is mixed with sand in a ratio of 1:5, 0.1 part of lime is added to it. Seizure occurs after an hour.

The mixture can be lean when it contains little binder. It does not delaminate during application and does not crack when dried, but is not durable. The greasy mixture is different in that it sticks to the tool. As it dries, it shrinks and may crack. When preparing, you need to make an average solution. Then it is well applied and forms a durable layer.
How to straighten corners
The unevenness of the corners emphasizes the curvature of the walls, and this most spoils the appearance of the room. To bring out the inner corners, beacons are first installed. They should be at a distance of about 30 cm from the corners. First, the plaster is applied between all the beacons, and then leveled with a rule. After the plaster has dried, the corner is laid with putty with a slightly greater density than necessary, at intervals of 20 cm. Then a perforated corner (counter-shulz) is pressed into it with the help of a level, the excess coating is removed. The next day, the surfaces of the adjacent plane of the walls are leveled, and then the finish coat is applied.
At the outer corners, the counter-shulz is pressed into the putty in reverse. All other operations are performed in the same way.
To speed up the process, the profile is first set to then after an hour it will be possible to align the angle. If the differences are too large, then they can be smoothed out with the same material.
Conclusion
When deciding how to level the walls, you should first determine the consumption of materials and funds. Walls are easier to level with drywall if the unevenness is significant.
A correct assessment of the quality of the surface allows you to make the right decisions and facilitate the repair of an apartment or house. Modern building materials allow you to achieve a lot, and some of them even have unique properties.
We also recommend
 What do beginners need to know about electricity?
 How to properly load the dishwasher: preparation, placement, removal
 How to properly place dishes in the dishwasher
 How to arrange the dishes in the dishwasher?
 Rating of the best carob espresso coffee makers for home (2019)
 What types of welding machines are there?