How to close up the pipe passage on the roof of corrugated board with your own hands. We sheathe the chimney with corrugated board Facing a brick chimney
is an extremely responsible task in itself, requiring special accuracy, sequence of actions, and strict adherence to the developed technological recommendations. Whatever material is used to cover the roof, it must ultimately provide one hundred percent protection of the building from the destructive effects of precipitation.
One of the most vulnerable in terms of possible water penetration and difficult to install nodes is the adjoining of the roof to the chimney or ventilation pipe. The durability of the truss system, the attic floor, and often even the finishes in the house itself directly depends on how well such areas will be sealed. Therefore, it is very important to treat this stage of roofing work with special attention and accuracy.
Features of the arrangement of the passage of the chimney through the roof
A high-quality adjoining of the roofing material to the pipe can only be done if the roof has a reliable rigid crate corresponding to the type of roof and the steepness of the slopes, on which the load will be evenly distributed both from the mass of the roof system itself and from external influences.
- The best option is when the chimney is installed even before the arrangement of the crate. That is, in most construction of the rafter system, a passage is provided for it, reinforced with additional details. In such cases, it will be much easier to connect sheet or piece roofing material to the pipe than in those when it is necessary to organize a passage for the newly erected pipe in the finished crate.
- If the pipe is installed later, then in order to make room for the passage of the chimney, it will be necessary to dismantle some elements of the crate, which may well weaken the overall structure.
- It is also necessary to foresee in advance that the pipe does not fall on the rafter leg, since its partial or complete dismantling is an extremely undesirable operation. If the pipe still falls on one of the rafters, and part of it has to be removed, then before carrying out this process, it is necessary to immediately install retaining posts under the remaining parts, which are fixed to the floor beams. In addition, most often you also have to connect parts of this leg with whole rafters, horizontal lintels.
- Whatever option neither considered, around the chimney, it is imperative to equip an additional reliable frame, which must be firmly connected to other elements of the rafter system and roof sheathing.
Prices for chimney pipes
flue pipe
- The clearance between the chimney and the elements of the truss system is regulated by the rules of SNiP 41-01-2003, paragraph 6.6.22. It states that the distance from the surfaces of concrete and brick chimneys to any parts of the truss system and roofing "pie" made of combustible material should be no less than 130 mm. From ceramic pipes that do not have insulation, this clearance must be at least 250 mm, and in the presence of thermal insulation - also at least 130 mm.
Remaining not closed space between the pipe and combustible or even low-combustible roof coverings, only completely non-combustible materials (usually sheet metal is used for these purposes).
The design of the junctions of the roofing to the pipe
When a reliable basis for arranging the adjoining of the roofing material to the chimney is ready, you can proceed to the installation of the coating sealing elements.
The design of the system for adjoining the coating to the pipe may be different, depending on the selected roofing material. The functions that are assigned to the elements included in the junction design are sealing and waterproofing the joints of the roof covering and ventilation or chimney pipes, as well as the removal and redirection of water flows flowing from the roof ridge to the pipe from above.
The scheme for arranging such an junction should ideally be determined even when drafting the truss system and roofing. The fact is that some options involve the installation of individual parts of the structure before laying the roofing.
In addition to the type of roof chosen to cover the roof, the location of the chimney, its shape, and the material from which it is made should also be taken into account when drafting the project.
Professional builders usually recommend that only ready-made structures, which are produced by roofing manufacturers, be used for arranging junctions. However, many craftsmen prefer to make these parts on their own.
It should be noted that the chimney pipe passing through the roof directly on the ridge line of the roof is the easiest to seal. With this arrangement, water during rain, as well as snow drifts in winter, are not able to accumulate above the back wall of the pipe, which minimizes the risk of roof leakage in this, perhaps, the most vulnerable junction.
It will not be difficult to equip a reliable connection of the roofing material to the chimney, which is located in close proximity to the ridge line, that is, almost immediately behind the ridge element. A very small space is also obtained above the pipe, which does not allow the accumulation of snow and water.
But to perform high-quality sealing of the chimney located in the middle or lower part of the roof slope is much more difficult. In this case, waterproofing must be especially reliable. Therefore, quite often, and especially, for example, when the roof is covered with a soft bituminous roof, it is necessary to equip an additional pitched structure - as shown in the illustration above. Such a special break in the roof will dilute water flows, directing them along the side walls of the pipe. Such protective extensions to the pipe are usually called grooves.
And, of course, the most difficult thing is to qualitatively equip the junction around the chimney, which falls on the middle or lower part of the valley. The pipe in this case will be in the path of pronouncedly directed flows of water, which, during rain or snowmelt, will flow into the chute of the junction of the slopes. In this case, it is extremely important to reliably seal not only the back side of the pipe, but also its side lines. Therefore, even at the design stage, it is necessary to try very hard to avoid such a location of the pipe.
Now, in order to answer the most popular questions that arise in the process of arranging this roof assembly, it is necessary to consider several options for sealing pipe passages through the roof.
Sealing passages of round pipes
As you know, stoves and fireplaces in recent years are increasingly equipped with round chimneys of different diameters. Modern metal chimney pipes most often represent a "sandwich construction", that is, they consist of three layers - two metal cylinders, external and internal, and a layer of thermal insulation between them. As a thermal insulation, as a rule, basalt-based mineral wool is used.
Prices for metal tiles
metal tile
Manufacturers have provided for sealing the adjoining of such round pipes to the roofing with special elements - penetrations. These parts can be made of metal or an elastic, heat-resistant composite material, which is mounted in combination with metal elements.
In principle, according to the same principle, a hermetic adjoining of the roof is also arranged for ventilation pipes.
Metal penetration for round pipes
Variants of finished metal products for arranging the adjoining of the roof to round pipes usually consist of two parts. This is an apron cap and the so-called "sole", which is a rigid base and made of steel sheet, on which the cap is fixed by the manufacturer. Metal penetrations differ from each other in the angle of inclination of the lower plate of the structure with respect to the cap, therefore, are selected depending on the slope of the roof. As a rule, in specialized stores you can always find the right version of the products, since they are produced for roof slopes of various slope slopes.
The upper part of the cap, before mounting the structure on the roof, is cut off to the diameter of the chimney pipe, since it must pass freely through the opening of the cap. Then, the “sole” is rigidly fixed to the roof surface with the help of roofing screws, on which sealing elastic gaskets made of rubber or neoprene are put on.
Very often, when installing a metal penetration on a relief roofing, to enhance the sealing of the abutment, a metal sheet is fixed above the pipe, which is brought under the ridge element and fixed overlay on the upper side of the “sole” of the penetration.
After the sole is fixed on the roof surface, and the pipe is passed through the penetration, the upper edge of the cap is pressed against the chimney using a special clamp, in which a heat-resistant elastic gasket is installed. This element will protect the junction of two elements from moisture ingress into it.
Ready elastic penetrations
As mentioned above, in addition to metal penetrations, you can also find elastic ones on sale, equipped in the lower part with a sole made of soft flexible metal, such as lead or aluminum. Through this plastic, but retaining the shape given to it, framing the "sole" of the penetration, it is fixed to the crate, through the surface of the roofing material. The cap itself is made of weather-resistant elastic rubber, and tightly covers the pipe around the circumference, especially since it is usually also “caught” with a metal clamp.
Slate prices
The advantage of elastic penetrations lies in their versatility, as they can be installed on slopes that are built at any slope. Due to the flexibility of the combined penetration base, the sole is easy to shape the relief of the roofing material.
Such flexible penetrations for round pipes are often referred to as "master flash". There is no shortage of such products in our time. And installation is very simple, and available to any owner of the house.
Video: installation of an elastic penetration for a master flash chimney
Sealing the junction of the roof to the round pipe using aluminum or lead tape
In cases where, for some reason, it is not possible to use ready-made penetrations for sealing pipe passages, a special self-adhesive aluminum or lead tape can be used to perform these works. Due to the flexibility, heat resistance and versatility of this material, you can use it to form a penetration yourself.
Pieces of tape are pasted over the vertical part of the pipe with the transition to the roofing. And then the tape is fixed around the chimney - in this way, sealed abutment joint.
This material is highly resistant to various external negative influences: high and low temperatures and their sudden changes, to moisture, ultraviolet radiation,
In order for the tape to provide high-quality waterproofing of the junction, and the sealing to last as long as possible, the tape must be glued to a clean, fat-free and dried surface of both pipes and roofs.
Options for sealing the junction of the roof to pipes of rectangular or square section
For arranging abutment around pipes having a rectangular or square cross section (most often brick), ready-made standard systems manufactured by roofing manufacturers are also used. In this regard, when purchasing this or that roofing material, you can immediately buy or order a set of penetration parts for a brick or concrete chimney for specific sizes.
This standard sheet metal version can be used for roofing materials such as, profiled sheet, as well as the familiar slate of the old and new modifications. For these coatings, the joint sealing scheme shown below is usually used.
So, before roofing sheets are fixed on the frame of the crate, preparatory work is carried out, which includes the following steps.
- Additional crate bars are fixed around the pipe, their cross-sectional size can be the same as that of other crate elements.
- Then, from the front wall of the pipe down to the eaves of the roof is fixed, so-called"tie", equipped flanging on both sides. The tie is usually made from galvanized sheet metal.
- Further, around the pipe, on top of the “tie”, a wall profile is laid and fixed. Its upper edge, which has a bend in the opposite direction with a size of 8 ÷ 10 mm, is inserted into a pre-cut groove on the chimney wall.
- Then, at this junction of the wall apron and the pipe wall, it is imperative to apply a weather-resistant sealant, that is, intended for external work.
- The next step is the installation of roofing material.
- The final stage is the installation and fixing of the external wall profile - an apron, consisting of four elements, installed on all sides of the pipe. These parts of the apron are screwed to the walls of the chimney, and are also fastened together at its corners.
Another, more modern option for sealing the abutment involves the use of self-adhesive waterproofing lead tape, which is convenient for use on both flat and any relief roofing.
When using such a tape, it must be fixed on the surfaces of the pipe walls with the help of special clamping metal strips, which can be made independently. The upper joint of the strips with the pipe walls must be additionally covered with a layer of weather-resistant sealant.
Flexible waterproofing self-adhesive tape is perfect for sealing the abutment of roofing coverings with high enough embossed pattern, as it easily takes its shape when pasted and retains it. Such a tape is very often used to close joints if the roof is covered with ceramic tiles, slate or ondulin.
Prices for ceramic tiles
ceramic tiles
Sealing the adjoining ondulin roof to a brick chimney - step by step
It has already been said above that many manufacturers of roofing materials tend to accompany their products with proprietary systems for sealing pipe passages. One example is the design system for adjoining the pipe to the wavy cellulose-bitumen roofing material ondulin, which is quite popular in our time.
| Illustration | Brief description of the operation to be performed |
|---|---|
| In this case, a variant of arranging the adjoining of a roof covered with ondulin to a rectangular chimney or chimney is presented. The sealing system will be mounted after the roofing material has been laid on the crate. The gap between the coating and the sides of the pipe, as well as below it, should be 20÷30 mm. On the rear side of the chimney, i.e. facing the ridge, the distance between the pipe wall and the batten can vary between 50 and 100 mm. |
|
| In order to fix the sealing apron along the perimeter of the pipe, it is necessary to include additional elements of the crate in the roof structure in advance, which are fixed along the walls of the chimney pipe. For this additional crate, a beam with a section size of 40 × 40, 40 × 30 or 50 × 30 mm is suitable. |
|
| The first step is to close the junction of the roof with the pipe from the front side of the pipe with a covering apron made specifically for ondulin. Usually, the manufacturer of roofing material also produces additional elements for the design of adjoining, ridge and other complex and vulnerable coating units. Therefore, when purchasing material, you must immediately ask about the range of additional elements, and, making preliminary calculations, they must be immediately included in the project. |
|
| The covering apron is applied to the place of its future installation - along the lower edge of the pipe facing the eaves. Marking is made on the apron, according to which it will be necessary to make cuts. The upper, flat part of the apron should remain exactly the width of the pipe, and the wavy part should have one wave on each side. In this case, it is necessary to cut the wavy part along the lower crest of the wave. First, the marking is done with a pencil. |
|
| And then the apron is cut according to the marked markings. It is most convenient to cut the part with a sharp construction knife. |
|
| Further, the finished apron is pressed against the pipe and fixed to the roof surface using branded roofing nails. The nails must enter through the ondulin into the beam of the crate installed around the pipe. |
|
| In this case, nails are driven into the top of each wave of the apron relief. Fastening is not carried out only on the extreme waves that go beyond the dimensions of the pipe on both sides. It is very important to drive in the nails correctly, strictly vertically to the roof surface. And measure the efforts so as not to deform the coating when the fasteners are clogged too much. |
|
| Now you need to prepare a waterproofing self-adhesive tape "Onduflash-super". This material is excellent for sealing complex areas - the butyl rubber component has excellent waterproofing qualities, and the aluminum base allows you to give the tape very complex shapes. The standard tape width is 300 mm. The length of the first segment should be 250÷300 mm |
|
| The cut off piece of tape is applied to the future installation site and preliminarily bent along the relief of the sealed corner. The function of this segment will be to seal the edges of the previously fixed apron. |
|
| After fitting the tape to the installation site, a protective film is removed from its back, covering the adhesive layer. | |
| The tape is applied at the area where the roof adjoins the pipe at the front corners so that it can simultaneously close the upper and lower parts of the apron by 70 ÷ 80 mm. In order for the tape to bend into the required position and fit snugly against the material of the roof, apron and pipe, its corner is cut. |
|
| Further, the tape must be pressed with a good effort to all surfaces. It is especially important that the tape fits as tightly as possible along the joint line. First, such sealing is carried out on one lower corner of the pipe, and then the same is done on the opposite side. |
|
| The next step is to attach the side apron to the pipe. The part is pressed against the surface of the roof and against the side wall of the pipe and the cut lines are marked. |
|
| Sections of the upper part of the apron must be made clearly along the vertical boundaries of the pipe, that is, the edges of the apron are cut at a certain angle. And the lower part of the part, located on the roofing, should extend beyond the pipe both in its lower and upper parts by 100 ÷ 150 mm. |
|
| Cuts are made along the marked lines with a sharp knife. First, a metal ruler is applied to the markup and it is necessary to draw a knife along it with gentle pressure. |
|
| That is, the material of the apron is cut through approximately ⅔ of its thickness. Then, from a slight bending force, the apron part breaks off neatly along the cut line. |
|
| In the next step, the prepared side parts of the apron are nailed to the roofing surface, under which additional elements of the crate are fixed. It is enough to drive three nails into each of the side parts of the apron - one in the center and one at the top and bottom. |
|
| Further, a piece is cut off from the waterproofing self-adhesive tape, the length exceeding the width of the pipe by 200 mm. This segment will go to seal the rear, the most vulnerable part of the chimney penetration. | |
| The cut off part of the waterproofing tape is applied to the place of its future installation and bent along the line where the roofing sheets adjoin the pipe. At the same time, they try to immediately give the maximum shape to its lower part, repeating the waves of ondulin sheets. | |
| Next, the protective film is carefully removed from the tape, and the waterproofing material is pressed tightly against the surface of the pipe and against the roofing. The sides of the tape are cut so that the top of the cut parts can be glued to the sides of the pipe, where the apron elements are already fixed. Thus, the tape isolates the junction of the side element of the apron with the pipe wall, preventing water drops from penetrating here during rain. |
|
| The next task is to glue the waterproofing tape on the front side of the pipe. It is fixed on top of the front upper part of the apron, that is, the one that goes onto the pipe. The width of the tape should be 100 ÷ 150 mm, and its length should exceed the width of the pipe by 200 ÷ 300 mm, since it will bend onto the sides of the pipe and hide under the side parts of the apron. The tape must also be pressed very well against the brick or plaster surface of the pipe. |
|
| Further, the upper edge of the waterproofing tape from the front side of the chimney is pressed with a metal fixing strip. Its fastening is made on dowels. |
|
| The same strips are screwed to the sides of the pipe, 15 ÷ 17 mm below the edge of the apron. The photo clearly shows how the fixing rail should be located, the ends of which are cut along the line of the pipe corners. |
|
| Further, the edges of the apron, remaining on top of the screwed side clamping strips, must be slightly bent from the surface of the pipe. | |
| Now this formed corner between the pipe wall and the slightly bent edge of the apron is densely filled with a layer of polyurethane sealant. For this operation, you will need a special construction syringe gun. |
|
| Now it remains only to cut and lay an additional piece of ondulin on the back of the pipe. Its width should be equal to the width of the location of the side elements of the apron. and the length is from the ridge to the pipe. An additional piece of ondulin is laid on top of the already laid coating, as well as on top of the waterproofing tape glued to it and the pipe. |
|
| The laid additional fragment of ondulin is nailed to the crate directly through the coating that has cooled down below. Fixation is carried out with roofing nails driven into the top of each wave of the coating. |
|
| When the arrangement of the junction of the roofing material with the pipe is completed, you can proceed to the further installation of the ridge elements. This ridge element will close the upper edge of the additional ondulin sheet on top of the pipe. |
The information presented above quite convincingly indicates that there is nothing supernaturally difficult in sealing the area where the roof adjoins the chimney pipe. It is quite possible to carry out such work on your own. However, at the same time, one should not forget about compliance with all safety requirements, since the work will take place at high altitude. Performing any installation operations on roof slopes without safety devices is extremely frivolous!
At the end of the publication, we suggest watching a video that shows in detail the process of sealing the adjunction of a tiled roof.
Video: Sealing the junction with a ceramic tile roof pipe
The priority of independent heating of a private house is more and more obvious. In addition to significant savings, this is the ability to independently choose alternative heating methods. Among the sufficient number of available options, stove heating is still popular. Despite certain installation difficulties, this is the best way to create a favorable microclimate in the house.
Any independent heating, with the exception of electricity, requires the removal of combustion products through the chimney. Today there are enough materials with which it can be organized. In the event that it is a refractory brick, it is best to protect it from the negative effects of aggressive environmental factors through cladding.
When building a house, the question often arises: how to sheathe the chimney with corrugated board?
The chimney lining is a kind of shield that prevents the formation of condensate as a result of the interaction of the temperature difference between the environment and the chimney.
Finishing the chimney is the beginning of the roofing finishing work, because otherwise you can damage the finished roofing or stain it. Visually, both the chimney itself and the roof covering should form a harmonious tandem, therefore it is best to select identical materials for their sheathing.
Depending on what materials the finishing work is supposed to be carried out, several options for sheathing are provided. Each of them has a number of positive characteristics, however, each has some disadvantages.

Ready-made factory design for the chimney
Clinker bricks and tiles
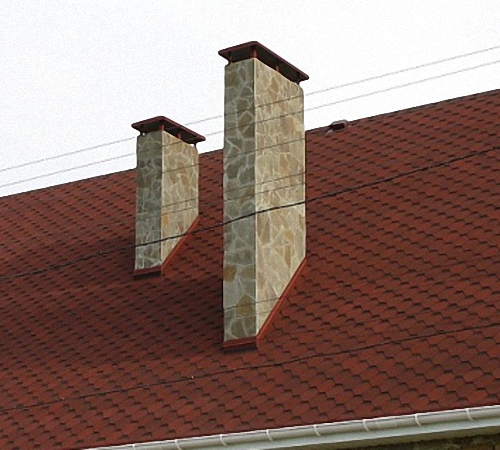
A fairly common way is when clinker tiles or bricks are used in the decoration. A sufficient degree of strength, resistance to weather conditions and temperature differences are its main advantages. In addition, this facing coating is not afraid of dirt, which is important from an aesthetic point of view. There is only one minus: the need to use solid clinker bricks, planted on a special clinker mortar, causes a high cost of work. Therefore, this method in most cases is not available to a wide range of consumers.
Prefabricated prefabricated structures
You can sheathe chimneys with pre-prepared material. As a rule, this is a factory version of a pipe that has a steel channel. By means of bricks, reinforced mesh, plaster, the chimneys are finally brought to an ideal state.
Plaster
Speaking of a chimney, which involves a budget cladding option, it is worth remembering the old proven way of plastering a smoker. Despite the fact that this method is considered the most budgetary, it is no less durable and reliable.
As an alternative, methods using fiber cement boards, slate, etc. can be considered.
Profiled flooring sheet - the priority of the choice of facing material
The market for finishing and facing materials is quite diverse. The main criteria justifying the choice of one or another option are reliability, strength, durability. However, no less important is the price of the material and the ease of its installation.

Schematic representation of the casing of the chimney outlet
The corrugated board most of all meets all of the above requirements, due to its high technical characteristics:
- resistance to temperature fluctuations,
- length of service life,
- Ease and speed of installation,
- ease of maintenance,
- small specific weight,
- Low cost.
It is equally good to organize the facing covering of the roof and the lining of the chimney pipe with corrugated board. In addition, it looks quite impressive, adding respectability, solidity to the structure, emphasizing the style.
The professional flooring has rather wide color palette that allows to realize any design decision.
Varieties of corrugated board suitable for lining the chimney
A wide range of profiled sheets significantly expands the boundaries of available cladding solutions. Among the types produced are:

How to bypass the chimney with corrugated board
- Sheets of a combined type used in the organization of various structures of enclosing and finishing nature,
- Support type corrugated board, characterized by increased strength,
- Aluminum profiled sheets, characterized by a long service life and increased resistance to moisture,
- Painted profiled decking sheets,
- galvanized,
- roofing,
- Facing.
Each of the types can be used as a finishing material, and therefore the priority of choice is determined by the price of the issue.
The subtleties of the chimney lining
Facing the chimney pipe with corrugated board is the best option for finishing activities. However, before proceeding with its purchase, you need to know about some of the nuances of its storage and the intricacies of working with it.
When purchasing corrugated board, you need to take care of compliance with storage conditions. A dry, well-ventilated area is best suited for this purpose. The material is given a strictly horizontal position on a flat surface. Forced storage in the open air must necessarily provide for covering with a dense waterproof film.
First you need to make a metal frame. It is he who is the basis to which the skin will be directly attached. The attachment mechanism provides for the overlap of one corner of the sheet on the other. Mounting strength is achieved through the use of self-tapping screws. The aesthetic appeal of the joints is given by special corners used for finishing.
The external perfection of the design, its strength, durability will depend on how well the installation was carried out. It is fundamentally important to carry out the most even arrangement of the sheets of the bottom row. The resulting errors in the geometry of the sheet are easily corrected by additional components during installation.
Given the negative attitude of profiled sheets to a high temperature regime, thoughts about using a grinder in carrying out the sheathing stages must be immediately discarded. Ideal tools are an electric jigsaw and a circular saw with a special blade.
Thorough observance of the requirements guarantees the correctness of the work. As a result, the chimney will not only be satisfied, it will deserve a lot of encouraging reviews.
How is the finish of the chimney on the roof implemented? How to seal the chimney with your own hands? What materials are used to carry out such work? How to line the pipe in order to maintain its performance?
These and similar questions are of considerable interest, both for owners of country houses and for compatriots who have decided to build a new house.
Professionally done finish

In the photo, the waterproofing of the passage with rolled materials
In order for the operation of heating equipment in a country house or cottage to be stable and efficient, the area where the roofing system and the chimney adjoin must be completely sealed. Roof penetration is responsible for this parameter of this section. (See also the article Features of finishing the cornice of the roof of the house.)
The design of the passage assembly is determined by the fire safety rules. For example, if excessive flue gas temperatures are transferred to the roofing system, there is a high risk of fire.
Important: The risk is especially high in relation to roofing systems with a large number of wooden elements that have not undergone timely flame retardant treatment.
To prevent fire and damage to the roof, the chimney pipe is finished as follows:
- We maintain a gap between the flammable sections of the roof and the chimney, the width of which is regulated by building codes.
- At the junction, the chimney is treated with materials with a low degree of thermal conductivity, such as asbestos.
- The section of the passage of the chimney pipe through the roofing pie is performed using a box made of galvanized steel or corrugated board.
- The gap between the chimney and the steel box is filled with non-combustible heat-insulating materials, such as basalt wool plates.
This method of arranging a roof passage with equal success can be applied both on a slope and on a ridge. Both methods have characteristic features that need to be taken into account in a timely manner.
For example, the installation of a chimney along a ridge provides for the need to make changes to the design of the truss system. Installing a chimney on a slope causes the formation of an additional pocket for the accumulation of snow, which is fraught with leaks. However, this problem is solved by using modern insulating materials. (See also the article How to install finishing panels for the front of the house.)
Old and modern chimney sealing technologies
If, relatively recently, the sealing of the junction of the chimney and the roof was carried out using improvised means, now such work is carried out using specialized materials and unified assemblies.
The choice of industrially manufactured means for sealing the passage in the construction market is wide. Therefore, everyone will be able to choose the option that is most suitable for arranging a particular chimney system.

Collar (salary) made of soft metal
As already mentioned, the finishing of the pipe on the second floor, in the attic and at the place of passage through the roofing pie was carried out with improvised means, and therefore it was not necessary to count on the optimal results of the work done.
Finishing the chimney pipe on the roof was a metal structure, the so-called "collar" or "salary".
The "collar" is done as follows:
- rectangular strips up to 40 cm wide are cut from sheet steel with a thickness of 0.2-0.5 mm;
- the prepared strips are bent according to the shape of the junction of the chimney and the roof;
- finishing parameters are applied based on the size of the chimney, the angle of inclination of the slope, the type of finish used;
- the elements of the "collar" made of galvanized sheet are connected into one piece overlaid and carefully soldered;
- if the elements of the collar are cut from a steel sheet, they are installed with a double standing seam;
- a lying seam connection is used for finishing a chimney on a roof assembled from corrugated boards or tiles;
- on a pitched roof with a slope angle of more than 30 °, right behind the chimney, a “bumper” is mounted in the form of a bar or a metal threshold that will direct rainwater flows around the pipe.

In the photo - installation of a prefabricated apron
In order for the price of finishing to be relatively low, and the quality of the work done to be satisfactory, the chimney is sealed with a protective apron.
The apron is made in two ways:
- using flexible aluminum or lead tape;
- using galvanized metal coated with protective polymer compositions.

Finishing scheme using soft metal tape and sealant
An apron made of aluminum tape is mounted in two layers, which are wrapped around the pipe around the entire perimeter. Half of the tape is inserted into the gap between the pipe and the roofing, while the other half of the tape is folded over and laid over the roofing material.
Further, the junction of the apron to the roofing materials is carefully glued using bituminous mastic or alternative means. The apron at the junction with the chimney is closed with metal profiles.
The final stage is the waterproofing of the assembled structure with a special waterproofing film. (See also the article How to do waterproofing and finishing work.)

In the photo - an apron made of sheet steel
The sheet steel apron is installed as follows:
- The roof deck is insulated with roofing material with an overlap on the adjacent walls of the chimney;
- On top of the roofing material, pre-prepared apron elements are mounted;
- The gaps between the apron and the surface of the chimney are filled with roofing silicone or other polymeric sealants.
Important: Statistics show that the most reliable and durable solution is not one of the above methods, but a combination of them.
That is, it is advisable to finish using a flexible tape, and in addition to this, install a steel apron.
Features of the use of roofing chimney seals

There is a universal tool with which the chimney finish is greatly simplified. We are talking about roofing sealants Master flush.
This type of insulation is suitable for most flue pipes, regardless of their diameter. Thanks to the use of this insulator, the chimney can be installed on the slopes of any roofing system with different angles of inclination.
Such amazing characteristics are provided due to the unique shape and elasticity of the insulator. Roof sealant Master-flash, as well as analogues, is made of special heat-resistant rubber or silicone with a working temperature range from -74 to +260 °.

Installed sealant Master flush
The installation instructions for the roof seal are as follows:
- Lubricate the inside of the seal ring with shampoo or wet soap;
- Next, we put it on the upper part of the chimney pipe and forcefully push it down;
- Having reached the roofing material, we dry the underside of the sealant from possible contamination;
- Next, we apply an insulating polymer composition to the cleaned surface and press the flange to the roof.
Within the framework of this article, we examined the most popular methods for protecting the chimney and adjoining the roofing system. In order for the result of the work carried out to be as effective as possible, it is advisable to apply the described methods not separately, but in a complex manner.
In order to simplify the finishing of the chimney and the adjacent roof, watch the video in this article.
The article will discuss how and with what to isolate the chimney pipe. Several practical methods are presented.
Chimney pipe insulation is required to prevent leaks and overheating. Simply put, it allows you to increase the life of the structure. Experts recommend performing complex work, which includes hydro and fire insulation.
Sauna chimney
When performing insulation of a chimney in a bath, the safety of people should be a priority. The main threat indoors comes from open flames. Therefore, it must be protected, having previously made the overlap resistant to high temperatures.
Basically, baths are built from wood, a highly flammable material. A very common misconception is the belief that sheeting the ceiling with metal sheets is sufficient. But in reality, such protection is not enough. After all, the upholstery will still heat up, which can lead to ignition. A popular solution to the problem is to insulate the chimney with red brick. But this is not suitable for every bath design.

There are currently two good options for chimney insulation:
- Folgoizol. A bath with such insulation will not lose heat, everything works like a thermos. At the same time, it warms up quite quickly, keeping the temperature for a long time.
- Teploizol. The material is used for winding the chimney.
A popular solution is the use of sandwich pipes, which demonstrate a high degree of safety. The construction of the insulation consists of several sections that can be easily combined with each other. This option is also suitable for saunas with a metal stove.

It is important to responsibly approach the brickwork in the bath. The duration of the operation of the building directly depends on its quality. You can not save on materials or work. After all, the need for repairs in the future will be associated with much higher costs.
Winding of a metal chimney
“How to wrap a metal chimney pipe in a bath?” - a popular question among gardeners. After all, there are many materials used for this cottage. The absence of combustible substances in the coating is a paramount nuance that must be taken into account. It is preferable to use a quality material that has all the necessary properties. It must also be completely safe to use.
The most common materials:
- glass wool;
- Fibrous building materials;
- Mineral wool.
Insulation of a metal chimney
Insulation of chimneys of a metal chimney is a separate topic for discussion. After all, it contains a number of nuances, which will be discussed later. This is a very difficult task, so it is recommended to perform it during the construction of the bath. It is more difficult to work with a finished building, because it may require rebuilding the roof.
A good solution would be to use sandwich pipes. This design is easy to manufacture, in addition, the cost of specialists will be reduced. However, the material itself does not belong to the budget. But the service life and quality fully justify its cost. Sandwich pipes are additionally insulated with mineral wool.
How to isolate the chimney, everyone decides for himself. It is important to remember that such insulation allows you to protect the chimney from the negative effects of combustion products, as well as moisture. If you do not worry about insulation in time, then there is a risk of destruction of the bath. After all, acid-enhanced condensate slowly destroys building materials. It poses the greatest threat in the spring, when the pipe begins to thaw (in more detail: "").
Box manufacturing
About how to insulate the iron pipe of the chimney, it was said earlier. Now you can move on to the next step. Many people think that making a chimney box is too difficult a task. In reality, this is not so. It is enough to approach the work responsibly, with knowledge of the matter.
Required tools:
- Drill;
- Scissors for metal;
- Compass;
- metal sheets;
- Self-tapping screws.

Stages of work:
- Hole preparation. Along the edges, it is necessary to fix the bars, which will act as a support for the body.
- Two blanks are cut from a metal sheet. They are given a U-shape. Then the finished parts are screwed to the ceiling using self-tapping screws.
- Again, two blanks are made, but they are already fixed on standing sheets with a small spade. It turns out a solid frame in the ceiling.
- Now the bottom is made for the box from a metal sheet. In the center of the workpiece there should be a hole for the chimney, here you need a compass.
- The box contains four fasteners of two centimeters. They are cut and bent perpendicular to the bottom.
- Walls are attached to the bottom. Now a chimney is inserted into the box, it is additionally fixed with clamps. The voids are filled with an insulating layer.
Chimney installation
Installing a chimney is not as simple a task as it might seem at first glance. There are many nuances that should be taken into account. If the chimney is not installed with sufficient quality, this can lead to property damage, as well as creating discomfort for the people inside, and harming their health.
Stages of work:
- The preparatory stage, where a project of work is selected, materials are purchased, and the form of construction is determined. There are straight chimneys, as well as designs with various bends.
- Now you can start assembling the chimney. Pipe joints, elbows and tees must be fastened with clamps.
- Passing the chimney through the roof using a special tool. To begin with, the level of the slope of the roof is determined, based on the data obtained, a suitable place is selected. It cuts a hole for the workpiece. From above, everything is insulated with a roof cut, and from the inside - with a cover sheet. See also: "".
- A special apron is fixed on the branch pipe. The pipe is extended to the required dimensions, its top is partially insulated with a special cover in the form of an umbrella. It will prevent atmospheric precipitation from entering the chimney.
Chimney fixture
The workpiece must be brought to the roof through the attic. All cracks, especially voids between the roof and the pipe, are filled with waterproofing. When removing the workpiece, you must remember safety precautions.
An elbow is used to secure the chimney pipe. It is designed to control the vertical arrangement of the structure. To give everything reliability, the pipe is additionally attached to the wall, using suitable brackets. Usually they are included in a ready-made set. They can also be made by hand, it is best to use metal corners as the basis for them.

As soon as the insulating structure is in place and securely fixed, it is necessary to close the chimney pipe with an umbrella. It is designed to protect the structure from precipitation, poplar fluff and fallen leaves. It is also necessary to think in advance how to cover up the chimney pipe, in order to avoid leaks.
Replacing a brick pipe with a metal one
If a brick chimney is not enough, it can be further extended with a metal pipe. The task is laborious, but quite realizable. It is important to approach it with all responsibility.
To begin with, a flat steel platform with a pipe is made. Moreover, its diameter should be the same as the diameter of the metal pipe that is planned to be used. The site must be securely fixed. It is fixed with dowels and screws. Sealing will add additional reliability.
Work order:
- On the brickwork, you need to mark the points at which the mount will be installed. They can not be placed on the masonry seam. It is advisable to place them closer to the center of the brick, and not on its edge.
- Holes are drilled in the marked places to accommodate the dowels. At the same points, holes are made on a flat platform, self-tapping screws will go there.
- A refractory sealant is applied to the brick base, then a steel platform is placed there. Self-tapping screws are screwed into the dowels. It is important to monitor the fit and uniformity.
- Now it remains to wait for the sealant to dry completely and proceed directly to extending the chimney using a metal pipe.

Important installation details:
- If the length of the pipe section above the roof exceeds 1.5 m, it is recommended to equip it with special stretch marks that strengthen the structures (read also: "").
- It is impossible to install a branch pipe, the length of which from the stove to the head is more than 5 m.
- Installing special plugs allows you to get rid of condensate.
- The section of the chimney above the roof must be longer than 1.5 m.
- Do not narrow the pipe when installing the chimney.
- Nearby structures made of flammable materials should not be heated to a temperature of 50 o C.
- The chimney must not be placed near electrical wiring.
The decision on how to insulate a metal chimney pipe should be made based on the budget, as well as the needs of the structure. It is important to approach the task as responsibly as possible, performing work in full compliance with all norms and nuances. Then the insulation of the chimney will last a long time without any complaints.
When arranging a chimney, the question inevitably arises of how to cover the outgoing pipe. The temperature difference, the impact of the external environment and weather conditions - all this affects the durability of the chimney. An important part of the system is its decorative effect. Beautiful cladding will elevate the level of aesthetic perception of the roof and give it a complete look.
Table of contents:
The choice of finishing materials
Initially, when choosing a material for finishing a chimney, its protective capabilities must be taken into account. Of the negative factors that reduce the life of the chimney, the following are distinguished:
- weather influence,
- temperature difference during the year
- high operating temperature
- ultraviolet radiation.
The main problem remains the difference between the high operating and outdoor atmospheric temperatures. Because of this, condensate forms in the chimney, which enters the structure and gradually destroys it. Good chimney insulation with lining materials can significantly reduce the formation of condensate. In addition, it is important to ensure the compliance of facing materials with respect to the roof roof. The material used must have a high degree of weather resistance and wear resistance.
Finishing the chimney is performed using the following materials:
- decorative brick,
- tile,
- cement boards,
- roofing material,
- ready-made solutions.
Finishing the chimney pipe with decorative brick is the most practical option. Clinker bricks are especially good in this regard. It is not noticeable pollution during operation and it goes well with any type of roof. Clinker tiles are distinguished by high mechanical strength and resistance to atmospheric influences and are more often used for lining tall thin pipes. For a powerful chimney structure, solid bricks are used, stacked in a checkerboard pattern on a special adhesive composition.
Plaster is more often used for decorative finishes. Due to its versatility and affordable cost, this finishing method is quite often used. The process of applying the material itself is similar to finishing the facade walls, while the choice in the direction of mineral or acrylic varieties will significantly increase the service life.
Cement slabs are good because they are light in weight and have various texture variations, thanks to which they are quite capable of recreating any surface with their help. At the same time, the material is environmentally friendly and non-flammable.
Under the roofing material, corrugated board is more often used. It is a profiled metal sheet, manufactured from steel by cold rolling. Profiled sheeting is interesting because in addition to its high protective properties and its durability, it also has a low price and is quite decorative at the same time. Metal structures are not heavy and are easy to assemble, while providing an attractive aesthetic appearance.
The original solution is the use of ready-made structures. More often these are rubber products that provide heat and waterproofing. A wide protective apron will protect the chimney from moisture and dirt getting into the roofing pie, but it is not a good design element. It is more suitable for external chimney pipes made of stainless steel.
What rules and regulations must be followed
Before cladding, it is important to pay attention to the compliance of the finished structure with the norms of SNiP. Requirements for heating and ventilation include the following points:
- insulation of hot surfaces provides for the laying of thermal insulation capable of providing a temperature difference on the surface of the cladding and the inner part up to 20 ° C,
- pipelines and air ducts must be made of materials with a protective anti-corrosion coating. Or from those that are themselves characterized by corrosion resistance,
- the free space between the pipes and the roof must be covered with non-combustible roofing materials,
- the use of asbestos materials is not allowed,
- if the stove is heated with coal, then in this case it is impossible to install pipes for the chimney made of stainless steel,
- the mouths of the chimneys must not impede the free exit of smoke from the chimney,
- the thickness of chimneys made of clay bricks should be less than 120 mm, those made of heat-resistant concrete - 60 mm.

Stages of finishing pipes on the roof
- Facing finishing begins with the installation of a special protective apron at the exit of the chimney pipe to the roof. The apron is laid in two layers: one is placed under the roof, the second layer of the protective apron is laid on top of the coating. The junction points are carefully sealed.
- Additional pipe finishing is required in such cases:
- insufficient draft in the chimney,
- providing decoration of the chimney elements facing the roof,
- the lining of the chimney pipe was made of simple brick, which did not have the proper degree of aesthetics,
- the materials used for the chimney do not match the style of the house, standing out from the general view,
Pipe sealing
Finishing the chimney on the roof first of all begins with ensuring the proper degree of sealing of the pipe outlet. Relatively recently, the norms prescribed the construction of expanded brickwork at the exit of the pipe. This was required in order to carry out the summing up of the roofing material in order to seal the joint. In the end, the design got a rather bulky look and was unattractive from an aesthetic point of view. Modern materials make it possible to avoid such requirements and at the same time provide effective sealing. Any roofing material must be wrapped on the chimney laying. Next, a protective apron is installed around the pipe. The apron itself is often made of 2-4 mm thick galvanized metal, but it requires a polymer coating for weather resistance. For aprons, non-combustible materials that can withstand high temperatures are always used.

The most optimal option for ensuring high-quality sealing is a combination of a flexible sealing tape and a metal apron with a polymer coating. The tape is made of aluminum foil with the addition of bituminous and polymeric materials as a self-adhesive layer. It is laid under the apron, at the exit of the chimney to the roof. After laying the apron, a transparent silicone sealant is applied to the seams, which completes the seal.
Execution of stitching
Finishing a brick chimney often requires additional lining. As a rule, it is required in such cases:
- brickwork is made of simple bricks,
- with a high pipe height of more than two meters above the roof surface, weak traction is provided,
- aesthetic tastes.
In addition, if the air ducts have a light plastic base, then often there is no need for brickwork. In this case, the casing simply closes the frame through which such communications pass.

As a material for the frame, a profile of the same thickness and texture is often used, which is used for drywall. In this case, all connections are made using metal dowels.
Covering the chimney with sheet metal is one of the most practical ways. The cost of labor intensity and the price of the material is minimal, installation is quite simple. With proper thermal insulation, the surface of the skin will not be exposed to strong heat, which will allow it to be coated with rubber paint to provide additional protection from ultraviolet and weather effects on the metal. Also, coloring will give the design additional aesthetics.
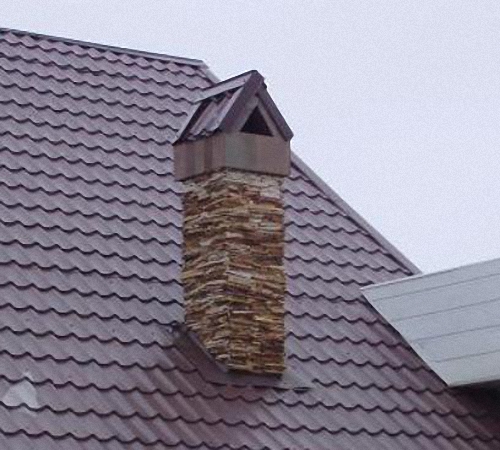
Pipe lining
A beautiful finish of a brick chimney often means lining pipes with decorative stone of artificial or natural origin. In this case, it is required to line the pipe with high-quality decorative bricks and ensure the strength of the fasteners with reliable connecting materials. Otherwise, when exposed to temperatures, the lining may break off the pipe. But at the same time, it is worth remembering that high-quality decorative brick already has the proper degree of aesthetics. Often, it does not need additional lining, as it does not violate the integrity of the selected composition. If the cladding elements are of considerable weight, then in this case they will require additional reinforcement. In addition to the adhesive composition, hardware or dowel fasteners are often used along the edges of the tile.

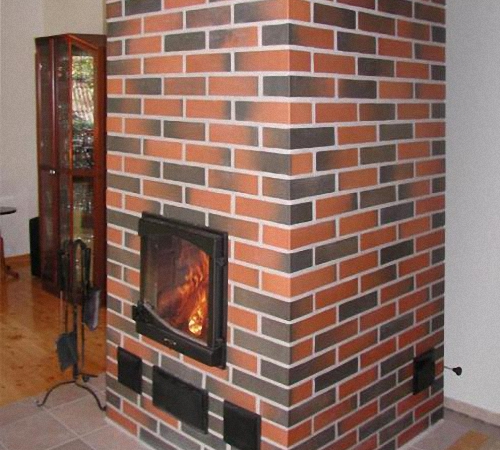
Decorating the chimney inside the house: selection of material
In a country house, a fireplace or stove is often built in the living room. In this case, the chimney often passes through ceilings and often through all rooms. In this case, there is a need to harmoniously fit the protruding parts into the interior.
- First, a frame is constructed from a metal profile, which is then covered with sheets of drywall. Ordinary material is not suitable for this, so a fire-resistant drywall sheet is required, which bears the designation GKLO.
- Mineral or fiberglass wool is placed inside the frame to provide thermal insulation. Thanks to this material, the surface of the sheet is ready for finishing with any material, including even simple wallpapering on the sheet.
- Finishing the chimney inside the house does not require special expenses. For example, ceramic tiles or plaster moldings will go well with many interior styles. It is advisable to make some elements in the form of a mosaic, especially its combinations of glass of different colors.
The most durable and durable material for finishing, both internal and external, is clinker brick. It is well suited for interiors made in a minimalist style, and often does not require additional finishing.
Plaster is more often used for interior decoration for simplicity and antiquity. This is the oldest way, still retaining many adherents.
The choice of decoration method depends more on taste preferences, since proper thermal insulation of the chimney will allow you to make exterior decoration with any material.
Advantages and disadvantages of cladding materials
The market offers a huge variety of different materials for decoration. In order not to get lost in this assortment, it is important to know their distinctive types, as well as qualities:
- Sidings are plastic panels for exterior decoration. They are installed on the chimney if high-quality thermal insulation has been provided. The material requires installation on a rigid base, is non-toxic and is not afraid of water. At the same time, it melts when exposed to a flame or high temperature and is characterized by low strength and frost resistance.
- Plaster is distinguished by its durability and resistance to atmospheric conditions, but at the same time it is rather laborious in laying and is characterized by high cost. Also, the application of plaster often implies a subsequent layer of decorative style, or painting.

- Clinker bricks are valued for their strength and durability. At the same time, its decorative properties are also on top. Of its shortcomings, a high price is distinguished: from 1000 rubles per 1 m2, and its weight. Often the design of the chimney in this case will require additional reinforcement.
- Ceramic tiles are suitable exclusively for interior decoration. It is mounted on even and flat surfaces, and at the same time it is demanding on preliminary preparatory work. The tile is characterized by its aesthetics and low price.
- Decking is one of the best materials for finishing the roof and chimney. The material is light weight, resistant to stress and weather. At the same time, manufacturers offer an extensive range of colors. Of the minuses of corrugated board, its poor sound insulation is distinguished.
- The metal tile is good for its ease of installation and durability. Finishing the chimney with a metal profile will ensure the aesthetics of the structure and its resistance to climate. Like corrugated board, metal tiles are not able to provide good sound insulation. In principle, this is not so important when finishing the chimney.
We also recommend
 Modular house of two change houses and a veranda Country houses based on change houses
 Automatic gates with a homemade drive: we build with our own hands
 How to build a doghouse and an aviary for a shepherd dog - a warm home for your pet A drawing of a doghouse for a German shepherd
 Adjoining the roof to the chimney pipe Lining the chimney with a profile
 We sheathe the chimney with corrugated board Facing a brick chimney
 How to make a trellis for cucumbers: we make supports from improvised means A trellis in a greenhouse for cucumbers with our own hands