How to make a gazebo out of wood: instructions with photos. Sizes of arbors: we choose the optimal building for a different number of people Rectangular arbor with our own
There is one element for giving, which cannot be replaced by anything else. A rectangular gazebo is a building that is built in a short period of time, but will serve for a long time. Food eaten outdoors is better digested and more beneficial, and spending time with your loved ones is priceless. In today's world filled with electronics, many people forget about live communication. But it is precisely this that is the key to strong relationships. Next, we will consider how a rectangular gazebo can be built with our own hands.
What size
In order to fully give a considered answer, it is necessary to analyze a few simple points:
- Where will the building be located?
- What territory can be allocated for it?
- Will the gazebo serve as a kitchen?
- How many people will be in the building at the same time?
- What kind of seats will be installed inside?
- Will the structure adjoin the house in the form of a canopy?
- Will the water rise high during heavy rains?
- Will communications be required?
There is no need to make the structure too large, as it will not be used to its full extent so often. Moreover, it will be an additional waste of maintenance. At this stage, you need to think about whether all the walls of the gazebo will be open or several of them will need to be closed. The easiest way is to imagine a table in the middle, surrounded by chairs. You can make a solution that is distinctive for some cultures - sunbeds.
We draw up a drawing

After considering the above questions, it's time to transfer the plan to a piece of paper so that it becomes a little more real than our imagination. Here are some projects that will take up little space, but allow you to place all the necessary elements.
- 2.5 × 3.5 m. This solution is enough to place a dining table and chairs inside. Four people will feel quite comfortable.
- 3 × 4 m. In such a gazebo you can invite guests or gather a large family at a good table.
- 4 × 4 m. This option is with a barbecue. A small platform is made with dimensions of 1 × 1 m without covering, so that the smoke can freely rise and not linger under the roof.
- 5 × 5 m. In such a gazebo, it will be possible to build sunbeds on which mattresses and pillows are placed. It will become a really good place to relax and spend time.
Dimensions are given as examples. They can be varied and adjusted to specific needs and land. Knowing the specific parameters, you can choose the type of foundation that will be used. There are several options that do not take much time in construction, but will be a good support for the whole structure:
- columnar brick;
- columnar monolithic;
- pile;
- solid slab.

How each of them is made, we will consider a little lower. The material planned for use is also applied to the plan. The gazebo can be closed from all sides with double-glazed windows. In this case, you can make a large number of casement or sliding windows. In such a building it will be comfortable in any weather. The most common material used is wood. It is affordable, easy to process, and no special tools are required to handle it. Profile metal can be easily used for the frame, but to work with it you need to have welder skills. One wall or several can be lined with facing bricks, which looks quite attractive and makes it possible to combine the design with the main building.
Foundation

It was said above what types of foundation can be used for buildings of this type. The easiest to build will be columnar brick. To implement it, you will need:
- Dig holes to a depth of 30 cm. This is done every meter along the length of all walls. Sand is poured with a layer of 20 cm. It is well rammed, then wetted with water so that the material shrinks.
- For each element you will need 4 blocks. Their size should be 20 × 20 × 40 cm. These are standard dimensions for cinder block or other similar building material.
- The first two are placed on the prepared pillow. They are leveled. It is most convenient to use a laser level, with which a line is projected. It will be a guide for all elements. A solution is applied between the stones to hold them together. They are equal in level.
- Thus, two elements are set in all corners.
- A fishing line is stretched between them, which will help to set intermediate supports.
- From above, two more bricks are perpendicularly laid on the mortar.
The foundation can be considered ready. But it is important to remember that this option is suitable for those areas where the soil has sufficient density and does not soak excessively during rains. Otherwise, the gazebo may lose support and collapse.
The columnar monolithic foundation resembles the previous version, but has its own characteristics:
- The optimal step of the supports for a particular structure is selected. It can be within 1-1.5 meters.
- First, holes are dug in the corners. Their depth should be below the freezing of the soil, and the dimensions, for example, 40 × 40 cm.
- Further, with the selected step, holes are dug along the future wall. If the width of the building is large, then in the middle it is also necessary to provide several supports for the central beam. If this is not done, then the floor will not be strong enough.
- Sand is laid at the bottom of each recess in the same layer as in the previous version.
- Formwork is made from edged boards, OSB sheets or plywood. It should be of such a height that the head is 20 cm above the surface. This will protect the main building material from getting wet during rains or other precipitation.
- The form is mounted and fixed.
- The inner walls are covered with roofing material.
- Reinforcement bars are inserted into the middle. It will be more efficient to make a crate: 4 main vertical elements should be 12 mm in diameter, the rest can be taken 8 mm. They are tied together with a knitting wire in such a way that a parallelogram is obtained. The transverse segments are arranged in increments of 30–40 cm.
- The prepared concrete solution is poured. It needs to be well sealed. It is better to do this with an electric vibrator. If this is not possible, then in extreme cases, you can use a piece of reinforcement.
- The upper ends of all elements are aligned in the same plane to facilitate further construction.
- At this stage, there is an advantage to making a blank for the grillage. To do this, you need a metal shank (a strip of sheet metal). Its width should be at least 5 cm. 2 pieces of 15–20 cm are made. They are vertically immersed in a fresh solution to the distance of a beam, which will then be applied.

You can also make a fixed formwork for such a foundation. To do this, you need an asbestos pipe with a diameter of 250 mm or more. Pits are dug in the same way, backfilling is done, but small gravel is still laid on the sand with a layer of 15 cm and is well rammed. Pipes are inserted inside, they are leveled. Crushed stone is poured up to half on the sides and compacted. Several reinforcement bars are inserted inside and the solution is poured. In the same way, blanks can be made from metal plates for timber.

Like the previous version, the pile foundation will allow you to withstand the construction of a large mass. It will be possible to build brick walls. The easiest will be working with screw elements.


In order for the supports to last as long as possible, they must be treated with an anti-corrosion agent and coated with paint. You can prevent the growth of weed under the floor of the gazebo as follows: sheets of roofing material are laid over the entire area. The overlap is 10 cm. From above, a 5 cm sand filling is carried out and it is well rammed.
The base in the form of a monolithic slab will allow you to achieve two goals in one pass - to make a foundation and prepare the floor.
- The territory is marked.
- A pit is dug to a depth of 30–40 cm.
- The bottom is covered with a layer of sand of 15 cm. It is well rammed.
- The next step is to lay a metal crate, which will give strength. Instead, you can use building rubble - broken bricks, the remains of concrete slabs or natural stone. It is laid in an even layer over the entire excavated area.
- Lighthouses are made from metal pipes or wooden pegs. They are leveled. At the same time, you can make a slight slope in one direction by 1–2 cm. This will allow spilled liquid or rainwater that has fallen into the ground to calmly drain.
- The solution is poured and pulled together with a rule or a flat metal bar, for example, a piece of profile for drywall.
- If it is not planned to lay tiles, then ironing can be done on top. To do this, dry cement is applied to the still damp floor and rubbed. Subsequently, a smooth surface with a slight gloss is obtained.
- The construction will reach its full strength no sooner than after 27 days.

In the case when there is absolutely no desire to mess with concrete and the foundation, you can simply dig the racks into the ground by 50-70 cm, make a backfill of crushed stone and sand and tamp everything well.
Main structure

The principle of erecting a wooden and metal frame is in many ways similar. For the first option, you will need a 10 × 10 cm timber and a 10 × 5 cm edged board. In the second case, you will need an I-beam channel for the base, and a square profile pipe measuring 6 × 6 cm or 8 × 4 cm for the racks. In this case, all work is carried out using welding machine.
- If the first three options for the foundation were chosen, then it is necessary to make the lower harness. To do this, the timber is cut along the length of each side, in the same way another element is made, which will be laid in the middle.
- They connect with each other. To do this, a cutout is made in the corners with a depth of 5 cm, and a width of 10 cm. The grooves are joined together and fixed with self-tapping screws.
- The next step is to install the corner posts. For them, the same material is used as for the grillage. They are attached to the base with metal plates-corners. To make the joint more reliable, it is necessary to cut the spike and sink it into the corresponding groove.
- If the walls are more than 3 meters, then it is necessary to make additional vertical supports from the edged board. You can install them after 1 m.
- From above, all elements are connected using two boards, which are nailed on the inside and outside. The corners are reinforced with metal strips.
- The next step is laying the floor. It can be made from a sanded board, which is nailed end-to-end. When finishing, it can be varnished and stained.
- If a shed roof is planned, then the racks on one side must be made 20 higher – 30 cm. For a gable or four-slope, they must be the same size. For the first option, it will be enough just after 40 cm to install boards from one wall to another and fix them. For a gable, you will need to assemble several farms, they can be arranged in increments of 60 – 100 cm. They represent an isosceles triangle. First of all, two extreme ones are mounted. They are leveled in the horizontal and vertical plane. Between them, 3 fishing lines are stretched, which will serve as a guide for the rest of the components. You can connect them to each other using a ridge beam or oblique jumpers. A crate is made for a specific flooring, and the area is covered.

For a monolithic foundation, the corner posts must be sunk into the ground. This can be done at the filling stage or after. At 4 corners, holes are dug to a depth of 50 cm. Columns are made according to the foundation principle, which was described above. They will be the support for the racks. Further assembly is the same as in the previous versions, but it is no longer necessary to perform the lower trim. In this case, you can go the other way. The main racks may not be wooden, but brick. To do this, columns are laid out in the corners, which are necessarily reinforced inside. A wooden beam 10 × 10 cm is laid on top of them. The elements are tied together, as described for the grillage. This will be the Mauerlat, which will become the basis for the roof.

Some elements that can be located inside have already been mentioned in the course of the article. The space between the uprights may be open. Several sides can be covered with transparent polycarbonate. In another version, up to the middle, masonry is made with facing bricks. The remaining opening is left as is, or a wooden grate is mounted in it. Around the area can be planted with wild grapes or ivy. Over time, he will envelop the entire gazebo and get a green island.
If desired, the structure can be made with elements borrowed from the kolyba. To do this, a hole is left in the middle of the roof, which will be used to exit the smoke. In this case, you can make a bonfire right in the middle, which will allow you to enjoy the fire in any weather, sitting around it on comfortable chairs or sunbeds.
It must be remembered that wooden structures need constant maintenance. At least every 3 years, it is necessary to remove the old coating and reapply a varnish or paint that is intended for outdoor use. In this case, it will be possible to avoid drying out and decay.

Video
An example of the construction of a rectangular gazebo:
Photo


A garden gazebo or garden house is a great place for family or friendly gatherings, for lunch or dinner in the fresh air. It not only performs its direct function, but also decorates the site. You can build a gazebo in almost any shape and size with your own hands, but there are some important things to be aware of. This article will talk about the optimal dimensions of the gazebo and provide drawings of buildings of various shapes.
Dimensions of the gazebo and plot
A gazebo made of wood can be made in different shapes and sizes, depending on the size of the site and how many people will be accommodated in it.
When planning the construction of a gazebo, think about how its size will correlate with the area of \u200b\u200bthe site. The building should not occupy too large an area, otherwise it will not look very good in a small area, just like a small gazebo in a huge area. How often do you receive guests and how many people usually visit you? You need to answer this question in order not to plan too large a building, which will occupy the usable area of \u200b\u200bthe site and require high costs for building materials. Of course, you can make a building of any size, but there are some optimal sizes of arbors with which the building will be comfortable and look harmonious.

If the garden house will be used mainly for lunches and tea parties, then 2 sq.m of area is enough for each person. If a whole recreation area with armchairs is planned, then 4 sq.m. are needed for each person.
When compiling a project, we must not forget about the foundation. Usually for garden arbors it is made columnar - it is strong enough for easy construction, but at the same time does not require large material costs. The foundation is made on each side 7-10 cm more than the floor. The distance between the columns is left within 150-200 cm. The height of the gazebo from floor to ceiling (useful height) is usually made equal to 2.2 m - this is enough to make even a tall person feel comfortable.
Table dimensions
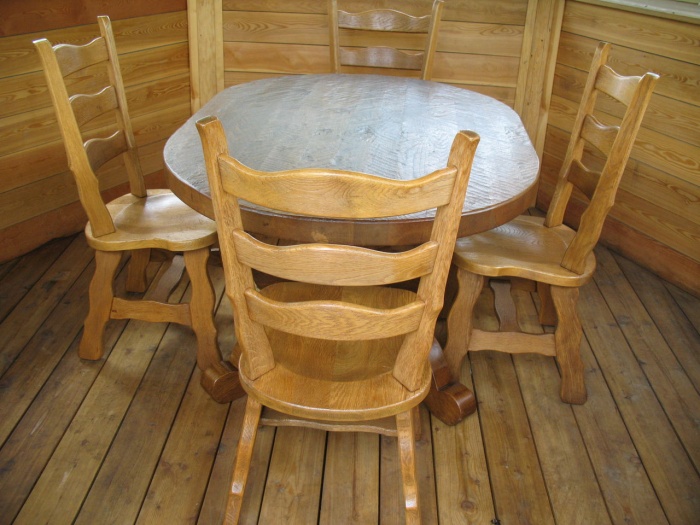
The table is an important part of the garden gazebo. Its size depends on the number of guests. Usually the table is made 50-70 cm wide, length - 70 cm for four, 110 cm for six. In the gazebo, it is necessary to leave sufficiently large passages around the table for ease of movement. Therefore, the width and length of the internal space must be at least 150-200 cm (for a table 50 * 70 cm). If the gazebo is of the correct polygonal shape (hexagonal, octagonal, pentagonal), then the table can be made round.
Rectangular
A rectangular or square gazebo is one of the most practical forms. It is easier to build than a polygonal one, it will fit more people than, for example, a hexagonal one of the same area.
Often it is made square, but sometimes the sides of the gazebo for giving are made in different sizes, for example:
- long side - 4 m,
- short side - 3 m.
The height of the arbor from floor to ceiling (useful height) is 2.1-2.2 m. Up to 20 people can be accommodated in such an arbor with an area of 12 sq.m. If you make it smaller:
- long side - 2.5 m,
- short side - 2 m,
then it has enough space for eight. A square gazebo is usually made 3 * 3 m in size.
Hexagonal
The hexagonal shape is considered classic. It is economical in terms of the cost of building materials and easy to implement, as it consists of a set of identical parts:
- 6 racks,
- 6 triangles for the roof,
- 6 sections of fencing.
A building with the following dimensions for 10 people will be convenient:
- distance from corner to opposite corner - 2.9 m,
- width - 2.5 m,
- height from the base to the ridge of the roof - 2.8 m,
- side length - 1.45 m,
- useful height - 2.2 m.
The area will be approximately 6.5 sq.m. It can also be placed in a small area. Below is a drawing of a hexagonal wooden gazebo with such dimensions.
A wooden gazebo is made on a columnar base made of bricks. Racks can be installed both strictly vertically and at an angle so that the building expands upward.
Octagonal
The gazebo can be made in the form of an octagon with a length of each side of 2.66 m and diagonals (distance from one corner to the opposite) 3762 mm. To do this, you need to draw a regular octagon on the ground.
Pentagonal
If you want to build an unusual gazebo, make it pentagonal. It can be not only equilateral, but also an elongated pentagon, for example, you can choose dimensions 5 * 3 m. If the gazebo has dimensions 5 * 5, then the side of the pentagon should be 146 cm long, as shown in the drawing. In the center, you can put a round table with a diameter of 110 cm. At the same time, for convenience, the structure is made expanding upwards.
Mini gazebo
Such a small garden house for 4 or 6 people is a table with benches and a roof. It can be made entirely of wood or have a metal frame. This option is suitable for a small area. The width of the gazebo is 150 cm, the length is 150 cm for 4 and 200 cm for 6 people. Table length - 80 or 120 cm, width - 60-80 cm, seat width - 40-45 cm.
A gazebo of this shape can be made larger, as in the drawing below.
Projects with barbecue or oven
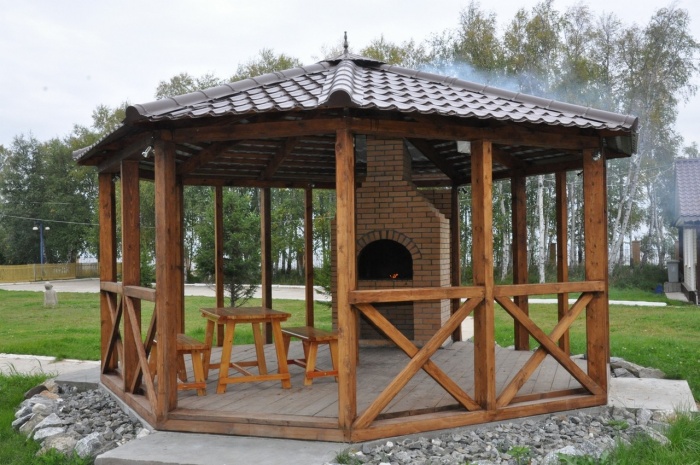
Even in a wooden gazebo of a suitable size, you can install a barbecue, barbecue or oven. Particular attention is paid to fire safety measures. To protect the building from fire, the floor is made of concrete, and part of the walls, located in close proximity to the source of fire. Wooden parts are treated with flame retardants. According to the rules of SNiP, at least 3 m of free space must be left in front of the fire source, that is, the gazebo with barbecue should be quite large - at least 4 * 6 m. It can be either rectangular with a classic gable roof or polygonal.

It can be closed or open. Closed gazebos with barbecues, which can be used in winter, are usually located close to the house, open, summer ones, on the contrary, at a distance. However, when choosing a place for a gazebo, keep in mind that the smoke from the barbecue or stove should not enter the house.
The brazier and all related details, such as the hood, chimney, must be included in the drawing immediately. When developing a project, it will be necessary to draw frontal and lateral (profile) projections of the building, as well as a plan - this is especially important for this. The brazier can be either ready-made metal or brick, folded in the country with your own hands.
Attention! If the gazebo is built on a columnar or strip foundation, and not a slab foundation, be sure to include a separate foundation for the barbecue in the plan - this is a heavy structure, it must be stable.
The barbecue is lighter, has a round shape, it can also be placed in the center of the building. It can also be metal or brick. A metal barbecue is placed in a ready-made garden house on a floor covered with sheets of tin. In the gazebo with a barbecue, you need to provide an exhaust hood. An intricately shaped brick barbecue might look like this.
It is also necessary to make a drawing of the brazier itself. A brazier with a chimney may look like this.
The hood is better to do in the form of an umbrella, it is more effective.
If the brazier is lined with bricks, then you need to draw up orders, that is, layouts of bricks in rows. This will help you not only quickly and accurately fold the hearth, but also calculate the amount of brick for it. Ordering is also useful if you plan to make a stove or fireplace.
You can also make a Finnish gazebo with a grill located in the center of the room on a stone countertop.
materials
For the erection of gazebo racks, a wooden beam measuring 10 * 10 or 15 * 15 cm is usually used. You can also build a chopped gazebo from a log. It will go well with a house built from the same material. The floor is made of OSB boards or slabs, you can also pour a concrete screed or tile the floor. For the roof and fencing, boards of various sizes are also used: 10 * 5, 150 * 5, 75 * 2.5 cm.
How to build a blueprint
To build drawings with your own hands and transfer them to the area, you need to remember a few rules from school geometry.
If the building is rectangular, its corners must be strictly 90 degrees. You can build a right angle using the Pythagorean theorem - for this you need to draw a triangle with sides of 3, 4 and 5 m. The angle lying opposite the side of 5 m will be rectangular. Also, to obtain an even rectangle or square, it is necessary to control that the diagonals of the figure are the same.

If you build a regular hexagon, then it consists of 6 identical equilateral triangles or 2 identical trapezoids. It is easy to draw a regular hexagon on paper using a compass. On the ground, you can do the same, using a rope with a peg instead of a compass.
First, a peg is driven into the center of the proposed gazebo and a circle is drawn. Next, a straight line is drawn through the center, which will intersect the circle at two points. These are the two vertices of the hexagon. Next, a rope with a peg is placed at these points and two more circles are drawn, each of which will also cross the first one at two more points. These are 4 more vertices of the hexagon. Drive pegs into each vertex to mark them.
To build an octagon, draw a square and draw diagonals in it. Mark the intersection point of the diagonals. Divide each side in half and draw from the point of intersection of the diagonals through the midpoints of the sides segments equal to half the diagonal. Their ends and corners of the square will be the vertices of the octagon. Check that the diagonals of the figure are equal. The supports are positioned as in the drawing.

Good day to all!
Today we will talk about how to build a gazebo at your dacha yourself. On the garden plot, it is one of the important elements of a comfortable stay, at least for most gardeners. Agree, because you not only come to your site to work properly, but also to relax. And what rest can be compared with outdoor recreation in a beautifully arranged gazebo.
If we compare the designs of arbors in general terms, they can be divided into categories such as open (a structure without walls, only a roof, used in the warm season), closed (can be compared with a small house) and portable (these arbors can be assembled, disassembled and put it anywhere).
As for the materials and dimensions of the structure, this largely depends on your capabilities, tastes and preferences. The easiest. Below is a diagram of a simple gazebo that you can easily build yourself.

The choice of the type of gazebo, closed or open depends on how you plan to use it. If you need a year-round gazebo, then undoubtedly only a closed one will do. And if you are in the country only during the planting and assembly seasons. That open gazebo is enough for you. It will take much less materials, and there will also be little cost in terms of money and time.
As for the roofing material, here, no matter what kind of gazebo you have. Slate, corrugated board, flexible tiles, cellular or monolithic polycarbonate are best suited.
At the beginning, we will see how to make a simple open gazebo from different types of materials.
The first step is to draw up a sketch and drawings of your gazebo, given the size of the site. Then, according to the drawings, the required amount of the desired material is acquired. By the way, you make a drawing for the material from which you will build.

You also add to the sketch whether you will have a brazier with a barbecue or an oven.

If you don’t care about some particularly “cool” design, then it’s best to make the gazebo rectangular. It will be much easier to build it than a polygonal one, and you will have to do much less markup. A drawing of the foundation is made separately. Where you specify the dimensions of the posts, their height and the depth to which they will dig.
In the drawing of the roof, it will be necessary to indicate the rafter system, the fastening of the upper trim, the lower support for the rafters and the step between the rafters.

For the convenience of work, attach to your project a detailed installation diagram of technical units, indicating the options for their fastening to each other..
Work begins with the installation of the foundation. For a gazebo, a hole up to 80 cm deep is enough.
We spread a layer of sand on the bottom, after which the supports are set and concreted. At the same time, one must not forget to check the level of their evenness, their distance from each other and the level in height.

After that, the lower harness is made and the floor from the log is equipped. For this, wooden bars are used. After the floor frame is made, you can lay out the flooring from the boards. Next, the upper trim is made and the roof frame is assembled. Then it is sheathed with a board and covered with roofing material.

The design is ready and you can proceed to its fence. First, we put horizontal bars, which will play the role of a railing. Then we put vertical racks. If you decide to make a fence in the form of a wooden lattice, then first you make a frame from a bar, and then you stuff the lattice itself inside it.
 Below is a diagram of the assembly of a gable gazebo.

And here is a diagram of the foundation:
 This diagram shows how to equip the roof:
 Can make a simple gazebo not only from wood but also from metal. For this purpose, you can use both aluminum and simple iron. All connections are made by welding.


If you decide to make an open gazebo with a barbecue, then you also make a sketch where you need to indicate where you will put it on your site. This is necessary in order to subsequently correctly bring water to the gazebo, and if there is gas, then it.

Such gazebos usually replace summer kitchens, so its construction must be approached with more care.
When making a drawing of a gazebo, it is necessary to reflect not only the dimensions of the future summer cottage building, but also the location of a fireplace or barbecue in it. Additionally, a diagram of the foundation and chimney is drawn. In addition, the project includes the brazier itself, the shape of the brazier, the number of firing points and laying the stone in rows.

Pergolas glazed (closed) for summer cottages and houses with barbecue inside
Most often, gazebos with barbecue facilities are closed. It will already be a full-fledged not only summer, but also winter kitchen. Structures are of different types: with windows, and fully glazed to the floor.


The material for the construction of arbors is both wood and brick. But the main element is glass. At the same time, there are three types of glazing: cold, warm and triplex. Cold glazing is the simplest way, when the glass is only inserted and no insulation is made. At the same time, the temperature inside will be ten degrees higher than outside. With warm glazing, good thermal insulation is made. And walls made of timber or brick will protect well from the cold. The method of frameless structural glazing is called triplex.

As for the glass itself, for glazing, you can use both plain glass and double-glazed windows or stained glass windows made of tempered glass.

In order to better navigate the choice of glazing, the table below shows the characteristics of several types of glazing.

As mentioned earlier, before you start building a gazebo, you need to choose the right place for it.

You can install it wherever you like. However, it is better to adhere to the rule that it is better not to put it next to a bathhouse, a compost pit, a toilet, a pond, a well, and of course, at the fence of neighbors.

In shape, in addition to standard rectangular arbors, you can build it in a round or oval shape:

In order to glaze the structure, several steps are required.

The first step is to apply a layer of sealant. When the sealant dries, it will be possible to insert either finished frames or glass into the appropriate grooves. After that, all joints are processed and re-coated with sealant.
A closed gazebo for a summer residence with a barbecue and a turnkey barbecue - do-it-yourself (project and drawing)
Closed gazebos with barbecue and barbecue look much more profitable and cozy than open ones. In addition, you can comfortably stay in it if it suddenly gets colder.
There are a lot of different options for creating such structures. It can be made of brick or timber and glazed, or you can make the part where the barbecue is located from stone, and the living room from wood.


When compiling a project, it is necessary to take into account all the nuances. In order not to be mistaken with the quantity and size of the required material, all this must be indicated in the project. In addition, do not forget to draw up a separate project for the barbecue and barbecue, as it will have to be built more carefully.

It is also necessary to take into account the fact how the smoke will come out. Since harmful gases are released during combustion, good and reliable ventilation will be needed.
In addition to stand-alone structures, of interest are gazebos attached to the house. What they are good for is saving space and creating additional house territory. You can get into such a gazebo immediately from the house, and not go to it through the entire site.


Such an extension is being built to almost any wall of the house, the main thing is that this wall is in good condition, without chips and cracks. A good option is if there is a window on this wall through which you can serve the necessary things.
Gazebo with summer kitchen
This type of gazebo is most often combined and consists of two zones. The first zone is the kitchen, where the barbecue grill is located. Since cooking here is associated with fire, it is best to make this area out of bricks. The second area is the living room. Here you relax, communicate, etc. This zone is best made of wood.


As you can see, there are a lot of options. As they say, how many people, so many views. Therefore, the choice is always yours.
And at the end, watch a short video on how to make a wooden garden gazebo.
Good luck with your building!
We will send the material to you by e-mail
ABOUT ennoblement of the territory, this is, as a rule, the construction of related facilities for recreation and creating the integrity of the landscape ensemble with the house. We are talking about such a structure as a do-it-yourself gazebo, the drawings and dimensions of which are individual for the site. The object is multifunctional and easy to work independently. From what and how to make - two questions that require detailed consideration. What will we do!
Rectangular gazebo plan
Types of gazebos from various materials - the advantages and disadvantages of each
Traditionally, the construction of the gazebo is carried out from the same material that was determined for the construction of the house. Wooden timber or log platforms will create a single picture with it, stone is in harmony with brick, forged or profiled rest corners are acceptable in any case.


Before building a gazebo from, it is important to see the harmony and appropriateness of a heavy object next to the house - it can no longer be moved. The price of brick buildings is high.
Related article:
combination
Often, the owners, in an effort to save money, use the materials left over from the main construction for the construction of the gazebo, combining iron, wood and brick. There are some interesting options:


Video: options and types of gazebos for summer cottages
Step-by-step instructions for making a wooden gazebo
Project
Analyzing what was written above, we can confidently conclude that a wooden gazebo with your own hands is suitable for self-production without special skills. The drawings and dimensions of the roof dome are as follows:

The position of the frame racks is oriented along its extreme points. The advantage of the hexagonal dome is an interesting appearance, better resistance to wind and snow.

materials
To make a budget option, you will need:
- Rack beam 150 * 150 mm - 6 pieces of 2 m each;
- Strapping and rafter timber for roof elements - 100 mm and 40 mm for battens;
- Roofing iron or tiles;
- Carved shields;
- Edged board;
- Fasteners - self-tapping screws, bolts;
- Impregnating and decorative compositions - varnish, stain and others.


Depending on the complexity of the design, a reinforcing bar, steel corners, logs are additionally required. Next, consider the algorithm for erecting a hexagonal gazebo with your own hands according to individual sizes and drawings.
Marking and preparation of the site

Sod is removed from the surface of the soil and leveled. The markings for the racks are carried out using stakes and a cord. In a hexagonal figure, the triangles formed by the twine are equal - see the drawing of the dome. After making sure that the position is correct, proceed to the next step.
Foundation and installation of racks


For recesses under the rack frame, use a hand drill. By rotating it to a depth of up to 0.7 m, 6 identical pits are obtained. The ends of the prepared racks are coated with liquid bitumen or wrapped with roofing material to prevent rotting. The installed timber is poured with a liquid cement mortar and left to set for about 1 week.
Installing the tie bar

Using the cutting method, the upper strapping beam is attached to the paw, and then the lower one for installing the sex logs. The knots are reinforced with steel corners. If you use self-tapping screws, then holes of a smaller diameter are pre-drilled, and then the fasteners are screwed in, otherwise the beam will crack.

For reliability, a do-it-yourself hexagonal gazebo, the drawings and dimensions of which are indicated on its own plan, must have an average strapping beam installed at half the height of the object. It will be a guideline for the installation of carved shields.
Dome Assembly

The roof is assembled at the bottom and installed immediately as a whole. To do this, the rafter beam is sawn at the desired angle and connected by the ends at one point. The other ends lie in the grooves on the racks, with a remainder outside the gazebo by 30–40 cm to protect against dripping moisture during rains. They are reinforced with bolts - the roof requires reliability. Between themselves, the rafters are reinforced with their own strapping. It remains to fill the crate on the sectors and cover the roof with tiles or ondulin.

Installation of floor and fittings

To the lower strapping beam, the floor logs are strengthened in pre-cut grooves. They should not interact closely with the ground, in order to avoid dampness. Next, the floorboard is laid. From the outside, wooden carved shields are strengthened, and inside the walls of the gazebo are mounted, unless otherwise provided.
Helpful advice! When laying the floorboard, leave a gap between adjacent boards. With high humidity, the wood swells and the floor may swell.
Protection and decor

The finished gazebo is cleaned with a grinding wheel or paper, then impregnated with compounds from moisture penetration and preventing mold and decay. It remains to decorate your own brainchild. This is a matter of taste - the wood pattern itself is already good. However, if recycled materials were used for the gazebo, then it makes sense to varnish the cleaned wood or reveal the pattern with a stain. In extreme cases, paint in dark noble colors.
Complex options are made on the basis of a simple one. For clarity, a detailed video instruction for assembling a country gazebo is offered to help the home master.
Video: how to build a gazebo with your own hands

Save Time: Featured Articles Every Week by Mail
We also recommend
 Do-it-yourself gazebos: drawings, sizes, diagrams, projects and sketches Make a gazebo with your own hands drawings
 Sizes of arbors: we choose the optimal building for a different number of people Rectangular arbor with our own
 Construction nails GOST 283 75
 How to choose a high-quality and reliable router?
 How to choose a manual router?
 Polyvinylchloride profiles for window and door blockstechnical conditions