Shadow Ranch can't find the little pebble. Walkthrough Nancy Drew: Mystery of the Shadow Ranch
(Nancy Drew: The Secret of Shadow Ranch quest walkthrough)
Nancy tells about all the previous events in a letter to the housekeeper of the family, Drew Hanna, so that a long intro will not distract us from the investigation. Once in the living room, we look around properly. To begin with, we approach the coffee table and study the first volume of the book from the Entertaining Horse Breeding for Dummies series. We read carefully - not only is it interesting, it will also come in handy in the future.
Passage of game Nancy Drew: Mystery of the Shadow Ranch.
Then we come to the fireplace. There we pay attention that the clock on the mantel shows the wrong time, and in the paper tray (to the left of the hearth) there is a newspaper with an article about the intense heat. We notice all the small details - we are detectives. Nancy puts the most important things in her notebook, where you can look from time to time to refresh your memories.
Then we move on to the left side of the living room. In the corner is a triangular chest with a puzzle on the lid. There are some things in the chest itself. There is a secretary to the left, but it is locked. What a pity! To the left of the secretary, near the window, two bookcases are freely located. On the right shelf is the second volume on entertaining horse breeding. We read carefully. Turning left again, we run into a wall with windows and an entrance door. There is a note on the door notifying us of the still broken porch and asking us to use the back door.
The question is brewing, how did Nancy manage to get into the house through the front door, if repairs are underway, and the door is generally closed? But that's beside the point...
To the left is another bookcase. Among other books we find there a novel autographed by the author, Bertha Purcell, signed by Diana Rowley. There is nothing else of interest on this wall. We return to the original position.
To the right of the fireplace, on the wall, is a portrait of Frances Humber. Even more to the right is a radio, on which we will be told about the terrible heat, the sale of livestock and miracle vitamins for animals. We go to the kitchen and the first thing we rush to the refrigerator. We look at the sheriff's phone - it is automatically entered into the memory of Nancy's mobile phone. We run through the table of measures with our eyes (this will be very useful in the future) and turn right. To the left of us are a stove and an oven, to the right is a table with a box of interesting recipes (carefully copied on a piece of paper), straight ahead - in the back of the kitchen - a man is standing with his back to us. We are trying to communicate, but he asks to contact the owners by phone first. We call Rowley and find out that Edda was bitten in the hand by a poisonous snake, so at the moment Diana is guarding her husband in the hospital, where they will stay for some time.
Passage of game Nancy Drew: Mystery of the Shadow Ranch. Nancy is asked to take the secretary key from David, pick up the letter from it and take it to the addressee. After a conversation with Rowley, we return to a conversation with Sam Thurmond, a local chef. He tells us about the ghost of a horse, which all the inhabitants of the ranch saw shortly before the accident, and the legend about the owner of this horse (before it was a ghost), Dirk Valentine, and a girl named Francis, who used to live in this house. It is her portrait that hangs in the living room. Of course, Nancy's eyes lit up from such a story.
After chatting with Sam, we go into the yard. We turn to the door and study the thermometer - it's hot. We go to the man standing next to the chicken coop. This is David. We talk with him about life, we get the key to the secretary. David clearly doesn't like our presence at the ranch.
We go to the gate, decorated with a skull - this is a stable. On the left - a stall, on the right - ammunition and fodder in one bottle. Inside we will find several saddles, a harness, a chest with feed, posters and Tex the groom. A very stern man, I must say. He tells us the rules of behavior with a horse and does not allow us to ride without passing an oral exam (I must say right away that any puncture leads to the expulsion of Nancy from the ranch) on knowledge of the subject. But before the exam, we need to get cheat sheets (player) and a flask (Nancy) - you should ask Sam for it. But before returning to the house, we take a saddle from the lower right corner (the name of the horse on the holder is Bob), and a hat from the bedside table. We go out to the stall, we approach Bob, our horse. We saddle, tighten the girth. The training went well. We remove the saddle and go to hang it in place. We raise the dropped letter and read - this is a congratulatory card for Tex from his sister. The corresponding mark appears in the notepad.
While we are walking towards the house, we are overtaken by a call from Bess and Jess, who are stuck at the airport due to a plane breakdown (they will never get to the ranch until the end credits). Having discussed with them all the events at the ranch, passing on the local legend about the robber, his beloved and the ghost of the horse, and also building a working version, we reach the living room. We open the secretary with a key and begin to rummage through the master's papers. We extract the bill of sale on the chest, the desired letter for Mary, a note with threats from Tex's sister. From the upper left compartment we take away three strange types of pieces of iron. We insert them into the lid of the triangular chest. Come up. Now we will look for the cipher, but it still has time.
For a couple of minutes we return to the stable to interrogate Tex about his sister's note. Do not be shy to tear a person away from work and bring him to white heat, and after several such interrogations he will tell everything himself. So, if you believe the words of Tex, he rarely communicates with his sister, and if he were in Rowley's place, he himself would have fired her because of the scandalous nature. We diligently outline and go to beg for a flask from Sam.
Passage of game Nancy Drew: Mystery of the Shadow Ranch. The talkative cook gladly loaded Nancy the Cinderella with tasks. To begin with, he demanded to bring him fresh vegetables from the beds, and then fill a bucket of water and prepare everything for making a fire. I always suspected that chopping wood was a purely feminine occupation. Sam only confirmed me in my opinion.
We go out into the yard, turn around to the door and remove a wicker basket from the wall next to the thermometer (I would say that this is a tray). We go to the beds and almost at the very fence we select branches for kindling. Then we pick two obviously ripe tomatoes. Pink ones raise questions, so we climb the Internet through a mobile phone for the right answer. Having collected everything that is possible, we go to the hearth and pull out the burnt encryption from the fire pit (in the words, the letters are rearranged, but you can read, but it’s hard to understand the symbols),

...and raise the red bucket from the ground. We go to the red building, fill the bucket with water and put it in the place where we took it from. We approach the door to the house - on the left there is still dry wood on the ground. We take. We return to Sam, and together with the task to get eggs from the chicken coop, we get a "not very reliable" basket. I'm going to the chicken coop. But in order to collect and safely bring the eggs to the kitchen, we need to fix the basket. Follow the instructions and focus on the pattern, it should be the same along the entire length of the basket. A properly placed straw will make a characteristic sound. After everything is folded, we take a red thread and fasten all the rods in three places. We collect eggs in all cells (read the inscription on the large poster and do not touch the white chicken - it is psychic!). The first egg placed in the basket will break, but this will not affect the task in any way, do not worry.
We leave the chicken coop and pick up the dried wood at the wheels of the cart. We return to Sam - he says that there are still eggs there. Again we go to the chicken coop and, without going inside, we select dry branches to the right of the building. This time the white chicken is gone, so we can boldly take her egg. After that, Sam resignedly gives us a flask, although we have not yet begun to arrange a fire. Well, okay. We'll still have a fire. We have dry land, we brought water. Now you need to chop wood. But first, let's take a couple of newspapers from the fireplace. The second headline is quite remarkable: bank robbers were seen in the area, stealing one hundred thousand dollars in Denver. Clothes, a car and green glasses served as signs for identification. Let's remember. We take this newspaper for kindling. We're going to chop wood. Entertainment guaranteed.
The sequence of actions is as follows: put a log, stick the striker with the blade down, choose the angle of impact and your own location relative to all this disgrace, and then hit the butt with a sledgehammer. And so - three times. A heartbreaking sight. But in fact, everything is very simple.
Passage of game Nancy Drew: Mystery of the Shadow Ranch. We pick up firewood and go to the red barn. If you stand a little further away from it, you can see dry branches lying between the bush and the right wall (you will have to peer very closely to see it). We take with us. We approach the hearth and lay out crumpled newspapers, branches and firewood. We hear praise from Sam. Now with a clear conscience we are going to be examined. To begin with, we look at the diagram of the structure of the horse and its hooves (this poster hangs on the wall in front of Tex). Redrawing the names, it will come in handy. We take the saddle and talk to Tex. We go to Bob, we saddle, we tighten the girth, we take it by the reins. We sit in the saddle. And then Tex appears with his questions (questions and answers are attached below, so copy it on a piece of paper and use it to your health).
Question. Where is the hock located? Answer. On the hind legs. Question.Where is the arrow on the horse? Answer. On the underside of the hoof. Question. How many feet are there in fifteen palms? Answer. Five feet. Question. What kind of horse is the Tennessee Walking Horse? Answer. Horse. Question. How can you recognize colic in a horse? Answer. She constantly lays down on the ground, then gets up. Question. What is the difference between bay and red colors? Answer. The bay has a black tail, mane and legs. Question. What Native American tribe began to breed the Appaloosa? Answer. Nez Perce. Question. What organ of the horse is affected by laminitis? Answer. Legs. Question. What should you always check before you sit on a saddled horse? Answer. Girth. Question. What is a mule? Answer. A hybrid derived from a mare and a donkey.Phew, done. We are allowed to ride on our own, but we are not allowed to gallop Bob. And thanks for that. We drive up to the gate and select Mary's store on the map. We go inside and take a look. Old photographs, texts about Native American petroglyphs depicting these drawings... An old chest with an engraving of EKh and AH and three square holes - exactly like on the lid of a ranch chest - stands against the wall.
On the table is a booklet dedicated to the Arizona fossils. The machine with the game "Run for cover", a table with books by Bertha Purcell - it was she who signed the book to Diana. It turns out that Bertha is a recognized expert on nineteenth-century Arizona history. And this summer she will visit local attractions. And here is her phone. Curious... Different arrowheads hang in a frame on the wall. We turn to the counter. On the left is a photograph of a lady riding a beautiful horse. The horse reared up...
Everything has been studied, you can begin to interrogate the hostess of the institution. After talking with Mary about everything, we return to the game. By clicking on the arrows on the screen, we help the cuckoo to dash into the hole before the coyotes have the opportunity to write it down in their lunch menu. Moves are made one cell, in turn. If you reach a dead end, click on "Reset". The main thing in the game is to "hang" the coyotes on the cuckoo's tail. As a reward, Nancy will receive an old one and a half cent coin with the inscription "Dry Brook".
We ask Mary about the prize, but she does not know what these coins were used for in the nineteenth century. We approach the chest and carefully examine it. Mary allows us to take some of the contents if we can open the chest. We did not pull her by the tongue.
We go outside and call first Bess and Jess, and then Rowley. And we make inquiries about the land that Mary wants to buy, about the ghostly horse, about Francis Humber and about the poisonous snake. We learn a lot of interesting things. The triangular chest used to belong to Francis's father. And his initials were M.Kh. So the chest in Mary's shop could also be his. A A.Kh. and E.Kh., apparently his mother and father, since a wedding motif is depicted on the chest ...
Once again we look at the advertising poster of Bertha Purcell, go out into the street and call the eminent writer. E.Kh. is Eldridge Humber and A. is Abigail. And this is indeed their wedding chest, and it belonged to Frances's paternal grandparents. The date of their wedding is the code: September 4, 1811. We return to the chest, insert three keys and set them at 4, 9 and 11 o'clock as if their heads were hour hands. We take the old clock from the chest. We return to the ranch with our heads held high.
We unsaddle Bob, take the saddle to its place. We bring down Tex and go to chat with friendly Sam about Mary Youngsson and her strong desire to buy a piece of land from Rowley. Then we go to open the triangular chest. We look at the color of the birds, go to the broken clock on the mantelpiece and note that the red bird is 12 hours, the blue one is 2, and the yellow one is 7. Then we act in the same way as before in the store.
Eureka! Inside we find an envelope addressed to Francis. Inside the envelope we find a letter from her beloved Dirk Valentine with a secret message and numbers: 9, 12, 15, 22, 5, 25, 15, 21. What this means is unknown. The second sheet in the envelope was a strange map with letters and drawings. Put aside.
We look in the chest. Antique clock with the initials M.Kh. on the inside of the lid they stopped at six minutes past three. We look at the clock carefully and click on the numbers on the dial in the following sequence: 10, 12, 4, 2, 6, 8. The dial opens and we see inside the watch chain from the first chest and a photo of a couple: an elderly man and a young woman.
The third item in the cache was the diary of Meryl Humber, Frances's father, who was the sheriff of the area. We read and learn a lot. Including about flowers. Rose Harrison - remember. Read on and we are told the tragic story of a single father whose daughter is in love with a train robber. Dirk was hanged thanks to Maryle, and Frances ran away from home and never made herself known again. A very sad story. We will investigate.
We promptly recall the second clock. We take out the box with the clock, take out the chain from the inventory and insert it into the clock. Initials F.Kh. issue the hostess. This watch also has a secret. Code 5, 7, 1, 9, 11, 3. Only half of the photograph lies in Francis's watch - the part that depicted dad is missing. On the back it says: "Green bottle under ...".
We go out into the yard. Evening comes with a picnic and campfire songs. We understand that Sam can't sing, and Tex and David claim that he can't cook. Be that as it may, everyone disperses, and then a ghostly horse appears, rushes past the red barn, in which the pipe immediately breaks through. The ranch is heating up. On this optimistic note, the day ends.
The morning begins with a call from a worried Diana Rowley. We talk about hurricanes and strange occurrences. In the background, Ed tries to declare himself healthy and break out of the hospital. After talking with Rowley, we call the sheriff and Bertha Purcell, and share information about Dirk Valentine. At the same time, we find out where Francis was hiding from her father. For help in solving the puzzle, we turn to Frank and Joe, amateur detectives. But their advice did not help. We draw conclusions and go out into the kitchen: Sam has gone somewhere. Using this opportunity, we rummage in the table to the right of the stove. We find a geological map - why could a cook need it? Suspicious. Unfortunately, Sam caught us in the act. In a fit of repentance, we ask for forgiveness and offer our help. Sam asks to bring him ripe vegetables from the garden. We take a basket, go to the tomatoes and dial the GDS number - that's where Sam bought the card. Interesting, interesting... The quiet cook is interested in Dirk Valentine's treasures. And he works in the house where the beloved of the famous robber lived. Very suspicious... Collecting vegetables, using hints from the telephone Internet.

Make a mistake twice and bring the cook the wrong thing - he will complain about you to the owners, and Nancy will go through the suitcase-station-house stage. That's when "Second Chance" comes in handy - the ability to return to the game before making a mistake. Tear all the beans from the left bed, you can't go wrong. She is already mature. After the harvest, we again have to go to the chicken coop - without touching the white chicken!
We bring eggs to the kitchen, but Sam again asks us for a favor - today is Tex's birthday, and if Sam bakes the cake, the birthday boy will not touch it. The icing is already ready, but the cake itself is ours. Sam does not limit us in time. We take a flask of water from him and go to read the recipe for the Shadow Ranch cake. Interestingly, this recipe was written by Frances. The cake is topped with a marzipan flower. And then a flower ... Okay, write it down (next to it are the measures that Nancy will use).
- 1 cup butter - 2 packs
- 2 eggs
- 1 2/3 cups milk - 5 scoops
- 4 cups flour - 2 pints
- 1 tablespoon baking powder - 3 teaspoons
- 2 1/3 cups sugar - 7 scoops
- 3 teaspoons vanilla
Bake in medium form for 45 minutes at medium temperature. We try the cake and decorate with icing sugar. After that, we collect Francis marzipan flower from pieces, focusing on the contours of the flower on the top of the cake. As a result, we got a flower called a tulip. Using food coloring in two colors, color the stem with leaves and the flower itself.
Passage of game Nancy Drew: Mystery of the Shadow Ranch. After we have skillfully baked and decorated the cake, we can continue to investigate. The entrance to the red building is closed by order of the sheriff. We call Fernandez and get permission to enter and inspect the damage. The pipe is really badly rusted, just like Sam said. On the ground just to the left of the pipe lies an arrowhead. And under the bottom shelf of the rack was something interesting. The lattice all this time hid the entrance to the secret passage. We pass to the end, get out in the basement of the house and stumble upon David. A delicate situation... We interrogate a secret treasure hunter and find out that his grandmother was the cousin of Francis Humber, and the heiress of her entire fortune. At least he's not a criminal. But David had the second half of the photograph from the watch. On the back it is written: "stairs to the basement." We look at the letter of Francis to her cousin - in the upper right corner we see another flower - a lily. Now we know Dave's secret and we promise to insure him and fix the chicken cage. After a heart-to-heart conversation, David left, and we were left alone with the basement. We're better off.
We look around. There is a bottle of acid on the shelf. A shelf below is a beaded purse. We take it in our hands and study it carefully. It looks like a flower is missing. We go into the hole again, go down one step, turn around and study it properly. Below it is a puzzle that looks like tags. A chip with the initials F.Kh. move one cell to the right. Below it is a green bottle. Inside we find Dirk's letter. Encrypted. All you can bear: Frances' shawl, embroidered purse, knitting book, Friday meeting at the big rocks. Riddle...
Below it is another letter. About four packs of crackers, an agate stone, and a meeting on Tuesday at the cactus. And here is the third letter. About the cake and the flower on Frances' letters, and Thursday's meeting at Charlie's grave. We leave through a secret door (outside it is disguised as a bookcase) and go to look at Francis's shawl in the portrait. Cheerful pattern. We love, but understand little. We take out the mobile and search through the browser. We read about agates and about knitting. The next flower will be a chamomile. It doesn't get any easier from time to time.
We call girlfriends and hold an emergency meeting. We give Bess and Jess a party task to find in their thick book on the 19th century data on the manufacturer of the beaded purse. We call Bertha Purcell and find out about the one and a half cents we won. Then we call Diana Rowley and make inquiries about Tex's sister. We go to ask the stern groom for a horse. But this hater of city ladies tells me to feed the chickens and horses first. We're in a hurry, we're in a hurry.
We approach the chests with grain, open the far right - this is a mixture for chickens. We pour two buckets into the yellow bucket on the scales, refuse to empty it and go to feed the chickens. Raise the lid, pour out the grain, close the lid. Let Tex burst with anger! Now we proceed to the difficult stage - the horses also want to eat.
Bob's ration: 2 measures of oats (leftmost box), 1 measure of corn (2nd box from left), 1.5 measures of mixed feed (third, corner box). We weigh. 4.5 kilograms - everything is strictly according to the books!
Ration for Clyde: 3 measures of oats, 1.5 mixtures. But this does not reach 4.5 kilograms, so we add another measure of corn.
Ration for Ace: 1 measure of oats, half a measure of corn (actually you need to take 2 measures of corn), 3 measures of feed mixture (actually you need to take half a measure of the mixture).
We feed the last horse, put the bucket in place and go to boast to the stern groom. But the uncle got something and decided to let us practice in throwing a lasso and jumping against the clock. And Tex himself will take the exam with us. As always. But we can ride Bob on our own business. After we pass the exam :).
We saddle Bob, tighten the girth, take him out into the corral. There are already three barrels carefully prepared by Tex and a broom leaning against a piece of wood. A lasso hangs nearby. First we drive up to it - it's easier. We take it, spin it, and when the rope forms a perfect circle, we throw Five out of five hits, and we are halfway to success.
Jumps are more difficult. It is necessary to keep within ten seconds without hitting a single barrel. A click of the mouse spurs the horse. Each mistake - plus five seconds to the final time, so one mistake is enough to fill up everything. The route map can be viewed on the wall in the stall. We go around the first barrel on the right, and the second and third on the left,

... after which we stop next to Tex. Gain some patience and let's get started. One click almost at the barrel is enough. Gone! Tex's jaw dropped. It serves him right! We take our lasso.
We're going to Dry Creek. We approach the house closest to us on the right. Symbols are carved on the veranda: a mirror-inverted "B" and a capital "D". Dirk Valentine? We go to jail. The cells are closed, we have no key. We walk around the city. On one of the bandages we find the letter, capital "P". We turn around 180 degrees and go to the barrel - next to it on the ground lies an arrowhead. The next pair of houses - at the post office is another band with letters. It looks like a capital "U" and "A". On the opposite side of the street is a Cappy store. Whole, clean. There is a brand new lock on the door - a chain with a code. Sealed by order of the sheriff. Calling is useless, as the signal is not caught in the mountains.
We go back and turn to the wooden toilet. There is something in the sand, but when we try to pick it up, a terribly disgruntled scorpion crawls out on us. And he's clearly not in the mood. Shamefully retreat and return to the Shadow Ranch... to pass cooing Mary Youngson and Tex. Interesting layout. During interrogation, Tex denied everything. Let's visit Mary. But before entering the store, we call Sheriff Fernandez and find out the lock code: 9274. We go to talk with the Indian woman, and by cunning we force her to admit that they have an affair with Tex. At the same time, we learn about the reason why Mary so wants to buy part of the land from Rowley.
We go outside and call Bertha Purcell to find out about Dry Creek. It turns out that Capp was once in the town something like a mayor. But this did not prevent him from keeping his tavern with a real piano. It's time to visit the Dry Creek again. This time the scorpion did not come out to greet us, so we calmly picked up another spearhead from the ground near the toilet.
Passage of game Nancy Drew: Mystery of the Shadow Ranch. We approach Kapp's establishment, dial 9274 on the lock and go inside. A sleeping bag in the corner, a thermos, water in a plastic bottle and toothpaste are clearly not nineteenth-century items. Someone definitely lives here. We approach the slot machine and throw our coin into the slot. It is necessary to achieve the appearance of the four most notorious villains. In total, two attempts are given for each coin. The fallen villains after the first attempt must be fixed with buttons. If all else fails, another coin can be won in the machine from Mary. If you win here, you will receive two half cent coins.
We continue to look around. There are books on the table. The upper one is a manual for electricians (literature also somehow does not fit into the concept of the nineteenth century). The book is covered in dust. There is a can of crackers on the bar, but the name is unreadable. We return to Mary's shop, ask the owner about the treasures of Dirk Valentine. On the street, we call Sheriff Fernandez and tell him that someone is hiding in the Dry Creek. We return to the ranch, interrogate the workers. Sam denies the presence of the treasure (as does Mary), Tex denies Mary's visit to the lands of Edd and Diana (as Mary herself denies it). One David does not deny anything, but he is trying to find out if Nancy has a boyfriend. Hee hee.
We are going to the Anasazi Gorge (the Anasazi is an ancient Indian tribe that inhabited part of Arizona). We walk, carefully examine the rock paintings - they immediately appear on the map left by Valentine Francis. From the ground in different places of the gorge we raise three arrowheads.
On the right side of the gorge (to the right of the stairs) we take out the lasso and lift our head up. We see a sticking out log.

We cling, we climb up. On the way we look at all the petroglyphs, pick up the tip of the spear at the top and collect five more petroglyphs in our piggy bank.
We go down the rope, move away and look at the rocks. We take out our drawing and begin to put the collected petroglyphs in their places as they are carved on the rocks. As a result, "write dad's name under the piano keys" will appear at the very bottom. We go to Mary's store, call Bertha Purcell and find out about Jonathan Valentine, Dirk's father, and also ask the writer to find out the full name of crackers in a tin. We check the mail and find a letter from friends about beadwork. Now we know what kind of flower was embroidered on the wallet and how to restore it. But for this we need beads. We go to Mary and ask for beads. While she is looking for the box, we have to decorate the window, and arrange the rings according to the size and color of the stones. It's very simple and doesn't take much time.
We finish sorting and return to Mary. We take beads. Once again, we examine everything in the store. Next to the booklet is a saw cut rosewood, and on the table to the right of the rings is a set of tuning forks with Frances Humber's initials on a bag. Again we talk with Mary about the tree. If necessary, we stock up on one and a half cents for saving the cuckoo from coyotes. We return to the Dry Stream, go to the Kepp tavern, approach the piano and open the puzzle under the keys. The code is Dirk's father's name: Jonathan. We start with the penultimate letter. Click on it until we see "A". We turn to the sixth letter - we are interested in "T", click on the last one - "H", then the third - "O" (the second letter will be automatically set), the fifth - "A", and the first - "D". It remains only to restore the fourth - "H", and the cache will open.
We pick up the note: "At the entrance to the sheriff, you need to find something that you can start. Add a pen and a fork. Arrange in places. And you can continue to search." The forks are apparently tuning forks from Mary's shop. We don't have a pen yet. Will seek...
We reach the toilet and see that on the left (the right side of the porch of the store) something is blushing. We come closer ... Here it is, the desired pen, lies near the hand mill.

We approach the porch of the prison, raise the floorboard under the initials of Dirk Valentine (inverted "B" and "D"). We find some kind of mechanical device. Again we hasten to Mary to ask for tuning forks, taking the device with us. Without going to the store, we look on the Internet about crackers - they were called "Sunflower". Here is another flower in our piggy bank. Now let's fix the wallet. Using the letter of Jess and Bess as a hint, we string beads on a thread in the following sequence: yellow, alternate black beads with black beads with red corners four times; red, white, red, red with pink corners - repeat four times. The end result is something that looks like a poppy. We ask Mary for tuning forks for a while, but she can give them to Nancy for good if we bring her ten arrowheads. We will put the tips in a special box. So far we only have six pieces. But we haven't been to a place called the Wild Trail yet. Let's jump there.
We select the seventh tip to the right of the path, opposite Bob. We take a step forward - to the left of the path we raise the eighth tip. The next step will take us to Charlie's grave. Under the striped stone opposite the grave, a snake hisses, it is better not to go there. We go further along the path - we raise the ninth tip. We reach the skull - the tenth tip lies in the dust on the other side of the road. We return to Mary and give the box to her. But then it turns out that one tip is superfluous, and we get it back. At the same time we pick up the tuning forks. It's time to solve another puzzle.
Passage of game Nancy Drew: Mystery of the Shadow Ranch. We leave for Dry Creek, go to Cappie and put the box on the bar, to the right of the can of crackers.
We insert the pen, arm ourselves with tuning forks and begin to act. Letters are engraved on the tuning forks, as well as on the lid of the box. We put tuning forks in the grooves of the lid to get the name Francis, turn the handle. There is a sound of breaking glass - a wall lamp has broken. Inside was another note from Dirk: "In the one found under the striped stone, the magnet will help to cope with the locks."
We return to the ranch, unsaddle Bob. Evening comes. We return to the ammunition and take gloves from the saddle. We have a chicken coop repair job. We will repair the right wall of the chicken coop. We take the gloves from the inventory and click them on the pliers. Those who like to collect puzzles will enjoy the task. Immediately upon completion of the work, Nancy will notice that her gloves glow in the dark.

The junior and senior detective differ in the complexity of the puzzles.
Hints are given by Frank and Joe Hardy.
Tasks are marked only after a change of location.
First day
Coming to visit Bess and Jess' relatives Ed and Diane Rowley in Tumbleweed, Arizona. We are met at the airport by David Gregory, a ranch worker. We call our friends and find out that they are stuck in Omaha due to aircraft malfunctions. Jess bought a book about 19th-century clothing and jewelry - that's something to remember.
We call Rowley - Ed was bitten by a snake that ended up in their bedroom and now they are in the hospital. Rowley is asked to deliver a letter for Mary Youngson, which is in the secretary. The key to the secretary must be taken from David, and you can only get to Mary on horseback. They start talking about the ghostly horse, but the conversation is interrupted.
1. We inspect the ranch
We leave into the yard, we go to David for the key to the secretary. David tells us about the ghostly horse. We open the secretary, read the bill of sale about the sale of the chest, a letter from Jane Nash, take a letter for Mary and a master key.
We go to the stable, we communicate with the groom Tex Britten. He explains what needs to be done to leave the ranch and what to do when returning.
Departure: take a hat, gloves, a saddle, a flask of water
Return: unsaddle the horse, hang the saddle in place.
We also have to pass him an exam on the knowledge of horses. Let's go look for information.
We look at all the posters in the stable - "The structure of a horse's hoof", "It is dangerous to ride without tightening the girth", "Quarterhorse".
We go to the house.
In the living room on the table is the Beginning Horse Breeder's Guide, Volume 1, and in the closet is Volume 2. I think this information is enough to pass the exam to Tex.
At the same time, we read newspapers by the fireplace (the third newspaper is “Pravda” -:)), look at the faulty clock on the mantelpiece. There is a large chest in the corner. Let's try to use master keys on the lid - they fit, but how to turn them?
Let's look at Bertha Purcell's book in the closet. Let's listen to the news on the radio.
We go to the kitchen. Meet Sam Thurmand. He tells us about Francis Humber - the former owner of the ranch, her father - the sheriff, Dirk Valentine and his ghostly horse. So that's whose big portrait is hanging in the living room!
He will give us a flask in exchange for the collected vegetables, we also need to prepare everything for the fire.
2. Help at ranch-1
We go outside, on the wall next to the entrance we take a basket, we go for vegetables.
Picking vegetables-1:
Sam asked to collect only ripe vegetables. We find out how they look - we go out through the mobile phone to the Internet.
Solution:
left bed - tomatoes "Northern Lights" - 4, right bed - tomatoes "Beefsteak" - 2, tomatoes "Golden Queen" - 2.
Sam gives an egg basket. I'm going to the chicken coop. We put the egg in the basket - it breaks. You have to twist it. The task is simple, but you need to very carefully put the parts one to the other - then they will “stick”. We sew the basket with thread.
junior detective
Senior Detective
Checking out the chicken coop. If there are no eggs, you will have to wait, but for now do something else.
We are preparing a fire.
In the house by the fireplace we pick up two newspapers.
We are looking for branches for a fire, there should be 5 of them:
look at the chicken coop door - on the right
immediately turn around - at the rusty trolley in the center of the yard
between vegetable beds
at the entrance to the house - on the left
look at the pump room door - on the right
Chopping wood. I numbered the angle of impact from left to right from 1 to 5, the position of the legs from left to right from top to bottom from 1 to 9.
Solution:
kick 2, legs 4
kick 5, legs 8
kick 3, legs 3
Call me Nancy the Tin Woodman!
We take firewood. Put 2 newspapers, 5 twigs and 3 split logs in the fire place. We take away from there some crumpled piece of paper with an incomprehensible cipher. We take a bucket, go to the pump room, pour water and put the bucket in place.
Now let's check the chicken coop.
All chickens are like chickens, but one is pecking. If you disturb her, you will see a horror movie on your computer screen. Therefore, we must wait until she leaves on her own business and then pick up the egg. In total, we bring six eggs to Sam, he gives a flask of water.
3. Leaving the ranch
Let's go to Tex. We have an exam.
We take a saddle, gloves, a white hat. We go to Bob, hang a saddle on him, be sure to tighten the girth (when the blue palm appears, you need to raise the blanket and tighten the girth three times), click on the reins (bring Bob out, then click on the reins again, and Nancy will climb on the horse) - we ready.
Correct answers for Tex:
where is the hock - on the hind legs
where the arrow is located - on the underside of the hoof
how many feet in 15 palms - 5
what kind of horse is the Tennessee walking horse
how can you recognize colic in a horse - it constantly lies down, then gets up
what is the difference between a bay suit and a red one - a black tail, mane and legs
which Indian tribe began to breed Appaloosa - Nez Perce
what organ of the horse is affected by laminitis - legs
what you should always check before you sit on a saddled horse-girth
what is a mule - a hybrid of a mare and a donkey
4. Mary and her shop
We give the letter to Mary and ask her about the chest that she bought from Rowley. The chest is closed, but if we open it, she will let us take something from there. On the chest are the initials EH-AH in a heart and doves. It can be opened if you find out who made it. We try to attach master keys - they fit, but how to twist them?
We look at the display case by the window. We read a brochure about Arizona fossils, we find out that iron (Fe) colors fossils orange, red and yellow, copper (Cu) blue and green, manganese (Mn) pink and purple, silicon (Si) gray and white. We read information about petroglyphs. We examine a box with tuning forks with the initials FH.
There is a slot machine in the corner. At the stand we look at how the arrowheads of the ancient Indians look like.
We read the annotation to Bertha Purcell's book “The Prairie Wind”. Her phone number is indicated there - apparently, for a reason.
We go outside, call Bertha (her phone will automatically appear in the mobile phone). Maybe we can learn something useful?
5. Open chests
Berta talks about the Humber family. EH-AH are the initials of Frances Humber's grandfather and grandmother. They married on September 4, 1811. So, the code for the chest is 4, 9, 11. We take the master keys, set the numbers, open the chest. We take a pocket watch from there, which is still closed.
We return to the ranch.
We put the saddle back in place, a greeting card from Jane Nash, addressed to Tex, falls on the floor. Turns out she's his sister! We ask Tex about her, he is rude and refuses.
Let's try to open the second chest.
We look at the cover. Each well is inside a bird pattern - pink, blue and yellow. In the center is a hint - the clock face. Look again at the clock on the mantel - the same colors. Pink corresponds to the number 12, blue - 2, yellow - 7.
We take out the master keys, set the code 12, 2, 7. Open the chest.
We read the diary of Sheriff Humber - the sad love story of Francis Humber and Dirk Valentine. We read a letter from Dirk Valentine, in which he writes about Frances' favorite flowers and flowers on her favorite things. Note that he gave his beloved a flower - Harrison's rose (you can read more about it in Nancy's mobile phone). We take a lined sheet with rocks where petroglyphs need to be applied, write down the numbers “9, 12, 15, 22, 5, 25, 15, 21″. If we take the English alphabet, “I love you” is encrypted with numbers. We take another pocket watch. The passage of this puzzle does not exist, because. the dialing sequence is randomly generated. Active numbers are 2, 4, 6, 8, 10, 12. You need to click on the numbers and memorize the sequence in which the numbers “stick”. When they are all “sticky”, the clock will open. Inside is a photograph of Frances Humber and her father and a clockwork. We apply it to the second watch that we found in the chest in the store. We open them in the same way as the previous ones. Active numbers are 1, 3, 5, 7, 9, 11. We take out half of the photo - Francis Humber is on it. On the back there is an inscription: “Green bottle under…”
Evening comes (if it has not come, it means that you have not completed something). Everyone is sitting by the fire, listening to Sam's songs, when suddenly a ghost horse gallops to the ranch from afar, and then breaks a pipe in the pump room.
Second day
6. Secret passage and green bottle
We talk with Rowley - they ask us to contact the sheriff. We go to the kitchen, a piece of paper with the sheriff's phone is hanging on the refrigerator (his phone will automatically appear in the mobile phone). We go outside to inspect the pump house. There is another sheriff's number on the door in case you forgot to look at the number on the fridge.
We call the sheriff - he allows us to look inside. We examine the pipe opposite the entrance - it is completely rusty. We see a grate near the floor to the left of the entrance, open it - well, as usual, a secret passage ... We go along it and get into the basement in which David is located. We talk to him. Turns out he's looking for Dirk Valentine's treasure! His great-great-grandmother was Frances Humber's sister. He shows us half of the photo he found - it's Father Francis. On the back there is an inscription: “stairs to the basement”. David leaves, we take a purse embroidered with beads from the shelf, we examine it - something is missing here. We find a bottle of acid - I wonder why it is needed? Most likely, someone poured acid on the pipe in the pump room so that it would corrode the iron, so that later it would be easy to hit the pipe and it would break. Everything is clear, this is no accident - someone is taking revenge on Rowley or wants to kick them out of the ranch.
If we go up the stairs, we get into the living room. If you click on the book in the left cabinet in the living room, the door to the secret passage opens. But we'll go and see what's in the green bottle under the stairs. Let's go down from the basement into the secret passage, and Nancy must say that this is exactly the staircase that is needed. Turn around and hit the top step.
It is necessary to move the plates so as to release the plate with the letters FH.
junior detective
Senior Detective
We take out the bottle, it contains Dirk's letters to Francis. We pay attention to the following: the pattern on the shawl in the portrait of Frances, the purse, the crackers at Cappie, the cake, the letter paper. Frances's favorite flowers (and Harrison's rose from the sheriff's diary) are listed here. Well, the plan of action is clear.
We go to the living room. We carefully look at the shawl. We climb the Internet, find an article about knitting, look at the patterns. We click on the shawl again - the pattern is called "chamomile".
Let's call our friends - they have a book on clothes and accessories of the 19th century. They'll get the wallet information and call back later.
Let's go to Tex. He admits that Jane Nash is his sister, Rowley fired her for her temper. After that, he got a job on the ranch himself and does not want the Rowleys to know about their relationship, because troubles have begun at the ranch, and Tex can be blamed for them. He has a motive - revenge for his sister. We can't ride until we help Sam around the house.
Let's go to David. He asks us to fix the chicken partition in the evening, only we will have to remember to put on gloves. We ask him about the letter that Francis wrote to his grandmother. We read the letter - a lily is drawn on it. David also reveals that the prison where Dirk Valentine was kept is located in Dry Creek.
7. We help at the ranch-2
We go to Sam, but he is not. Come on, let's see what he hides in his chest? Geological map! What for? The map shows the telephone number of the Southeastern Geological Society. Sam returns - we've been caught. We talk with him. He confesses that he was looking for gold at the Rowley site, but did not find anything. Sam was in the pump room and saw a pipe that was rusted through and believes it broke due to the stomp of a horse.
We go out into the yard, we call the geologist. He reveals that Sam bought the map because he heard about Dirk Valentine's treasure, who hid it at the foot of a shady mountain. Gold is impossible to find in these parts, so Sam is lying.
We return to Sam and apologize. We ask if he needs help. Vegetables again...
Left bed - beans 5, Ivory tomatoes - 2, right bed - Beefsteak tomatoes - 2, Black Tortoise beans - 3.
We're going for the eggs. We take 6 pieces, do not touch the monster chicken. Sam gives a flask of water and asks for a cake.
8. We bake a cake
The recipe is in the box on the table.
The translation of some units of bulk measures of weight into others hangs on the refrigerator.
You will need:
1 pint = 2 glasses
1 tablespoon = 3 teaspoons
Solution:
butter - 2 times, egg - 2 times, milk - 5 times, flour - 2 times, baking powder - 3 times, sugar - 7 times, vanilla - 3 times.
Pour the dough into a medium bowl and bake at medium temperature for 45 minutes.
Now decorate the cake with icing. We collect a flower from pieces of marzipan. If the pieces are placed correctly, they will “stick”. When we collect everything, we get a tulip. Take a brush and paint the flower. The cake is ready.
We go to Tex, who has a birthday today. His character has not improved, he still does not allow to leave the ranch.
9. We feed chickens and horses
Feed weight is in kilograms. We number the boxes from 1 to 5 from left to right.
1 - oats, 2 - feed mixture, 3 - corn, 5 - chicken feed.
In the first box there is a measure weighing 1 kg, in the second - weighing 1.5 kg, in the third - 0.5 kg. In this way,
Bob: 2 times out of 1, 1 time out of 2, 2 times out of 3
Clyde: 3 times out of 1, 1 time out of 2
Ace: 1 time out of 1, 2 times out of 2, 1 time out of 3.
Then 2 times out of 5 - we go to the chicken coop, pour it into the chicken feeder.
Finally, Tex allows Bob to be taken, but says that it is necessary to learn how to throw a lasso and quickly go around obstacles on a horse.
10. Making Lasso
To get the lasso from Tex, you need to throw it on the broom 4 times out of 5.
The secret of the throw: hold down the left mouse, wait until the lasso turns into a perfect circle, release the mouse.
Now we pass the dressage exam. You need to jump between three barrels faster than 10 seconds. The route is drawn on a poster on the fence of the stable.
Secret: as soon as the blue arrow appears on the screen, you must quickly click on the barrel. We complete the task in 9.5 seconds and get a lasso.
We are leaving. On the way we meet Mary Youngson, which means the store is closed. We'll visit her later. It's time to deal with the lined piece of paper from Dirk's letter.
11. Anasazi Gorge and petroglyphs
We carefully look at the rocks and transfer all the petroglyphs to the sheet. You need to find 17 drawings. We click on the petroglyph, a leaf appears on the screen, we put the drawing in the right place. Some petroglyphs can be seen if you climb up - this is where the lasso comes in handy.
When you do everything right, the phrase will appear at the bottom of the sheet: "Write dad's name under the piano keys."
Let's go to Mary. When we ask her about what she did on the lands of Rowley, in response she says that she was not there. Weird…
Let's call Bertha, maybe she knows something? Berta reveals that "daddy" is Dirk Valentine's father, Jonathan. So, you need to find and write the name "Jonathan" on it.
We are going to the new location “Dry Stream”.
12. Dry stream
I'm walking down the street. On the sides of the street are dilapidated buildings of a store, a post office, a sheriff's house with a prison, a bank, Cappie's bar. Let's go to the sheriff's house - we need a key to open Dirk's cell. We go to the bar - there is a lock on the door. "Closed by order of the sheriff." The phone does not work here, so we return to any location, for example, to Mary's store. We find out the code from the sheriff - 9-2-7-4. We return to Cappie's bar. We see on the table “Manual for electricians”. What is it doing here? Some powder is scattered on the table...
On another table is a jar of crackers with the label worn off. Maybe Bertha will help us again? Nearby is a recess in the table.
Under the window is a slot machine. We see that someone lives in the bar - water, boxes, a mattress.
There is a piano in the corner. We open the panel - we need to type the name "Jonathan".
Let's number all the letters from 1 to 8.
1 rotates 1 and 4, 2 rotates 1, 2 and 5, 3 rotates 2 and 3, 4 only rotates itself, 5 rotates 1 and 5, 6 rotates 6 and 8, 7 rotates 6 and 7, 8 rotates 2, 4 and 8.
press 5 until set to 5 A (5 times)
press 1 until set to 1 D (3 times)
press 3 until set to 3 O (3 times)
press 8 until set to 2 F (1 time)
press 7 until set to 7 A (3 times)
press 6 until set to 6 T, and to 8 - H (1 time)
press 4 until set to 4 N (3 times)
We get a note:
“At the entrance to the sheriff you need to find
What can be started.
Add a handle and forks
Put in place.
And you can keep looking.”
Let's look at the terrace by the prison. One floorboard opens (the initials “DV” are on it) - we get the box that Dirk made.
We turn around, we approach the store on the right - and here is the handle.
We carry the box to Cappie's bar and put the box in the recess on the table, insert the handle. On the lid of the box is the inscription "-P-N-S". Where to get forks?
Let's go to Mary.
13. Tuning forks, crackers and a beaded purse
We call Bertha. When she has free time, she will send us the name of the crackers.
Checking the mail - Bess and Jess sent us a letter about beadwork.
You will have to embroider the flower according to the pattern they sent to find out what kind of flower it will turn out to be. We don't have beads.
We ask Mary if she knows about Dirk Valentine's treasure. She knows but doesn't believe it. We ask her if she came across Frances cutlery - forks, spoons ... She didn’t see them either.
Let's look at the tuning forks on the table - they are very similar to forks. Mary will agree to give them to us in exchange for ten arrowheads.
Mary will also give us beads if we decorate the display case with rings.
It is necessary to put the rings by color in size from smallest to largest. We take any line. The sample ring is on the left. We collect rings in this line only of the form, as in the figure on the left. We first lay out three blue rings in size from small to large, then three red ones, then three green ones. This puzzle is randomly generated and there is no ready-made solution.
The finished window looks like this:
We are talking about Mary's showcase, and we have beads.
We string the beads like this: yellow, (black, black in a red box) - 4 times, (red, white, red-pink) - 4 times. If you make a mistake, click on the needle and the last bead will go back into the box. As a result, we got a poppy.
Looking for tips.
There are 2 of them in Dry Creek - to the right of the store, near the toilet. There sits a scorpion that must not be touched. You need to change the location and return later, then it will no longer be there. The second tip is near the barrel to the right of the mail.
In the gorge 3 - near the rock at the bottom in the center; bottom left, where you can climb the rocks; upstairs, where you need to climb with the lasso.
On the Wild Path - 4. Everyone lies near the path (if you go straight from Bob and do not turn anywhere). Let's pay attention to the striped stone, under which the snake hisses (it is not necessary to touch the stone) and Charlie's tombstone.
We return to the ranch. On the way we see Mary with Tex.
We ask Tex if he saw Mary at the ranch, he denies everything and offers to leave her alone. We go to the pump room, look at the rusty pipe - next to it lies the blue 10th tip.
We check the mobile phone, Berta sent us the address of the site about crackers - Kelleher. We read an article on the Internet, a sunflower is depicted on a jar of crackers. Well, we found out the names of all six colors.
We go to Mary, we ask her what she talked about with Tex. It is revealed that they are in love with each other, but they hide it so that Rowley doesn't think he's on Mary's side and get him fired. The fact is that Mary has been arguing with Rowley about their land for a long time, because Tex found a lot of fossils on the site, from which Mary makes souvenirs and then sells them. Another mystery solved.
We pick up the tuning forks and go to the Dry Creek.
We put tuning forks to get the word "Francis", we turn the knob, and suddenly the lamp on the wall breaks. It has a note:
“In the one found under the striped stone, the magnet will help to cope with the locks.”
We saw a striped stone on the Wild Trail, and a magnet on the refrigerator at the ranch.
We return to the ranch.
Evening came. It remains to fix the partition for chickens. We go to the stable for gloves. There are no horses in the stalls. We put on gloves, take pliers and carefully attach pieces of wire to the partition. if the piece is placed correctly, it will “stick”.
When everything is done, look at the gloves and see that they glow. Again, from afar, a ghost horse gallops to the ranch. The ranch is now without electricity.
Third day
We talk with Bess and Jess. The gloves glow just like a ghost horse, and we stained them with some kind of powder at Cappie's bar. So it's interconnected.
We take a magnet from the refrigerator, we go out into the street. At the porch lies a horseshoe. Maybe it's from the hoof of a ghostly horse? It's time to return to the Dry Creek.
Let's go to Tex. It wasn't there! We need to help Sam again. We talk with Tex about a horseshoe - a stone is stuck in it, very similar to a stone from a Dry stream.
Let's go to Sam.
14. Help at ranch-3
Picking up vegetables again.
Left bed - Northern Lights tomatoes - 4, right bed - Beefsteak tomatoes - 2, Golden Queen - 2, Black Tortoise beans - 2.
We take a basket and collect 6 eggs (one of them was laid down by a monster chicken, so you will have to return for this egg a second time).
Let's go to Tex. Now you need to assemble the bridle. Well, he has tasks, however ... The finished bridle hangs on the wall next to the door - you can see how to assemble it correctly.
If the parts are placed correctly, they “stick”. First we put the leather oval, then the straps, then the silver part, the blue one on it, and lastly the rope.
We give the bridle to Tex, we go to the Dry stream.
15. Prison
We go to Cappie's bar to look at the glowing powder. The book on electricity has disappeared, things too. We approach to look at things closer and see some kind of key on the box, we reach for it and get hit on the head.
We were locked in a cell. There are incomprehensible lines on the wall. What if it's the letters of the alphabet? We write the alphabet on a piece of paper, count the number of all the dashes in each letter and translate. First dash 17 is the letter “P”, then 16 is “O”, etc. After entering each letter, press “Enter”.
It turns out: "Under the lamp of the bank."
It's time to get outside.
There is a key on the wall. If you try to get it, it will fall to the floor and the game will end. Therefore, we throw a lasso and pull the chair under the key. We turn around and take two bricks in the next chamber, set the angle to 2, the impact force to 2.
The key is on the chair. Throw the lasso again and take the key.
We leave the cell, on the floor we select a piece of paper with a code. Using this code, we translate the message on a crumpled piece of paper from the fire: “It will be necessary to take more things if there is nothing at the ranch. Check the bookcase again, Dirk might have hidden it under the Sheriff's nose." Yes, we have a whole gang of bandits here!
Let's see what lies under the bank lamp (you need to move one of the bricks).
This is another message from Dirk: “There are different ways to play the same game. The ring that you and Ellie have, put it in the machine at Cappie's bar."
We need to talk to David.
16. Cappie's machine gun
We return to the ranch. David gives his grandmother's ring and recommends calling the police about the attack. After talking with the sheriff, we go to the Dry Creek. We go to Cappie's bar, we approach the machine, put the ring on, nothing happens, we need a token. We return to Mary.
The game has three rounds. You need to lead the cuckoo into the hole before the coyotes eat it.
Solution:
H - down, L - left, P - right, B - up.
Junior Detective:
N 2 times, P 2 times, N 5 times, P 5 times
N 3 times, P, V, P, N 5 times, P 5 times
Senior Detective:
N 2 times, P 2 times, V, N 6 times, P 5 times
2 times, P 7 times, L 3 times, N 4 times, P 3 times
2 times, P 2 times, N 2 times, L 2 times, B 3 times, N 3 times, P 2 times, B 3 times, P 5 times, V
We take the token.
We return back. I recommend saving the game so that you do not have to go for the token again if you lose, because. The sequence of ejection of pictures is random, and there are only two attempts.
If you collect evil characters, you will only win additional tokens.
So drop the token into the coin slot and place David's ring on top.
After the first try, click on the red buttons under the characters to fix the correct pictures. When you win, get the key.
We're going to the Wild Road.
17. Striped stone on the Wild trail
We go to the stone. If a snake hisses there, it is better to move away and return - it will no longer be there. Raise the stone, open the chest. It was not for nothing that we read the brochure about fossils in Mary's shop.
With the help of a magnet, you need to hold chips with the names of minerals in the central field. We compare the name of the mineral and its color (iron Fe - red, copper Cu - blue, manganese Mn - pink, silicon Si - gray). The matter is complicated by the fact that the boards interfere with us, and we do not see bends and obstacles in the way of the chip. Secret: you need to slap the lid of the chest 5 times, then the boards will disappear.
Finally, the chest is opened. Take a magnet and swipe all the chips to the center.
We get a box. On the lid, you need to install all six of Francis's favorite colors (the sequence of colors is determined by the selection).
We put a rose in the center, above it - a poppy, on the left - a sunflower, on the right - a lily, below - a chamomile and a tulip.
Open the lid - here is another lock. On the right is Dirk's message: "To solve my riddle, make the ballerina dance." We insert the key won in the machine, open the lock.
Instructions inside. It is necessary to draw a line along the symbols on a sheet with petroglyphs without taking your hands off. The character sequence is specified. We draw a line, we get the letter “V” - Valentine.
We go to the Anasazi Gorge to look for a stone with the V symbol.
We are looking for this symbol on the map - it is at the top. We throw a lasso and climb up. We raise the cobblestone with the symbol V, under it is a note and a raw stone. The note says to go to Charlie's grave, turn around and look through the stone. We've already seen Charlie's grave on the Wild Trail.
We're going to the Wild Road. We approach Charlie's grave, Nancy takes out a stone - it is badly scratched, it will have to be polished somewhere. We return to Mary and ask her to polish the stone. After that, we see that this is a very beautiful landscape agate. It shows a tree.
We return to Charlie's grave, take out the agate, turn around and see on the opposite side the same tree as on the agate. We saddle Bob and go to a new location “?”
18. Labyrinth in the Rock Settlement
We go forward, throw a lasso, climb up. We have a labyrinth.
The labyrinth map is carved on the wall at the entrance. You will also need a note from the prison - there is a decoding of the symbols. The path is:
chocolate - kiwi - yellow - red - blue - orange - kiwi - yellow - chocolate - blue - kiwi - orange - blue - chocolate - kiwi - orange - red - blue - yellow - kiwi - blue - kiwi - chocolate - yellow.
We go through the maze, in parallel collecting five keys that lie in pots.
Solution:
Right to Chocolate and left to Kiwi (i.e., green) - turn right, here in the jug is the 1st key.
Now to the left to Orange - here is the second jug, where the 2nd key lies.
We return back to the 1st jug (back to the orange). Immediately to the left will be Yellow.
We turn right and into Red - here the stairs go up. The 3rd key lies in a jug on the step.
We turn right into Blue - there is a ladder down here.
We go to Orange, turn right into Kiwi, then right into Yellow - there is a ladder up here. We turn left and go to Chocolate, right to Blue, left to Kiwi.
Immediately left to Orange, right to Blue, left to Chocolate. Now you need to take one step forward to the Kiwi and turn back. Here in the jug is the 4th key.
Now we turn around again. To Kiwi, to Orange, right to Red, left to Blue, to Yellow, left to Kiwi, to Blue. To the right under the Red jug with the 5th key.
In Kiwi, turn left - there will be a ladder up. In Chocolate and in Yellow - there is a door in front of you.
Insert the keys into the lock. Here it is, the treasure!
We leave and meet with the villain. We must trap him.
I recommend saving the game, because. will have to act very quickly.
We run down. In the hall where we found the fifth jug, you need to quickly swap red and green stones above the doorways.
The villain falls into a trap, and we watch the end credits
Copying of material is allowed only with the indication of the author of the walkthrough, known on the Internet as Julia-10
Publisher in Russia and CIS countries: "New Disc"
Russian site of Nancy Drew: http://www.nancydrew.ru/
Nancy Drew is a young observant person who manages to find a reason to investigate every incident. That is, stick your curious nose into all the cracks and pester others with leading questions. And all this - with constant success leads the tireless Nancy to unravel the mysteries.
Books written by Caroline Keane have been reprinted many times in many countries around the world. If you look carefully, you can easily find them in our bookstores.
This time, Nancy was invited to visit the ranch of Edd and Diana Rowley, the aunts and uncles of her friends Bess and Jess. In order to relax and have a good time. But upon arrival, Nancy finds out that her friends - they flew on another flight - are still missing. Moreover, there are no ranchers themselves ...
System requirements
Operating system Microsoft Windows 98SE/Me/2000/XP
Processor Pentium-II 400 MHz
64 MB RAM
605 MB free hard disk space
3D video adapter with 16 MB memory
16-bit DirectX compatible sound card
CD drive
It is highly recommended that you close all other programs in Windows before starting the game.
Passage or "How it was in the game ..."
Nancy tells about all the previous events in a letter to the housekeeper of the family, Drew Hanna, so that a long intro will not distract us from the investigation. Once in the living room, we look around properly. To begin with, we approach the coffee table and study the first volume of the book from the Entertaining Horse Breeding for Dummies series. We read carefully - not only is it interesting, it will also come in handy in the future.
Then we come to the fireplace. There we pay attention that the clock on the mantel shows the wrong time, and in the paper tray (to the left of the hearth) there is a newspaper with an article about the intense heat. We notice all the small details - we are detectives. Nancy puts the most important things in her notebook, where you can look from time to time to refresh your memories.
Then we move on to the left side of the living room. In the corner is a triangular chest with a puzzle on the lid. There are some things in the chest itself. There is a secretary to the left, but it is locked. What a pity! To the left of the secretary, near the window, two bookcases are freely located. On the right shelf is the second volume on entertaining horse breeding. We read carefully. Turning left again, we run into a wall with windows and an entrance door. There is a note on the door notifying us of the still broken porch and asking us to use the back door.
The question is brewing, how did Nancy manage to get into the house through the front door, if repairs are underway, and the door is generally closed? But that's beside the point...
To the left is another bookcase. Among other books we find there a novel autographed by the author, Bertha Purcell, signed by Diana Rowley. There is nothing else of interest on this wall. We return to the original position.
To the right of the fireplace, on the wall, is a portrait of Frances Humber. Even more to the right is a radio, on which we will be told about the terrible heat, the sale of livestock and miracle vitamins for animals. We go to the kitchen and the first thing we rush to the refrigerator. We look at the sheriff's phone - it is automatically entered into the memory of Nancy's mobile phone. We run through the table of measures with our eyes (this will be very useful in the future) and turn right. To the left of us are a stove and an oven, to the right is a table with a box of interesting recipes (carefully copied on a piece of paper), straight ahead - in the back of the kitchen - a man is standing with his back to us. We are trying to communicate, but he asks to contact the owners by phone first. We call Rowley and find out that Edda was bitten in the hand by a poisonous snake, so at the moment Diana is guarding her husband in the hospital, where they will stay for some time.
Nancy is asked to take the secretary key from David, pick up the letter from it and take it to the addressee. After a conversation with Rowley, we return to a conversation with Sam Thurmond, a local chef. He tells us about the ghost of a horse, which all the inhabitants of the ranch saw shortly before the accident, and the legend about the owner of this horse (before it was a ghost), Dirk Valentine, and a girl named Francis, who used to live in this house. It is her portrait that hangs in the living room. Of course, Nancy's eyes lit up from such a story.
After chatting with Sam, we go into the yard. We turn to the door and study the thermometer - it's hot. We go to the man standing next to the chicken coop. This is David. We talk with him about life, we get the key to the secretary. David clearly doesn't like our presence at the ranch.
We go to the gate, decorated with a skull - this is a stable. On the left - a stall, on the right - ammunition and fodder in one bottle. Inside we will find several saddles, a harness, a chest with feed, posters and Tex the groom. A very stern man, I must say. He tells us the rules of behavior with a horse and does not allow us to ride without passing an oral exam (I must say right away that any puncture leads to the expulsion of Nancy from the ranch) on knowledge of the subject. But before the exam, we need to get cheat sheets (player) and a flask (Nancy) - you should ask Sam for it. But before returning to the house, we take a saddle from the lower right corner (the name of the horse on the holder is Bob), and a hat from the bedside table. We go out to the stall, we approach Bob, our horse. We saddle, tighten the girth. The training went well. We remove the saddle and go to hang it in place. We raise the dropped letter and read - this is a congratulatory card for Tex from his sister. The corresponding mark appears in the notepad.
While we are walking towards the house, we are overtaken by a call from Bess and Jess, who are stuck at the airport due to a plane breakdown (they will never get to the ranch until the end credits). Having discussed with them all the events at the ranch, passing on the local legend about the robber, his beloved and the ghost of the horse, and also building a working version, we reach the living room. We open the secretary with a key and begin to rummage through the master's papers. We extract the bill of sale on the chest, the desired letter for Mary, a note with threats from Tex's sister. From the upper left compartment we take away three strange types of pieces of iron. We insert them into the lid of the triangular chest. Come up. Now we will look for the cipher, but it still has time.
For a couple of minutes we return to the stable to interrogate Tex about his sister's note. Do not be shy to tear a person away from work and bring him to white heat, and after several such interrogations he will tell everything himself. So, if you believe the words of Tex, he rarely communicates with his sister, and if he were in Rowley's place, he himself would have fired her because of the scandalous nature. We diligently outline and go to beg for a flask from Sam.
The talkative cook gladly loaded Nancy the Cinderella with tasks. To begin with, he demanded to bring him fresh vegetables from the beds, and then fill a bucket of water and prepare everything for making a fire. I always suspected that chopping wood was a purely feminine occupation. Sam only confirmed me in my opinion.
We go out into the yard, turn around to the door and remove a wicker basket from the wall next to the thermometer (I would say that this is a tray). We go to the beds and almost at the very fence we select branches for kindling. Then we pick two obviously ripe tomatoes. Pink ones raise questions, so we climb the Internet through a mobile phone for the right answer. Having collected everything that is possible, we go to the hearth and pull out the burnt encryption from the fire pit (in the words, the letters are rearranged, but you can read, but it’s hard to understand the symbols),


Make a mistake twice and bring the cook the wrong thing - he will complain about you to the owners, and Nancy will go through the suitcase-station-house stage. That's when "Second Chance" comes in handy - the ability to return to the game before making a mistake. Tear all the beans from the left bed, you can't go wrong. She is already mature. After the harvest, we again have to go to the chicken coop - without touching the white chicken!
We bring eggs to the kitchen, but Sam again asks us for a favor - today is Tex's birthday, and if Sam bakes the cake, the birthday boy will not touch it. The icing is already ready, but the cake itself is ours. Sam does not limit us in time. We take a flask of water from him and go to read the recipe for the Shadow Ranch cake. Interestingly, this recipe was written by Frances. The cake is topped with a marzipan flower. And then a flower ... Okay, write it down (next to it are the measures that Nancy will use).
1 cup butter - 2 packs
2 eggs
1 2/3 cups milk - 5 scoops
4 cups flour - 2 pints
1 tablespoon baking powder - 3 teaspoons
2 1/3 cups sugar - 7 scoops
3 teaspoons vanilla
Bake in medium form for 45 minutes at medium temperature. We try the cake and decorate with icing sugar. After that, we collect Francis marzipan flower from pieces, focusing on the contours of the flower on the top of the cake. As a result, we got a flower called a tulip. Using food coloring in two colors, color the stem with leaves and the flower itself.
After we have skillfully baked and decorated the cake, we can continue to investigate. The entrance to the red building is closed by order of the sheriff. We call Fernandez and get permission to enter and inspect the damage. The pipe is really badly rusted, just like Sam said. On the ground just to the left of the pipe lies an arrowhead. And under the bottom shelf of the rack was something interesting. The lattice all this time hid the entrance to the secret passage. We pass to the end, get out in the basement of the house and stumble upon David. A delicate situation... We interrogate a secret treasure hunter and find out that his grandmother was the cousin of Francis Humber, and the heiress of her entire fortune. At least he's not a criminal. But David had the second half of the photograph from the watch. On the back it is written: "stairs to the basement." We look at the letter of Francis to her cousin - in the upper right corner we see another flower - a lily. Now we know Dave's secret and we promise to insure him and fix the chicken cage. After a heart-to-heart conversation, David left, and we were left alone with the basement. We're better off.
We look around. There is a bottle of acid on the shelf. A shelf below is a beaded purse. We take it in our hands and study it carefully. It looks like a flower is missing. We go into the hole again, go down one step, turn around and study it properly. Below it is a puzzle that looks like tags. A chip with the initials F.Kh. move one cell to the right. Below it is a green bottle. Inside we find Dirk's letter. Encrypted. All you can bear: Frances' shawl, embroidered purse, knitting book, Friday meeting at the big rocks. Riddle...
Below it is another letter. About four packs of crackers, an agate stone, and a meeting on Tuesday at the cactus. And here is the third letter. About the cake and the flower on Frances' letters, and Thursday's meeting at Charlie's grave. We leave through a secret door (outside it is disguised as a bookcase) and go to look at Francis's shawl in the portrait. Cheerful pattern. We love, but understand little. We take out the mobile and search through the browser. We read about agates and about knitting. The next flower will be a chamomile. It doesn't get any easier from time to time.
We call girlfriends and hold an emergency meeting. We give Bess and Jess a party task to find in their thick book on the 19th century data on the manufacturer of the beaded purse. We call Bertha Purcell and find out about the one and a half cents we won. Then we call Diana Rowley and make inquiries about Tex's sister. We go to ask the stern groom for a horse. But this hater of city ladies tells me to feed the chickens and horses first. We're in a hurry, we're in a hurry.
We approach the chests with grain, open the far right - this is a mixture for chickens. We pour two buckets into the yellow bucket on the scales, refuse to empty it and go to feed the chickens. Raise the lid, pour out the grain, close the lid. Let Tex burst with anger! Now we proceed to the difficult stage - the horses also want to eat.
Bob's ration: 2 measures of oats (leftmost box), 1 measure of corn (2nd box from left), 1.5 measures of mixed feed (third, corner box). We weigh. 4.5 kilograms - everything is strictly according to the books!
Ration for Clyde: 3 measures of oats, 1.5 mixtures. But this does not reach 4.5 kilograms, so we add another measure of corn.
Ration for Ace: 1 measure of oats, half a measure of corn (actually you need to take 2 measures of corn), 3 measures of feed mixture (actually you need to take half a measure of the mixture).
We feed the last horse, put the bucket in place and go to boast to the stern groom. But the uncle got something and decided to let us practice in throwing a lasso and jumping against the clock. And Tex himself will take the exam with us. As always. But we can ride Bob on our own business. After we pass the exam :).
We saddle Bob, tighten the girth, take him out into the corral. There are already three barrels carefully prepared by Tex and a broom leaning against a piece of wood. A lasso hangs nearby. First we drive up to it - it's easier. We take it, spin it, and when the rope forms a perfect circle, we throw Five out of five hits, and we are halfway to success.
Jumps are more difficult. It is necessary to keep within ten seconds without hitting a single barrel. A click of the mouse spurs the horse. Each mistake - plus five seconds to the final time, so one mistake is enough to fill up everything. The route map can be viewed on the wall in the stall. We go around the first barrel on the right, and the second and third on the left,

... after which we stop next to Tex. Gain some patience and let's get started. One click almost at the barrel is enough. Gone! Tex's jaw dropped. It serves him right! We take our lasso.
We're going to Dry Creek. We approach the house closest to us on the right. Symbols are carved on the veranda: a mirror-inverted "B" and a capital "D". Dirk Valentine? We go to jail. The cells are closed, we have no key. We walk around the city. On one of the bandages we find the letter, capital "P". We turn around 180 degrees and go to the barrel - next to it on the ground lies an arrowhead. The next pair of houses - at the post office is another band with letters. It looks like a capital "U" and "A". On the opposite side of the street is a Cappy store. Whole, clean. There is a brand new lock on the door - a chain with a code. Sealed by order of the sheriff. Calling is useless, as the signal is not caught in the mountains.
We go back and turn to the wooden toilet. There is something in the sand, but when we try to pick it up, a terribly disgruntled scorpion crawls out on us. And he's clearly not in the mood. Shamefully retreat and return to the Shadow Ranch... to pass cooing Mary Youngson and Tex. Interesting layout. During interrogation, Tex denied everything. Let's visit Mary. But before entering the store, we call Sheriff Fernandez and find out the lock code: 9274. We go to talk with the Indian woman, and by cunning we force her to admit that they have an affair with Tex. At the same time, we learn about the reason why Mary so wants to buy part of the land from Rowley.
We go outside and call Bertha Purcell to find out about Dry Creek. It turns out that Capp was once in the town something like a mayor. But this did not prevent him from keeping his tavern with a real piano. It's time to visit the Dry Creek again. This time the scorpion did not come out to greet us, so we calmly picked up another spearhead from the ground near the toilet.
We approach Kapp's establishment, dial 9274 on the lock and go inside. A sleeping bag in the corner, a thermos, water in a plastic bottle and toothpaste are clearly not nineteenth-century items. Someone definitely lives here. We approach the slot machine and throw our coin into the slot. It is necessary to achieve the appearance of the four most notorious villains. In total, two attempts are given for each coin. The fallen villains after the first attempt must be fixed with buttons. If all else fails, another coin can be won in the machine from Mary. If you win here, you will receive two half cent coins.
We continue to look around. There are books on the table. The upper one is a manual for electricians (literature also somehow does not fit into the concept of the nineteenth century). The book is covered in dust. There is a can of crackers on the bar, but the name is unreadable. We return to Mary's shop, ask the owner about the treasures of Dirk Valentine. On the street, we call Sheriff Fernandez and tell him that someone is hiding in the Dry Creek. We return to the ranch, interrogate the workers. Sam denies the presence of the treasure (as does Mary), Tex denies Mary's visit to the lands of Edd and Diana (as Mary herself denies it). One David does not deny anything, but he is trying to find out if Nancy has a boyfriend. Hee hee.
We are going to the Anasazi Gorge (the Anasazi is an ancient Indian tribe that inhabited part of Arizona). We walk, carefully examine the rock paintings - they immediately appear on the map left by Valentine Francis. From the ground in different places of the gorge we raise three arrowheads.
On the right side of the gorge (to the right of the stairs) we take out the lasso and lift our head up. We see a sticking out log.

We cling, we climb up. On the way we look at all the petroglyphs, pick up the tip of the spear at the top and collect five more petroglyphs in our piggy bank.
We go down the rope, move away and look at the rocks. We take out our drawing and begin to put the collected petroglyphs in their places as they are carved on the rocks. As a result, "write dad's name under the piano keys" will appear at the very bottom. We go to Mary's store, call Bertha Purcell and find out about Jonathan Valentine, Dirk's father, and also ask the writer to find out the full name of crackers in a tin. We check the mail and find a letter from friends about beadwork. Now we know what kind of flower was embroidered on the wallet and how to restore it. But for this we need beads. We go to Mary and ask for beads. While she is looking for the box, we have to decorate the window, and arrange the rings according to the size and color of the stones. It's very simple and doesn't take much time.
We finish sorting and return to Mary. We take beads. Once again, we examine everything in the store. Next to the booklet is a saw cut rosewood, and on the table to the right of the rings is a set of tuning forks with Frances Humber's initials on a bag. Again we talk with Mary about the tree. If necessary, we stock up on one and a half cents for saving the cuckoo from coyotes. We return to the Dry Stream, go to the Kepp tavern, approach the piano and open the puzzle under the keys. The code is Dirk's father's name: Jonathan. We start with the penultimate letter. Click on it until we see "A". We turn to the sixth letter - we are interested in "T", click on the last one - "H", then the third - "O" (the second letter will be automatically set), the fifth - "A", and the first - "D". It remains only to restore the fourth - "H", and the cache will open.
We pick up the note: "At the entrance to the sheriff, you need to find something that you can start. Add a pen and a fork. Arrange in places. And you can continue to search." The forks are apparently tuning forks from Mary's shop. We don't have a pen yet. Will seek...
We reach the toilet and see that on the left (the right side of the porch of the store) something is blushing. We come closer ... Here it is, the desired pen, lies near the hand mill.

We approach the porch of the prison, raise the floorboard under the initials of Dirk Valentine (inverted "B" and "D"). We find some kind of mechanical device. Again we hasten to Mary to ask for tuning forks, taking the device with us. Without going to the store, we look on the Internet about crackers - they were called "Sunflower". Here is another flower in our piggy bank. Now let's fix the wallet. Using the letter of Jess and Bess as a hint, we string beads on a thread in the following sequence: yellow, alternate black beads with black beads with red corners four times; red, white, red, red with pink corners - repeat four times. The end result is something that looks like a poppy. We ask Mary for tuning forks for a while, but she can give them to Nancy for good if we bring her ten arrowheads. We will put the tips in a special box. So far we only have six pieces. But we haven't been to a place called the Wild Trail yet. Let's jump there.
We select the seventh tip to the right of the path, opposite Bob. We take a step forward - to the left of the path we raise the eighth tip. The next step will take us to Charlie's grave. Under the striped stone opposite the grave, a snake hisses, it is better not to go there. We go further along the path - we raise the ninth tip. We reach the skull - the tenth tip lies in the dust on the other side of the road. We return to Mary and give the box to her. But then it turns out that one tip is superfluous, and we get it back. At the same time we pick up the tuning forks. It's time to solve another puzzle.
We leave for Dry Creek, go to Cappie and put the box on the bar, to the right of the can of crackers.
We insert the pen, arm ourselves with tuning forks and begin to act. Letters are engraved on the tuning forks, as well as on the lid of the box. We put tuning forks in the grooves of the lid to get the name Francis, turn the handle. There is a sound of breaking glass - a wall lamp has broken. Inside was another note from Dirk: "In the one found under the striped stone, the magnet will help to cope with the locks."
We return to the ranch, unsaddle Bob. Evening comes. We return to the ammunition and take gloves from the saddle. We have a chicken coop repair job. We will repair the right wall of the chicken coop. We take the gloves from the inventory and click them on the pliers. Those who like to collect puzzles will enjoy the task. Immediately upon completion of the work, Nancy will notice that her gloves glow in the dark.

And immediately a ghostly horse will appear as a harbinger of misfortune - a wire will fly off the pole and the ranch will plunge into darkness.
The next morning begins with a call from Bess and Jess with the good news: they will finally make it to the ranch. Someday. We say goodbye and go to get a magnet from the refrigerator. Moments later, the red apple magnet is in Nancy's pocket. On our own head, we agree to help Sam collect vegetables and eggs once again ... We go out into the yard and stumble upon a strange horseshoe. Let's go show it to Tex. He determines that the stone in the horseshoe is clearly from an abandoned city.
We quickly collect vegetables for Sam (we cut off everything except the Ivory variety) and eggs, ask for a flask of water and go to Tex for permission to ride. The stern man decided to complicate our life and dismantled Bob's bridle. Until we collect, we will not go for a ride. We focus on the bridle hanging to the left of the door (it would be better to redraw it on a piece of paper if you are not a horseman and cannot assemble the harness with your eyes closed). We take out the contents of the jar and proceed.

After everything went well, we again ask Tex to let us ride and set off to seek adventure in an abandoned city. We go to the tavern. The books were gone, the things in the corner too. We play in the machine - if someone has not done this for the first time - we collect four bandits, we get two coins. We go to look at the box in the corner, we see the key lying on it. When you try to pick it up, we get hit on the head with a heavy object and immediately turn off.
We come to our senses on the bunk in Dirk Valentine's cell behind the locked door. Not bad. To the right of the sink we see crossed out sticks. But we will deal with them later. Turn around 180 degrees and pick up bricks from the floor. We have to artistic throwing bricks into the key. So, the disposition is as follows: the key hangs on a nail to our right. A little further on, a chair is lying on its side. Goal: get the key.
We spin the lasso (don't ask me how to do it while sitting indoors in cramped conditions - I'm not a cowboy), throw it over the back of the chair, put the chair in an upright position. With bricks we knock down the key from the nail, setting the strength and height of the throw. After the key is on the chair, we again throw a lasso on the back and drag the chair. The key falls to the floor in our direction and ends up in Nancy's hands. Now we are quietly engaged in the inscriptions on the wall. The code is simple, one dash equals one letter of the alphabet. That is, four vertical and one oblique - the fifth letter, that is, "D". We arm ourselves with the alphabet and count. We write the found letter under the sticks. We get "under the lamp of the bank." We open the lock of the chamber, go out and stumble upon paper - the key to deciphering a piece of paper from the hearth. Now we can read what is written there. From the note it becomes clear that the criminals have an accomplice in the house, as we suspected. Well, it's nice to be right.
We approach the bank, peer into the bricks on the right corner and pull out a note from the cache: "There are different ways to play the same game. I know them and will help you play. Put the ring that you and Ellie have into the machine that is in Cappie's bar. We need a ring.
We return to the ranch, unsaddle Bob, take the saddle back to its place and go to chat with Dave. We ask the young man for his grandmother's ring for a while and tell him about the incident in the Dry Creek. Before returning to Cappie's establishment again, we call the sheriff and repeat our story. Civic duty done, now you can go.
We approach the slot machine, save the game, insert the ring of David's grandmother into the red oval on the machine and get the task to collect the kindest four characters. Be prepared to download several times. This time, as a prize, we will get the key. In anticipation of a close solution to the mystery, we jump to the Wild Path. We reach the striped stone, with considerable effort we move it aside and come across a puzzle.
In the center of the labyrinth there are four multi-colored circles, in the corners - four chips with elements: iron (Fe), silicon (Si), copper (Cu) and manganese (Mn). With a magnet, you need to drag each chip through the labyrinth, which for the sake of entertainment is still closed on top with six strips, to the circle corresponding to it: iron - to orange, silicon - to gray, copper - to blue-green, manganese - to pinkish-violet.
As I already mentioned, six planks are nailed on top of the labyrinth, so most of the time you will have to act by touch - the groove of the labyrinth is narrow, chips will often be lost. Focus on the sound, it's easier.

When all the chips are in place, the cache will open. There will be a box inside. To open it, you will again have to break your head properly.
Press in the middle of the picture to make a yellow rose appear. On the left we expose a sunflower (a flower from crackers), on the right - a lily (a flower from Francis's letters). At the top we click until a poppy appears (as on a wallet), at the very bottom we are interested in a camomile and a tulip. The box opens. Inside we find a note and another locked compartment. We read the note and open the ballerina with the key. Inside is another clue. It is associated with petroglyphs in the Anasazi Gorge. It's easier to guess riddles when you're on the spot. We're going to the gorge.

Upon fulfilling the condition, we got a handwritten Latin V - Valentine. And we just have such a petrogram on the map - V, collapsed to the right. We throw a lasso, climb a rock, move the stone with the petroglyph to the side. Under it, in a niche, another note and a white oval stone were found.
"At Charlie's grave, lift it up. Turn around and find the path to the treasure without difficulty. Go there. Yes, and I'm not talking about Charlie buried in Dry Creek."
Why are all the notes with actions written in white (and not quite white) verse, and the postscript about Charlie is in prose? Apparently, this part should not be taken into account - this is a red herring for outsiders. We take the stone with us - it is badly scratched - and we go to Mary's shop to polish the round stone. A few minutes, and we have in our hands a landscape agate depicting two trees in the form of the letter V. Not believing Dirk, we return to Charlie's grave known to us, turn 180 degrees and immediately see a tree from our agate. It turned out that this place is quite far away, so we ride horseback.
There is only one way, it is impossible to get lost. We raise our heads up, we see a protruding log, we throw a lasso, we rise. Dirk hid his treasures in an ancient Anasazi dwelling carved into stone. Amazing. We go forward along the winding corridor and see another encrypted message on the wall. As written in the key, the letters in the words are rearranged, and the squares with vertical dashes represent the colors. We carefully look, and we ourselves write down on a piece of paper in what sequence to go. After that we are on our way. The colors indicate the desired door. Don't forget to pick up five keys from the vases along the way!
Brown (chocolate), green (kiwi) - there is a jug with a key inside in the corner, yellow - we go forward and take the key from the vase under the opening of the "orange" door, red - stairs up and the key in the jug on a piece of wall, blue - stairs down , orange (orange), green, yellow - stairs up, brown, blue, green, orange, blue, brown - another vase with a key inside, green, orange, red, blue, yellow, green, blue - a vase with a key under the opening of the "red" door next to the hole covered with a rug, green, brown - stairs up, yellow - the door.
The "yellow" door is padlocked with five keys that we found in vases on the way here.

We open the lock (strange, no puzzles), we go inside. The room is painted with hearts and, one might say, romantically decorated. In the right corner is a small chest filled with golden hearts. This is Dirk Valentine's treasure.

We close the chest and exit the door to see Sam walking down the maze. He launches into spatial speeches with explanations of what is happening. We run down, as soon as he finishes ranting, we go down the "brown" stairs and get into the hall. We change the stone above the red door (where the last key was taken from the vase) with the stone above the green door. After that, from a safe place, we observe how the criminal falls into the pit. All of this leads into the final cutscene, in which everything ends well: Dave gets the treasure, Rowley continues to run the ranch, Mary and Tex officially start dating, the horse is no longer smeared with glow cream, and the traveling frogs finally make it to the ranch. And Nancy Drew, nicknamed Ironpants, is sent to England to investigate the curse of Blackmoor Manor.
Don't want to join? ;).
"... And how it was in the book"
I do not want to reveal all the secrets of the book - it is worth reading. But without the book, some moments of the game will be incomprehensible. First, it was no coincidence that the headlines in the newspapers mentioned bank robbers seen in the area. In the book, there are not only Dirk Valentine's treasures, but also robbers. Sam was one of that gang. Secondly, the moment with Dave's question about the young man Nancy is detailed in the book and is directly related to the investigation.Thirdly, Tex was not dating Mary, but...
However, I will say no more. Read for yourself, the book is shorter than this game. But it's no less interesting.
Conclusion and assessments
What can I say? It's rare to come across a really interesting game. So interesting that after its completion the book was also read with pleasure. "The Secret of the Shadow Ranch" was completed in a little less than two days with a break for sleep and food. It's impossible to break away. A few moments even after reading the book remained incomprehensible, but oh well ...And if you consider how many materials on the Internet had to be rummaged through in order to quickly answer Tex's questions, and not leave the location and go back to the house to read "Entertaining Horse Breeding" in two volumes, then the benefits of the game become clear - I can now describe differences in colors or structure of the hoof, as well as tell the story of the appaloosa. So in any case, the game is worth the candle, despite the fact that the main criminal was identified in the first third of the game. I look forward to the rest of the parts about Nancy Ironpants and her friends.
Well, a little bit of technical information in the end. The game has two difficulty levels. I played low. If you choose a more difficult passage, then forget about helping Bass with Jess and Joe with Frank, although the latter did not help much anyway. Well, the puzzles, of course, will become more difficult.
Otherwise, a great game and a great gift for a teenage girl. I don’t know if the boy wants to play for the girl :).
The ratings will be as follows:
Graphic arts: 80%
Sound: 80%
Game process: 90%
General impression: 83%
Walkthrough Nancy Drew: The Secret of Shadow Ranch
Level: junior detective
Rowley invites Nancy to the Shadow Ranch vacation. Bes and Jess, unfortunately, did not arrive. However, a mysterious horse ghost has appeared on the ranch.
Be sure to check your email and secure your horse's saddle girth.
The first day
Contact Rowley and check your email. Talk to Bes and Jess. Examine the room - a bookcase, a picture and a table. You can read the guide for a beginner horse breeder. In the kitchen, on the refrigerator, you will find the Sheriff's phone number. To the right is the chef Sam, talk to him. We go to the street. Dave is standing near the chicken coop. Chat with him and take the key. Next, we inspect the stable (to the right of the chicken coop) and speak with the groom Tex. On the barrel are named gloves, a saddle and a hat (Bob). We take it all. On the way back, you can see posters hanging on the walls. Again we go to the cook. Open the cabinet with the key located to the left of the chest. There you will find an interesting letter written by Tex the groom's sister. Take the letter, read the note and take the three levers from the top shelf. These levers must be inserted into the blue chest. Under each lever, you will see birds of a different color.
Remember the broken clock? A number corresponds to a certain color. We put the red lever at 12 o'clock, the blue one at 2 o'clock and the yellow lever at 7 o'clock.
Take the clock from the cache. Having opened them, active numbers will be available on the dial: 12, 10, 8, 6, 4, 2. The task is not difficult. You need to keep all numbers pressed down. Press the button, if it remains pressed, then press another. Memorize the sequence and the puzzle will be completed. The main thing is not to leave the mini-game, otherwise the sequence will be different. After opening the secret compartment of the clock, take the item, read the letter and the diary. Also take the diagram from the envelope with the letter. Search the Internet for information about Rose. Take the newspapers by the fireplace. Now go out, turn around to face the door and pick up the basket.
Go to the sunflower beds and take the branches.

Now inspect the firewood. For a mini-game to appear, you need to place the first log and pick up a sledgehammer with a wedge. Carefully inspect the location of the log, the position of your legs depends on it. Position your legs in the same way as the log is located. It is also necessary to monitor the location of the wedge in the log. If it is in the middle, then the impact force is average. Then take logs. Take the bucket from the fire place and head to the red house. On the right, you can fill the bucket with water. Then we go to the place where the fire is located. Take the encrypted note among the ashes. Throw newspaper, brushwood and firewood. Leave the bucket next to the fire. We go to the beds where vegetables grow.
To harvest vegetables, first read the information about harvesting. Search the Internet. First, read the name of the vegetable in the garden, then look for information about it on the Internet. Be careful if you pick a green vegetable or an overripe one, then the task will need to be completed again. Well, if you pick all the vegetables in a row, then you will be kicked out of the Ranch. After collecting the vegetables, take them to Sam and take the egg basket. Examine it in inventory. To collect the side of the damaged basket, pull the red thread 3 times. Well, now you can collect the eggs. There is a sign hanging in the chicken coop, which says about a dangerous chicken. It is better not to touch the chicken if it is sitting under the sign. Otherwise, you will be escorted from the ranch and you will have to take a second chance. Collect the eggs and take them to Sam, but he will demand a Dangerous Chicken Egg. After that, he will give the flask.
Nancy Drew is a young observant person who manages to find a reason to investigate every incident. That is, stick your curious nose into all the cracks and pester others with leading questions. And all this - with constant success leads the tireless Nancy to unravel the mysteries.
Books written by Caroline Keane have been reprinted many times in many countries around the world. If you look carefully, you can easily find them in our bookstores.
This time, Nancy was invited to visit the ranch of Edd and Diana Rowley, the aunts and uncles of her friends Bess and Jess. In order to relax and have a good time. But upon arrival, Nancy finds out that her friends - they flew on another flight - are still missing. Moreover, there are no ranchers themselves ...
System requirements
- Operating system Microsoft Windows 98SE/Me/2000/XP
- Processor Pentium-II 400 MHz
- 64 MB RAM
- 605 MB free hard disk space
- 3D video adapter with 16 MB memory
- 16-bit DirectX compatible sound card
- CD drive
Passage or "How it was in the game ..."
Nancy tells about all the previous events in a letter to the housekeeper of the family, Drew Hanna, so that a long intro will not distract us from the investigation. Once in the living room, we look around properly. To begin with, we approach the coffee table and study the first volume of the book from the Entertaining Horse Breeding for Dummies series. We read carefully - not only is it interesting, it will also come in handy in the future.

Then we come to the fireplace. There we pay attention that the clock on the mantel shows the wrong time, and in the paper tray (to the left of the hearth) there is a newspaper with an article about the intense heat. We notice all the small details - we are detectives. Nancy puts the most important things in her notebook, where you can look from time to time to refresh your memories.
Then we move on to the left side of the living room. In the corner is a triangular chest with a puzzle on the lid. There are some things in the chest itself. There is a secretary to the left, but it is locked. What a pity! To the left of the secretary, near the window, two bookcases are freely located. On the right shelf is the second volume on entertaining horse breeding. We read carefully. Turning left again, we run into a wall with windows and an entrance door. There is a note on the door notifying us of the still broken porch and asking us to use the back door.
The question is brewing, how did Nancy manage to get into the house through the front door, if repairs are underway, and the door is generally closed? But that's beside the point...
To the left is another bookcase. Among other books we find there a novel autographed by the author, Bertha Purcell, signed by Diana Rowley. There is nothing else of interest on this wall. We return to the original position.
To the right of the fireplace, on the wall, is a portrait of Frances Humber. Even more to the right is a radio, on which we will be told about the terrible heat, the sale of livestock and miracle vitamins for animals. We go to the kitchen and the first thing we rush to the refrigerator. We look at the sheriff's phone - it is automatically entered into the memory of Nancy's mobile phone. We run through the table of measures with our eyes (this will be very useful in the future) and turn right. To the left of us are a stove and an oven, to the right is a table with a box of interesting recipes (carefully copied on a piece of paper), straight ahead - in the back of the kitchen - a man is standing with his back to us. We are trying to communicate, but he asks to contact the owners by phone first. We call Rowley and find out that Edda was bitten in the hand by a poisonous snake, so at the moment Diana is guarding her husband in the hospital, where they will stay for some time.
Nancy is asked to take the secretary key from David, pick up the letter from it and take it to the addressee. After a conversation with Rowley, we return to a conversation with Sam Thurmond, a local chef. He tells us about the ghost of a horse, which all the inhabitants of the ranch saw shortly before the accident, and the legend about the owner of this horse (before it was a ghost), Dirk Valentine, and a girl named Francis, who used to live in this house. It is her portrait that hangs in the living room. Of course, Nancy's eyes lit up from such a story.
After chatting with Sam, we go into the yard. We turn to the door and study the thermometer - it's hot. We go to the man standing next to the chicken coop. This is David. We talk with him about life, we get the key to the secretary. David clearly doesn't like our presence at the ranch.
We go to the gate, decorated with a skull - this is a stable. On the left - a stall, on the right - ammunition and fodder in one bottle. Inside we will find several saddles, a harness, a chest with feed, posters and Tex the groom. A very stern man, I must say. He tells us the rules of behavior with a horse and does not allow us to ride without passing an oral exam (I must say right away that any puncture leads to the expulsion of Nancy from the ranch) on knowledge of the subject. But before the exam, we need to get cheat sheets (player) and a flask (Nancy) - you should ask Sam for it. But before returning to the house, we take a saddle from the lower right corner (the name of the horse on the holder is Bob), and a hat from the bedside table. We go out to the stall, we approach Bob, our horse. We saddle, tighten the girth. The training went well. We remove the saddle and go to hang it in place. We raise the dropped letter and read - this is a congratulatory card for Tex from his sister. The corresponding mark appears in the notepad.
While we are walking towards the house, we are overtaken by a call from Bess and Jess, who are stuck at the airport due to a plane breakdown (they will never get to the ranch until the end credits). Having discussed with them all the events at the ranch, passing on the local legend about the robber, his beloved and the ghost of the horse, and also building a working version, we reach the living room. We open the secretary with a key and begin to rummage through the master's papers. We extract the bill of sale on the chest, the desired letter for Mary, a note with threats from Tex's sister. From the upper left compartment we take away three strange types of pieces of iron. We insert them into the lid of the triangular chest. Come up. Now we will look for the cipher, but it still has time.
For a couple of minutes we return to the stable to interrogate Tex about his sister's note. Do not be shy to tear a person away from work and bring him to white heat, and after several such interrogations he will tell everything himself. So, if you believe the words of Tex, he rarely communicates with his sister, and if he were in Rowley's place, he himself would have fired her because of the scandalous nature. We diligently outline and go to beg for a flask from Sam.
The talkative cook gladly loaded Nancy the Cinderella with tasks. To begin with, he demanded to bring him fresh vegetables from the beds, and then fill a bucket of water and prepare everything for making a fire. I always suspected that chopping wood was a purely feminine occupation. Sam only confirmed me in my opinion.
We go out into the yard, turn around to the door and remove a wicker basket from the wall next to the thermometer (I would say that this is a tray). We go to the beds and almost at the very fence we select branches for kindling. Then we pick two obviously ripe tomatoes. Pink ones raise questions, so we climb the Internet through a mobile phone for the right answer. Having collected everything that is possible, we go to the hearth and pull out the burnt encryption from the fire pit (in the words, the letters are rearranged, but you can read, but it’s hard to understand the symbols),

And from the ground we raise the red bucket. We go to the red building, fill the bucket with water and put it in the place where we took it from. We approach the door to the house - on the left there is still dry wood on the ground. We take. We return to Sam, and together with the task to get eggs from the chicken coop, we get a "not very reliable" basket. I'm going to the chicken coop. But in order to collect and safely bring the eggs to the kitchen, we need to fix the basket. Follow the instructions and focus on the pattern, it should be the same along the entire length of the basket. A properly placed straw will make a characteristic sound. After everything is folded, we take a red thread and fasten all the rods in three places. We collect eggs in all cells (read the inscription on the large poster and do not touch the white chicken - it is psychic!). The first egg placed in the basket will break, but this will not affect the task in any way, do not worry.
We leave the chicken coop and pick up the dried wood at the wheels of the cart. We return to Sam - he says that there are still eggs there. Again we go to the chicken coop and, without going inside, we select dry branches to the right of the building. This time the white chicken is gone, so we can boldly take her egg. After that, Sam resignedly gives us a flask, although we have not yet begun to arrange a fire. Well, okay. We'll still have a fire. We have dry land, we brought water. Now you need to chop wood. But first, let's take a couple of newspapers from the fireplace. The second headline is quite remarkable: bank robbers were seen in the area, stealing one hundred thousand dollars in Denver. Clothes, a car and green glasses served as signs for identification. Let's remember. We take this newspaper for kindling. We're going to chop wood. Entertainment guaranteed.
The sequence of actions is as follows: put a log, stick the striker with the blade down, choose the angle of impact and your own location relative to all this disgrace, and then hit the butt with a sledgehammer. And so - three times. A heartbreaking sight. But in fact, everything is very simple.
We pick up firewood and go to the red barn. If you stand a little further away from it, you can see dry branches lying between the bush and the right wall (you will have to peer very closely to see it). We take with us. We approach the hearth and lay out crumpled newspapers, branches and firewood. We hear praise from Sam. Now with a clear conscience we are going to be examined. To begin with, we look at the diagram of the structure of the horse and its hooves (this poster hangs on the wall in front of Tex). Redrawing the names, it will come in handy. We take the saddle and talk to Tex. We go to Bob, we saddle, we tighten the girth, we take it by the reins. We sit in the saddle. And then Tex appears with his questions (questions and answers are attached below, so copy it on a piece of paper and use it to your health).
Question. Where is the hock located? Answer. On the hind legs. Question.Where is the arrow on the horse? Answer. On the underside of the hoof. Question. How many feet are there in fifteen palms? Answer. Five feet. Question. What kind of horse is the Tennessee Walking Horse? Answer. Horse. Question. How can you recognize colic in a horse? Answer. She constantly lays down on the ground, then gets up. Question. What is the difference between bay and red colors? Answer. The bay has a black tail, mane and legs. Question. What Native American tribe began to breed the Appaloosa? Answer. Nez Perce. Question. What organ of the horse is affected by laminitis? Answer. Legs. Question. What should you always check before you sit on a saddled horse? Answer. Girth. Question. What is a mule? Answer. A hybrid derived from a mare and a donkey.Phew, done. We are allowed to ride on our own, but we are not allowed to gallop Bob. And thanks for that. We drive up to the gate and select Mary's store on the map. We go inside and take a look. Old photographs, texts about Native American petroglyphs depicting these drawings... An old chest with an engraving of EKh and AH and three square holes - exactly like on the lid of a ranch chest - stands against the wall.
On the table is a booklet dedicated to the Arizona fossils. The machine with the game "Run for cover", a table with books by Bertha Purcell - it was she who signed the book to Diana. It turns out that Bertha is a recognized expert on nineteenth-century Arizona history. And this summer she will visit local attractions. And here is her phone. Curious... Different arrowheads hang in a frame on the wall. We turn to the counter. On the left is a photograph of a lady riding a beautiful horse. The horse reared up...
Everything has been studied, you can begin to interrogate the hostess of the institution. After talking with Mary about everything, we return to the game. By clicking on the arrows on the screen, we help the cuckoo to dash into the hole before the coyotes have the opportunity to write it down in their lunch menu. Moves are made one cell, in turn. If you reach a dead end, click on "Reset". The main thing in the game is to "hang" the coyotes on the cuckoo's tail. As a reward, Nancy will receive an old one and a half cent coin with the inscription "Dry Brook".
We ask Mary about the prize, but she does not know what these coins were used for in the nineteenth century. We approach the chest and carefully examine it. Mary allows us to take some of the contents if we can open the chest. We did not pull her by the tongue.
We go outside and call first Bess and Jess, and then Rowley. And we make inquiries about the land that Mary wants to buy, about the ghostly horse, about Francis Humber and about the poisonous snake. We learn a lot of interesting things. The triangular chest used to belong to Francis's father. And his initials were M.Kh. So the chest in Mary's shop could also be his. A A.Kh. and E.Kh., apparently his mother and father, since a wedding motif is depicted on the chest ...
Once again we look at the advertising poster of Bertha Purcell, go out into the street and call the eminent writer. E.Kh. is Eldridge Humber and A. is Abigail. And this is indeed their wedding chest, and it belonged to Frances's paternal grandparents. The date of their wedding is the code: September 4, 1811. We return to the chest, insert three keys and set them at 4, 9 and 11 o'clock as if their heads were hour hands. We take the old clock from the chest. We return to the ranch with our heads held high.
We unsaddle Bob, take the saddle to its place. We bring down Tex and go to chat with friendly Sam about Mary Youngsson and her strong desire to buy a piece of land from Rowley. Then we go to open the triangular chest. We look at the color of the birds, go to the broken clock on the mantelpiece and note that the red bird is 12 hours, the blue one is 2, and the yellow one is 7. Then we act in the same way as before in the store.
Eureka! Inside we find an envelope addressed to Francis. Inside the envelope we find a letter from her beloved Dirk Valentine with a secret message and numbers: 9, 12, 15, 22, 5, 25, 15, 21. What this means is unknown. The second sheet in the envelope was a strange map with letters and drawings. Put aside.
We look in the chest. Antique clock with the initials M.Kh. on the inside of the lid they stopped at six minutes past three. We look at the clock carefully and click on the numbers on the dial in the following sequence: 10, 12, 4, 2, 6, 8. The dial opens and we see inside the watch chain from the first chest and a photo of a couple: an elderly man and a young woman.
The third item in the cache was the diary of Meryl Humber, Frances's father, who was the sheriff of the area. We read and learn a lot. Including about flowers. Rose Harrison - remember. Read on and we are told the tragic story of a single father whose daughter is in love with a train robber. Dirk was hanged thanks to Maryle, and Frances ran away from home and never made herself known again. A very sad story. We will investigate.
We promptly recall the second clock. We take out the box with the clock, take out the chain from the inventory and insert it into the clock. Initials F.Kh. issue the hostess. This watch also has a secret. Code 5, 7, 1, 9, 11, 3. Only half of the photograph lies in Francis's watch - the part that depicted dad is missing. On the back it says: "Green bottle under ...".
We go out into the yard. Evening comes with a picnic and campfire songs. We understand that Sam can't sing, and Tex and David claim that he can't cook. Be that as it may, everyone disperses, and then a ghostly horse appears, rushes past the red barn, in which the pipe immediately breaks through. The ranch is heating up. On this optimistic note, the day ends.
The morning begins with a call from a worried Diana Rowley. We talk about hurricanes and strange occurrences. In the background, Ed tries to declare himself healthy and break out of the hospital. After talking with Rowley, we call the sheriff and Bertha Purcell, and share information about Dirk Valentine. At the same time, we find out where Francis was hiding from her father. For help in solving the puzzle, we turn to Frank and Joe, amateur detectives. But their advice did not help. We draw conclusions and go out into the kitchen: Sam has gone somewhere. Using this opportunity, we rummage in the table to the right of the stove. We find a geological map - why could a cook need it? Suspicious. Unfortunately, Sam caught us in the act. In a fit of repentance, we ask for forgiveness and offer our help. Sam asks to bring him ripe vegetables from the garden. We take a basket, go to the tomatoes and dial the GDS number - that's where Sam bought the card. Interesting, interesting... The quiet cook is interested in Dirk Valentine's treasures. And he works in the house where the beloved of the famous robber lived. Very suspicious... Collecting vegetables, using hints from the telephone Internet.

Make a mistake twice and bring the cook the wrong thing - he will complain about you to the owners, and Nancy will go through the suitcase-station-house stage. That's when "Second Chance" comes in handy - the ability to return to the game before making a mistake. Tear all the beans from the left bed, you can't go wrong. She is already mature. After the harvest, we again have to go to the chicken coop - without touching the white chicken!
We bring eggs to the kitchen, but Sam again asks us for a favor - today is Tex's birthday, and if Sam bakes the cake, the birthday boy will not touch it. The icing is already ready, but the cake itself is ours. Sam does not limit us in time. We take a flask of water from him and go to read the recipe for the Shadow Ranch cake. Interestingly, this recipe was written by Frances. The cake is topped with a marzipan flower. And then a flower ... Okay, write it down (next to it are the measures that Nancy will use).
- 1 cup butter - 2 packs
- 2 eggs
- 1 2/3 cups milk - 5 scoops
- 4 cups flour - 2 pints
- 1 tablespoon baking powder - 3 teaspoons
- 2 1/3 cups sugar - 7 scoops
- 3 teaspoons vanilla
Bake in medium form for 45 minutes at medium temperature. We try the cake and decorate with icing sugar. After that, we collect Francis marzipan flower from pieces, focusing on the contours of the flower on the top of the cake. As a result, we got a flower called a tulip. Using food coloring in two colors, color the stem with leaves and the flower itself.
After we have skillfully baked and decorated the cake, we can continue to investigate. The entrance to the red building is closed by order of the sheriff. We call Fernandez and get permission to enter and inspect the damage. The pipe is really badly rusted, just like Sam said. On the ground just to the left of the pipe lies an arrowhead. And under the bottom shelf of the rack was something interesting. The lattice all this time hid the entrance to the secret passage. We pass to the end, get out in the basement of the house and stumble upon David. A delicate situation... We interrogate a secret treasure hunter and find out that his grandmother was the cousin of Francis Humber, and the heiress of her entire fortune. At least he's not a criminal. But David had the second half of the photograph from the watch. On the back it is written: "stairs to the basement." We look at the letter of Francis to her cousin - in the upper right corner we see another flower - a lily. Now we know Dave's secret and we promise to insure him and fix the chicken cage. After a heart-to-heart conversation, David left, and we were left alone with the basement. We're better off.
We look around. There is a bottle of acid on the shelf. A shelf below is a beaded purse. We take it in our hands and study it carefully. It looks like a flower is missing. We go into the hole again, go down one step, turn around and study it properly. Below it is a puzzle that looks like tags. A chip with the initials F.Kh. move one cell to the right. Below it is a green bottle. Inside we find Dirk's letter. Encrypted. All you can bear: Frances' shawl, embroidered purse, knitting book, Friday meeting at the big rocks. Riddle...
Below it is another letter. About four packs of crackers, an agate stone, and a meeting on Tuesday at the cactus. And here is the third letter. About the cake and the flower on Frances' letters, and Thursday's meeting at Charlie's grave. We leave through a secret door (outside it is disguised as a bookcase) and go to look at Francis's shawl in the portrait. Cheerful pattern. We love, but understand little. We take out the mobile and search through the browser. We read about agates and about knitting. The next flower will be a chamomile. It doesn't get any easier from time to time.
We call girlfriends and hold an emergency meeting. We give Bess and Jess a party task to find in their thick book on the 19th century data on the manufacturer of the beaded purse. We call Bertha Purcell and find out about the one and a half cents we won. Then we call Diana Rowley and make inquiries about Tex's sister. We go to ask the stern groom for a horse. But this hater of city ladies tells me to feed the chickens and horses first. We're in a hurry, we're in a hurry.
We approach the chests with grain, open the far right - this is a mixture for chickens. We pour two buckets into the yellow bucket on the scales, refuse to empty it and go to feed the chickens. Raise the lid, pour out the grain, close the lid. Let Tex burst with anger! Now we proceed to the difficult stage - the horses also want to eat.
Bob's ration: 2 measures of oats (leftmost box), 1 measure of corn (2nd box from left), 1.5 measures of mixed feed (third, corner box). We weigh. 4.5 kilograms - everything is strictly according to the books!
Ration for Clyde: 3 measures of oats, 1.5 mixtures. But this does not reach 4.5 kilograms, so we add another measure of corn.
Ration for Ace: 1 measure of oats, half a measure of corn (actually you need to take 2 measures of corn), 3 measures of feed mixture (actually you need to take half a measure of the mixture).
We feed the last horse, put the bucket in place and go to boast to the stern groom. But the uncle got something and decided to let us practice in throwing a lasso and jumping against the clock. And Tex himself will take the exam with us. As always. But we can ride Bob on our own business. After we pass the exam :).
We saddle Bob, tighten the girth, take him out into the corral. There are already three barrels carefully prepared by Tex and a broom leaning against a piece of wood. A lasso hangs nearby. First we drive up to it - it's easier. We take it, spin it, and when the rope forms a perfect circle, we throw Five out of five hits, and we are halfway to success.
Jumps are more difficult. It is necessary to keep within ten seconds without hitting a single barrel. A click of the mouse spurs the horse. Each mistake - plus five seconds to the final time, so one mistake is enough to fill up everything. The route map can be viewed on the wall in the stall. We go around the first barrel on the right, and the second and third on the left,

Then we stop next to Tex. Gain some patience and let's get started. One click almost at the barrel is enough. Gone! Tex's jaw dropped. It serves him right! We take our lasso.
We're going to Dry Creek. We approach the house closest to us on the right. Symbols are carved on the veranda: a mirror-inverted "B" and a capital "D". Dirk Valentine? We go to jail. The cells are closed, we have no key. We walk around the city. On one of the bandages we find the letter, capital "P". We turn around 180 degrees and go to the barrel - next to it on the ground lies an arrowhead. The next pair of houses - at the post office is another band with letters. It looks like a capital "U" and "A". On the opposite side of the street is a Cappy store. Whole, clean. There is a brand new lock on the door - a chain with a code. Sealed by order of the sheriff. Calling is useless, as the signal is not caught in the mountains.
We go back and turn to the wooden toilet. There is something in the sand, but when we try to pick it up, a terribly disgruntled scorpion crawls out on us. And he's clearly not in the mood. Shamefully retreat and return to the Shadow Ranch... to pass cooing Mary Youngson and Tex. Interesting layout. During interrogation, Tex denied everything. Let's visit Mary. But before entering the store, we call Sheriff Fernandez and find out the lock code: 9274. We go to talk with the Indian woman, and by cunning we force her to admit that they have an affair with Tex. At the same time, we learn about the reason why Mary so wants to buy part of the land from Rowley.
We go outside and call Bertha Purcell to find out about Dry Creek. It turns out that Capp was once in the town something like a mayor. But this did not prevent him from keeping his tavern with a real piano. It's time to visit the Dry Creek again. This time the scorpion did not come out to greet us, so we calmly picked up another spearhead from the ground near the toilet.
We approach Kapp's establishment, dial 9274 on the lock and go inside. A sleeping bag in the corner, a thermos, water in a plastic bottle and toothpaste are clearly not nineteenth-century items. Someone definitely lives here. We approach the slot machine and throw our coin into the slot. It is necessary to achieve the appearance of the four most notorious villains. In total, two attempts are given for each coin. The fallen villains after the first attempt must be fixed with buttons. If all else fails, another coin can be won in the machine from Mary. If you win here, you will receive two half cent coins.
We continue to look around. There are books on the table. The upper one is a manual for electricians (literature also somehow does not fit into the concept of the nineteenth century). The book is covered in dust. There is a can of crackers on the bar, but the name is unreadable. We return to Mary's shop, ask the owner about the treasures of Dirk Valentine. On the street, we call Sheriff Fernandez and tell him that someone is hiding in the Dry Creek. We return to the ranch, interrogate the workers. Sam denies the presence of the treasure (as does Mary), Tex denies Mary's visit to the lands of Edd and Diana (as Mary herself denies it). One David does not deny anything, but he is trying to find out if Nancy has a boyfriend. Hee hee.
We are going to the Anasazi Gorge (the Anasazi is an ancient Indian tribe that inhabited part of Arizona). We walk, carefully examine the rock paintings - they immediately appear on the map left by Valentine Francis. From the ground in different places of the gorge we raise three arrowheads.
On the right side of the gorge (to the right of the stairs) we take out the lasso and lift our head up. We see a sticking out log.

We cling, we climb up. On the way we look at all the petroglyphs, pick up the tip of the spear at the top and collect five more petroglyphs in our piggy bank.
We go down the rope, move away and look at the rocks. We take out our drawing and begin to put the collected petroglyphs in their places as they are carved on the rocks. As a result, "write dad's name under the piano keys" will appear at the very bottom. We go to Mary's store, call Bertha Purcell and find out about Jonathan Valentine, Dirk's father, and also ask the writer to find out the full name of crackers in a tin. We check the mail and find a letter from friends about beadwork. Now we know what kind of flower was embroidered on the wallet and how to restore it. But for this we need beads. We go to Mary and ask for beads. While she is looking for the box, we have to decorate the window, and arrange the rings according to the size and color of the stones. It's very simple and doesn't take much time.
We finish sorting and return to Mary. We take beads. Once again, we examine everything in the store. Next to the booklet is a saw cut rosewood, and on the table to the right of the rings is a set of tuning forks with Frances Humber's initials on a bag. Again we talk with Mary about the tree. If necessary, we stock up on one and a half cents for saving the cuckoo from coyotes. We return to the Dry Stream, go to the Kepp tavern, approach the piano and open the puzzle under the keys. The code is Dirk's father's name: Jonathan. We start with the penultimate letter. Click on it until we see "A". We turn to the sixth letter - we are interested in "T", click on the last one - "H", then the third - "O" (the second letter will be automatically set), the fifth - "A", and the first - "D". It remains only to restore the fourth - "H", and the cache will open.
We pick up the note: "At the entrance to the sheriff, you need to find something that you can start. Add a pen and a fork. Arrange in places. And you can continue to search." The forks are apparently tuning forks from Mary's shop. We don't have a pen yet. Will seek...
We reach the toilet and see that on the left (the right side of the porch of the store) something is blushing. We come closer ... Here it is, the desired pen, lies near the hand mill.

We approach the porch of the prison, raise the floorboard under the initials of Dirk Valentine (inverted "B" and "D"). We find some kind of mechanical device. Again we hasten to Mary to ask for tuning forks, taking the device with us. Without going to the store, we look on the Internet about crackers - they were called "Sunflower". Here is another flower in our piggy bank. Now let's fix the wallet. Using the letter of Jess and Bess as a hint, we string beads on a thread in the following sequence: yellow, alternate black beads with black beads with red corners four times; red, white, red, red with pink corners - repeat four times. The end result is something that looks like a poppy. We ask Mary for tuning forks for a while, but she can give them to Nancy for good if we bring her ten arrowheads. We will put the tips in a special box. So far we only have six pieces. But we haven't been to a place called the Wild Trail yet. Let's jump there.
We select the seventh tip to the right of the path, opposite Bob. We take a step forward - to the left of the path we raise the eighth tip. The next step will take us to Charlie's grave. Under the striped stone opposite the grave, a snake hisses, it is better not to go there. We go further along the path - we raise the ninth tip. We reach the skull - the tenth tip lies in the dust on the other side of the road. We return to Mary and give the box to her. But then it turns out that one tip is superfluous, and we get it back. At the same time we pick up the tuning forks. It's time to solve another puzzle.
We leave for Dry Creek, go to Cappie and put the box on the bar, to the right of the can of crackers.
We insert the pen, arm ourselves with tuning forks and begin to act. Letters are engraved on the tuning forks, as well as on the lid of the box. We put tuning forks in the grooves of the lid to get the name Francis, turn the handle. There is a sound of breaking glass - a wall lamp has broken. Inside was another note from Dirk: "In the one found under the striped stone, the magnet will help to cope with the locks."
We return to the ranch, unsaddle Bob. Evening comes. We return to the ammunition and take gloves from the saddle. We have a chicken coop repair job. We will repair the right wall of the chicken coop. We take the gloves from the inventory and click them on the pliers. Those who like to collect puzzles will enjoy the task. Immediately upon completion of the work, Nancy will notice that her gloves glow in the dark.

And immediately a ghostly horse will appear as a harbinger of misfortune - a wire will fly off the pole and the ranch will plunge into darkness.
The next morning begins with a call from Bess and Jess with the good news: they will finally make it to the ranch. Someday. We say goodbye and go to get a magnet from the refrigerator. Moments later, the red apple magnet is in Nancy's pocket. On our own head, we agree to help Sam collect vegetables and eggs once again ... We go out into the yard and stumble upon a strange horseshoe. Let's go show it to Tex. He determines that the stone in the horseshoe is clearly from an abandoned city.
We quickly collect vegetables for Sam (we cut off everything except the Ivory variety) and eggs, ask for a flask of water and go to Tex for permission to ride. The stern man decided to complicate our life and dismantled Bob's bridle. Until we collect, we will not go for a ride. We focus on the bridle hanging to the left of the door (it would be better to redraw it on a piece of paper if you are not a horseman and cannot assemble the harness with your eyes closed). We take out the contents of the jar and proceed.

After everything went well, we again ask Tex to let us ride and set off to seek adventure in an abandoned city. We go to the tavern. The books were gone, the things in the corner too. We play in the machine - if someone has not done this for the first time - we collect four bandits, we get two coins. We go to look at the box in the corner, we see the key lying on it. When you try to pick it up, we get hit on the head with a heavy object and immediately turn off.
We come to our senses on the bunk in Dirk Valentine's cell behind the locked door. Not bad. To the right of the sink we see crossed out sticks. But we will deal with them later. Turn around 180 degrees and pick up bricks from the floor. We have to artistic throwing bricks into the key. So, the disposition is as follows: the key hangs on a nail to our right. A little further on, a chair is lying on its side. Goal: get the key.
We spin the lasso (don't ask me how to do it while sitting indoors in cramped conditions - I'm not a cowboy), throw it over the back of the chair, put the chair in an upright position. With bricks we knock down the key from the nail, setting the strength and height of the throw. After the key is on the chair, we again throw a lasso on the back and drag the chair. The key falls to the floor in our direction and ends up in Nancy's hands. Now we are quietly engaged in the inscriptions on the wall. The code is simple, one dash equals one letter of the alphabet. That is, four vertical and one oblique - the fifth letter, that is, "D". We arm ourselves with the alphabet and count. We write the found letter under the sticks. We get "under the lamp of the bank." We open the lock of the chamber, go out and stumble upon paper - the key to deciphering a piece of paper from the hearth. Now we can read what is written there. From the note it becomes clear that the criminals have an accomplice in the house, as we suspected. Well, it's nice to be right.
We approach the bank, peer into the bricks on the right corner and pull out a note from the cache: "There are different ways to play the same game. I know them and will help you play. Put the ring that you and Ellie have into the machine that is in Cappie's bar. We need a ring.
We return to the ranch, unsaddle Bob, take the saddle back to its place and go to chat with Dave. We ask the young man for his grandmother's ring for a while and tell him about the incident in the Dry Creek. Before returning to Cappie's establishment again, we call the sheriff and repeat our story. Civic duty done, now you can go.
We approach the slot machine, save the game, insert the ring of David's grandmother into the red oval on the machine and get the task to collect the kindest four characters. Be prepared to download several times. This time, as a prize, we will get the key. In anticipation of a close solution to the mystery, we jump to the Wild Path. We reach the striped stone, with considerable effort we move it aside and come across a puzzle.
In the center of the labyrinth there are four multi-colored circles, in the corners - four chips with elements: iron (Fe), silicon (Si), copper (Cu) and manganese (Mn). With a magnet, you need to drag each chip through the labyrinth, which for the sake of entertainment is still closed on top with six strips, to the circle corresponding to it: iron - to orange, silicon - to gray, copper - to blue-green, manganese - to pinkish-violet.
As I already mentioned, six planks are nailed on top of the labyrinth, so most of the time you will have to act by touch - the groove of the labyrinth is narrow, chips will often be lost. Focus on the sound, it's easier.

When all the chips are in place, the cache will open. There will be a box inside. To open it, you will again have to break your head properly.
Press in the middle of the picture to make a yellow rose appear. On the left we expose a sunflower (a flower from crackers), on the right - a lily (a flower from Francis's letters). At the top we click until a poppy appears (as on a wallet), at the very bottom we are interested in a camomile and a tulip. The box opens. Inside we find a note and another locked compartment. We read the note and open the ballerina with the key. Inside is another clue. It is associated with petroglyphs in the Anasazi Gorge. It's easier to guess riddles when you're on the spot. We're going to the gorge.

Upon fulfilling the condition, we got a handwritten Latin V - Valentine. And we just have such a petrogram on the map - V, collapsed to the right. We throw a lasso, climb a rock, move the stone with the petroglyph to the side. Under it, in a niche, another note and a white oval stone were found.
"At Charlie's grave, lift it up. Turn around and find the path to the treasure without difficulty. Go there. Yes, and I'm not talking about Charlie buried in Dry Creek."
Why are all the notes with actions written in white (and not quite white) verse, and the postscript about Charlie is in prose? Apparently, this part should not be taken into account - this is a red herring for outsiders. We take the stone with us - it is badly scratched - and we go to Mary's shop to polish the round stone. A few minutes, and we have in our hands a landscape agate depicting two trees in the form of the letter V. Not believing Dirk, we return to Charlie's grave known to us, turn 180 degrees and immediately see a tree from our agate. It turned out that this place is quite far away, so we ride horseback.
There is only one way, it is impossible to get lost. We raise our heads up, we see a protruding log, we throw a lasso, we rise. Dirk hid his treasures in an ancient Anasazi dwelling carved into stone. Amazing. We go forward along the winding corridor and see another encrypted message on the wall. As written in the key, the letters in the words are rearranged, and the squares with vertical dashes represent the colors. We carefully look, and we ourselves write down on a piece of paper in what sequence to go. After that we are on our way. The colors indicate the desired door. Don't forget to pick up five keys from the vases along the way!
Brown (chocolate), green (kiwi) - there is a jug with a key inside in the corner, yellow - we go forward and take the key from the vase under the opening of the "orange" door, red - stairs up and the key in the jug on a piece of wall, blue - stairs down , orange (orange), green, yellow - stairs up, brown, blue, green, orange, blue, brown - another vase with a key inside, green, orange, red, blue, yellow, green, blue - a vase with a key under the opening of the "red" door next to the hole covered with a rug, green, brown - stairs up, yellow - the door.
The "yellow" door is padlocked with five keys that we found in vases on the way here.

We open the lock (strange, no puzzles), we go inside. The room is painted with hearts and, one might say, romantically decorated. In the right corner is a small chest filled with golden hearts. This is Dirk Valentine's treasure.

We close the chest and exit the door to see Sam walking down the maze. He launches into spatial speeches with explanations of what is happening. We run down, as soon as he finishes ranting, we go down the "brown" stairs and get into the hall. We change the stone above the red door (where the last key was taken from the vase) with the stone above the green door. After that, from a safe place, we observe how the criminal falls into the pit. All of this leads into the final cutscene, in which everything ends well: Dave gets the treasure, Rowley continues to run the ranch, Mary and Tex officially start dating, the horse is no longer smeared with glow cream, and the traveling frogs finally make it to the ranch. And Nancy Drew, nicknamed Ironpants, is sent to England to investigate the curse of Blackmoor Manor.
Don't want to join? ;).
... And how it was in the book"
I do not want to reveal all the secrets of the book - it is worth reading. But without the book, some moments of the game will be incomprehensible. First, it was no coincidence that the headlines in the newspapers mentioned bank robbers seen in the area. In the book, there are not only Dirk Valentine's treasures, but also robbers. Sam was one of that gang. Secondly, the moment with Dave's question about the young man Nancy is detailed in the book and is directly related to the investigation.
Thirdly, Tex was not dating Mary, but...
However, I will say no more. Read for yourself, the book is shorter than this game. But it's no less interesting.
Conclusion and assessments
What can I say? It's rare to come across a really interesting game. So interesting that after its completion the book was also read with pleasure. "The Secret of the Shadow Ranch" was completed in a little less than two days with a break for sleep and food. It's impossible to break away. A few moments even after reading the book remained incomprehensible, but oh well ...
And if you consider how many materials on the Internet had to be rummaged through in order to quickly answer Tex's questions, and not leave the location and go back to the house to read "Entertaining Horse Breeding" in two volumes, then the benefits of the game become clear - I can now describe differences in colors or structure of the hoof, as well as tell the story of the appaloosa. So in any case, the game is worth the candle, despite the fact that the main criminal was identified in the first third of the game. I look forward to the rest of the parts about Nancy Ironpants and her friends.
Well, a little bit of technical information in the end. The game has two difficulty levels. I played low. If you choose a more difficult passage, then forget about helping Bass with Jess and Joe with Frank, although the latter did not help much anyway. Well, the puzzles, of course, will become more difficult.
Otherwise, a great game and a great gift for a teenage girl. I don’t know if the boy wants to play for the girl :).
The ratings will be as follows:
- Graphic arts: 80%
- Sound: 80%
- Game process: 90%
- General impression: 83%
We also recommend
 Passage of the game Darksiders II Key to Redemption
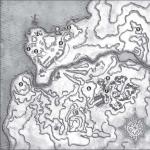 Complete walkthrough of the main and side quests of the second chapter
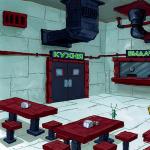 SpongeBob SquarePants (Walkthrough)
 spongebob games squarepants
 Escape Impossible: Revenge Walkthrough Walkthrough Can you escape video
 And the dragon came. Difficulty of choice. Key points of the game The Witcher 2 kill the dragon or escape the consequences