Passage of the game Darksiders II. Passage of the game Darksiders II Key to Redemption
Let's watch the introductory video. The balance of the world was disturbed, the brother of the protagonist is to blame for this. Death is sent to correct the mistakes of the War. On the horse we get to the Dark Fortress. Climb up and deal with enemies. We pick up the items that fell from them. We go inside, run along the walls, holding the jump button. We jump from one beam to another, turning 180 degrees. We destroy the enemies, climb the wall with vines and smoothly move to the ceiling. Difficulties should not arise with the first mini-boss - the Ice Giant. We strike - we deflect. Then we pass into the corridor, make a double run along the wall and push the mechanism to start the elevator.
We go up, climb the ledges. We jump from wall to wall and climb up. We continue to move vertically along the vines. We move to the right to the beams, follow the instructions displayed on the screen. We deal with enemies, go down the vines. In order not to fall into the abyss, we get to them by running along the wall. We move to the right, we jump onto the ledges, then onto the beams, we climb higher and higher. Meet the Keeper of Secrets. We carry out target acquisition in order to focus our eyes on War. We attack and dodge the triple blows of the enemy. Having used up a little less than half of the health, we quickly press the button to gain the upper hand. We finish off the brother and, using the portal, we move to another place. Before that, the Keeper of Secrets strikes us, but then we manage to kill him.
The Elder heals our wound and then sends out a Construct of Warriors. We deal with them and communicate with a new acquaintance.
The flame of the mountains
We move along the paths and get to the Trestone, where we meet the beautiful Elia and her brother Valus, the keepers of the forge. It is necessary to help the creators, to free the Flame of the mountains and the Tears of the mountains from corruption. Our benefit is that then we can get to the tree. Once upon a time, blacksmiths created a great assistant who coped with damage, but while the forge is captured, accordingly, it will not be possible to summon an assistant. We communicate with Thane and ask him to open the gate. Before leaving, you can acquire various skills from him.
We run forward, in front of the abyss we go around to the right, climbing the wall. Having got out into a vast territory, we see in the distance a one-eyed monster blocking the path. We call the horse and go to the Cauldron. Arriving at the place, we help Karn to destroy the constructs. We enter the building, use the mechanism on the right to open the next door. To successfully move through dangerous corridors, you need to remember a few rules:
We grab and throw shadow bombs at mechanisms that cannot be reached
We search the chests and find a lot of useful items
We hold the corresponding button so that the raven shows us the right path
We push the balls into the sockets, and to extract them from them, we use bombs
We extract from the chests special keys that unlock the green doors
Thus, we get to the first boss Garn. The danger is his chainsaw hand, we jump off at the moment of attack to the right or left. When the enemy is weakened, we inflict as many blows as possible and move away, as Garn has a habit of exploding and gathering again. We destroy the boxes, in some of them you can find healing potions. As a reward, we get the Dark Avenger weapon, which once belonged to the ferocious warrior Draven and therefore absorbed the rage and vindictiveness of its owner.
We pass through the doors and turn the lever in the center 720 degrees counterclockwise. The cauldron is replenished with unquenchable flames. Now you can return to Elia and report on the work done. To quickly move to it, open the global map and select the target (Armor and weapons). After talking with Elia, we get the Atonement pistol belonging to Discord.
Mountain tears.
We get to the open area and rush on a horse to the gate. After talking with Karn, we shoot at the reddish pimple on the gate and pass on. On the way we encounter enemies, flying Pityers will pester us endlessly until we destroy the hotbed where these creatures come from. The gates ahead are closed, on the left the damage has blocked the ledges. We shoot at the pimple and climb up. We deal with enemies, go further and jump down. We get to the Storm Fort.
We run along the corridor, in front of the door we turn right and climb up. We grab the shadow bomb, throw it at the ball on the opposite side. We shoot at the bomb, jump down, push the ball into the appropriate slot. We pass through the door and move to the next one on the left. We continue to go forward until we get to the statue in the center of the room. We climb up on the right, we are taught to jump from wall to wall while running along it. Push the ball down and install it in the socket. Now we go to the left, rise and jump. A little further there is another ledge, we climb along them and pick up the shadow bomb. We release the ball in the corner, again we go after the bomb and attach it to the ball. We push the ball to the locked gate. We climb onto the platform in the center along one of the sides, where there is a ledge. We step on the button and shoot at the bomb on the ball. We install the ball in the place intended for it. We pass through the opened door, in the corridor we destroy the pityers and the hotbed. Behind the next door, we undermine the damage that enveloped the lever and start the flow of water. We jump into the water and go down to the end of the current. Then we climb the ledges on the left, open the door, jump into the water again. We continue to swim, this time under water. We climb up, while running we jump from wall to wall. We fall into a trap, chop small enemies, and then deal with a larger one.
We go further, we need a key to open the door on the left. We jump into the drained drain and go along it to the end. We get to the chest, take the key and return to the door. We move along the corridors and get into a room with a puzzle. First you need to get the ball, you can do this, as we already know, with a bomb that is at the top. It's not possible to push the ball just like that, so we use a proprietary technique, thanks to which the ball instantly appears on top. We place it in the slot, grab the bomb and stand on the lowered platform. We throw a bomb into the ball and blow it up. We pass through the corridor, where we deal with enemies and a hotbed. Behind the next door we pull the lever - it does not lend itself. We shoot at the bomb on the damage, activate the lever again. We jump into the water and swim to the end. Climb up, pull the lever. We get into a huge territory, we are interested in the door on the right. We pass there and meet with the boss Karkinos. Our actions will be as follows:
1) We grab the ball and forcefully push it into Kirkonas
2) Quickly destroy the hatched crab and attack the soft belly of the boss
3) Run and dodge underground creatures
4) Dodge the battering ram
As a reward, we get the "Crusher from Kirkonas" - a powerful hammer that unleashes colossal damage on the heads of enemies. We go to the lever, activate it and, having opened the global map, we quickly move to Elia. We enter the forge working at full power and take the key of the creator from the ancient one, which will help activate the Guard in the smelter. To do this, we first need to get to the forest and find a construct there.
Move the mountain.
After entering the building, we activate the construct and bring it to the connector in the floor, as we did earlier with the balls. We shoot at the target under the door and move along the chain to the other side. We deal with the enemies, take away the shadow bomb from the small room and destroy the damage. We climb ledges, beams and again ledges. We jump off, rounding the lowest ledge, and go down the stairs. We deal with the flyers and the hotbed, from where they appear. We pass through the door, go up the stairs to the left. On the right we will see a ledge, we climb along them to the next door.
We find ourselves outside and run to the door with multi-colored elements. But so far it will not be possible to open it, so we enter the next building. We destroy the enemies, climb the stairs and go into the next room. We activate the construct on the left and use it to clear the path to the door. We get up on the connector and jump off the construct. We face enemies, in order to destroy the sentinel construct, it is necessary that he launch an attack. We quickly jump back and, returning in a jump, strike. On the ledges we go around the crystals of damage. We get to the next hall and go around the abyss along the ledges on the left. Using the construct, we split the corruption crystals on the opposite side. We return there and activate the lever. We quickly return along the bridge to the construct and make our way along the corridor to the hall. We go straight, stand in the connector and release the chain. We move to the other side, shoot at the bomb on the left. We install the ball in the slot, deal with the enemies and stand right in front of the grate next to the bomb. We grab it and throw it into the ball - we shoot. We get the key from the chest, along the vines we return to the construct. We saddle it, remove the chain and unlock the green door. On the vines on the wall and ceiling we get to the lever. With the help of the construct, we cut our way to the connector, leave it and move on. In the arena we fight with many enemies and five sentries who will attack one at a time. The most important thing is to destroy them in time to prevent the appearance of new enemies. With each new sentry there will be more enemies, and they become larger.
We get along the corridors to a small room, where there is a designer in the corner, and a lowered lift is in front. We get up on the lift as a constructor. We climb to the left side through the ledge and along the walls we move to the opposite side. We pass further, on the left is the designer. Using it, we raise the lift (the path to the connector from the lift is indicated by circles on the floor). Where the second constructor stood there is a connector, we lower the grate. With another constructor we pass through the place where the grate fell. We also get up in the slot and shoot the chain. On the beams we return to the designer, we drive them to the connector near the beam. The door is open, we can go through it. Having got out, we get to the next door on the right. We deal with the manifesting snoops and later with two mini-bosses. Don't forget to use Reaper Form to effectively defeat large enemies. We pass inside, roll the ball into the slot, in the next room there are again two large enemies. We are not fond of combinations, we make several blows and dodge.
We get to the boss Lump-construct. Despite its huge size, the enemy has a weak point - the heart, hidden under the thickness of the armor. Actions are as follows:
1) We run in a circle, being as far as possible from Uvalnya
2) Watch out for the shockwaves and jump when they get close to us
3) Quickly pick up one of the fallen shadow bombs, throw it at the enemy and shoot
4) We strike at the dropped heart, without being distracted by other small enemies
5) We continue to run in a circle, finishing off the embroidered enemies
We go upstairs, interact with a huge statue, that is, with the Guardian. After talking, we sit on his shoulder, and he takes us to the Valley of the Father of Stones. On the advice of the ancient, we return to Eidard and communicate with him.
Mountain heart.
We pass through the forge and communicate with the Guardian. The bridge has been restored, and meanwhile we have a satellite - Karn. We get to the smelter, we go along the circular path. We interact with a partner - he will throw us over the abyss. We climb up the ledges, wait for the boiler and jump onto it. We move to the right, getting ready to jump. Jumping down, we cross the abyss by running along the wall. We destroy the constructs, pull the lever on the left, go through the door. We jump on the lever, open the door for Karn. He runs to the next door and prepares to hold it when we jump off the lever.
We get to the Guardian and in order to revive him, you need to get three Hearts of Stone. Turn left and go to the first passage. We get to a structure. The bird points the way up, Karn will help you get there. We jump into the water, swim under it to the other side. Thus, we get to the ball, now you need to open the door. We pass further, again we dive into the water. There will be a passage through which we will get to the button. The door has opened, Karn will hold it while we get the orb out of here. We push the ball by force into the slot on the wall. A constructor appears from under the water, activate it and move back from where we came from. At the crossroads, turn right, destroy the crystals. We go straight to the next passage. We stand on the connector, start the circuit. Having reached its half, we jump into the vines on the left. We climb up, then we jump along the beams. In the next room we run from wall to wall, we cling to the ledge. We wait until the magma flow disappears, and quickly run along the wall. After passing through the door, we deal with enemies. We get to the chest, we extract the key from it. Right from here we jump onto the chain and head to the original room, where we unlock the green door.
We rise along the twisted stairs, we pass further. Karn will transfer us to the opposite side, and we must immediately eliminate small opponents. We go further, free a certain object from the shackles and get the ability "Death Grip", which allows you to cling to objects / targets located at a distance. We return back, using a death grip to cross over the abyss, jump onto the lever and wait for Karn to hold the door. Or we go around through the passage on the left. Further, we pass into the room on the right. We destroy a couple of enemies. Bombs hang at the top right, we grab them with a death grip and throw them into the mechanism on the left. We go further, along the beams on the left we get to the lever. Activate it and climb the wall to the ledges and jump onto the beam. In the jump, we use the grip, move along the vines on the ceiling, jump again and find ourselves at the lever. We activate it - the bridge is completely restored. Now we climb the wall and move along the ledges to the right. We get to the lift, pull the lever and go down. Everything is as usual, we move along the beams, ledges, when running along the wall we use a death grip. We press the button, we are attracted to Karn and we are thrown to the other side. We keep our way down, where we can activate the construct and get to the Heart of the Stone. We attach ourselves to him and drop him down so that his partner can deliver him to the Guardian. We will be attacked in the elevator, destroy everyone and stand in front of the Guardian.
A new path has opened, we cross the magma using a death grip. We pass through the first pipe, kill the flyers, move along the second pipe. We stand on the button and wait until Karn holds the next door. Then he will throw us over the abyss, we fly over the second abyss on our own with the help of a grip. We revive the construct and stand in the place allotted for it - between the two columns. We shoot with a chain and climb up to the central hill. Rotate the lever counterclockwise 360 degrees. We quickly jump down and prepare to jump onto the ledge of the slowly lowering platform on the left. We climb onto the chain, from the chain to the center. On the vines we climb to the right and get to the lever. Activate it, bridges appear. We go back, saddle the construct and with the help of it we pass through two bridges and destroy the interfering crystals.
We find ourselves in the territory where we see the second Heart of the stone. We destroy the enemies and jump into the water on the left. We climb along the wall to the vines, then along the ledges, we help ourselves with the help of a death grip. Next, jump back into the water on the other side. We keep the way up to the lever along the ledges and beams. Activating the lever will cause the water level to rise. We return to Karn and, driving the construct, we drive up to the stonebreaker. We pull the nearby lever, the construct is destroyed, and its ball falls into the hole. This ball then ends up in a cauldron that collapses under the weight. Periodically, a bomb appears at the bottom of passing boilers. We attract it with a death grip and throw it at the crystals above. We climb up, take the key from the chest. We unlock the door nearby, roll the ball back into the socket in the floor. We climb the walls, jumping from one to another, and get to the Heart of Stone. We return to the Guardian, in the room with bridges the water level has risen. We jump down and climb the indicated ledges. We get through the pipes to the button that opens the door.
The last heart is left, if we don’t know where to go, then we ask Dust to show the way. We are interested in a lattice door through which Karn will help to get over. There will be a lever on the right, activate it. We restore the construct, with the help of it we cut through the path, destroying the crystals. We clean the room with the Heart and stand in the corresponding slot in the center. We climb the wall, we pass further. Using a death grip, we reach the beam in a jump. We move along them, then a long run along the wall, using the grip. We are getting to the Heart quite quickly, but the most interesting is ahead. As soon as we free the Corrupted Heart, Karn will take it away, and we will find ourselves in traps, alone with the Corrupted Guard boss. Rather, he is only a warm-up opponent, since an epic battle awaits us later. The scheme of action is as follows:
1) Avoiding Claps and Dangerous Spins
2) Quickly carry out a series of attacks with scythes, and when the enemy is weakened - with additional weapons
We approach the guard and freeze in doubt. After all, the Heart is tainted with corruption, and activating a guardian with this item can lead to the most terrible consequences. And so it happens, the defender, who should be the main weapon in the fight against corruption, himself became this very corruption. We follow it, that is, we get out of this place and get to the Trestone. Then we go to the forest, where we will meet the raging Guardian. The battle will take place in several stages:
Stage 1:
1) Run clockwise (on a horse) and dodge hammer blows
2) Distance from the Guardian - as far as possible
3) Hold on the sight, and as soon as the enemy's hammer is on the ground, shoot at the shadow bombs on his hand
4) We quickly run up to the Heart and are attracted to it with a death grip, inflicting three blows
5) Repeat these steps until the arm falls off completely
Stage 2:
1) We run in any direction, the main thing is not to collide with a huge shadow bomb
2) We shoot the bomb until it flies up
3) We stand right behind the Guardian, but we don’t come close to him
4) The bomb will fly towards us, but will collide with an obstacle between us, that is, with the Guardian
5) We quickly run up to the fallen cannon, climb up it and cling to the Heart in a jump; throw three standard hits
6) Repeat these steps until the arm falls off completely
We watch the video of the destruction of the last Heart. The ancient of the last strength again restores the purified Guardian so that he can remove corruption from the path.
Tree of life.
We get to the ill-fated place where we communicate with brother Absalon, who became Corruption. Then we will talk with the merchant, we can buy more powerful weapons, armor and potions from him.
Bone Lord
We get to the Cleft of Leviathan and go inside the building. We run along the walls, use the death grip. We move along the vines, we go down lower and lower. We get up on the button and wait until all the grates open. Then quickly run from wall to wall. Enter the door on the left and fight the skeletons. We pass further, before the bridge we turn to the left. We grab the bomb and hook it next to the mechanism. We pass along the bridge, on the other hand we aim and shoot at the bomb. The bridge has been restored, we pass along it and take the key from the chest. We deal with the emerging bugs. Near the first bridge, you can jump onto the beam and get to the exit. We unlock the green door, go down the beam. We destroy a couple of skeletons, go down the stairs. We get out, on a horse we get to the Serpent Peak. Let's watch the video. We get to the Throne Room, it is not so difficult to do this. We climb higher and higher, jump on the beacons. Arriving at the place, we try to enter the Bone Lord. The guards do not let us in, because this requires the permission of the Councilor. In turn, the Advisor also does not want to let us in, but agrees to one condition - to defeat the Champion of the arena.
Royal fee.
We get to the Golden Arena, along the way we avoid the abyss along the vines on the wall and ceiling. We go down the twisted stairs. We twist the lantern, grabbing one of the sides, 180 degrees, thereby opening the other door. To attract the attention of the Champion, you need to find three soul stones. Turn right and climb up the ledge. We pass through the door, go down the steep stairs, bypassing the abyss by running along the wall. We deal with a large number of skeletons and go to the next room. We get up on the button in the central hill. The cage has opened, we pick up the bomb with a stranglehold. We throw it at the lantern, we attract to ourselves the very foundation that remains after the explosion. We put it on the button and go further along the opened grate. We run from wall to wall so as not to fall into the pit. Without turning into the room, we pass on, push the mechanism and pull the lantern towards us. Now we can look into the room and hang the lantern on the outstretched hand of the statue in the center. We twist and aim a bright light at the door. We get to the first stone of the soul, tear it out of the forehead of the statue. We go back, the grate is blocking the path - we must deal with the bugs. This pistol is perfect for this. We return back, a new door will open, from where skeletons will appear. We run along the corridor and climb up the ledges. We jump along the beams to the opposite side. We pull the lever and get out into the arena. Insert the soul stone into the head of the statue.
We deal with the skeletons and go upstairs to the next door. Once inside, turn left and go up the steep stairs. From the fallen half of the bridge we attract a shadow bomb. We get to the lantern and break the nearby crystals. Behind them will be another bomb, we grab it and throw it across the abyss. We move along the walls to the opposite side. Explode the crystals near the lantern with a bomb. We direct the lantern into the grate, go forward to the end and to the right. We take the lantern from the button, destroy the enemies and put it on the button near the statue with the lantern. We get along the walls to the previous statue with a lantern and direct it to the grate. We attract the lantern from the button with a death grip and hang it on the statues above (we climb the twisted stairs). The bridge has been restored, we cross it, go through the door and go down. We destroy numerous boxes if health potions are needed. We go further, deal with bugs and skeleton archers. We take the second stone of the soul, we return to the arena along the opened path. Insert the soul stone into the head of the statue.
We go to the central door. In the corridors we encounter a huge number of warrior skeletons and destroyer skeletons. The latter are especially dangerous, they act as mini-bosses. Having bypassed the bridge, we stand on the button and quickly run up, we attract the bomb. We get up on the platform and throw the bomb into the mechanism. We find ourselves on the other side, where we find the third stone of the soul. But before you get it, you need to defeat the Skorobeya-bump. After his attack, quickly pull up to him and deliver powerful combo blows from behind. If you attack from the front, the enemy quickly applies a shield, which complicates the process of destruction. We take the soul stone and return to the arena. Insert the soul stone into the head of the statue. Gnashor appears in the form of an underground worm. When he leans out, his head emits blue light, we quickly do a death match. We beat the defenseless enemy until he goes underground again. When the enemy finally crawls out from under the ground, a real fight will begin. Our actions will be as follows:
1) Keep a distance from the enemy when he takes out the worm and starts to strike them on the ground
2) We attack Gnashor, and when his blue talisman appears, we quickly attract him
3) We inflict as many blows as possible until he disappeared underground
4) We run around the territory and as soon as the ground rattles under us, we dodge
Having defeated the Champion, we get the Golden Skull. We open the global map and quickly move to the Eternal Throne. We communicate with the Advisor, and then with the King. We ask him to provide the Source of Souls. You need to complete the task of finding and delivering the three immortal lords.
Farisir.
We get to the tomb of Farisir. Once inside, hit the crystal in the center of the elevator and go down. We move along the corridors, dealing with mummies. In the room with the button, turn right and climb up. We clear the area from crystals with the help of bombs. We jump down and pull down a large statue. We stand on the button, continue to pull the statue towards us so that it is directly in front of us. Bombs hang on the left, we throw them at the statue, thereby moving them away from us. When it is under the bars, we leave the button and go further. On the lift, hit the crystal with the Roman numeral one (I). We go into the only room with a test. On the ledges on the left we get to the mechanism. We push it and move to the opposite side, using a death grip. From here we can see shadow bombs stuck to the ring in the center. We grab it and throw it into the mechanism on the opposite side. We return to the original position and shoot at the bomb. When both rings are at the same level, quickly fly to the other side. We take the key from the chest and go back. We jump into the pit and climb up, having previously destroyed the zombies. We face the ghosts, deal with them and get to the lift. We go to the third floor, open the green door. We move along the corridors, destroying ghosts and one general. We find ourselves somewhere between the third and fourth floors. On the ledges we move to the other side. We shoot at the bomb on the crystal on the left. We go down to the lever, activate it and a bridge appears. As we noticed, there is a column a little higher next to the bridge, we pull it to the button in the center. We return upward between the third and fourth floors. We jump onto the lift, go to the second floor and get to Farisir through the central door. The enemy will not be a problem, and he does not have any special moves. Therefore, we simply attack Farisir and dodge his blows. Sometimes he will summon skeletons, but they are also very easy targets.
We get the opportunity to call the immortal lord. We stand in the center and press the appropriate button. We order him to stand on the button behind bars.
Arbiter.
We get out (it is possible from the global map) and go to the tomb of the Arbiter. On the way we will have an obstacle, we stand in a circle and call on the lord. We direct it to the lever behind the bars on the left. Having reached the tomb, we go inside and get to the lever, fenced with bars on all sides. In the next room, we call the lord, standing in a circle, and direct him to the lever. We pass further, turn into the room on the right. We quickly call the lord to help deal with the enemies. We pull the lever and go to the immortal to the button behind the bars. We go back to the center, jump down. Pull the column between the two platforms. We jump on them and go to a meeting with the Arbiter. At his request, we set off for three restless souls, and then he will return to the Bone Lord.
We pass through the indicated door, move along the bridge and in the corridor we fight with the Lich, who summons endless skeletons. Of course, we direct all forces against the main enemy, trying to deal with him as soon as possible. We continue to go along the corridor, call on the lord on the right and enter the door on the left. We send it to the button, we pass along the bridge. Similarly with the next bridge, but it does not open up to the end. Therefore, in the jump, we use a death grip. We attract a lantern and put it next to it. Inside the wall on the left, we will notice the bombs and with the help of them we will destroy the crystals on the sides of the non-revealing half of the bridge. With a lantern we pass to the center and hang it on the statue. Rotate it 90 degrees, send it to the ally's button. We go into the next room, before reaching the stairs, we climb the ledges on the right. We jump in a turn and cling with a grip. We go upstairs and free the first soul. Then we deal with the enemies and return to the lord.
We go to the next door and, having passed along the bridge, we immediately encounter enemies and the boss Torturer. He is so slow and weak that if we just ran around in circles and fired a pistol, we would have overcome him very soon. However, we attack with everything we have. Still, the enemy has one strong point - the Tormentor attacks very sharply, so we carefully monitor him and often dodge. Requires a key to move on. We turn into another passage, call the immortal. We point him to the button around the corner. There were useful obstacles on the walls, on them we get to the back side of the lattice. Let's not forget to use the death grip on the last jump to hook on the lord. We go through the gap, again we are attracted to the wall. We move forward, on the right we notice a lever that opens the next door. We search the chest in the room and take the key. We jump down through the hole opposite the lever. We unlock the green door and find ourselves at the destroyed stairs. Using a death grip, we climb to the center. Once again we use the grip, we cling to the ledge. We jump in a turn, quickly apply the grip twice, climb higher on the wall, jump again in a turn - hold a grip. We get to the very top, take the second soul and, having finished with the enemies, we return to the Arbiter.
We leave through the central door for the last soul. We pass through the abyss, call on the lord and enter the lift. We deal with enemies and hit the crystal, which will take us to the second floor. However, we are prevented from doing this by a crystal of corruption. We send the immortal to the button that opens the grate, behind which are shadow bombs. We climb up and throw the bomb straight from there into the crystal. We jump down to the platform and go further. Climbing up, taking the soul. We see a suspended Keeper of Bones. We are attracted to him with a death grip and strike. Then the Bone Giant appears. With him, too, everything is quite standard - we attack, we dodge. We return to the Arbiter.
Before us appears the last servant of the King, who sends us to new trials.
Vasilevs.
Before heading to the Golden Arena, let's stock up on health potions. Arriving at the place, we jump into the portal and find ourselves in the Psycameron. We fight with Walkers - very strong opponents. As often as possible we dodge and strike, only after their attack. We go further, we call already two lords. We send the first one to the button on the right, stand right under the door and point the second lord to the button on the left. We pass forward, we call on the lords. We stand on the button on the left and when the bridge is restored we send the lord to the button behind bars. We go up the stairs, we see the red door. Under it there is a passage, we jump there. We direct the immortal to the button behind bars. We pass further, we go down down the long beam. Ahead on a hill are three wall-mounted mechanisms. The order of activation is as follows: center - right - left. We take the key from the chest and go back up the beam.
We unlock the green door, we observe a certain arachnid creature. We call on the lords, stand on the button in front of the bridge. We look obliquely to the left and send to the assistant button. The door on the opposite side opened. We go there, we are not in a hurry to run along the walls to the ledges. We look down and to the right, we send to the button of the lord. Now we run along the wall and find ourselves right under the grate, which will open soon. We jump down directly from the ledge and with a death grip we are attracted to an ally. We climb the stairs, without turning right, we continue to move forward. We go down to the left, we see a button behind the bars and send an assistant to it. We move along the corridor, raise the bridge, activating the wall mechanism on the left. We pass through it and get to the door.
We call the lords in a small room and enemies immediately appear. It will not be difficult to deal with even two Lumpy Scarabs, since two immortals are a terrible force. We go further, we get along the wall to the mechanism and activate it. We enter the opened door and go to fight with the boss, more precisely with two bosses - Vasilevs and Echidna. Both share one health for two. At first, the fight will seem easy, but from the second half of your health, you will have to carefully look around and not lose sight of the insidious Vasilevs. We do not stand in the way of the spider, so as not to be up to our ears in electricity. Thus, we defeat the last lord and return to the Bone Lord in the Eternal Throne.
City of the dead.
The King sent us to the City of the Dead. Use the Spirit Separator ability. We move each of the side statues in the opposite direction, without releasing them. We apply the previous appearance, again choosing the same ability. We pass inside, deal with the skeletons and the general. We stand on the button in the corner, use the soul separator. We send one copy to the opposite side, and with the other we climb up the ledges and slide the mechanism. Idea in the next room, we head to the passage on the left. We go around the abyss by running along the wall, turn right and get to the lever. We use the spirit separator, with one copy we turn the lever 180 degrees counterclockwise, and with the second we pass into the next room, we pick up the bomb from the wall on the left. We return to the room with the lever, on the right we see the mechanism, we throw a bomb at it. A platform is released on the left, we climb it with the main character and use the spirit separator. With one turn the lever, with the other we drag the platform to the other side. Here we are in the next room. Climb the stairs, go straight ahead and jump down through the gap in the floor. We take the key from the chest, activate the mechanism on the left. We get to the green door, unlock it and move on.
As soon as we enter the bridge, we immediately use the spirit separator. With a copy we climb the ledges on the right. We rise to the very top from wall to wall. We turn the lever, thereby turning the bridge in the other direction. With the second copy, we go further and look for a wall mechanism that opens the way to the lantern. We accept the previous state and return back. We attract a lantern to ourselves, we get to the statue through the passage, where there is an abyss. We put it right on the edge, go over the wall and pull it towards us. We install the lantern on the statue, turn it 180 degrees, and then move along the open path. We climb up the vines, we are not afraid to jump in a turn, so we can grab a death grip. We move along the ledges and soon we encounter two ghosts. Here you can see two levers - a large wall one and a regular one located on the other side. We use the spirit separator and activate the wall lever, run to another lever that turns the bridge. We will not be able to go back, so we take on our former appearance and are again divided into souls. We activate the wall lever, with the second copy we attract the bomb opposite. We pass along the bridge and, turning to the left, we throw a bomb into the mechanism. Now we can go further, there is another mechanism ahead, we go through the door on the left. We keep going until we get to another mechanism that will open the door below. We jump to the bridge and go to the arena. We fight against three ghosts, a general and three tormentors! Nearby there are two chests where we will find health potions. We pass further, we cling to the lever and the fire begins to rise. We quickly move along the ledges and get out to the top.
Having got out, we break through to the next door, simultaneously destroying the enemies that appear. We will save the Reaper's appearance against the Liches, who will be after the abominations - also very dangerous creatures, when attacking which we take damage.
We get to the hall, where we see a beam of light at the top. You need to get there, for this we go straight through the next door. We rise upward, bypass the lattice through the wall. We stand on the button and use the spirit separator. With a copy we run along the wall to the mechanism and activate it. We return to the original state and go through the opened door. From here it will not be difficult to jump to the statue with the help of a death grip. We twist the statue emitting light 180 degrees. We pass to the other side and fight with a few speed bumps. Then we grab the bomb and destroy the crystals. We climb up, get out onto the balcony. A snake is circling through the air, so as soon as it flies away, we quickly pick up the key from the chest. We go back and see that you can climb to the green door from below along the ledges. So let's do it and get to the place with two buttons. The point is to move the platform from one room to another, as we did before. To begin with, we stand on one button and apply a spirit separator. We stand with a copy on the next button. With the second copy we climb up and move the platform as close as possible to us. We take the previous form and stand on the platform, again use the soul separator. One copy will press the button that is responsible for the nearest grate, and the second will hold the platform further. We move the first copy to the adjacent button, the second copy will move the platform to the button next to the door. We accept the former form and move on. We activate the mechanism on the left, fly to the center. We turn the statue back to the place where the bomb is located. We return there and throw a bomb at the crystal. We push the mechanism on the statue and go down. We go to the door where the pillar of light is directed and meet with the boss Howling Bolshak. We act as follows:
1) We dodge aside from simple blows; when the enemy uses a sweeping blow, he moves his hand first in a small, then in a large circle. Considering this, we quickly move from a large to a small circle.
2) We attack Bolshak on the hands (after a simple blow) and the head (after a sweeping blow)
3) We finish off the weakened enemy
4) He will hide in the pit, and we must chop up a lot of skeletons that appear from the center.
We go further and meet with the Elder Raven, who says that we need to visit the Tree and pick up the key from there before we get to the Source of Souls. Open the global map and quickly move there. We pass through the gate to the Lost Light.
Key to redemption.
We jump to the Crystal Tower, where we encounter the Corrupted Angels. We deal with several, then a real warrior of light Nathaniel will come to the rescue. After talking with him, we can buy everything you need. We enter the tower, pull the lever and find ourselves at the top. We go to the left, deal with enemies. On the ledges on the wall we avoid the pit and destroy the remaining angels. We jump into the hole and from there we rise along the ledge. We move away and use the spirit separator. With one copy we get to the bomb, grab it and go to the edge of the pit. With the second copy, we attract it from the other side with a death grip and, having reached the crystal, we throw it at it. We put on the usual appearance and run to the place where the crystal was. On the ledges and vines we climb to the very top. We meet with the Archon and ask him for the key. He promises to help if we get Arafel's rod on Earth.
Wand of Arafel.
We jump into the portal and immediately find ourselves in the thick of things: we observe the fight between angels and evil spirits. We help Uriel deal with the flocks. We grab a weapon in the corner and the game turns into a shooter. There are several shooting modes, something like a machine gun and a shotgun. Having cleared the area, we communicate with the angel. We learn that the Rod was broken, and its parts are scattered throughout the city. We move forward without releasing the weapon from our hands. At the sight of enemies, we tactfully retreat. Potions will become incredibly valuable, they often fall out of enemies, so we try not to miss them. We get to the subway, we go down. Here we will find the staff of Arafel, get out and meet Uriel again.
We pass through the sewers and again get out into the streets. At the exit, we can pick up more powerful weapons. Raven will tell you where to go if there are problems. We meet the tall boss Noss. We shoot at it until it is completely destroyed; we shoot flying creatures only when there are too many of them. The damage from them is small, and they appear constantly. We go down into the tunnel and it seems that the flow of enemies will not stop until the very second part of the Wand. The main thing is not to leave the creatures behind us and confidently move forward. We pick up the Eye of Arafel and, having got out, we meet with Uriel.
We pass through the building and exit to the street on the other side. We destroy everything that gets in our way. We move under the bridge, then we climb it and go back already on its surface. At the end of the path, we pick up the last part of the Wand and return to Uriel. We enter the portal and go to the Archon in the Crystal Tower. We give him the Wand, we get a transport on which we can get to the castle.
Spots of heresy.
Unfortunately, we cannot control the bird, so we just look at the local landscapes. Having reached the citadel, we go inside and run to the left. Climb up the wall, turn the lever. The water below is cleared of damage, we jump off and go through the doors. In the room with damage, turn right, get out. Climb the stairs, go inside and climb up the ledges. We go further, we watch a small cut-scene. Clinging with a death grip, we fly further and destroy a couple of angels. Next to the crystals, we run along the wall and find ourselves on the other side. We stand on a large circle on the left and apply a spirit separator. With the first copy we stand on the button on the right, the second - we pass through the opened passage. Climb up the ledge to the left, turn left and stand on the button. We take the old form. We get out of the pit on the other side, climb over the wall. We grab the bomb and throw it at the crystals in the center. We fly over the abyss and enter the building. We jump down, hit the blue ball in chains. We get a new ability Traveler in the void. We create a portal in the blue area on the wall and the same one at the top. We pass along the lower portal to the upper one. We return back by jumping over the abyss. We install two new portals and go to the neighboring island. Pull the lever, jump down. Now we create charged portals (holding the button) on the wall and floor. We fly into the one on the wall, and fly upstairs. We move forward, destroying new angels that are able to call on weaker angels. We avoid the abyss with the help of portals, we get to the bright ball. We create a portal near it, look around and see another such ball in the distance. We create a portal, and the bridge is freed from crystals. Walking forward a little, we see a passage on the left. It creates two infected portals - on the wall and in the floor. Here it is advisable to choose a gun and shoot numerous souls. Climb up the stairs and enter the building. We deal with enemies, we stand in the center. Use the spirit divider and use the copies to climb the two levers on the sides.
We climb the wall, once at the top, open the portal in front of the ball. We look down, create another portal near another ball. The water is clear, we follow the stream. Having reached the end, we grab the bomb on the right and destroy the crystals on the left. We climb up the vines, keep going until we get out on the other side. Ahead we see a locked door, on the right - crystals, so we go to the left. We jump down, destroy the enemies. We pass further, we jump down through the hole in the floor. We see a ball and a place to create a portal. We go outside, deal with the enemies. We fly with the help of a death grip, climb the ledges and run along the walls. Once at the top, we see two levers and through the glass we can observe two areas for portals directed at each other. Each of them is responsible for its own lever. We will need to make sure that the one on the right is higher than the left and then we can fly over the abyss. Outside, not far from the levers, there is another place where you can create a portal. We do it as follows:
1) Use the spirit separator and use one copy to turn the first lever
2) With the second copy we create two portals and turn the second lever with it
3) With the first copy we look into the portal on the wall and create another infected portal through it, turn the lever
4) We release the lever of the second copy and fly to the other side through the portal on the wall, activate the lever that opens the door.
We apply the previous form and go down the short path to where the ball was. We create a portal, we return upward. We pass further through the opened lattice. Run along the wall, destroy the angels. We take the key from the chest, climb the ledges up. Bomb, destroy the crystals and go up to the locked door. We go inside and create a portal.
We move along the drain, cross the abyss with a death grip. We get to the building and go inside. Dealing with oncoming enemies. We are in a place where there are numerous abysses. Create a portal on the wall ahead and another one on the bottom right. We cross the abyss, using a death grip, and jump right into the portal. Create a charged portal above your head. We enter the lower portal, fly out of the upper one and run along the wall. Again we create two charged portals. We climb up the ledges.
We destroy the enemies and get to the mechanism. We use the separator of the spirit, we twist the mechanism with one, we extend the platform with the second. In the usual way, we climb onto the platform, and again applying the spirit divider, this time already pushing the platform inside. We pass further, near the mechanism we use the separator of the spirit. With one copy we twist the mechanism, with the second we create charged portals below and near the mechanism. We release the lever with the first copy, go down and, looking through the portal, create another charged portal. Now we take the previous appearance and go back along the island to the very first mechanism. We go further to the ball and create a charged portal on the wall. We perform the operation of pushing the platform from the outside to the inside. We get to the second mechanism and twist it. The inner ball has absorbed energy, we release the lever and thereby destroy the damage. We create a portal in the place opened for it. We go to the next room, at the top of the ball we create a portal. The water is cleared, and we move along the drain. Having passed to the end, we will descend to the right and run to the breach in the wall. We create portals and find ourselves inside, where we jump down.
We get to the door and pull the lever on the left. The water is completely clear, we can enter the central door. We create a charged portal on the wall - below and above. Having flown over, we create another portal higher. We jump down, enter the portal. We run along the wall to the right, then we go up the stairs and find ourselves in the library, where Jameira the Scribe is waiting for us. He's an easy target if done right. We create below two portals on the walls. We stand in front of one of them and wait until the enemy fires a clot of energy. We quickly dodge and he, it turns out, hits himself. We attack the stunned enemy, retreat. We repeat this action one more time until the Scribe finally flies up, from where he will direct the laser at us. We create a charged portal directly below it and another one on the wall of the upper level. As soon as we see the laser, we quickly take a position so that there is a central portal between us and the beam. We watch the video, from which we learn that in fact the Archon misled us and the key was with him all this time.
We leave for the Crystal Tower and, having climbed the stairs, we watch a series of videos. We run in a circle and dodge wave attacks. Then we quickly carry out a series of blows and again move away. When the Archon takes off, we again dodge wave strikes. Soon he will be above our head, we cling to him with a death grip and attack. This action must be carried out until the enemy collapses to the ground. Then we can finish him off, that is, cut his wings so that he cannot take off. We continue to attack the enemy and dodge the waves. As a reward we get the Angelic Key. We return to the Tree of Life to the Elder Crow. We leave for the Edge of Shadows through the portal, where we have to get the Demon Key.
Mad Queen.
We jump forward, go through the building and meet a friend from whom you can buy useful items. We skip further, we get to the Black Stone. We go into the door on the right and go up the circular stairs. We watch a video in which Death communicates with Lilith. She hands us a new "toy" that allows you to create portals and travel to the past.
Lord of the Black Stone.
We go back, we go down the stairs. Enter the next door and immediately turn left. Use the Time Traveler on the wall. The territory has been restored, we are entering the center. We fight with enemies, we are afraid of what is with chains. If he pulled, we sharply dodge to the side. After finishing with everyone, we go into the first door on the right. We run along the walls and climb up the ledges. We pass along the corridor, having finished with a couple of demons. Using a death grip, we climb even higher. Having got out, we pull the lever and destroy the enemy. Open the portal to the past, go through it and jump down. We climb up to the opposite side. We go to the left door and move straight to the center. We see that the chest is bricked up with damage. On the wall we create a portal to the past, we destroy enemies. We stand on the button on the left and use the spirit separator. A passage has opened, along which we get to the room of one of the copies. We deal with the enemies and pick up the bomb from the recess in the wall. We stand on the edge of the abyss with fire, run up with the second copy and attract the bomb. Again we stand on the edge of the abyss, with the first copy we attract the bomb. Thus, we deliver it to the crystals and free the chest. We return to the present through the portal. We take the key from the chest and run back to the locked door, having previously dived into the past. Next, pull the lever, jump down the indicated path. There we can create a portal to the present and then climb to the central door along the ledges. We go further, create a portal to the past and meet with Samael.
Stage 1:
1) If health potions are in short supply, then you will have to dodge a lot to survive. An effective way is to dodge and immediately strike
2) When Samael returns to his throne, follow the fireballs and run from side to side
Having spent half of his health, we run up to the throne and strike. Getting ready to quickly press the appropriate button. We dodge back so as not to be on fire.
Stage 2:
1) Keep a distance from the enemy, close contact is very dangerous, as we will be constantly struck by electricity
2) Small circles will appear on the ground, followed by one large one. Only the big one is dangerous, we catch the pace and then we can easily avoid damage
3) Don't forget to use the gun! We simply run away from randomly arising large circles, and do not evade, because this will only slow us down and there is a risk of running into fire!
For our labors, we get the Demonic Key and return to the Elder Crow. We insert the keys and enter the Source of Souls.
Source of souls.
The embodiment of Chaos, that is, our brother Absalom, is the last game boss. Revelations do not have to wait - dodge, attack. The main thing is to save all your strength for the very last stage of the fight (after two finishing moves). We enjoy the sweet victory and watch the final video.
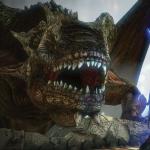
First, you see a video, during which a certain substance bursts out of the ground, which is unclear what it looks like, and almost immediately after it we see a huge spirit, frightening with its incomprehensible tentacles. This boss does not think for a long time, and instantly, only when he sees you, he begins to beat his fist on the ground. Naturally, such a meeting with a stranger will definitely not end well.
It should be noted that the main blow of the howling Bolshak is a fist from above. It is best to jump away from such a “greeting” of his, because if you fall under it, you will lose a considerable amount of vitality. But immediately after hitting Bolshak, you can hit him with a few retaliatory blows on the arm. In addition to the "hammer" strikers, this boss also likes to strike along the ground - you can escape from them if you get as close to him as possible.
When you manage to take away from this spirit about 1/3 of its vitality, it will be offended and disappear. But do not relax - instead of him, a whole crowd of skeletons will come to you, with whom you will also have to fight. Once you've killed the bulk of this Skeleton Troop, the Howling Big Gable will reappear in front of you. Now you will continue to fight in a two-on-one manner. Some time later, the rider will be able to get on top of the boss and clear his head a bit, which will make Bolshak even more angry and disappear again. At this time, you will have to fight the skeletons again.
Finally, Bolshak will appear for the third time, and now the final part of solving the issue will begin: How to kill the Howling Bolshak? You must strike at his tentacles, from which he will fall. As soon as this happens, you need to immediately run up to him and, without sparing, hit him in the eye. Now he will come into a real rage, but you have nothing to fear - he falls almost immediately. After that, Death approaches him along his hand, which then takes on its real form and already finishes off the boss. That's all, the issue is resolved!
We go to the Bone Lord (the task is completed. We get 2350 XP, 10,000 Gilt). We teleport to the entrance to the City of the Dead, we get the ability Soul Splitter.
City of the Dead

Select the Soul Splitter weapon. We fork (middle mouse button), move the left statue with one hero, but do not release it so that it does not roll back. We switch to the second hero (hold down the E key), move the right statue. Doors open, now you can remove the bifurcation (middle mouse button).
We enter the room, take the chest. We pass on, immediately go to the right near corner, there lies page of the Book of the Dead (2/10) volume 3. Then we kill the monsters. We fork, we put one hero on the first pressure plate, from this the bars around the second plate are lowered. We put the second hero there, and first we climb the wall to the second floor and press the lever. The door leading forward is open.
We leave in the central room. We go straight to the northern doors, to the right of them, on the smoking grate lies Relic of Renagoth (5/15). We go into the open passage on the left. After passing through the next door, we find a ledge on the wall on the left, we climb, we run along the walls, we get the “Lich Spines” thing.
In the room with a rotating lever, we split into two, with one hero we rotate the lever counterclockwise, and leave it here. As the second hero, we pass through the opened gate, take a yellow projectile on the wall to the left, throw it into the lever hanging over the abyss, not far from the rotating lever. We pick up the opened mobile platform, move it closer to the center. We turn off the bifurcation, climb onto the movable platform and bifurcate so that our statue remains on the platform. With one hero we go to hold the rotated lever, with the second - we push the platform to the other side of the gate. After that, turn off the bifurcation and find ourselves outside the gate.
To take the chest behind bars, we stand on one slab, split in two so that our statue remains here. With the first hero we stand on another plate, with the second - we take the chest. We go to the second floor, take another chest there. Then we fall into the pit between the two stairs, we take two chests there. One of them will contain a key.
We leave into the central room, we go in the door, chained with chains.
We split in the center of the bridge. The first hero from the bridge jumps to the right side, on the wall ahead we find a hint: S, W, E, E, E (Soul Arbiter's Scrolls), in a narrow place, jumping from wall to wall, we rise to the second floor. On the right lies page of the Book of the Dead (3/10) volume 3. We turn the lever, leave the hero here. As the second hero, we go along the turned bridge, collect the seal from below and the chest on the second floor. We go further, take the chest, press the lever that opens the way to the lantern. We turn off the split and return to the central room.
Take the green lantern with the demonic hand. We carry it through the western corridor, and then we hang it on the statue. We turn the statue to the left, go through and take page of the Book of the Dead (4/10) volume 3. We turn the statue towards the abyss, after which we pass along the raised bridge.
We climb to the floor above, take the chest, go to the next room.
We pass to the bridge, in its center we fork. With one hero we go to the lever, press it. In the corner nearby we find Relic of Etu-goth (8/15). As the second hero, we jump onto the luminous pole. The first hero is attracted to the statue, we find a yellow shell on the wall, we throw it into the lever behind the bars at the door. The path is open, now you can collect bonuses. We connect, and then bifurcate again right in front of the grate, which opens with a pole. With one hero, click on the pole. The second we go forward, collect the chest, shoot Stone of Power (12/25) on the wall next to it, climb up the vines, jump off and take the seal. We go to the next door.
We run along the walls, we get to the second floor of the central room. We pass further, use the lever to open the doors below, jump down and move on.
We kill all enemies, we take away two chests. Then we climb up, running away from the rising elevator with fire and spikes.
Fire lift. Climbing sequence:
We use the demonic hand, climb onto the pole-lever. After that, a fiery elevator will chase us. We climb up the beam, from the first ledge we jump to the left ledge, from it we run further to the left along two walls. On two bars we climb up. From the ledge we run to the left along two walls, we jump to the lower ledge, we crawl further to the left. On ledges and bars we move to the left, then up, and then to the right. We run up the wall, we cling to the demonic hand. Then we run along the wall to the right, then along the two walls to the right. Again we run up and cling to the demonic hand. We crawl along the ledge to the left wall, climb a little higher and exit this dangerous elevator shaft.
We press the lever, we go further. We go along the roofs, we kill three waves of monsters. Here, on a rickety turret, hangs Stone of Resistance (4/10). Then we fall down, take the chest. We go up, jump over the pillars to the other side. We enter a huge hall.
We pass through another door, there we rise to the second floor. We split up at the top. One hero stands on the stove, and the other runs to press the lever.
SECRET: Behind the lever, there is a hole in the wall through which a glowing dwarf figurine can be seen. To take it, with one hero we first stand on the platform, with the second hero we cling to the ledge that appeared from pressing on the floor platform. We leave the platform with the first hero, and the second at this time, along with the ledge, will fall to the other side of the wall. Inside we collect weapons, a chest and a gnome figurine GnoMAD's Gnome (1/4).We fork again to take the chest behind bars, move on.
We press the lever, jump along the ring onto the suspended platform, turn the statue in the opposite direction, go through the opened door.
We kill the monsters, destroy the growths of crystals, climb up, take the chest, where we find the key. To take the seal, we return along the rings to the other side. We return to the central room.
We go to the doors, chained. Behind the door in the boxes lies page of the Book of the Dead (5/10) volume 3. We run along the walls, we collect the chest. We go down, stand on the pressure plate, split in two. With the first hero we stand on the second plate, with the second - we rise, we move the movable platform towards ourselves closer to the cliff. Nearby on the wall we find a hint: NSSEN (Soul Arbiter's Scrolls). We turn off the bifurcation, climb onto the moving platform, bifurcate on it. With one hero we go down, stand on the first pressure plate, with the second - we move the platform with the statue through the first opened grate. Then, with the first hero, we move to another pressure plate, with the second hero, we move the platform to the upper pressure plate. We turn off the bifurcation, we enter the opened doors.
We press the lever, we throw a yellow projectile into the growths of crystals on the central statue. We jump there along the ring, we press the lever. The elevator goes down to the bottom. At the bottom we turn the statue towards the only closed door, after that we enter it.

Boss: Wailing Highway (Wailing Host)
This boss should only be hit on the head or dangling tentacles. Boss attacks with separate hands will not be hit if you stand next to him. When the boss raises two hands at once, you need to move away, he will hit right in front of him. After losing the first third of his life, the boss will start to summon dozens of skeletons.
When Howling Bolshak has half his life left, he will fall headlong to the floor. We approach his head, carry out finishing (press the "E" key). The main character will tear off the mask from the Bolshak, after which the real face of the boss will be visible. (If the mask is not removed in time, the boss will restore all health and will have to be beaten again).
At the end of the battle, the Howling Bolshak will also need to be finished off by pressing the "E" key, after which the boss will be defeated.
We go forward, we speak with the Lord of the Ravens (Crownfather). Location completed.
Now you can return to the Tree of Death to move to the next world.
Until we get out. With the new split ability, you can get several secrets in other locations (text below the lines):
The Fjord (Fjord), The Nook (Bay), Leviathan's Gorge (Leviathan's Cleft).
Sentinel's Gaze (Sentinel's Gaze) We return to The Maw, in the northeastern part of the location we enter the small Sentinel's Gaze building. We go down the pillar, take the chest on the left, move on. Below is the print. On the side house on the roof we take the Relic of Etu-goth (9/15) and the yellow projectile. We jump down, destroy the crystals, take the chest. We climb to the second floor of the tower. Here, in order to bring the projectile to the crystals, we use the splitting ability. We fork, we put one hero on the edge of the second floor, so that the projectile can be seen. With the second hero, we jump down, get to the projectile, and throw it at the first hero (if the hero does not catch the projectile, it will automatically detonate). After breaking the crystals, we climb to the very top. Here, Stone of Power (13/25) hangs on the statue. The following crystals are also destroyed using bifurcation. We take a chest. SECRET: behind the chest is an inconspicuous pit. We fall into it, and we fall into the Boneriven location. Boneriven (Boneriven) We kill enemies. We press the floor plate, wait until the door rises higher (but not to the very top), quickly run forward. We kill enemies, we take a chest. We fork, we press the plates, when the door rises higher, we run forward. We take two chests. At the fork we go along the upper road. Where the upper road begins to go down, Stone of Mystic (24/34) hangs on one of the spikes. On the upper road in a small room on the side we take a projectile, destroy the crystal down. We take the chest, raise the doors, run forward. In one of the side rooms we find a clue: WEN (Soul Arbiter's Scrolls). We take the seal, a couple of chests. We reach the second platform, split in two, return with one hero to stand on the first platform. Turn off the split, move on. We kill monsters, we continue to go. In the side rooms we find the item "Keen Talisman", three chests and a hint: WNS (Soul Arbiter's Scrolls). In the last room dwells the invisible ( bloodless) monster, in the center is the last chest in the location. |
Soul Arbiter's Maze We enter the room, run up the pillars in the wall, get to the other side along the rings, press the lever, jump off and climb other logs. We take a chest. Above one of the windows on the second floor hangs Stone of Power (14/25). We enter the door. We pass along the corridors. In the last room we take a scroll with a hint: N, W (Soul Arbiter's Maze). After that, we approach the book lying on the table ( The Mysterious Book). The book is the entrance to the labyrinth. We select the level (only the first one will be available at first), and then we enter the teleport that has opened in the center of the room. We find ourselves in a small round arena. When all enemies are defeated, gates will open in four directions (N-North, W-West, E-East, S-South). Entering the teleport in the center, you can exit this labyrinth. Entering the teleport of any of the four directions, we get to another of the same arena. You can pass the level of the labyrinth only if you go to the teleporters several times and in the right sequence. (There are also sequences that will lead to a room with a Secret chest). The correct sequences are written in blood on the walls throughout the world of Kingdom of the Dead. All the records you find are collected in one place - on the Soul Arbiter's Scrolls item. To view the records, enter the item menu, select the last tab "Quest Items", select the item "Soul Arbiter's Scrolls", look at its detailed description (Tab key). All Soul Arbiter's Scrolls entries:
At level 5, the Black Death scythes are hidden (level 15). Starting from level 7, you need to fight not only monsters, but also bosses. At the end of the 7th level of the labyrinth, there is a Stone of Mystic (25/34) on one of the walls. After all 10 levels we get to the boss Judge of Souls. The boss is an ordinary fighter, but he can temporarily hide behind an impenetrable energy shield, and summon many ordinary monsters. After killing the boss, we return to the Eternal Throne to the adviser of the Bone Lord. The quest "Counselor's Prey" is completed. |
Tree of Death
We go forward, we speak with the Lord of the Ravens (Crownfather). The main task "City of the Dead" is completed. We get a new task "The Key to Redemption". Let's go to the next world.
We also recommend
 Passage of the game Darksiders II Key to Redemption
 Complete walkthrough of the main and side quests of the second chapter
 SpongeBob SquarePants (Walkthrough)
 spongebob games squarepants
 Escape Impossible: Revenge Walkthrough Walkthrough Can you escape video
 And the dragon came. Difficulty of choice. Key points of the game The Witcher 2 kill the dragon or escape the consequences