Making outdoor advertising with your own hands. How to make an advertising sign from LEDs? Design and operating principle
make a pillar, make a sign, make an advertisement,
Hello, let’s start in order, you have created a business, the first steps are to provide information about yourself on the Internet, then the production of outdoor advertising (the most popular pillars and signs, signs), in order to save on the budget, we will consider the option of doing it yourself (free advertising, conditionally, of course :))) )), need or how to make outdoor advertising. let's divide all this into several points
1. create a layout (requires graphic editors such as Illustrator Coral or Photoshop). Otherwise, you will have to negotiate with a freelance designer; the company may charge you more, the price of the issue is from 500 rubles. For a simple layout you can try it cheaper. It is very important to consider here * attract attention and do not overload with information. on the street, a person sees an advertisement on average for no more than 3 seconds, then it’s unnecessary, few people look at large-format “newspapers”, the money is wasted. It is important to describe the product or service in 2-3 words, you can add fluorescent film ( for brightness, attracts attention, verified), an image and a little description in small print - this is for interested potential clients. And so the layout is there, let's move on to the next point.
2. find a “printer” or, if this is a vector image, find a “floor polisher” where you can cut the film. We place an order, buy the film if it is not included in the service and wait several days. As a result, we have a blank image on our hands. the average price is from 200-600 rubles per 1 sq.m. depends on the quality of the print; for the street, average quality is enough “for the eyes” :))).
pavement sign (800-1000 RUR) and a sign - we buy a ready-made frame or look for a welder and order a metal frame from professional steel according to the required dimensions. pipes. Now you need to decide on the material for the background image, there are many options: galvanized steel 200-250 rub. per sq.m. This can be considered a vandal-proof option; sheet plastic is the lightest option. We cut steel with metal scissors, plastic with a jigsaw or a stationery knife, to the required size. The background is ready, it's time to roll out the image. We use a squeegee to help us, pour water and a couple of drops of detergent into a spray bottle. We irrigate the adhesive part and the background part where we will glue the advertisement, apply and expel the water with a squeegee. ready. Give it at least a day to dry, screw it onto the frame with self-tapping screws and it’s ready!
4. An external sign is simpler, with a sign it is more difficult; you need to think in advance about the mounting location and mounting method, agree with the building administration, and then proceed with installation.
In conclusion, I want to say that before starting work you need to weigh the pros and cons, so as not to get caught by a specialist. effects in the form of “crooked” images, wasted time and nerves. In fact, the simplest products are easier to order in advertising agency. But if you need quantity or large volumes of outdoor advertising, you should try making outdoor advertising yourself. Successes and good luck to you in all your endeavors!!!
If the article turned out to be useful, gratitude is welcomed in the form of a click on the social network buttons :)))) Thank you!!! (at the bottom of the page)
A gypsy woman approached the saddened merchant and, for a small reward, promised to give sensible advice on improving sales. The seller paid what was required and watched in bewilderment as
as the gypsy took one of the pots and put it on the free shaft - the horse was unharnessed. Raising the shaft up so that the pot now towered above the crowd of people walking at the fair, the gypsy left.

A specialized publication from the beginning of the 20th century will tell you how to make an old sign according to all the marking rules, what tools you may need and what unusual materials you can use for this.

This gradation of sizes is intended for proper marking of words on the signboard layout. The image of each letter consists of several dots: for example, half letter I consists of two points connected by a dotted line; whole letter P - out of four; one and a half letter Sh- out of six.

The width between the vertical sticks of letters is called letter spacing and usually it is slightly larger than the width of the stick itself - depending on the type of font, of course. The distance between individual letters is simply called spacing and, as a rule, this gap is always the same, except in cases where after the letters G, R And T is written A; or ahead T, Ch, U there is a letter A - in this case the interval is slightly reduced.
Also, when creating a sign with your own hands, you should pay attention to ensuring that letters with superscript and subscript symbols (Y, Ш, Ц) do not touch the letters in the lines above or below with these elements, otherwise the entire inscription becomes difficult to read.
How to make a beautiful inscription
Let's say you need to make a sign with the word BATH (four whole letters). If the inscription is to be made directly on the wall, and not on a board with limited space, then you can use a simple method.
Take a square in your left hand and use a pencil or a piece of chalk to mark four points of the imaginary size of the letter on it: the first point is placed at some distance from the right corner of the tool and count the thickness of the letter stick from corner to point B(straight dotted line in the first picture or in the next picture - a green line).

The second point is the interval of the letter (red line in the figure), the third point is placed at the same distance as the first and is considered the second stick of the letter (blue color). All three points and the angle of the tool are the distance whole letters (in the first picture there is an arched dotted line).
Next, a fourth dot is added to indicate the interval, i.e. distance between letters. The value of this gap is usually 3/4 of the letter itself, but in some cases it can be a little less. In the first figure, the interval is indicated by a cross.

After the preliminary work, they begin to mark the entire word directly on the wall: draw two parallel lines - the distance between them is equal to the desired height of the letters. Starting from the right edge of the wall, put dots and connect them with a line, marking the letters to the end of the word.

If there are words with letters of different sizes - one and a half, whole, half, etc., then when marking, the spacing between letters may not be the same. For example, in the word GRAMOPHONE between letters R, F, A And ABOUT you can notice a reduction in distance.

The letter in this word G has three points between R And A, the interval is shortened by half a letter; letter M has five points, F - six, the remaining letters are four dots.
How to make a semicircular inscription on a sign
To write a word evenly and beautifully along a curved arc, mark a central point, from which two semicircles are drawn. If the inscription should be at the top, then markings begin from the bottom arc; if at the bottom, then from the top.
First, mark the middle of the space (the center of the inscription) and draw two arcs at a distance from each other equal to the desired height of the letters. A horizontal line is drawn in the center, from which the markings begin, in the same way - from right to left, as in the above examples.
It should be remembered that markings in semicircular inscriptions are always made along the inner line of the circle. To ensure that the letters stand correctly and beautifully, marks are made on both the top and bottom lines.

Tools for making signs
For amateur creation of signs with your own hands, the author of the book recommends a small number of tools: firstly, this is an easel. It is most convenient to paint a sign in a standing position, so it is difficult to do without a special stand. If desired, you can make such a stand yourself - there are versions of easels that lean against the wall (Fig. 1 and 2) or can stand on their own, leaning on a support (Fig. 3).

Such racks are made from simple block wood, in which holes are made to accommodate pegs. The sign that is being worked on is placed on these pegs.
In addition, the author believes that a novice sign maker may find this tool useful. like a mace - a smooth, even stick with a ball at the end, which serves the painter to support his right hand while painting small details.
Tools such as all kinds of squares, a leveling rod, brushes of different sizes, a palette, and paint supplies will also come in handy.
How to make an original sign
Snow sign
Among the huge variety of signs, it is quite difficult to stand out with originality, so you should not neglect the slightest idea, no matter how strange it may seem at first glance. So, for example, one sign specialist spent the whole evening racking his brains for an order from a regular client, and in the morning he simply sculpted a huge snowman in front of his store, giving him a double-sided face facing both sides of the street.
Sign made of smoke and soot
The same creative thinking played a role when ordering a sign at a kitchenware store. Oval and round plates of large diameter were taken from the owner of the shop, which the sign maker thoroughly smoked using birch bark.
Sawdust sign
Sign made from shavings
Signs made from linden wood shavings, planed by folding, turn out to be very beautiful. Such shavings can be glued to cardboard or fabric, creating an original texture for the sign. Coloring the shavings is done in the simplest way - pour water into a bucket or basin, dilute permanent paint in it, and then dip the shavings into this solution and dry thoroughly after painting.
How to make an embossed sign
Convex, three-dimensional letters using the technology of the last century were made using rather primitive methods: they were cut out of thick wood; cut out of flexible metal and soldered to the base of the sign; they were made from papier-mâché: soaked paper with added glue. This putty was pressed into pre-prepared plaster molds, and after drying, it was taken out and painted in different colors.
By the way, very often additional decorative elements were sculpted from papier-mâché: coats of arms, vignettes, profiles, flowers, etc. To do this, a copy of the desired object was made from window putty, filled with plaster, and after hardening, the putty was removed, obtaining a mold for making a part from papier-mâché.
Signs on canvas
In some cases, signs are made on a piece of fabric. As a rule, such inscriptions are written in a lying position, because Usually the fabric is stretched on the floor, and when lying down, the risk of drops getting on the fabric is minimized.
If the inscription is made with oil paint, then the canvas is fixed on a stretcher and coated well with potato starch. Starch prevents the paint from spreading and protects against the formation of a yellowish coating around the letters, which often occurs when using oil-based paints.
Sign on glass
Making such signs is considered quite difficult, because... work is carried out mainly from the reverse side and in mirror image. The glass is wiped clean with a soft cloth and letters are marked on its front side. Then they begin to write these letters on the back side of the glass, each time allowing the paint to dry thoroughly.
After this, the letters are covered with gold: food gelatin is poured with water, allowed to swell, filtered and the area that needs gilding is moistened with this solution. A special piece of gold plated paper is placed on the letter soaked in gelatin, covered with a napkin and smoothed with your hand. When the gilding transfers to the letter, it is coated with transparent varnish - glossy or matte.
One way to promote a new or old business is outdoor advertising. Some have the opportunity to invest large amounts of money in “promotion”, but others can only count on minimal investments. In such a situation, the question arises of how to make a sign with your own hands.
Before you start, decide what the banner should be like. It is recommended to pay attention to three factors - accessibility (in terms of cost of materials), competent content and manufacturability.
Materials and tools
Answering the question of how to properly design a sign, let’s consider the list of materials and tools required for this.
Materials to make a beautiful sign:
- Galvanized steel sheets 100*200 cm (note that the minimum sheet thickness should be 0.6 mm);
- Self-adhesive film, made in several shades (pay attention to the opaque glossy film);
- Rags;
- Solid glue and double-sided tape.
Tools to create signs:
- Stationery scissors;
- Scissors designed for cutting metal;
- Ruler with a simple pencil;
- Roulette;
- PC connected to the printer.
If you don’t know how to choose a design yourself or decide on colors, then look at examples on the Internet or use the help of friends, relatives, etc.
Instructions for creating advertising
Step-by-step instructions on how to make a sign:
- Decide on the parameters of outdoor advertising, and then put markings on the steel sheet. To make a sign that meets the parameters of 200*50 cm, the sheet is cut into two parts. In this case, the film base needs to be made up of several pieces, since the width of the film is usually 45 cm.
- Cut the sheet according to the markings. Burrs remaining along the edges can be processed with a file.
- Make templates according to which the letters will be cut. To do this you will need a PC and a printer. You can use any graphic editor. In it, decide what font and letter size is required.
- All letters need to be glued. Select a film of the shade in which the letters should be made.
- Roll out a roll of film of the desired color on a sheet of metal, then lay out the letters and decide on the order of their placement. Glue the letters carefully.
- The final stage is edging. For this, hair from the same self-adhesive film can be used.
Now you know how to design a sign yourself.
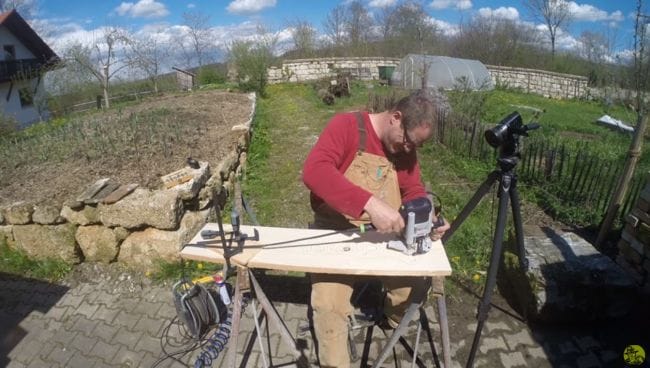
Dear DIYers, good day to you! Among us there are definitely those who are engaged in home production and sale of their products - be it forged products, carved furniture or, banally, honey. But in order for the master to be found faster, it would be nice to somehow declare yourself. The sign is a great idea! In this article, Rigotti, author of the channel "Selbstversorger Rigotti", will tell us how to make an original sign ourselves. His friend sells honey and wants to attract the attention of customers.
Here's what his sign will look like.
Materials.
- Board.
- Aerosol paint.
- Paper.
- Oil for wood impregnation.
Tools used by the author.
- Fraser.
- Font cutter, link to it.
- Pneumatic dremel, compressor for it.
- Clamps.
- Disc sander.
So, the author begins to make the inscription. To do this, he will need a regular wooden board. It is advisable to choose a light type of wood. First, he's going to engrave the street name and house number on it, and then he'll make another smaller sign with a sketch of a honey pot or other beekeeping paraphernalia. When a friend has honey, he will announce it with a sign.


For the first, preliminary sanding, Rigotti first takes rough paper, eighty paper. And for the second circle - a finer one, with 180 grit.


First, Rigotti printed out the letters themselves on a laser printer, in the font he liked. The size of the letters must be selected so that the overall inscription is noticeable and at the same time the letters fit into the width of the board.


Next, using adhesive tape, he fixes sheets of paper with letters on the board.


Then, with pressure, he traces the letters with a pen along the outer edge. As a result, their contours are pressed onto the board.


The next step is that Rigotti removes the paper and once again traces the outlines of the letters with a pencil. This is how he develops lines for the type cutter, along which he will cut out the inscription.


It also creates “cloud” markings around letters.


In order for the cutter to glide well over the surface, the wood should not be so rough. Therefore, when working with wood, the first thing you need to do is to properly clean and sand it, the author notes. The cutter should not catch or stop anywhere! Otherwise, you won't be able to cut out the letters.
Now, attention! Rigotti will mill not the letters themselves, but the space around them, so that the letters stand out in relief, like a seal. In addition, according to his plan, only part of the surface of the board will be milled. So he draws something resembling a cloud around the word. Everything that is outside this cloud will not be filmed. The edging of the letters will be processed with a special engraving cutter, also called a “type cutter”.

This is what the cutter looks like. With its help you can get a very beautiful border.


In order for the router to glide well over the surface, the master applies a thin layer of WD lubricant to the base of the device, not advertising. The optimal angle of incidence of the light is very important, notes Rigotti, in order to see exactly where the cutter is located. At the moment, the sun is at the right angle, and even clouds should not interfere in the next few minutes. It would be better, of course, if there were no clouds at all.


He sets the depth according to the depth of the milling attachment itself.


So, the first step has been taken! Here is the name of the street, and the letters are bordered. Now everything that is inside the cloud must be cleaned, except for the letters themselves, of course.


First, the author cuts out the edge of the cloud, and then the middle. Now all he has to do is mill out the space between the two edgings.


Next, Rigotti removes the rough structures with a pneumatic dremel, using a variety of attachments to make it all look a little cleaner.


So much better! But in this form the inscription itself is still difficult to recognize. Therefore, the author decides to paint the background inside the cloud black using spray paint.


After waiting for the varnish to dry, the author gives the board the desired shape and rounds the corners using a jigsaw.


Chamfers the edges using a router.
Every business owner wants to stand out from their competitors. Currently, technologies for the production of illuminated advertising have stepped far forward and offer the widest selection of materials and technologies for the manufacture of signs for every taste and budget.
Let's look at duralight and LED neon as an affordable material for making not only signs, but also decorative lighting for the entrance area, the facade of your building, or even the interior (both the reception and interior design elements). Why duralight or LED neon? The fact is that these particular materials do not require any special knowledge of sign manufacturing technology, which requires taking into account many nuances. In addition, modern duralight is made on the basis of the same LEDs, due to which its light output will be maximum, applicable to its manufacturing technology.
WHAT IS USED IN LIGHT BOXES AND SIGNS?
Let's figure out why LED duralight, light modules, strips and LED neon are better than good old neon tubes, morally and technologically outdated incandescent lamps and fluorescent lamps. I think that incandescent lamps are being immediately swept aside. Such lamps were used in outdoor advertising about 40 years ago, and only due to the lack of other alternatives. The only case is duralight (until quite recently it was assembled based on miniature incandescent light bulbs).
OBSOLETE MATERIALS FOR BOXES AND SIGNS.
- Incandescent lamps— high heat transfer is not applicable for our conditions. In winter, during operation, such a lamp melts the snow and ice around it, the plastic elements of the sign, it is flooded with water, when it turns off and cools down, it becomes overgrown with ice, which eventually melts again and safely burns out along with the electrical wiring elements. Extremely low efficiency - high power consumption, low light output. Let's forget about them.
- Luminescent electrics— it is impossible to create complex elements from fluorescent lamps. Such electrics take a long time and turn on poorly at low temperatures. Small selection of lamp color options. Recently, it has been used only in light boxes, or for illuminating shop windows. It is being successfully replaced by LED technologies, which have a higher light output efficiency, many times greater mean time between failures and are less demanding on ambient temperature. In isolated cases, energy-saving lamps are found in small signs made using handicraft methods. I consider such use unacceptable, if not from an aesthetic point of view, then at least because of the low IP class, which can be very fraught for those who like to “save money”.
- Neon (gas light) tubes- being currently one of the oldest technologies, it does not have many disadvantages compared to LED neon and even LED duralight. But there are also significant disadvantages - for gas-light tubes, the operating temperature regime is considered to be a relatively narrow range from -25 to +50 C. At lower temperatures, increased currents are required to operate the tube, which sharply reduces the service life of the tube itself. Under real operating conditions, it was noticed that temperatures of -15 and below lead to a significant drop in the brightness of the neon tube, as a result of which the key inscription of the name of your store, made in neon, is inferior in luminosity to the underlying box on fluorescent lamps. Also, neon advertising requires a very high supply voltage, which is dangerous for indoor use, and you have to think about where to place bulky and heavy power transformers. Another significant disadvantage is that the glass is fragile! Well, besides, we are considering the possibility of making advertising with our own hands, and with neon tubes we cannot do without the help of competent specialists and expensive equipment.

MODERN LIGHTING MATERIALS FOR LIGHTED SIGNS AND BOXES.
As a result, it turns out that neither luminescent nor gas-light technologies are suitable for us to make illuminated advertising or its elements with our own hands. This is where we come back to using it for our purposes. LED duralight, LED neon, LED strip and light modules as the most accessible and profitable materials for us .

- Round duralight.
- LED modules.
- Flexible LED neon.

PROS AND DISADVANTAGES OF USING NEON AND DURALIGHT.
Pros (+).
- Durability— LEDs mean time between failures is up to 100,000 hours of continuous operation. I have never seen a MTBF declared below 30,000 hours even from Chinese manufacturers.
- Extremely low power consumption— LED neon flex consumes 4-8 Watts per linear meter (neon tube is about 20 W-meter). In general, as practice shows, with the same glow intensity, LEDs consume 4 times less energy than fluorescent lamps, and about 10 times less than incandescent lamps.
- Operating temperatures— the range recommended by LED manufacturers ranges from -70 at the lower limit of the range to +85 (cautious manufacturers limit this threshold to +50) at the upper limit. At the same time, the brightness of the glow is maintained, as well as the instant start.
- Flexibility— both duralight and LED neon are essentially flexible plastic tubes with LEDs and electrical circuit elements lined inside. I would like to note that duralight bends easier, with a smaller bending radius and along any axis, unlike LED neon. Due to this factor, it is more convenient to lay out flat and fairly large sign elements (for example, the outlines of letters) with LED neon, while with duralight you can easily repeat any outline of a design element.
- High IP65 rating— most of the tubes currently produced can operate completely immersed in water without any problems.
Minuses (-).
We have discussed a lot of advantages of LED neon and duralight, but there are probably also disadvantages? Yes, both LED neon and duralight have their drawbacks.
- A common disadvantage is the multiplicity of cuts. Due to the fact that elements of the device’s electrical circuit are located inside the tube, both duralight and LED neon have a certain cutting pitch (multiplicity), which varies from 0.15 to 3.0 meters for duralight and from 0.91 or 1, 52 meters for LED neon. In this regard, some design restrictions are imposed, since you have to hide the excess length of the light cord somewhere.
- It is believed that the disadvantage of duralight compared to LED neon is discreteness of duralight glow. Those. You can save money and make the contour illumination of a sign from duralight, which is cheaper than LED neon, but in the end we will get either uneven light with pronounced points of illumination (if the illuminated surface is close to the sign), or a too weak and inexpressive glow (with increasing distance from the sign to the illuminated surface). Naturally, this point can be considered a disadvantage only when performing certain tasks, but when choosing a design solution, you should always take into account that the step between the LEDs in duralight is very noticeable and amounts to 0.5 - 2.5 cm, whereas LED- neon has an even glow, indistinguishable from neon, along its entire length.

- And finally, I would like to note once again that LED neon bends well only in one plane, and in other planes the bending radius is significantly inferior to duralight, which cannot be ignored if you want to highlight a complex small shape.
USEFUL LINKS ABOUT DURALITE.
We also recommend
 Making a folding bed table for a laptop Do-it-yourself computer table for a laptop drawings
 Table for a laptop in a bed: recommendations for choosing, making it yourself Make a table for a laptop
 How to turn an ordinary fan into an air conditioner DIY air conditioner from an air purifier
 DIY wooden chairs - solid and comfortable
 How to remove dust and humidify the air in an apartment
 DIY cutting board Blanks for cutting boards drawing