Secrets and nuances. Installation of plasterboard walls Do-it-yourself plasterboard work
2015-05-28, 00:28
Working with a drywall profile GCR design How to cut drywall How to attach drywall to a profile
Hello dear DIYers.
Consider the nuances that await you when working with drywall, knowing which you can significantly reduce the repair budget.
Working with a drywall profile
To work with the profile, you will need the following tool:
1. Scissors for metal.
2. Pliers.
3. Metal square.
5. Roulette.

The first tricks appear when cutting the profile.
Although guide notches are applied on its plane, in the form of dots, it is better to make an accurate marking of the cut.
For marking, it is better to use a metal square and a scratch. The pencil is not noticeable on the metal profile, and the scratch can be seen better and will not be erased by accident.

After cutting, the following bends remain on the profile:

 .
.
It seems to be a trifle, 2-3 mm. but later, when assembling the structure, this trifle will lead the plane away, because the ceiling profile is inserted into the bypass, and such bends will expand the latter.


Often I heard that they say drywall will tighten up. No, it won't hold up. Or wait, but not all. So it's better to take pliers and align these bends.


The same applies to partition profiles. If you want less putty to be spent on subsequent finishing, then do not be lazy and trim the unnecessary protrusions formed when cutting the profile.
A couple of times I ran into lightweight profiles. Their price is lower, but the metal is thinner.
In no case do not get fooled by the price of such a profile. Thin metal does not hold the self-tapping screw properly, which then cannot normally tighten the drywall.
As a result, having saved not the price of a profile, you will lose on putty consumption.
GCR design.
If you have never assembled a drywall structure on your own, then it is best to contact the creator of this technology, the Knauf company, for familiarization. Click the link to find technical advice on the installation of the structure.
I will point out some little things that are not shown there, which can significantly lighten your wallet, and knowing which, you can avoid this relief.
Let's start with attaching the profiles to each other with self-tapping screws. A seed is a small self-tapping screw intended only for connecting profiles.
It is better not to use seeds on a plane to which a drywall sheet will then be attached. Or do it with one condition, which is just below.
Here is an example of a plane that is sheathed with drywall:

And here is the seed that fastens the ceiling and bypass profiles:

Now we attach a sheet to this plane (I really didn’t spoil the sheet and attached a strip, just to show you):
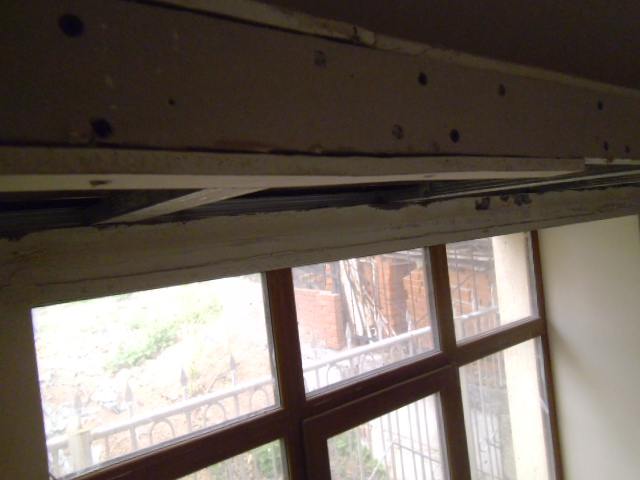
Let's substitute a ruler for clarity:

Here is such a "smooth" plane turned out. And they do it all the time!
In the head of such masters, the life-affirming thought firmly sits: “Nothing, it will be leveled with putty.”
Of course it equalizes. The puttyer (ca) will swear and level, and your loot, with a joyful exclamation of “Hurrah, freedom”, will fly away from your stuffy and dark wallet. It doesn't matter that he won't be free for long. It probably won't give you much comfort.
For reference.
If a package of putty is 25 kg. it costs an average of 350 rubles, and its consumption, with a layer thickness of one millimeter, is approximately 1.5 kg. per square meter, then every extra millimeter of the layer, grabs about 20 rubles from each square meter.
Seed cap thickness - 2.5 mm.
It turns out that there are several of these millimeters, and several tens of square meters. Here is the price of misaligned tips when cutting the profile, and not properly fastening the profiles to each other.
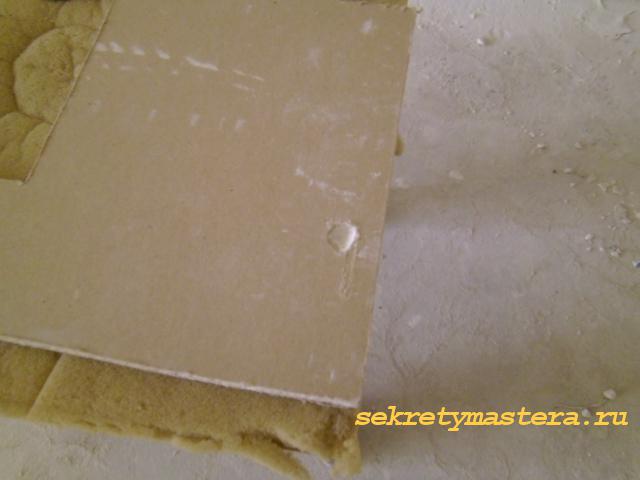
It happens when there is no other way out but to put a seed on the front. In this case, we apply the sheet going to this place and press it lightly, so as not to break it, but so that the screw head leaves a dent on the drywall, and in this place we make a recess.
Now we fasten this sheet, not being afraid to bend the plane.
The next point is the use of direct suspensions, extensions, clips, and crabs.
In the application of direct suspension, there are no nuances.
Extensions and clips should not be fixed on the profile with seeds, since the self-tapping screw will “take away” the profile a little, and it will only get worse.
But crabs are a controversial thing. They are conceived correctly - the crab creates a rigid crosshair, which, in theory, should set a flat plane for the structure.
In practice, it turns out differently. Firstly, 8 seeds provided for the installation of a crab is a clear search.
As I said above, each seed slightly leads the profile. To prevent this from happening, you need to hit the tip of the seed exactly in the center of the mounting hole, holding the screwdriver perpendicular to the plane of the profile, which is almost impossible, and even when mounting the ceiling.
Therefore, the crosshairs are better done in a different way. No crabs. In addition, this method is easier, since it requires 4 seeds instead of 8, and cheaper, since crab is a relatively expensive thing.
We cut the end of the profile as follows, bend the side planes, and fasten it to the transverse one.


To cut drywall, you will need a knife and a ruler.
A knife can be purchased special for drywall, but a simple wallpaper knife is also suitable, and a profile is usually used as a ruler.


The process is as follows: a layer of cardboard is cut along the ruler, then the sheet is broken, and the second layer of cardboard is cut.


The nuances in this case are as follows:
1. You need to cut drywall on a flat and relatively clean surface. Bumps and debris trapped under the sheet can break through the drywall.
2. You need to cut through the cardboard with pressure. The deeper the cut, the smoother the break will be.
3. Since the knife is driven with pressure, at the end of the cut it jumps off the sheet, and so that at this moment the tip of the blade is not damaged, you need to put something at the end of the sheet (a piece of drywall, plywood, etc.).
4. Immediately after cutting, be sure to chamfer from the end of the sheet, which is joined to another sheet.

5. For cutting a segment, a hacksaw blade is suitable.

6. If you need to cut a thin strip, or cut a sheet by a centimeter - one and a half, it is better to cut through the cardboard on both sides, and then break the strip.
How to fix drywall to a profile
1. The self-tapping screw that fastens the GKL sheet to the frame is screwed in perpendicular to the plane. Going obliquely, with one edge of the cap it can break through the top layer of cardboard, while the opposite one will remain sticking out above the plane.
2. In no case should the head of the self-tapping screw break through the top layer of cardboard and sink into plaster, as this means that the fastening in this place turned out to be weak. The top layer of cardboard is broken, the gypsum under it is destroyed, only one bottom layer of cardboard remains.
3. The head of the self-tapping screw should not protrude above the plane of the sheet, as this will turn the work of the filler into hell, because the spatula will constantly stumble upon this self-tapping screw.


4. The cut ends of the sheet must be cut off at an angle to the inner plane. Otherwise, the probability of a crack appearing at the junction will approach 100%.

5. Do not screw in a self-tapping screw in places where one profile overlaps another. These are corners, crosshairs and entry points to the bypass profile.
In the figure, the red color shows the places where you can not screw the self-tapping screw.

6. Seeds are screwed in at the second speed of the screwdriver, self-tapping screws securing the sheet - at the first
How to use drywall and profile trimmings can be found in the article.
I wish you success in working with drywall
7 comments
- A screwdriver that is useful for installing the frame of the crate and directly attaching the sheets to this frame.
- A couple of small to medium sized spatulas to easily apply putty and glue.
- A notched trowel that will be useful for applying adhesive to the drywall surface.
- Building level, which will help to markup, if required.
- A cutting tool (a clerical knife or a light hacksaw is suitable) for cutting material.
- A drill with various nozzles, which may be required both for making holes in the wall, and for mixing adhesive and putty compositions.
- The gray color tells us that this is the most common, even classic version of the sheet, which is suitable for use in rooms with moderate ambient humidity.
- The pink color of the sheet (sometimes faded red or purple) means that this type of sheet is temperature resistant and fireproof, which makes it an ideal material for sheathing areas around a fireplace or stove.
- GKL - standard;
- GKLV - moisture resistant;
- GKLVO - moisture-fire resistant.
- Screwdriver;
- Building level, plumb line, hydraulic level;
- Chopping thread;
- Metal scissors or grinder;
- Mounting or clerical knife;
- Construction or simple pencil;
- Drill or perforator;
- Yardstick.
- Electric tool.
- Hand tool.
- Auxiliary tools for productive work.

electric tool
Electrical tools include:


Hand tools
Working with a profile made of metal and drywall, you need not only tools powered by electricity, but also manual ones. The tools are as follows:

All of the above tools will become indispensable assistants in the process of preparing materials and plasterboard sheets.
materials
Of course, in addition to tools, materials are also required. These are:
- GKL. The material is different, each master, according to the parameters and requirements, selects the desired size, shape, thickness.
- Metal profiles or mounting rails.
- Bolts, screws, nuts, self-tapping screws, dowels "butterfly".
- Materials for finishing the finished structure. These are putty, primer.

The main thing is to select high-quality materials so that the design lasts for many years.
Basic drywall work
Before starting work, the sequence of actions and the nuances of each of the processes are studied. The sequence of actions is as follows:
- Purchase of materials.
- Surface preparation.
- Creating a framework.
- Mounting the frame in the surface on which the drywall construction will be equipped.
- Fastening drywall to the surface.
How to fix drywall to the frame: basic rules

Faced with the work of attaching drywall sheets to the frame for the first time, they have some fears and concerns regarding this process. Knowing some rules and features, problems in the process of fixing should not arise.
The rules that will lead to the successful fastening of the GKL to metal profiles are:
- First rule. No need to be afraid to move and rearrange the drywall sheet from place to place.
- When working with the material, it is necessary to act carefully so that all sheets are tightly adjacent to each other. Dowels should be given special attention, they should not go deeper into the sheet by more than two millimeters;
- The easiest way is to fix drywall sheets vertically, so you get even, perfect cuts;
- On the drywall sheet, it is necessary to make a markup that will help distribute the screws proportionally and at the right distance.
 Schematic drawing of fastening drywall to a profile
 These tips will help you most correctly install drywall sheets on the frame.
How to glue drywall
It also happens that, for certain reasons, drywall sheets do not need to be attached, but glued. This is easy to do, the main thing is to fulfill the following conditions:
- The surface must be cleaned from various contaminants.
- Depending on the structure of the base, whether it is a frame or a smooth wall, it is necessary to choose a special adhesive for drywall sheets.
- Carrying out the gluing process carefully, firmly fixing each sheet to each other, everything will turn out quickly, and the surface will last for many years.

How to bend drywall
Often in the design of premises you can find curved, curved architectural forms of plasterboard structures. Having come up with such a design, you will need to bend the sheets. There are two ways:
- dry;
- wet.
Dry way
This method can be used to bend sheets if the bends are insignificant. To do this, carefully bend the sheets. After that, wait a few hours for the GKL to fix in the desired form.
 Dry bend drywall
 wet way
When it is required to make a complex architectural figured structure, as a rule, a wet bending method is used. For this, a needle roller is passed over the sheet. Then, water is poured into the resulting holes. GKL should lie down for several hours. When wet, the sheet will bend perfectly, taking the required shape.
 Wet drywall bend
 With cuts
There is another method of bending. To do this, you need to make incisions and carefully bend in these places.
 Notch bending pattern
 How to cut drywall
Knowing some secrets, you can easily cut the GKL. Would need:

Drywall finishing
Some prefer not to waste time and wallpaper, paint the surface directly on top of the drywall. This is a bad idea, because the material will absorb everything and may bend or even delaminate. Therefore, it is necessary to pre-prepare the surface. To do this, you need to putty the structure. You can use a special grid that will help make the surface perfectly flat. Apply several times to get the perfect result.
How to paint drywall
When the putty has dried, you can start painting. Everything is done in the same way as painting any other surface. The main thing is to carefully paint over each piece of the structure.
How to glue wallpaper on drywall
Wallpapering a drywall construction is a fairly popular idea. The process is accessible and understandable. The main thing is to wait until the putty is completely dry, then glue the canvases using the standard method, applying glue to the drywall surface itself and to the wallpaper.

Working with drywall is quite simple. It is important to study the process from beginning to end, and then engage in the transformation of space.
- Guide profiles for creating a frame, they are also often called PN or UW. They have a standard depth of 40 mm and the width can be 50, 75 or 100 mm. Guide profiles are used to create the basis for fastening rack and ceiling profiles.
- Ceiling guides (PNP or UD) have the same functions as the previous profiles, but are used for mounting suspended ceilings.
- Ceiling profiles (PP or CD) are designed to create a frame and lintels. They are inserted into the guides and fixed to the ceiling with suspensions, crabs, anchor clamps.
- Rack profiles (PS or CW) are used when it is required to install plasterboard partitions or to create walls. They are fixed in guides.
- a hammer;
- metal scissors;
- screwdriver;
- stationery knife;
- markers;
- laser level or hydraulic level;
- drywall planer;
- pliers.
- Step back from the wall at least 3 cm (profile width), and make marks: using a plumb line or laser level, draw a line on which the drywall wall will be located.
- Attach the main UD rails to the floor and ceiling. Their edge should follow your line.
- After that, it is necessary to set up vertical racks from CD profiles. To do this, they are inserted into the guides and screwed with screws to each other.
- To stiffen the CD profiles, every 50 cm they are attached to the wall with the help of hangers, which are fastened to the wall with two dowel-nails. Suspensions are screwed to the profiles with self-tapping screws, and their corners are bent.
- The width of a standard drywall sheet is 120 cm, so the distance between the centers of CD profiles is 60 cm.
- After mounting the frame, insulation, electrical wiring, water pipes or heating pipes are placed in it.
- When installing drywall sheets on the ceiling, not only direct hangers are used, but also wire strands and "butterflies", which have special steel "wings" that fix the strands at the desired distance from the ceiling.
- suggests that you use special fasteners for this - anchors.
- Self-tapping screws for installing drywall are screwed in increments of 25-30 centimeters.
 What is the name of the amount of money at stake in the game Modern monetary system is a financial pyramid
 How to name a horse: we select a suitable nickname
 How to name a horse: we select a suitable nickname
 Point of the celestial sphere above the observer's head
 Common peacock (Indian)
 What is the name of the male and female
Thank you very much for a really useful article. The interior decoration of the house is just around the corner, we will do it ourselves. Are you planning material for exterior decoration, in particular siding?
I do the material in the process of this or that work, since the article needs photo and video material. If the information you need at the moment is not on the site, then ask a question in the comments. Almost all finishing works are well known to me, and I will quickly give you an answer.
Good evening Aryom. The plans are not of a doctor, but of a design engineer. But intentional……!
For a log house, in general, a particularly powerful foundation is not needed. In the Mari villages, log cabins still stand on six stones. Well, this is of course an anachronism, but they are worth it.
About driven piles. Do you have something special with the soil there? And now there are screw piles. Their installation is simpler and they themselves are cheaper, and there is no need for such a depth. Well, if of course the soil is marshy, then another matter.
About the excavator. To dig a meter-long trench of 60 meters together is half a day. More trouble with an excavator. Well, if of course the ground is rocky, then another matter. You see how difficult it is to answer questions about the foundation without knowing all the circumstances in the place.
After all, the excavator digs so much that then the solution leaves much more, spreads over irregularities. Smoothly by hand.
You often mention boot, apparently there is a lot of it, but in our country it is used more and more for decoration. The fences there are exclusive, etc.
Come on, it's better on the log house. A finished log house can only be taken with a good specialist, it’s right that he refused. And when they cut, do not be lazy, come and check that they cut a semicircular groove and maintain its width. Do not listen if they say that everyone does this and there are no complaints. This is deceit. Demand your own, and do not fall for prepayment. Categorically. Cut down part - check and if OK, pay. Though on the crown, but not in advance. And then you are tormented to prove your point, even though you have 1.92 m. The most common slyness is “You need to buy a forest.” You give money for the forest, and then there is nowhere to go. And the anxiety begins.
In size 9x12 this is a huge house. And vooobsche something purely individual question. And so, a 12-meter winter road is quite businesslike, you just need to make sure that such logs are from the butt, and the log run-off does not exceed 1 cm per meter. The logs will be hefty, more than 40 cm on the butt. You can't turn things like that without technology.
In height - if the log house is 3.8, then with floor-ceilings after shrinkage, the height of the ceilings in the room will be 2.6-2.7. So for you, you can probably make 14 (4+ m.) crowns so that the top of the head does not touch the chandelier.
I also have a request: if everything works out with turpentine, will you give me a contact?
Thank you for the phone, what the hell is not joking. But what if. Yes, and look for advice when I turn, because I have five grandchildren. I won't post it as a comment.
If anything, ask, only on individual positions and with details. I will definitely answer.
Sergey Yurievich, thanks for the answer!
The plot is not every spring, but it is flooded up to 1/2 of the area, I plan to build a house in the flooded zone, but the water is very close. Soil: 20-30 cm fertile chernozem, deeper entirely clay, after 50 cm quite dense, damp.
About turpentine: I searched the Internet for “natural gum turpentine” and came up with several links of 0.5 liters each from Beauty from Mezroll, Moscow, but it is not clear whether it is natural?
And I also found Moscow drying oil: BIASK in cans GOST 7931-76 linen, more: there is Belarusian and import: linavarnits from vekker (Finnish?)
Back in construction:
why concrete piles? cheaper and easier (100 thousand rubles / 1 day + 1 day for preparation, a huge margin of safety (maybe even excessive), there are no problems with heaving of the soil). Instead of a grillage - the lower crown of the log house.
Rubble stone in the Urals is really full, if you take a shaft of 11 tons - no more than 10 thousand rubles (or even 7 thousand rubles) with delivery. True, there is more fuss with it, but concrete can be made without reinforcement (the entire mining and industrial part of the region is on such foundations, though there is rubble masonry, although not always neat.
I don’t want screw piles, because not cheaper, but not so reliable, + corrosion of the metal at the place where the blade is welded to the pipe, the angle may sink due to a sharp change in the area of \u200b\u200bsupport of the pile to the ground. There are with cast tips, but even more expensive (like driven concrete products).
Another question: is it too late to harvest moss now? I often visit the mountains, we are about to get snow, until the “third Indian summer” :).
Regarding consultations: the mail from which the letter was written is corporate, that is, at work, you can use it.
I found a cutter in Argayash (Sosnovsky district of the Chelyabinsk region), he has already begun to cut a log house 12x12 m of 4 walls, everything seems to be neat. We took this log house as a sample (in size), I think to order from him, but requires a 50% prepayment now, although I said what we will do from the winter forest and on the moss.He promised to help with the moss too, there are people who harvest it (I hope after the Trinity :)). By the way, what is your price for moss (to ask the price?).
Your opinion? do the foundation now (I can do it before the snow) or in June? The log house will settle on the site of the cutters, although it is not known until what time.
Thank you, keep in touch!
Sergey Yurievich, hello again!
Tell me (main milestones) how to plan a log house 12x12 m to make it easier to overheat (logs, rafters, rafter beams?)
Internal size 10.7x10.7 m 4-rexwalls, internal partitions made of timber 200x200 mm. + annex 12x6 m.
The roof is simple gable, or mansard type (but a cold attic).
Entrance from the north through the annex.
Bathroom, toilet, boiler room and storage room in the outbuilding.
In the log house: two children's rooms, one adult bedroom and a living room / kitchen
How to do without a long corridor?
Thanks in advance.
Good evening Artyom. Well, piles, piles, since everything is calculated, there are no objections.
You know, I'm not a design engineer, and I can't say exactly how it will be better, since all my knowledge is based only on personal experience. What I did, I know about it.
Once I put a log house on driven piles on the banks of the Kama, but there the groundwater was close, 1.5-2.0 meters and loam, and you have clay and that's good. Usually the clay is damp on top, but if you dig deeper by 50 centimeters, then it is already dry and hard a la brick. In any case, there have never been problems with foundations on clay.
And we have a lot of soils similar in description to yours in Tatarstan. Especially along the right bank, it is completely black earth from 0.3 m to 1.0 m, and then clay.
Bored with a grillage on such soils showed itself very well. But since they make rubble there, then you need to do this. I always try to consult with the old-timers before I decide on the foundation, and this tactic has never let me down.
About moss. It can be harvested until specific frosts. But you probably don't care. If the log house was waiting for installation, then it’s another matter, but they will cut it down for you in the winter, it will settle until July, and there will be fresh moss.
As for the chopper, I don’t know how, but you need to make him cut down the right way. As you need, and not "everyone does it."
If only you knew how much frank hack-work is cut. The demand is huge, buyers have no knowledge, and this led to the fact that log cabins are made, with which then there are only problems.
Well, I seem to have described everything in my articles, I won’t repeat it, but keep in mind that everything that is said there must be observed, and only then the log house will correspond to your dreams.
Here is another article that I removed in connection with the termination of the work of the brigade. According to the age. . It also has some very useful stuff.
And more, if you need it. A high-quality log house made of good hand-cut wood cannot be cheaper than 12,000 per cubic meter. How many joys I saw in connection with the purchase of an inexpensive log house and how many tears during its operation.
The foundation is best done now and left for the winter. Definitely.
About the floor plan. Here is a free application https://www.sketchup.com/en. I draw everything in it. More or less like this:


There is a mobile version. The simplest toolbar, 3D, rotation in any angle, you can go inside, dimensions. Master a couple of days and do whatever your heart desires and however you like.
Yes, even more. There are two companies, a company in Mari-El Drevo12 and somewhere in Altai Kedroff. I dealt with their log cabins. I even visited the Mari on the site, and finished off the Altai log house. Log cabins of the highest class, manual cutting, do not require caulking, but a little expensive. But they will deliver in Russia. There are websites on the internet. The Mari have even better log cabins, or rather, the attitude to their production and installation is more responsible. Look if anything.
Working with drywall will help allow you to finish the premises at the highest level. Walls, using such material, can be perfectly aligned and hide all visible and sometimes quite complex defects, and on the ceilings you can create simply excellent figures, adding to which certain lighting, you can make a decorative masterpiece from the ceiling.
With the help of drywall, you can easily and simply create your own unique and inimitable interior. You can decorate concrete walls and any others with drywall with your own hands, while maintaining the quality of such a finish at a high level. In addition, drywall sheets have excellent soundproofing performance, as well as performance for thermal insulation. Well, just an indispensable assistant for any kind of repair and finishing work, eh? To carry out drywall work was not burdensome and took place quickly, you will need to prepare a special tool.
Tools used for installing drywall
For quick and unhindered work with material such as drywall, you will need a different type of tool, and its number will depend on the method of installing drywall (on a crate, or using adhesive mixtures). To save space and time, we will describe a full range of tools that are equally will be good both for working with the crate and with adhesive compositions.

So, drywall work will be required in stock:

Now that you have collected the entire set of tools that may be required when working with drywall sheets and finishing them, it is worth considering the varieties of drywall and getting to know its characteristics better.
Variety of drywall
It is worth noting that before you purchase the required number of sheets, you will need to carefully measure the room and calculate it (quantity). We add 10% of the calculated amount to the obtained value for every “fire” case (damage to the sheet, poor-quality sheet in the package, etc.).

Now directly to the question. The production of drywall is now represented mainly by 4 types, each of which is intended for use in specific premises with their special characteristics. The marking of drywall sheets for their intended purpose is unified, and when choosing, you will not need to puzzle over why this sheet is green and that one is red, and what these colors mean in general.

Certain markings (or designations) have been adopted for each of the considered species. So, a simple drywall is designated as GKL, resistant to fire - GKLO, water - GKLV, and the combined type, respectively, - GKLVO.
Additional Consumables
To work with drywall and finish, whether it be a wall or a ceiling, in addition to the tools and the sheets themselves, you will also need to purchase consumables. So, among them will be:

In order to carry out finishing or repair work using drywall, a number of preparatory measures will be required. Let's figure out which ones.
Preparation for work
Whatever work is carried out with drywall sheets: whether you decide to finish the walls, the ceiling or sheathe the balcony, it doesn’t matter, because the required surfaces will need to be put in order. Conventionally, such measures for preparing surfaces for work are as follows: cleaning the walls, sealing cracks and holes and treatment with antiseptics and soil compounds. To begin with, the work surface will need to be cleaned of the old coating as best as possible. The putty layer, no matter how reliable it may seem, is recommended to be removed to zero. Old wallpaper, even old drywall - everything will need to be removed. It is more convenient to carry out such work using a hard spatula and a roller moistened with water. If cracks are found in the surfaces of walls or ceilings, holes will need to be deliberately cleaned to the very foundation. All detected protrusions are also better to chip off, knock down and process with a primer or putty. After the surfaces have been treated, it is recommended to apply a thin layer of plaster, which is designed to smooth out other minor surface defects. At the end of the surface preparation, it is recommended to carry out additional treatment with antiseptic compounds and a primer.

And it’s better with an antiseptic primer. Now, when the walls or ceiling are completely ready for further work, you need to wait for the surface to dry completely and only then continue facing or finishing work. formulations.
Methods for attaching drywall to surfaces
It is much easier to carry out installation work with drywall using adhesives than when installing a frame from a profile, however, it should be understood that in this state of affairs, additional installation of heaters and sound insulators is simply impossible. The process of gluing panels is as follows: the surface that we already pre-prepared, we measure using a plumb line or level. If there are irregularities, it will be necessary to bring them to the same level relative to the common plane. Such procedures can be carried out as follows: slaps of solid adhesive are applied to the walls in certain places and in the required quantities so that when attached to them, the drywall sheet is in a strictly horizontal or vertical position. Later, after complete drying, the sheet is fixed on these slaps with the help of self-tapping screws. Such a measure will help to achieve a relatively high-quality finish and give the walls an even and smooth appearance (after attaching the sheets, of course). A primer layer is applied over the slaps and in general on the entire surface, which must dry thoroughly before drywall is attached to it. 
After the primer has dried, proceed to gluing the sheets. You should start from the far corner. The adhesive solution is applied to the reverse side of the sheet and applied to the surface, while it is pressed tightly, but without much concentrated effort, because with such an impact, the drywall sheet is easy to deform. After the sheet is applied, we wait for some time until the surface and the adhesive composition seize, and proceed to gluing the next sheet. After the work is completed, it is necessary to leave the room alone for about a day (or better, if there is nowhere to rush, two ). After that, you can safely start grouting. When the seams are sealed, additional priming work is carried out, and after them - finishing with putty solutions.
The process of mounting on a frame is inherently similar to the process of mounting on glue. However, here the profile acts as glue slaps, which is fixed to the surfaces in such a way that one even and regular plane is created. The advantage of this method of fixing drywall is that the frame allows you to place various types of insulation between the profiles if necessary. The only difficulty lies in the fact that the profile is set in one plane, which will greatly help the level, plumb line and rule. When the profile is installed and the insulation is laid, you can begin to fasten the sheets. They are fixed with a screwdriver and self-tapping screws directly on the butt profile. All subsequent work: grouting, priming and puttying are similar in principle to those described earlier for the case of mounting on glue.

Conclusion
The methods and methods of installing drywall sheets on the surface discussed in the article: walls, ceiling - will be especially useful for novice repairmen or those who started finishing work for the first time. Knowledge of the classification of sheets will also be useful, and a list of the necessary tools and requirements for the surface to be faced will help to approach the matter as responsibly as possible and be "in full swing." I would also like to note, and it is important to understand that, despite all its positive characteristics, drywall It also has a long service life, and with proper operation and installation, it will become an indispensable assistant in creating a pleasant and cozy atmosphere in your home. All the best!
Often, gross mistakes are made in working with GKL, certain knowledge will help to avoid them. Drywall installation technology must be observed, no matter what type of work you choose. Naturally, some nuances, changes and additional requirements are possible, but the basis is the same for all do-it-yourself work with this material.

Where to begin
Starting drywall work in any room, you must understand the qualities and properties of the material, only in this way you will determine how GKL is suitable or not suitable for such work. You must choose the type of material, its dimensional parameters, determine the type of drywall installation, frame rigidity, tools and materials, and only after that, having additionally drawn up a work plan, proceed to install a wall, partition, communications lining box, ceiling, arch or other structure .
Drywall and its types
This material has many varieties and types, distinguished by composition, thickness and application.
There are three main varieties:
The standard sheet of drywall is the most common in use, in terms of thickness and application, it is arched, ceiling and wall. Moisture-resistant material designed for the repair and decoration of premises with a high level of humidity. Sheets of this material are able to absorb excess moisture in the air and allocate it back when there is a shortage.
You should not feed yourself with the illusion that the GKLV is completely waterproof. Moisture-resistant drywall is based on gypsum, in which there is only a certain percentage of special additives that make the material moisture resistant. When rough finishing a box or other structures made of GKLV with your own hands, the surfaces must be primed.
Moisture-fire-resistant drywall has enhanced performance in two of these directions. It is used for fire protection of rooms with high, low and normal levels of humidity.

Tools for the job
The tool kit of a home master, of course, can differ significantly from the "equipment" of a professional. However, there is a certain minimum, without which the installation of drywall is simply not possible.
Read also:
Rational putty consumption per 1 m² of wall: correct calculation
The necessary set of tools for working with GCR with your own hands:
For a rough finish of any GKL construction with your own hands, you will need a container for diluting putty mixtures, a wide and narrow spatula, as well as a mesh or sandpaper.
In order to greatly simplify your work when mixing the mixture, you can purchase a mixer - a special nozzle for a drill for stirring building and finishing mixtures.
However, professionals have their own secrets for installing drywall with their own hands. Some of them are in the toolkit. An air or gas gun, for example, greatly simplifies the installation of the GKL, and the Prosekatel simplifies the assembly of the frame. A lift helps to lift a massive sheet of material under the ceiling, and a needle roller helps to bend the material in an arc.

Assembly order
The main plasterboard structures include ceiling structures, as well as walls, boxes and partitions. The main mistakes home craftsmen make in assembling these particular segments with their own hands. Knowledge of the technology and sequence of work during the installation of a ceiling, wall, box or partition and drywall guarantees a successful result in the end, as well as the durability and safety of the structure.
Knowing the technology of installing drywall on the simplest elements of the interior, you can learn how to mount complex geometric shapes with your own hands.

Mounting technology
It is important to work correctly with the marking and installation of the frame, followed by the usual sheathing of the frame with drywall, which will create a uniform, integral surface, or make an original multi-level ceiling.
When creating a frame for a box, you should remember what you plan to hide in it.
It is important to remember that in addition to the standard profile for creating a ceiling box, certain accessories can be used to help in the work. In addition, sometimes you have to strengthen the structure, for example, if you want to install some communications, lighting, ventilation, and so on in the thickness of the ceiling.
Read also:
Do-it-yourself drawings on the walls will create a mood and make the interior unique

Assembly rules
Here, as in any other work with drywall sheets, several types of installation can be used, and each type has its own technology. It is necessary to remember about the frame and frameless method, to understand that the frame can be wooden or metal, and the frameless method involves the installation of drywall on the adhesive composition.
It is possible to install drywall using the Knauf technology, which involves a clear sequence consisting of preparation, installation of the frame, cladding of the GKL walls and puttying of the surfaces.
We consider the drafting of a project to be the most important stage in such work, because it can include not only a drawing, but also all the costs of work, which is very convenient.
Do not forget to immediately determine the type of work, because it will depend on whether it is worth leaving a place in the wall for insulation, whether it is necessary to soundproof the room, make a separate box for communications, niches in the wall, and so on.

Box device: installation nuances
The main objective of this design is the decorative "framing" of some communications, unaesthetic elements or any fasteners. The process of mounting the box on the ceiling is not much different from assembling the box on the wall or in the partition. At the heart of the box, like any other drywall construction, is a frame made of a metal profile, which is sewn up with material. After a rough finish, the box can be decorated with any materials: be it sea pebbles with glass mosaic or ordinary paper wallpaper.

Partition wall mounting technology
We believe that the main thing in the construction of such structures should be considered the project and its observance, as well as clear marking, correct installation of the frame and its strengthening, if necessary.
In a similar way, we can talk about so many elements and stages, because drywall works include the technology of mounting a drywall frame, decorative elements installed in rooms, and even the most elementary things, such as shelves and small boxes. But it is worth paying attention to more complex structures, for example, plasterboard fireplaces, cabinets, walls with niches and more.
If you decide to ennoble the space of a house or apartment with the help of drywall, you should first learn how to work with drywall. The material is popular among modern builders and repairmen, because with its help various ideas are embodied in reality.
 An example of designing a room with drywall
 Before working with drywall, they are prepared, mandatory for the procedure. Work begins with the profile using improvised means.
Tools
Work will be better and faster if you purchase special aids for gypsum boards. Set of tools:
Many of us are sure that drywall is a modern building material that came into use only at the end of the last century. Not! In fact, this material has been used for about 200 years. Of course, during this time, production technologies have changed, but this does not negate the following fact: everyone can master the basic points of dealing with drywall on their own.
As a rule, today no one uses wooden bars for mounting the frame; instead, metal U-shaped profiles are used.
Work with drywall occurs using 4 types of profiles.
The main fasteners for the frame profile are self-tapping screws, the length of which is from 9 to 12 mm. There are also rivets and mounting pliers (cutter) for connecting several profiles. The frame is attached to the wall or ceiling with anchors or dowel-nails.
Do not be afraid of a large set of parts used in the installation of drywall. This is not a complete list of what professional builders use. In addition, do not forget that one-time work implies only the presence of direct suspensions, CD and UD, dowel-nails or anchors.
Particular attention should be paid to the tools for mounting drywall on the walls. 
Since you will have to drill holes in profiles, walls and other materials, buy or rent a hammer drill with a 3-5 joule impact force. It is much easier to make a hole in concrete with a hammer drill than with an impact drill. She just can't handle that many holes. In addition, the perforator is perfect for mixing various putty and assembly mixes. To do this, you need a special nozzle-mixer.
Equally important is a cordless screwdriver with a set of special nozzles to screw screws with different types of hats.
In addition to power tools, hand tools are also used:

To attach one rack of a frame 2.5 m high to the wall, use direct suspensions in the amount of five pieces, that is, every 50 cm - 1 suspension.
Two anchors are used to secure each, in total 10 holes need to be drilled. The distance between the posts is 60 cm, so for a wall 6 m long and 2.5 m high, you will need 7 frame posts and 70 holes.
How to work with drywall
Working with drywall is primarily the creation of a frame and its further sheathing. Usually, leveling walls, erecting partitions, arches and niches.
Do-it-yourself installation of drywall is as follows.

 Types of fasteners for creating a frame
 If you need to cut a sheet of drywall, this can be done very simply with your own hands. To do this, cut the cardboard and a few millimeters of the plaster layer with a clerical knife, and then break it on the corner of the table. Cut off the second layer of paper after breaking.
How to seal sheet joints
After installation is necessary. When joining whole sheets, the edges should form the required shape, and when installing cut pieces, a chamfer is cut off to ensure a triangular seam. 
Use putty to fill the mounting seam. The junction is reinforced with a paint grid (sickle). Serpyanka is used after filling the seam with putty, then it is puttied clean. To reinforce the corners, you can use reinforcing perforated corners.
If working with drywall requires creating curved structures, you can bend the sheet yourself. To do this, pierce a sheet of cardboard with a spiked roller and moisten it with plenty of water. After 10-15 minutes, the gypsum will get wet, and it will be possible to give it any shape without any problems.
This technique is often used for and .
Now not a single repair in an apartment is complete without such a practical material as drywall. If you learn how to work with it correctly, then you will be able to create amazing structures for hiding communications, creating partitions and zoning rooms.