Plywood furniture - how to choose plywood and tips for creating furniture (103 photos). The essentials for do-it-yourself plywood crafts Work from plywood
Plywood figurines are an original and budget decoration for the garden. How wonderful it is to stroll through a cozy shady garden, enjoying the fresh air, the scents of flowers, the singing of birds. I want to decorate my own garden, give it individuality, so that each guest understands that the backyard has a soul. Today on sale there are a large number of garden figurines made of polymeric materials. However, they are quite expensive. We offer you some ideas plywood figurines which can be done.
DIY plywood crafts
- funny figurines;
- unusual planters for flowers;
- bird feeders;
- fences.

Making figures from plywood is very easy, even a teenager can handle it, of course, under the guidance of adults, and children will be happy to help in decorating the work with paints.

Summer resident from plywood
Plywood is sheets of thin wood veneer, interconnected with different adhesives. The thickness of the sheets can vary from 3 to 30 mm, so it is possible to choose the appropriate texture of the material. It depends on what kind of wood the veneer is made from.


Given that plywood is made from natural material, precipitation and low temperatures do not pass without a trace. When choosing a material, you should pay attention to moisture resistance. For outdoor use, look for plywood labeled FKM and FSF.
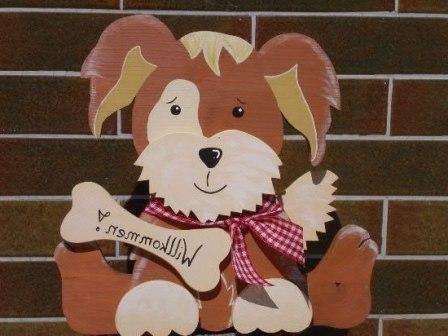
Cheerful plywood dog
Grinding. Plywood sheets are divided into polished on one side (Ш1), as well as on both sides (Ш2) and unpolished (НШ). Oil or acrylic paints are suitable for decorating your masterpieces. They are not afraid of exposure to ultraviolet radiation for at least a few years.
Step-by-step master class on how to make figures from plywood
Now you can start making plywood figurines with your own hands. To work, you may need:
- jigsaw;
- pencil;
- plywood 20 mm thick, moisture resistant;
- stencil;
- sandpaper;
- electric screwdriver and self-tapping screws;
- paints;
- glossy varnish for wood.
Do-it-yourself plywood firebird

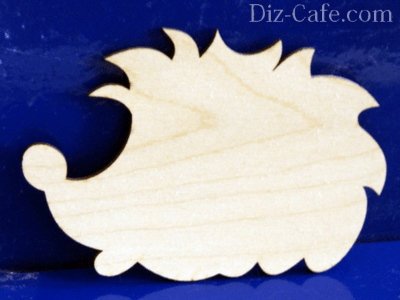
Do-it-yourself plywood snail


Plywood snail for garden
Plywood scarecrow for a summer cottage


DIY crafts have always been an exquisite decoration of a house or garden plot. You can make them without outside help. The success of any creative undertaking depends on how serious the preliminary preparation was. Preliminary work plan - simple and affordable schemes that can be downloaded ready-made with an attached photo of the product or created by yourself.
Properly drawn up drawings of light plywood crafts can turn the laborious processes of creating items for decorating everyday life into easy and feasible in a matter of hours.
Sawing with a jigsaw from plywood: the specifics of the process


A useful leisure option that is available at any time with a minimum of tools and materials. In order to make a craft you need:
- pre-drawn drawing;
- jigsaw - a tool for cutting material;
- a sheet of plywood of any size (depending on the desired dimensions of the finished product);
- mounting bolts, self-tapping screws, screws, glue (if needed).
Crafts can be for children, in the form of decorations for home and garden, kitchen, landscaping. It is better to work collectively, involving the child as assistants. For him, it will be informative and interesting, crafts in this case become a matter of pride and are placed in a conspicuous place.
A manual jigsaw is a metal frame, curved in the shape of the letter "P". The nail files used in this tool are made of steel, they are very thin and fragile. Therefore, if you plan to make several crafts from plywood in an evening, the number of removable elements should be taken with a margin. Professionals prefer to use a jigsaw - this increases the speed of material processing.
How to make a simple craft drawing


To do this, stock up on a large-format sheet of paper. It doesn't matter if it's thin or cardboard. The drawing is needed in order to attach it to plywood and cut the material along the lines. Schemes can be of two types:
- simple,
- complex.
The first type is a regular drawing applied with a pencil or marker on paper. A complex drawing is a scaled image with symbols and markings with dotted lines (the future bend of the craft) and the specified length of the ribs.
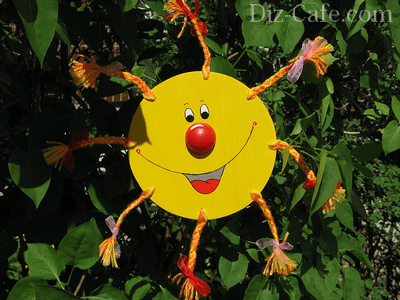
Light plywood crafts take a minimum of time and effort, they are accessible even to children. Carbon paper (special paper with a layer of paint applied to one side) will be a good helper in the implementation of the project. It lies directly on plywood, and a drawing is superimposed on top. It is enough to draw once with pressure along the main lines and a clear pattern will appear on the material, according to which you can cut with a jigsaw. In the photo you can see a diagram of an impromptu sun for a summer residence.
Toy car - an exclusive craft for children


If you want to make a plywood craft project in the form of a car using a jigsaw, you can take an example of a finished drawing as a basis. Artistic talents are welcome, in this case light projects are created by yourself. The main thing is to follow the rules and proportions. To make a car craft from plywood, you need to cut it separately:
- 2 wings
- 4 wheels
- bottom,
- hood,
- trunk,
- top.
When creating projects-schemes of plywood crafts that others will make, you need to number each part on paper, attaching a description in which order they will be connected in series. If the drawings and future products go "size to size", follow the correspondence of the sizes, carefully rechecking all calculations. The photo shows an example of a car made of plywood - such a craft will definitely work out with the correct organization of the creative process.
Easy crafts for giving: a thoughtful approach


Dacha is a place of rest, which the owners tend to decorate with exclusive handicrafts. If the plans include a makeshift garden, you can create drawings of a well and a stork attached to it. Such country crafts from plywood can be made to the site anywhere, and due to the minimum weight of the material, the structure is easy to transport out of town.
These are simple products. It is enough to cut out 4 equal-sized sheets from plywood, providing places for fasteners. An artificial stork should match the appearance of the bird as much as possible. It must be drawn on paper and transferred with a carbon paper to a plywood sheet. The finished bird is painted with paints on both sides. These are options for easy crafts for giving, where you do not need to make the product voluminous and use glue or bent elements. You can place such an exquisite decoration in the garden among the abundance of flowers and vegetation.
The presented crafts for giving from plywood in the photo will become an incentive for creativity for a novice gardener, you can borrow ideas or modify them to suit your aesthetic preferences.
Making drawings of products for summer cottages or urban life is not only the lot of professionals, but also an unknown world for novice craftsmen. The process itself does not require significant financial costs and brings a lot of pleasure.
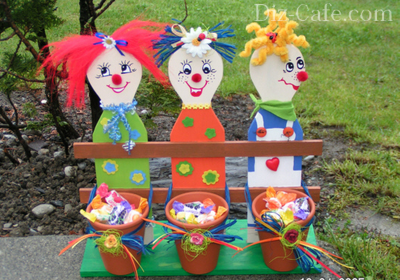
How nice it is to stroll through your own garden, enjoying the enchanting nature and amazing fresh air. Thinking over the design of a suburban area, each owner tries to make it special by adding color and creating a positive mood. Garden figurines made of plywood can successfully complement plant compositions and transform the site in an amazing way, making it a nice and cozy corner, conducive to a pleasant stay. Anyone can make such funny plywood figurines. To create such an ornament, it is not at all necessary to have the skills of an artist, it is enough just to show imagination and make a minimum of effort.
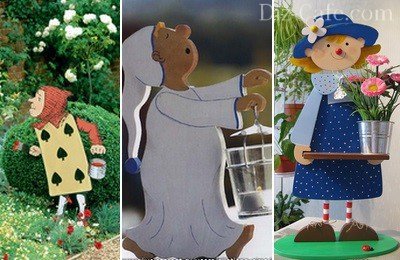
Such figures are designed to accentuate certain places on the site, making them more elegant and attractive. Due to the natural naturalness, decorations made of wood and plywood most harmoniously fit into landscape design.
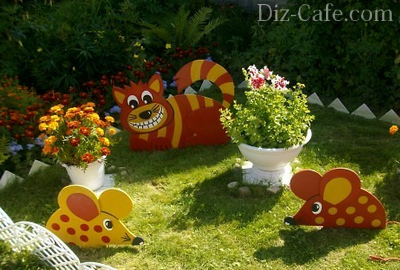
Figures cut out of plywood on garden plots look extraordinary
From plywood, you can make many interesting functional decorations for a summer residence. It can be:
- Funny figurines;
- Containers for flowers;
- Bird feeders;
- Decorative fences.
There are a lot of options for plywood figurines, and each of them is distinguished by originality and expressiveness.
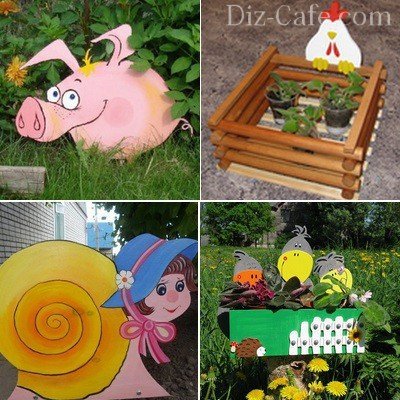
Miniature toy houses, animal figurines, whimsical fairy-tale sculptures and cartoon characters adorn many suburban areas today.
Plywood is one of the lightest and most convenient materials for creating crafts. It is so easy to work with that the figures from it are obtained quite quickly, and most importantly, it is interesting.
Plywood is a sheet of wood veneer, fastened together in several layers with glue or a synthetic compound. The strength and thickness of the material directly depends on the number of these layers. The thickness range of plywood sheets ranges from 3 to 30 mm. The material can have a completely different texture, which can affect the color and structure of the finished craft. For example: thanks to the beautiful structure and warm shades, birch plywood looks very aesthetically plywood, while coniferous plywood is more suitable for painting.
To create garden decorations, plywood sheets are perfect, the material for the manufacture of which was: poplar, alder, aspen, pine, birch, spruce
The main advantages of plywood:
- Environmental friendliness;
- Strength and durability;
- Waterproof;
- Good flexibility;
- Compatibility with other materials;
- Ease of processing.
But since plywood is still a tree, which by its nature is subject to environmental influences, a number of points should be taken into account when choosing a material:
- moisture resistance. For the design of outdoor spaces and decorating the backyard, you can use plywood sheets labeled FKM and FSF. In their manufacture, melamine and phenolic resins are used, which have a moisture-repellent effect.
- Sanded finish. On sale you can find sheets polished on one side (SH1), processed on both sides (SH2) and not polished at all (NSh). This moment is very important only in the case when you do not have time for additional processing.
Oil and acrylic paints are ideal for creating expressive and colorful garden decorations. They perfectly lay down on a wooden surface, creating saturated color combinations. Paints are resistant to UV rays, retaining their attractiveness for several years.
When choosing materials for making decorations, it is important not only to correctly pay attention to the quality characteristics of plywood. The moment of choosing paints for decoration is also important, which will retain color saturation for several seasons.
We create figurines with our own hands
Most often, dachas are decorated with flat figures cut from moisture-resistant plywood sheets. To create an original decoration, we need:
- Moisture resistant plywood 2 cm thick;
- Stencil;
- Jigsaw;
- Simple pencil;
- Fine-grained sandpaper;
- Screwdriver and screws;
- Acrylic paints, brushes and varnish.
If you plan to install the figure without leaning it on any support in the garden, you must also provide for the manufacture of pegs for its base. Their size depends on the dimensions of the figure itself. But, in any case, count on the fact that the pegs should go deep into the ground by at least 50 cm.
We invite you to remember the forgotten type of creativity - sawing with a jigsaw, making an unusual decoration for the garden with your own hands
You can decorate any corner of the garden with a plywood figurine by hanging it on a rope, fixing it to a support with nails and placing it on stands
A stencil for making a figure can be made independently. To do this, you need to draw the drawing you like on a piece of paper, drawing it up in the form of a drawing or silhouette, and then simply cut it out.
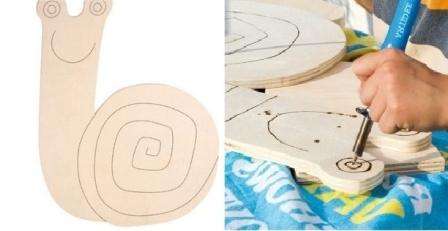
Master class # 1 - a curious snail
This cute plywood figurine is so easy to make that anyone can make it. Little helpers will gladly respond to the offer of adults to participate in an exciting process.
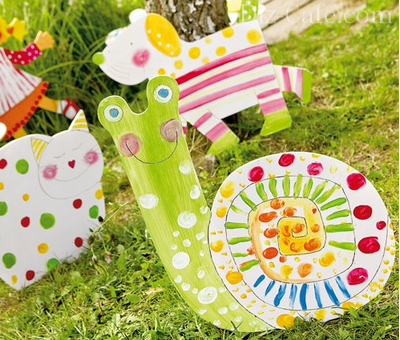
The charming snail will surely appeal not only to little fidgets, but to adult guests of the site, becoming an elegant decoration for the playground and a favorite character in exciting games

On a sheet of paper we make a sketch of the future figure, the image of which is subsequently transferred to the base of plywood
If you are confident in your abilities, you can do without a paper template by drawing a snail directly on a sheet of plywood. For safety reasons, you will have to do it yourself for cutting out a figure with a jigsaw. But drawing the contours and decorating the snail can be safely entrusted to impatient little helpers.

With the help of a felt-tip pen or a burner, we draw the contours of the snail so that even after coating with paint they remain bright and expressive
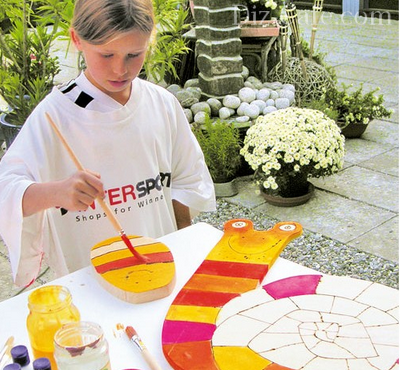
We paint the blank with acrylic paints, choosing spectacular contrasting combinations. To get rich colors, acrylic paints are best applied in 2 layers.
The snail is ready. Let the paints dry a little, and you can safely plant a cute character in any place you like in the garden.
Material on how to make garden figures for a summer residence with your own hands will also be useful:
Master class # 2 - charming Scarecrow
Having allocated only a couple of hours of free time to make the Scarecrow, you can make a funny figurine with your own hands, which will bring a touch of soulfulness and warmth to the site.
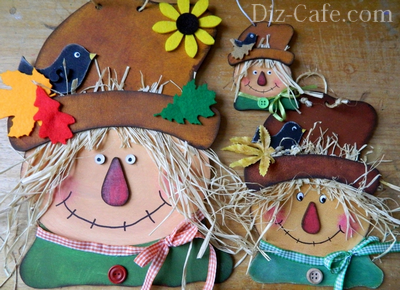
Here is such an incredibly cute and charming fairy tale character Scarecrow from the fairy tale "The Wizard of the Emerald City", can also settle on your site
The figurine will be made in several stages. First, we take a sheet of plywood, on which, using a stencil, we draw the outline of the future character. The finished drawing can be transferred to plywood using ordinary tracing paper.
If we make a figure that will rely on pegs, we immediately attach them. To do this, we drill paired holes in the body of the figure, the diameter of which corresponds to the size of the pegs.
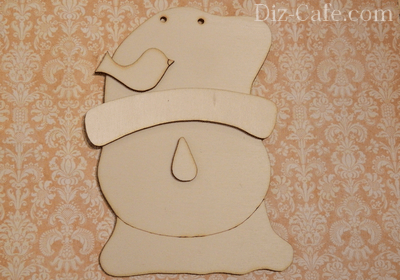
Using a jigsaw, cut out the figure along the outlined contour. We carefully sand its edges with sandpaper, giving them smoothness.
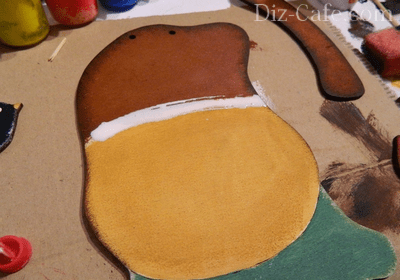
We make out the figure: on the workpiece with a simple pencil we draw the elements of the character and paint them with acrylic paints
Having painted the frontal part of the workpiece, we decorate the end faces. When the paints are dry, cover the figure with varnish.

To decorate the figure, we used dried grass, which we used to decorate the scarecrow's hair, a button and a satin ribbon, from which we laid out the character's collar
Our cute fairy-tale character is ready. It remains only to stretch the wire through the holes in the hat and fix it on a tree branch or fence.
A little secret: if in the process of sawing with a jigsaw a plywood sheet begins to delaminate, it is necessary to impregnate it with a solution prepared from PVA glue and water, taken in a 1: 1 ratio. Plywood is impregnated 2-3 times, applying each subsequent layer after the previous one has completely dried.
Since such crafts are quite light, finished products should be securely fixed, partially buried in the ground, covered with sand or glued to the base.
By the same principle, you can make themed plywood structures, for example: a miniature fairy forest with bizarre trees lost in a flower garden or a pretty clearing near a pond filled with funny figures of animals. Do-it-yourself plywood structures will decorate your site, making it attractive and unique.
We also recommend
 What is the name of the amount of money at stake in the game Modern monetary system is a financial pyramid
 How to name a horse: we select a suitable nickname
 How to name a horse: we select a suitable nickname
 Point of the celestial sphere above the observer's head
 Common peacock (Indian)
 What is the name of the male and female