From what and how can you make a brush for painting? What is needed for coloring.
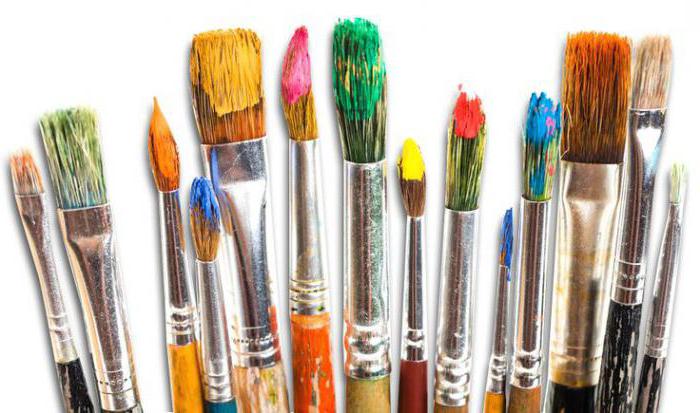
In modern conditions, making a brush with your own hands is usually carried out using bristles and animal hair. You can make such brushes with your own hands and get a quality tool for painting or painting. Brushes can be made round or flat depending on the area of use. In addition, the pile can be shortened or elongated.
Making a brush with your own hands is not difficultThe most common and high-quality brushes from the tail hair of such animals are considered:
- badger;
- column;
- proteins;
- gerbils.
Given the high cost of the animal hair tools listed above, homemade brushes can replace this material with the hair and hair of other animals. In particular, instruments made of mink, arctic fox and fox wool have become more and more common lately. In addition, waste from the activities of fur factories can be used as a material. Also, the pile can be made from the wool of camels, sheep or long-haired dogs, as well as human hair.
Manufacturing technology
The first step in the manufacture is the preparation of bristles or animal hair. In addition, a stand for brushes and material for the handle must be prepared. However, first of all, you should start with the choice of material for the bristle tuft.
Material selection
When choosing a material, you need to focus on what kind of work you plan to use the brush for. So, for painting with watercolors or oils, some materials are suitable, and for fine painting works, others. At the same time, there are areas of use that require the use of a certain material. For example, for ink painting, most masters prefer to use products made from camel wool.
 Trimming wool for the future pile of brushes
 Consider the main characteristics of the most common homemade brushes, depending on the material used:
- Sandstone brushes, as a rule, are made flat with a long or short hairy surface. They are distinguished by soft and elastic hair. Therefore, such tools are mainly used for fine painting work or drawing with oil paints or watercolors. In addition, brushes with sandstone bristles can be used to glaze the lacquer.
- Badger products have a round or flat shape. They are somewhat stiffer than the previous version, and therefore they are mainly used for working with oil paints.
- Brushes with kolinsky pile can be flat and round. They have high elasticity and resilience. They are mainly used for fine work, as well as for raw glazing.
- Squirrel tassels can only be round. They are exceptionally soft and elastic, so they are mainly used for painting on porcelain or paper.
Hair preparation
It is advisable to start harvesting in early autumn, when the animals molt. Individual unsuitable hairs are removed from the collected bundle and trimmed. Next, the cut part is placed in a glass for alignment. The hair bundle obtained after this should be combed out with a comb with sharp teeth.
Carefully combed pile must be tied up and degreased in clean gasoline. To do this, the bundle is stored in a closed jar for several days, after which it is boiled in a tanning solution to make the hairs non-hygroscopic.
 Carefully combed pile is bandaged and degreased
 The next step is hardening, the conditions of which depend on the type of hair. Usually the hair is kept at a temperature of 150 degrees for about an hour. For hardening, the bundle is placed on a metal mesh or hung up so that the hairs are well warmed up by air of the required temperature.
Knitting brush
The pile, which has been hardened, is suitable for knitting a brush. To do this, a certain number of hairs is taken and lowered into a tin or plastic mold with a conical bottom. This form must be prepared in advance. After you have put the required amount of hairs into the mold, you can make a blank for the brush by tapping on this mold. Next, the bundle of hair is removed and tied up, after which the non-working surface is varnished. It is inserted into a metal capsule or clip.
The capsule can be made either from thin metal strips, connecting their edges with an overlap with soldering. In addition, this work can also be seamless, which is considered a more acceptable option.
It is recommended to make the capsule from brass or tinplate, as these materials are durable and resistant to corrosion. Its size will depend on the desired brush number. Also at this stage, do not forget about such an important element as a stand for brushes.
 The brush stand is an equally important element
 Making a pen
After you managed to make a pile, you should start making a handle. It is best carved from such types of wood:
- pine;
- alder;
- birch.
After turning, the handle is covered with a colorless varnish or painted with a solid color paint. Next, the beam inserted into the capsule is filled with synthetic glue or other waterproof composition from the wide end. This must be done so that the glue reaches the end of the pile, which is in the capsule.
After everything is dry, the primer with a bunch of bristles should be connected to a wooden handle. For strength, it is recommended to additionally compress the capsule with a wooden handle. The finished handle should be varnished.
Choice of pile length
You need to choose the length of the bristles released from the primer. The length of the released hair should depend on its elasticity. This is of fundamental importance, because if you release the bristles too long, then the brush will look disheveled. Otherwise, insufficiently released pile will not pick up a sufficient amount of paint.
After you have decided on the length, the finished brush must be moistened with water and combed until the bristles are as even as possible.
Conclusion
Thus, making a brush with your own hands is a completely affordable procedure. It consists of several stages, one of which is the choice of material. Hair and bristles are selected in this case, taking into account the purpose of the brush and financial capabilities.
Repair is a long and very troublesome business, and in addition it is costly. Today, the choice of materials in hardware stores is huge, which means that the scope for imagination has no limits. Despite this, the paint never loses its relevance. Radiator batteries and pipes, wall panels - all this requires annual renewal. Therefore, you will have to be a little painter as well. To get the job done quickly and efficiently, you need good paint brushes. And, of course, you need to decide on the material. It can be varnish or enamel.
Goods for the painter
It can be difficult for the layman to imagine how many of them there really are. Paint brushes differ not only in size. And if until now you have used the only one to perform all types of work, then after reading the material everything will change. So:
- Flywheels (KM) - huge and fluffy, made of natural fiber with the addition of synthetics. I have a round shape and are widely used on large surfaces and for whitewashing. The diameter is about 60 cm, and the length of the hairs reaches 180 mm. They tolerate contact with any solvents, perfectly withstand temperature extremes and are not afraid of hot water.
- Maklovitsy (KMA) - often used to These are wide, rectangular brushes for paint, which are based on natural horsehair and nylon. This allows the coating layer to be evenly applied. Hair length 100 mm, used for applying adhesive or casein material.
- Handbrakes (KR). Small and round, they are great for covering windows or pipes. Consist of pure bristles and horsehair. The middle is empty so that you can accumulate paint.
- Paneled - very reminiscent of the paint brushes that we used in childhood, in drawing lessons. Diameter 6-8 mm, they are used to outline contours.
- Radiator.
- Paint Flat (KF) - wide and flat, made of nylon and badger hair, it is used to eliminate smudges.
- Synthetic flat (KP) - artificial. Inexpensive and functional, it is perfect as an assistant in repairs. They ideally apply formulations diluted with water. A universal option to paint any surface, and sizes can be selected.
Using different piles
Synthetics, at first glance, is an ideal option. It is cheap, works great on any surface, wear-resistant. In fact, painters know that quite a lot depends on the material chosen. Bristles made of natural materials absorb the composition well and evenly distribute it over the surface. It is slightly rough to the touch. But on some surfaces, it will leave villi, and the brush wears out quickly.
Synthetic paint tools are made of polymers and have a small thickness. They are excellent for applying water-intensive paints, since such hairs do not absorb the material. This is also justified from an economic point of view.

What do you need to know?
High-quality brushes have a number of properties, but the main functional element is the pile. The longer its length, the more composition the tool absorbs. Therefore, the less often you will need to dip it in the jar. The hairs are not always straight, which allows even better absorption and even treatment of the surface.
Not only the length is important, but also the elasticity of the hairs. If they are not flexible enough, then a large amount of material will remain on the pile. Another rule - the larger the surface area, the more voluminous the brush is. For ceilings and walls, wide, rectangular specimens are needed, and for tables and windows, small ones with various handles are needed.

So the same and so different
At first glance, it is very difficult to choose the optimal paint brushes. What are, we have listed, but it did not become easier from this. But a professional consultant will certainly help. Today, for each type of work there is a special tool. There are kits for working with varnish based on synthetic resins, for painting with liquid wax or working with compositions based on water-based emulsion.
The main recommendations regarding the choice of brush are as follows. You need to be attached to the material with which you will work. Later, among the varieties with the desired pile, you will select those that fit in size. If you plan to do varnishing, then it is better to purchase a tool not with synthetic, but with natural hairs. It will be ideal for formulations that include a solvent. The secret is that these hairs have a porous structure and can absorb much more composition.
If you have to work with water-based compositions, then natural pile, on the contrary, is not recommended here. It will lose its shape after the first application. Synthetics absorb less paint, but manufacturers are doing everything to bring its functionality closer to natural.
How to clean a brush from paint?
After you have finished the work, you need to take care of the tools used. Someone thinks that they just need to be thrown away. But this is too wasteful. Much better to wash and save them. To do this, carefully wipe the brush on a paper or cloth towel. The more composition you can remove, the better the laundering process will be.
The second step is the use of a solvent. Do not forget that the choice should be made in accordance with the characteristics of the composition used.
- Brushes for watercolor and latex, that is, all that are produced on a water basis, are perfectly washed with ordinary water. The only rule is that they must not be allowed to dry out.
- White spirit allows you to cope with oil formulations.
- suitable for shellac.
The third step is to rinse again in water and pat dry with a towel.

For interior decoration and as a hobby
They are not always used only to cover the panel with an even layer. If you want to decorate your room with a bright image, then you need to choose the right paint brushes. The nylon tool is the best solution for artists who prefer acrylic. It is synthetic and comes in a huge variety of shapes and sizes. The main advantages are:
- Elasticity - the material from which the bristles are made does not break and is very flexible. This allows you to apply smooth and clear strokes. It is very convenient and perfect even for a beginner.
- Durability - if you take a natural bristle brush, you will quickly understand what the problem is. Painting and coating surfaces with acrylic involves the need to immerse the instrument in water. Therefore, the pile deteriorates and falls out. But the artificial one continues to serve.
- Easy to care for - nylon tools are very easy to clean from acrylic, which dries and crumbles. But a brush with natural bristles has a porous structure and is much more difficult to clean.
Rich choice
But which brushes for acrylic paints to choose for a particular job, you will have to decide directly on the spot. Flat, synthetic tools allow you to apply wide strokes due to the thick and long pile. Round - used for painting and painting. Oval synthetic are more often used in painting. They are close to flat in functionality, but change line thickness more easily. Contour brushes are flat, with short bristles. They are needed for applying small details and drawing.

Oil paint brushes
The main requirement for them is increased rigidity, which is due to the specifics of working with oil. A kolinsky pile tool is considered the best choice. The cost of kolinsky brushes is the highest of all, but the costs are offset by high performance properties. It is made from natural materials and pile. As a result, the brushes listen well, with their help you can not only apply an even layer, but also make a pattern or pattern. Unfortunately, the product from the column is very delicate. Even portrait painters note that it can not be used on all canvases. Flax, for example, will very quickly erase its delicate villi. Therefore, when carrying out repairs, most often for oil paint, combined brushes made of natural and synthetic bristles are taken.

Instead of a conclusion
As you can see, the choice is not as simple as it might seem. You will have to take into account the nature of the work to be done, its scale, as well as the coverage that needs to be updated. The material chosen as a coating will also play an important role. Therefore, first think over all the details, and then go to the store. Then success in a difficult task will definitely be ensured for you.
You will need
- - Hair dye (sold in packages with an oxidizing agent)
- - Bowl for preparing the composition
- - brush
- - Comb
- - Balm for recovery after staining
- - Gloves
Instruction
Read carefully the instructions for the preparation of the composition and use of paint. Mix the paint and oxidizer in a bowl, as directed in the instructions. Paint one at a time.
Comb your hair. It is not advisable to wash your hair before dyeing, so the paint will better fix on the hair. Apply any protective cream along the hairline to prevent redness and dye marks.
Tip your hair over the bath, take some paint with your hands (without a brush) and rub it into the roots of the hair all over the head, as you rub a mask or oils. If you are only coloring the roots, then use more dye. Raise your head and apply the color with a brush along the hairline, comb through with a comb.
Apply the dye to the entire length of the hair with rubbing movements. Walk the brush along the entire length, as if combing. Use all the remaining paint and comb through.
Leave the paint on for a certain amount of time and wash off. Then wash your hair with shampoo and apply a revitalizing balm that will soothe the scalp and smooth out the hair scales.
Related videos
Helpful advice
If you are afraid that you have dyed your hair unevenly, then during the action of the paint, comb it several times, rubbing the coloring composition into your hair. Try to wash your hair with shampoo for colored hair. This way they will last longer.
When re-dyeing the same color, pause after applying the dye to the roots (20 minutes), and then re-dye the roots and the rest of the hair.
www.kakprosto.ru
Rules for dyeing hair at home
If you are going to radically change the color of your hair, then before dyeing, consult a hairdresser or try on a wig of a similar shade.
First, determine how many packs of paint you will need. If the hair is shoulder length or lower, you will have to buy two packs of the coloring composition so as not to be left with undyed strands. As a staining tool, you can use a regular dishwashing sponge, cut in half. Experts even recommend that beginners use a sponge, since not everyone can handle a professional brush for coloring.
If you want to make your curls snow-white, then before dyeing them with tint paint, lighten your hair with a special bleaching compound. Be sure to test yourself for sensitivity to coloring components by applying a little paint to the elbow area and leaving it for a couple of hours. In the absence of redness, itching and irritation on the skin, you can safely dye your hair.
Be sure to use gloves and a shoulder cape, as paint of any shade can leave marks, both on clothing and on the body. Prepare a few clips or clips to divide your hair into sections for easy coloring. Lightly dampen your hair and divide it into several large strands. Start coloring curls from the back of the head and roots, as these are the most difficult and poorly visible places.
You can dye each strand individually from roots to ends, or you can first apply paint to the roots and only then cover all the hair with it. The second option is preferable, especially for those who have not yet mastered dyeing their hair on their own. Make one parting in the center and divide each half into small strands, coloring them well and securing with a hairpin. Comb through the strands occasionally with a comb or comb.
When the hair is completely covered with paint, lightly lather it and massage your head, as when washing. Some masters do not recommend covering the hair with cellophane or a scarf, but if the paint drains, you can use a special dye cap. Keep the dye on your hair for a strictly specified amount of time. A longer exposure to paint will not give them color saturation, but under the influence of chemicals it can significantly spoil the curls. After that, rinse your hair well from the paint, apply a restoring balm - the new color is ready.
www.justlady.ru
How to dye your hair at home: principles and secrets
Dyeing your hair at home is a procedure so simple and natural that you can not be afraid of it at all. As a rule, curls need additional painting about once a month. In order for the strands to be painted evenly, it is advisable to have an assistant, but you can do it yourself.
Self-coloring

Achieving the desired uniform shade is not difficult if you know how to properly dye your hair at home.
Tools and preparations
For the procedure you need to prepare:
- A towel to protect your clothes. Coloring compositions are quite resistant, it is quite problematic to wash them off.
- Gloves that protect the skin of the hands for the same reason.
- Container for mixing paint.
- Brushes for applying the drug to curls (very convenient devices). If there are none, you can use an unnecessary toothbrush.

Hair coloring involves the presence of a simple tool, as in the photo
Also, do not forget about the time of exposure to the drug - on average, it ranges from half an hour to 40 minutes. The paint applied at home is strictly maintained for the amount of time indicated in the instructions.
First of all, the tube with the paint and the emulsion that develops it must be mixed 1: 1 until the state of perfect uniformity.

Paint at home is prepared in the same way as in salons - in plastic dishes
On a note! You can mix the coloring preparation for curls only in plastic or glassware. Metal products cannot be used, as the mixture may react with the metal, therefore, an unpredictable hair color will appear or there will be a poor-quality result.
Coloring process
All hair length
- If the hair is dyed for the first time, then the drug should be applied to the entire length - from the very roots to the ends. It is recommended to apply the composition from the back of the head from the roots.
- Curls are separated by partings, a strand is separated, a homogeneous mass prepared in advance is applied to it with a brush. If the hair is long, the colored strand is folded into a bun and fixed.

The price of a successful result is the right action
- You can use the crab hairpin, picking up the already dyed parts of the hair.
- After the entire head is already covered with the composition, the hair must be combed with a small comb so that the paint is evenly distributed over the curls.

We maintain the composition on the head for the required amount of time, wash off in the usual way
regrown roots
- If you only need to finish the roots that have grown, the procedure will be similar. However, you need to know exactly what hair color the curls were dyed in the previous time. This is a rather important point in order to achieve an even shade, without sharp transitions.
- First you also need to divide the curls into partings, and apply the mass only to that part of the strands that has grown. At the same time, curls can freely fall on the shoulders, since the paint will be applied only at the roots.
The photo shows the process of how to dye your hair yourself at home, more precisely - regrown roots
- After about 2/3 of the time set by the instructions for keeping the composition has passed, its remains can be distributed along the entire length of the hairstyle volume. This can be done with a frequent comb, simply combing the paint from roots to ends.
Black hair, white hair... Or would you prefer a different shade?
Well, there are all sorts of little tricks regarding painting. So:
- On the areas of the forehead, ears and nape, which are close to the roots of curls, so that the skin is not painted, you can apply a greasy cream. Then, after the manipulations, there will be no characteristic spots on these parts of the face.
- After the end of the exposure to the paint, you need to slightly moisten your head with water and, without removing your gloves, massage the scalp and “knead” the curls for several minutes (3-5) - this action will provide a more uniform color.
- After the paint has been applied at home, washed off, and the desired result has been obtained, the hair needs additional care: moisturizing, nourishing, restoring. Be sure to use the conditioner balm, which is usually included with the paint. This technique will fix the color well and preserve the structure of the curls.

Paint at home is applied simply, we have indicated this in our article.
Finally
Remember, after dyeing even with the most gentle preparations, the hairstyle experiences some stress, therefore porous hair, brittle and with split ends, may occur. Only proper care can prevent this situation. How to care for dyed hair? Read about it in other articles on our website.
And we will continue our topic, how to dye your hair at home, watch the video!
vikistars.com
how to replace a hair dye brush 25.09.2017 13:02
You need to paint over the eyebrows with a well-sharpened special eyebrow pencil, after you have painted over the eyebrow with a pencil, you need to comb it with a special eyebrow brush, this is done in order to get rid of the excess and put it in the right shape.
You can also paint eyebrows with a beveled brush and matte brown shadows. In no case do not apply them in an even layer, this will make the eyebrows unnatural.
In order to correctly paint over the eyebrows, apply shadow (or pencil) in short jerky movements so that they resemble hairs.
As for the color of the eyebrows, one and the main rule is that they should be natural. Fashion trends for the color and shape of the eyebrows are constantly changing, but here are some tips that may come in handy:
eyebrows must match the makeup, i.e. if you paint an eyebrow under daytime natural makeup, it should be soft and as natural as possible, and if, for example, under dark rich smoky eyes, then the eyebrow should be drawn more carefully.
With paint
If you have an eyebrow color that doesn’t suit you or you just don’t like it, and you are tired of constantly painting over your eyebrows with cosmetics, you can try using a special eyebrow dye. It will not replace cosmetics if, for example, your eyebrow does not grow partially, because. the paint does not last long on the skin, but is designed to change the color of the hair.
In order to do everything right, you will need: eyebrow paint (a standard set usually includes, in addition to paint, a mixing cup and a brush), a toothpick, fat cream (or petroleum jelly), cotton pads.
Apply a fat cream along the contour of the eyebrow, this is done so that the paint is then easily washed off the skin. If you are confident in your accuracy, this step can be
Source
What modern women do not come up with to be more beautiful! Face and hair masks, jewelry, decorative cosmetics. Even hair, which is called girlish beauty, is rarely left unchanged. The hair is cut, braided, dyed. Learn how to dye your hair at home and avoid unpleasant surprises.
Secrets of competent selection of coloring composition
Important to remember before painting!
in no case should any additional components (oils, balms, shampoos) be added to the paint, since the effect of such a composition can be very unpredictable;
modern cream paints do not flow, so there is no need to put a plastic cap on your head and wrap it with a towel;
in no case proceed to staining if there are any damages on the scalp (scratches, wounds, rashes, itching);
for colored hair, at least once a week, you should make a mask that is suitable for your hair type, and use a balm every time after washing.
How to dye your hair at home
It doesn't matter why you decide to dye your hair yourself. Maybe you want to save money, or maybe you just don't have time to go to a beauty salon. It doesn’t matter if you have used the services of a master before, or if you dye your hair for the first time. The main thing is to learn how to do it right.
Any hairstyle will look even more beautiful if you choose the right hair dye color. Do a little research before choosing a dye, especially if you are going to radically change the color of your hair. You can upload your photo to one of the image sites and experiment with hair color and hairstyle there. Perhaps you will make a discovery for yourself: many do not even realize how much this or that color suits them, this or that
Source
Methods for removing certain types of paint: oil, water-based, aerosol, stamp, printer, shoe dyes. How to wash paint from various surfaces: leather, clothes, linoleum and plastic, wallpaper and window panes, car body? Features of elimination of chronic pollution. Methods for cleaning paint brushes.
Paint is a popular finishing material, widely used both in the home space and on the street. That is why no one is immune from accidental contact with her. Annoying stains on clothes or splashes on a car, a stained floor or damaged freshly pasted wallpaper, smeared hands - all this gives a lot of trouble and worries.
How can you deal with the problem?
If you want to find a successful solution to a “colorful” problem, it is possible without resorting to the help of professionals. It is only necessary to remember that paints are different in composition, and each surface has its own characteristics. Therefore, for each specific case, it is necessary to choose the right cleaning agent.
We clean the paint from the skin of the hands, face and eyebrows
Carrying out painting work without personal skin protection will certainly manifest itself as splashes of paint on the face and spots on the hands. You need to deal with them carefully, using gentle washes. How to wash the paint from the skin of the hands or face?
A time-tested product that gently removes oil paint from the skin. You just need to wipe the traces of paint on the face and eyebrows with a cotton swab generously dipped in vegetable oil. If your hands are dirty, you can wash them by pouring oil directly into your palm, rub thoroughly and rinse with warm water and soap.
Designed to eliminate defects in the color of eyebrows and hair, but can also be used in the fight against coloring compositions of a different type. Well remove water-based, acre
Source
Many people think that in modern conditions, painters have not used a brush for a long time and all work is carried out with the help of an airbrush, which allows you to apply paint to the surface to be painted. Even despite the convenience of using such modern equipment, a paint brush is an indispensable tool. With it, you can paint the corners and various elements of small sizes. Such painstaking procedures are not possible without this tool.
Application area
The paint brush has received the greatest distribution for household works. In particular, it is most often used for such works:
The last direction of using brushes is becoming more and more popular. When used correctly, a paint brush will allow you to restore furniture or, on the contrary, make it look older or more refined. For example, painting in the form of trees, marble or other patterns can be applied to the surface.
Working with a paint brush
Modern professional brushes have a fairly simple design. The main detail of the product is the handle, on which, with the help of a bandage, a working surface is fixed, which looks like a long bunch of pile.
In order to properly apply the paint and varnish material, it is necessary to blot the brush into the paint and transfer it to the surface. In this case, for uniform distribution, there should be pressure on the brush. The effectiveness of painting depends on the appearance of the work surface.
After you have purchased a paint brush, it is not recommended to immediately start painting. If you do not prepare the tool, then due to too stiff bristles, streaks may remain on the areas to be painted. To avoid this, you should dip the brush in a water-based solution for about one hour. All this will lead to the fact that the bristles of the tool will become larger and softer.
Source 
Acrylic brushes are different. The nylon brush proved to be the best, but it is not suitable for all types of work, therefore it cannot become the only one in the artist's arsenal. Before buying a particular brush, you should figure out if it is suitable for acrylic and for the specific features of a particular artist.
Brush shapes
You can work with acrylic with a tool of any shape, but each of the brushes is capable of performing a certain amount of work while painting. It is very easy to spoil the picture if you choose the wrong shape of the brush for certain strokes.
Round. This tool is considered universal, suitable for any paints and techniques. They can be used to draw details or fill, depending on the number of the brush. The round shape is achieved by enclosing the pile in a rounded cage.
Flat. To create this shape of the brush, a flat clip is used. Brushes can be wide and narrow, long and short. They are convenient to use for painting large areas of the picture with plain paint, including acrylic.
contour. The shape of these brushes is similar to a flat one, but the tuft is shortened and wider, which makes strokes easier to control. It is also convenient to create color transitions with contour brushes when painting.
Brush in the shape of a cat's tongue. The shape of such an instrument resembles a dome or an oval. It is considered a compromise between round and flat brushes, as it leaves different strokes depending on the position. For beginners, the tool is not suitable, since its use requires some skill.
Linear. To create such a brush, a long pile is taken, and the thickness of the tool is very small. The brush is more suitable for inscriptions or very thin, small details.
Who is the best hair supplierPeople dye their hair for different reasons. The right hair color makes the eyes brighter and the complexion more even. But, unfortunately, it can also work out the other way around: a new color will add a dozen years and make all the wrinkles and d
Being
Source 
Do you agree that beautifully curved and clear eyebrows can give a woman's face a special charm? Eyebrows, despite the fact that their importance is often underestimated, is one of the most expressive elements of your face. The fact that eyebrows should be in perfect order every day, probably, you don’t need to tell anyone ... Everything is important in them: both color and shape. And in order to achieve the ideal, too much time is simply not needed. The main "tools" in a woman's arsenal: a pencil (shadows) and tweezers. In the article we will tell you how to dye your eyebrows with paint at home, we will give step-by-step instructions.
Are you terribly tired of sitting down at the mirror every day and “drawing” your eyebrows? So it's time for more radical steps. For example, in order to paint eyebrows with paint. Believe me, it's much more convenient. Especially for the summer time, when because of the heat there is a constant desire to wash, freshen up, but you have to endure, because it's a pity to wash off the beauty so carefully induced.
To solve this problem, special paints have long been invented for coloring eyebrows. If you want to do everything perfectly with high quality, entrust painting to a professional in their field. Moreover, absolutely any salons, and even ordinary hairdressers, will come to your aid. In addition, the master can help you choose the perfect eyebrow shape and color for you, which will perfectly match your appearance. Eyebrow tinting done by a professional does not take much time - a maximum of 10 minutes, without taking into account adjustments.
Basically, tinting your eyebrows at home is quite simple. After all, this procedure is absolutely simple and it is quite possible to perform it without any help.
We select the color
caring for venus hair flowersVenus hair fern, home care for which can bring its owner a lot of positive emotions, will delight the owner with its exceptional decorativeness and beauty.Cultivate Venus
If, for various reasons, you do not want to visit a salon for eyebrow painting, you can carry out this procedure yourself.
Source 
In modern conditions, making a brush with your own hands is usually carried out using bristles and animal hair. You can make such brushes with your own hands and get a quality tool for painting or painting. Brushes can be made round or flat depending on the area of use. In addition, the pile can be shortened or elongated.
Given the high cost of the animal hair tools listed above, homemade brushes can replace this material with the hair and hair of other animals. In particular, instruments made of mink, arctic fox and fox wool have become more and more common lately. In addition, waste from the activities of fur factories can be used as a material. Also, the pile can be made from the wool of camels, sheep or long-haired dogs, as well as human hair.
Manufacturing technology
The first step in the manufacture is the preparation of bristles or animal hair. In addition, a stand for brushes and material for the handle must be prepared. However, first of all, you should start with the choice of material for the bristle tuft.
When choosing a material, you need to focus on what kind of work you plan to use the brush for. So, for painting with watercolors or oils, some materials are suitable, and for fine painting works, others. At the same time, there are areas of use that require the use of a certain material. For example, for ink painting, most masters prefer to use products made from camel wool.
Consider the main characteristics of the most common homemade brushes, depending on the material used:
Sandstone brushes, as a rule, are made flat with a long or short hairy surface. They are distinguished by soft and elastic hair. Therefore, such tools are fundamentally
Source
Most women dye their hair at home, because it is not always possible to visit a professional. In order for the hair to tolerate dyeing well, some rules must be followed.
1. Preparation for staining
You can not just paint, because in this case they will not have a natural protective film. It is recommended to start coloring no earlier than two days after shampooing. So the paint will lie better, and the hair will remain healthier.
2.What is needed for staining
Before you dye your hair, put on something that you don't mind ruining. For example, some old T-shirt. In the process of dyeing it is very easy to get dirty, and the paint is practically not washed off. You will also need hair clips, gloves, a wide-toothed comb, a timer to keep track of the time, and a mirror.
Before starting, read the instructions as carefully as possible and make sure everyone understands well.
3. Before painting
Apply a rich cream to the skin near the hairline. This is necessary in order to prevent the ink from getting on the skin, since it is strongly eaten, and it can be difficult to wash it off.
Divide your hair into four equal parts. To do this, first draw a regular parting, and then another, in a perpendicular direction. Take a hair clip and clip the top two and one bottom section of your hair.
4. Hair coloring
 Put on gloves and prepare the paint as directed in the instructions. Start painting from the back of the head, first the two lower sections, then the upper ones. Paint is best applied with a special brush. If there is no brush at hand, a regular toothbrush will replace it.
If you are secondary, then all attention must be focused on the roots. On the roots, you should use about two-thirds of the dye. Wait for a while, then spread the remaining dye over the rest of the hair. This way you color your hair evenly and do not dry it out.
How to make a paint brush in five minutes, let's try to figure it out with you.
Everything is in the shops now! Buying any brush and pretty cheap is not a problem, but imagine this situation. You need to paint something. Literally two brush strokes. The brush after such a short-term use will have to be thrown away. It's a pity, but there's nothing to be done, it's somehow not handy to wash it.
And in this situation, this article will come to your rescue.
How to do it yourself, it is very simple and cheap to make a paint brush that does not need to be thrown away and does not need to be washed, with detailed photographs and will be described in it.
What can you make a brush out of?
This does not require a lot of time and materials. An old dried brush or any other pen that is comfortable to hold in your hand during painting and a few more details will be enough.

We disassemble the old brush so that the handle remains intact, and discard the rest.

Next, we select an ordinary clerical clip of the same width as the width of the brush you need, and adjust the width of the handle to the width of the clip. It is better not to cut the handle with a knife, but to saw it off, so it will be more accurate, and there is no risk that the tree will break off in the wrong place.

To secure the clip to the handle, you need to pick up two small and not thick screws. Depending on the diameter of the screws, you need to take two drills. The larger one is for drilling the clamp, and the smaller one is for drilling a hole for the screw in the handle (so that it does not split when tightening the screws).

We drill holes.

Attach the clamp to the handle.

We cut the foam rubber of the desired size and insert it into the clamp.

The brush is ready.

This do-it-yourself brush for painting is made, you can use it indefinitely and not worry that the paint will dry out and the brush will have to be thrown away. After painting, you simply throw away the used foam rubber, and it is enough to wipe the handle lightly from traces of paint. You can not even throw away the foam rubber, but leave the brush as it is.

In order for the brush to be ready for further use, it is enough to simply change the dried foam rubber for a piece of new one and the brush is again ready for use. You can take any foam rubber, such as you have.
If there is no foam rubber, then you can use a piece of old fabric folded in several layers, a piece of felt or something similar.
As you can see, there are no dead ends.
We also recommend
 Do-it-yourself vacuum cleaner repair
 Tenon-groove connection: tenon cutter and cutters for a manual router
 How to properly varnish wood Kitchen table varnish
 I work at a band sawmill, ran into the board waving
 Cutting plywood on CNC: tool selection and technology for cutting plywood sheets, price
 How to choose a CNC milling machine (milling cutter) for wood with your own hands