Jelly cake with cottage cheese and fruit without baking. Jelly cake with fruits
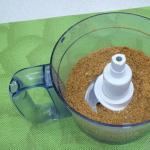
1. Break the cookies into pieces and place in a food processor. In which install the “cutting knife” attachment.

2. Beat the cookies until crumbly. You can also do this using a fine grinder or place the cookies in a bag and beat them with a rolling pin.

3. Cut the butter into pieces and place in a deep bowl.

4. Melt the butter in the microwave or in a water bath. Do not bring it to a boil, you just want it to melt.

5. Pour the butter and 50 ml of sour cream into a food processor to the cookie crumbs.

6. Stir the cookies to form a viscous mass. Line a baking dish with split sides with cling film and spread the dough in an even layer. Tamp it down well. Place the pan in the refrigerator while you work with other ingredients.

7. Place the cottage cheese in a food processor.

8. At high speed, beat it until smooth and homogeneous. If you don't have a food processor, grind it twice through a fine sieve.

9. Pour sour cream into a deep container, add sugar and beat with a mixer at high speed until a fluffy mass forms.

10. Brew gelatin in 50 ml of water, following the instructions on the package. Stir and leave until completely dissolved.

11. Add the whipped sour cream to the cottage cheese in a food processor and pour in the dissolved gelatin.

12. Mix the products and pour into the mold in a second layer. Smooth it out evenly and put it in the refrigerator until it hardens completely. This process will take you approximately 1 hour.

13. During this time, prepare the cherry syrup. Place the cherries in a saucepan and add sugar.

14. Fill with drinking water, approximately 150 ml and boil for 10-15 minutes.

15. Remove the cherries from the syrup; if they have pits, remove them, and place the berries on the frozen curd jelly.

16. Dilute the syrup with dissolved gelatin (brew it, following the instructions written on the package) and pour over the cherries. Place the cake in the refrigerator for about another hour to allow the top layer to set. Afterwards you can serve the cake to the dessert table.
In addition, you can make another contrasting layer, for example green from grapes or kiwi.
Watch also the video recipe on how to make a no-bake jelly cake with lime flavor.
It probably happens to many people that they want something sweet and tasty, but don’t feel like baking at all. There is not always the desire or free time. And then no-bake cakes come to the rescue. There are now a huge variety of them on the Internet. And it can even be difficult to figure out which recipes are tasty and which ones are not! Which one is worth cooking and which one is not worth cooking. So that later you don’t feel sorry for wasted time and money.
I would like to present to your attention a cake that is easy to prepare and turns out very tasty. It costs very little. And even less time to prepare. It can be considered a cake, or just a delicious dessert.
During the time that I have been preparing this cake, there has not been a single person who would refuse to eat a piece. Moreover, everyone certainly asks for more. And usually, after the cake is put on the table, after 10 - 15 minutes there is not a single piece left of it, even the smallest piece.
Children are generally ready to eat it at least every day. My granddaughter, having eaten it the day before, comes the next day and asks if there is still cake left. And not only the granddaughter, the husband also looks into the refrigerator, and not finding it there, he wonders “why I did so little.” And all because you can’t have too much of this dessert.
This dessert cake is especially good in the summer. When you take it out of the refrigerator, with fresh fruits and berries, it’s simply impossible to resist such a delicacy.
Let's make this cake today. Summer is just around the corner, there is an abundance of berries and fruits on the market. When, if not now, to cook it.
No-bake jelly cake - a very tasty recipe
You can use absolutely any fruits and berries. The ones you have in the refrigerator, or the ones you love. You can also use only berries, or only fruits.
You can buy a sponge cake for the cake ready-made, or bake it yourself. In the recipe I will give two options for baking the sponge cake. One is in the microwave, the other is in the oven.
We will need:
- banana - 1 piece
- kiwi – 1 piece
- peaches – 2 pcs.
- apricots – 5-6 pcs.
- strawberries – 0.5 tbsp
- raspberries – 0.5 tbsp
- sour cream – 0.5 l
- gelatin – 3 tbsp. spoons (30 g)
- sugar – 1 glass
- biscuit -250-300 gr
Preparation:
1. Bake a sponge cake. See the recipe below.
2. Soak gelatin in boiled cold water. Leave to swell for 30 minutes.
3. Wash berries and fruits, peel if necessary. Let the water drain and dry with a paper towel.

4. Cut bananas, kiwis, peaches and apricots into pieces. It is better to make the pieces tangible and large. It will be nice when a piece of cake contains coarsely chopped fruit.
5. Sort the berries, remove the stem. I'm using raspberries and strawberries today. The strawberries are already “leaving”, and I was only able to collect small berries from the garden. If you have larger ones, the cake will look brighter and more beautiful!

6. Cut the sponge cake into cubes measuring 2.5 x 2.5 cm. I baked the sponge cake in the microwave, it turns out a light color. In my opinion, such a sponge cake is more suitable for our white dessert.

If you bake it in the oven. It will turn out more ruddy. In this case, the crusts can be cut off and eaten. Children really love to be nearby at this moment. Oh, how they like rosy, crispy warm crusts!
7. Prepare sour cream and jelly cream. Beat sour cream with sugar using a mixer. It is advisable to use non-liquid sour cream. You can also choose different fat contents, depending on your preferences.
I use 20% fat sour cream.
8. After the gelatin swells, melt it in a water bath until liquid.

9. Pour into sour cream in a thin stream, stirring constantly. Stir until smooth.
10. Prepare a deep bowl or salad bowl. Line its bottom with cling film.
11. Start assembling the cake.
12. The cake can be assembled as your imagination tells you. You can put peach slices and bananas underneath.

13. Then pieces of biscuit.

14. Lightly pour sour cream and jelly cream.
15. Lay out the next layer of fruits or berries again. Alternate this with the biscuit. The main thing is to lay out fruits and berries in such a way that they are partially located at the very wall of the salad bowl. Subsequently, when the cake is ready, they will be visible around the edges. And this makes the cake very beautiful and appetizing.


16. Periodically pour the layers with sour cream and jelly cream. But you need to calculate everything in such a way that the last layer is the cream.

17. When assembling the cake, you must not hesitate; after a fairly short time, the cream will begin to harden and turn into jelly. We need to fill it up before that.
18. And so, the cake is assembled. The last layer is a layer of sour cream. Cover the top with cling film and put it in the refrigerator to cool. Minimum cooling time 2.5 – 3 hours. If it is possible to keep it in the refrigerator longer, then it will only be better for it.
19. Cut the finished cake into pieces and serve either with tea or simply as a dessert.

20. We eat with pleasure and prepare to listen to sincere words of gratitude and praise.

The next day, get ready to hear a request to make the same cake again. But in order not to repeat yourself, prepare an equally tasty and equally easy-to-prepare dessert -. Or a dessert that is more difficult to prepare, but so tasty that it’s worth absolutely all the effort – it’s delicious
Well, now the promised recipes for making biscuits.
Biscuit in the microwave in 5 minutes
When I first came across this recipe, I thought it was a joke. How to bake a sponge cake in 4-5 minutes. I immediately started trying to do it. And what do you think? It turned out that it was possible to bake a biscuit. Quite tasty too. And just right for our delicacy today.
Of course, his color turns out to be unusual, light. And it won't rise very much. So, we use a minimum of ingredients. If you add ingredients, it is quite possible to bake such quick biscuits as a base for cakes.
Let's not languish for long, let's start cooking. From this amount of products we get a biscuit that is slightly larger than what we need for the cake. This, of course, is not scary, since it does not stay on the table for long. If you take half of this amount, then bake in a mold that is not very large in volume.
We will need:
- Egg - 2 pcs
- Milk - 10 tbsp. spoons
- Vegetable oil – 5 tbsp. spoons
- Sugar – 8 tbsp. spoons
- Flour – 6 tbsp. spoons
- Baking powder – 1 teaspoon
Preparation:
1. Mix eggs with sugar using a whisk. There is no need to beat vigorously until it bubbles. It is enough for the sugar to simply dissolve.
2. Add flour, pre-mixed with baking powder. Baking powder can be replaced with regular soda slaked with vinegar. It will be enough to take it on the tip of a knife.
3. Add milk and butter.
4. Make the batter.

5. Prepare a heat-resistant form. I use a glass mold. The bottom should be lined with baking paper and greased with oil.
6. Pour the dough into the mold.
7. Bake in the microwave at 1000 watts. To do this, go to the microwave power mode, select 1000 (or sometimes the maximum is written 100). Then set the time to 5 minutes. This is exactly how long it took me for the sponge cake to bake.

If the number of ingredients is smaller, then the baking time should be reduced. If there are more of them, then the time needs to be increased.
If in doubt over time. First set it to less minutes than indicated. When the time is up, take out the cake and check it with a toothpick. If, after taking it out, there are no traces of dough left on it, then the biscuit is ready. Or put the form in the microwave again and set it for an additional number of minutes.
8. Let the finished biscuit cool down, then take it out, remove the paper and cut it into pieces.
How to cook a sponge cake in the oven
The biscuit cooked in the oven turns out golden brown, with a beautiful, delicious-smelling crust. If you don't have a microwave, then cook the sponge cake in the oven.
We will need:
- Flour – 170 g (1 cup)
- Sugar -150 gr
- Eggs – 4 pcs.
- Baking powder – 1 teaspoon
- Rast. Oil – for greasing the mold
Preparation:
1. Mix eggs with sugar using a whisk or tablespoon until the sugar dissolves.
2. Add flour and baking powder. Mix thoroughly until smooth.
3. Grease the silicone mold with oil and pour the dough into it.

4. Preheat the oven to 180 degrees.
5. Bake for 35-40 minutes until done.
6. Take out the finished biscuit, let it cool, then remove it from the mold.

Both sponge cakes are baked without much difficulty. But if you want to speed up the process of making a cake at all, then just buy a ready-made sponge cake in the store.
I hope that today’s recipe for a delicious dessert – a no-bake cake – will be to your liking. In any case, it is always very necessary for us...

Moreover, it is very easy to prepare it following step-by-step instructions. When you prepare it, you will even be surprised at how easy it is!
I want everything to work out for you. And so that you please yourself with a delicious and healthy dessert on a hot summer day!
Bon appetit!
Jelly cake with fruit is a good way to enjoy during the hot season, because the treats are usually prepared without baking. Some recipes can be adapted for a vegetarian or any other diet menu by eliminating the dairy base and replacing sugar with another sweetener.
How to make jelly fruit cake?
Every cook can prepare a jelly cake with fruit without baking if he uses a good recipe and does not forget about some basic rules for making such desserts.
- To make a fruit jelly cake at home, you will need suitable utensils: a springform baking dish or a deep bowl, it needs to be covered with cling film, so the cake can be easily removed from the container.
- As a base cake, crushed cookies mixed with butter are used, shortbread cake, which you can bake yourself in advance, or a sponge cake, which is also prepared with your own hands or a purchased sponge cake is used.
- The jelly mass is prepared on the basis of sour cream, whipped cream, and yogurt.
- A simple cake with jelly and fruit does not involve the use of dairy products. Pieces of fruit are poured into the jelly mass, forming layers of the delicacy. Each layer should harden in the refrigerator for at least one hour.
- Any jelly fruit cake should be chilled for 4-8 hours.
Jelly cake with fruits and sour cream

A cake with jelly and fruit prepared according to a basic recipe is very easy to assemble. It is important to use fatty sour cream, which can be whipped; instant granulated gelatin is also suitable. Use any fruits that are on hand: citrus fruits, pineapple, strawberries or bananas and other soft fruits.
Ingredients:
- sour cream – 500 ml;
- gelatin – 3 tbsp. l.;
- water – ½ cup;
- strawberries – 100 g;
- banana – 2 pcs.;
- orange – 1 pc.;
- vanillin;
- sugar – 1 tbsp.
Preparation
- Dissolve gelatin in water and leave to swell for 30 minutes.
- Beat sour cream with sugar until fluffy.
- Place gelatin on low heat, stirring until it dissolves, do not boil!
- While stirring the sour cream, add gelatin in a thin stream.
- Add chopped fruits and mix.
- Cover the mold with film, pour in the sour cream base.
- Refrigerate the jelly fruit cake for 4 hours.

A sponge cake with jelly and fruit can be prepared in two ways: the first is to use the cake as a base on which the jelly will be placed, the second is to break the sponge cake and add it to the gelatin mass. This recipe uses kiwi, it needs to be boiled in syrup for 5 minutes.
Ingredients:
- biscuit – 1 pc.;
- sour cream – 500 ml;
- gelatin – 40 g;
- water – ½ tbsp. + 1 tbsp. for syrup;
- sugar – 1 tbsp. + ½ tbsp. for syrup;
- vanillin;
- lemon curd – 2 tbsp. l.;
- banana – 2 pcs.;
- kiwi – 4 pcs.;
- jelly with kiwi flavor – 40 g.
Preparation
- Boil water with sugar, add kiwi mugs. Simmer for 5 minutes, remove the fruits from the syrup, and cool.
- Pour gelatin with water and heat for 30 minutes.
- Dissolve Kiwi jelly in 100 ml of warm water.
- Cut the biscuit into 2 layers, place one in a springform pan.
- Soak the crust with lemon curd.
- Beat sour cream with sugar and vanilla.
- Add gelatin in a thin stream, stirring the mixture.
- Pour the sour cream base over the biscuit and cool for 30 minutes.
- Place banana and kiwi mugs, pour in jelly.
- Refrigerate the cake for 4-6 hours.

Cheesecake lovers will appreciate it with fruit. For smoothness and dense consistency, add cream cheese to the cottage cheese: Philadelphia, mascarpone. Fruits in this version serve as decoration, so that the cake does not seem cloying, you can use sour fruits, or dilute the composition with berries.
Ingredients:
- shortbread cookies – 400 g;
- butter – 50 g;
- curd mass – 400 g;
- mascarpone – 250 g;
- sugar – 200 g;
- vanillin;
- gelatin – 40 g;
- water – ½ tbsp. + 300 ml for jelly;
- strawberries, raspberries – 200 g;
- canned pineapple – 2 rings;
- jelly “Cherry” - 90 g.
Preparation
- Grind the cookies into crumbs, add melted butter, distribute in the mold, compact. Put in the refrigerator.
- Soak gelatin in ½ tbsp. water.
- Beat cottage cheese with sugar and add mascarpone.
- Warm up the gelatin and pour into the cottage cheese.
- Place the curd layer on top of the crust and refrigerate for 1 hour.
- Pour hot water over cherry jelly.
- Add chopped fruits and berries to the jelly and mix.
- Place the fruit layer on top of the curd layer and smooth it out.
- Refrigerate the jelly cake with berries and fruits for 4 hours.
Sand cake with jelly and fruit

Fruit jelly cake according to this recipe also turns out very beautiful. You can use canned slices or fresh apricots or peaches; make a thick jelly from the syrup and pulp, which will cover the finished dessert with a thick layer. Some of the sour cream and jelly cream and fruit are used to decorate the cake.
Ingredients:
- Savoyardi – 25-30 pcs.;
- shortbread cake – 22 cm diameter;
- sour cream 25% - 500 ml;
- gelatin – 40 g;
- sugar – 150 g;
- canned apricots – 200 g + 6-7 pcs. For decoration;
- apricot syrup – 200 ml;
- jelly “Peach” - 90 g.
Preparation
- Soak gelatin in ½ tbsp. water, after half an hour, heat until dissolved.
- Pour 200 ml of hot water into the jelly.
- Beat sour cream with sugar, add gelatin in a thin stream.
- Add 2/3 of the prepared and chopped apricots, mix.
- Place the cake in a springform pan, spread the savoiardi around the circumference, pour in 2/3 of the sour cream, and cool for 40 minutes.
- Pour syrup and grated apricot pulp into the cooled jelly. Mix.
- Spread the jelly over the cake and let it cool for 1 hour.
- Decorate with cream and slices, cool for another 3 hours.

To prepare a delicious jelly and fruit, you need to choose fruits and a milk base that suit your taste, this means that with cherry yogurt and, for example, orange, the dessert will not be very tasty. Crushed cookies are used as a base, as for cheesecake, or a ready-made cake layer: sponge cake or shortbread.
Ingredients:
- cherry yogurt – 500 ml;
- sugar – 100 g;
- gelatin – 40 g;
- water – ½ cup;
- chocolate cookies – 300 g;
- melted butter – 50 g;
- strawberries, cherries, raspberries – 200 g.
Preparation
- Soak the gelatin and heat for 30 minutes until the granules dissolve.
- Beat yogurt with sugar, add gelatin gradually, add 2/3 of the prepared berries.
- Grind the cookies, combine with butter, place in the mold, compact.
- Pour the yogurt mixture over the crust, cool for 30 minutes, garnish with the remaining berries, and refrigerate for 4 hours.
Jelly cake with fruits and cookies

This fruit and cookie jelly cake recipe comes together in no time. For fruits, you will need dried dried apricots (in summer you can use fresh apricots), banana, strawberries and tangerines. For the base, you can use full-fat sour cream or yogurt; all components are laid out in layers. For decoration you will need a bowl and cling film.
Ingredients:
- sour cream – 600 ml;
- cookies – 400 g;
- gelatin – 50 g;
- sugar – 150 g;
- strawberries – 100 g;
- banana – 2 pcs.;
- tangerines – 3 pcs.;
- dried apricots – 50 g.
Preparation
- Soak the gelatin, warm it up after 20 minutes (do not boil!).
- Beat sour cream with sugar, add gelatin.
- Cover a bowl with film, pour in 1/3 of the sour cream, add a layer of broken cookies and chopped fruit, repeat another layer, pour in the rest of the cream.
- Place whole cookies on top of the cake and refrigerate for 4 hours.
- Turn the jelly and fruit onto a plate, remove the film.

This cake can be made without baking using a store-bought crust. To make the dessert look impressive when cut, a springform pan is taken with a larger diameter than the cake. To use these ingredients, you will need a 30 cm container; the cake is baked in a 22 cm mold. The jelly filling for the fruit cake is prepared from ready-made orange jelly.
Ingredients:
- sponge cake - 1 cake;
- cream 33% - 600 ml;
- powdered sugar – 200 g;
- orange jam – 100 g;
- jelly “Orange” - 90 g;
- water – 300 ml + 100 ml for gelatin;
- gelatin – 50 g;
- orange – 2 pcs.
Preparation
- Soak the gelatin in cold water, boil until the granules dissolve.
- Pour hot water over the jelly, stir and set aside.
- Whip the cream with powder and add gelatin in a thin stream.
- Cut the biscuit into 2 layers, place one in the mold, soak with jam.
- Spread 2/3 of the cream, cool for 30 minutes.
- Place the second cake layer, soak in jam and spread another 2/3 of the cream, cool for 30 minutes.
- Scald the oranges, wash and dry. Cut, place on top of the cake, pour over the jelly.
- Cool for 2 hours, remove from the mold, decorate with cream, refrigerate for another 3 hours.
Exotic cake with jelly and fruit

The unusual one with fruit was called “Exotic” due to its original design. You can use readily available oranges, bananas, berries, or use mangoes and peaches. In this case, it is better not to use ready-made flavored jelly, but to make it yourself from gelatin and orange juice.
Ingredients:
- ½ kg of cottage cheese 9% fat;
- 320 g sour cream 20% fat;
- 35 g gelatin;
- 180 g granulated sugar, or 4 tbsp. spoons of honey;
- 250 ml purified water;
- Fruits (kiwi, bananas, pineapples, oranges - any) - any quantity;
- 50 g dark chocolate;
- 1-2 mint leaves.
The best way to teach your family to eat cottage cheese is to use it to prepare extraordinary dishes, where the healthy product will be part of a melting, delicious dessert.
Jelly-curd cake with fruit, prepared without baking, is exactly the recipe that fully reveals the taste of a delicate fermented milk product and does not detract from its usefulness by heat treatment. Recipes for jelly-curd cakes without baking are varied:
- A no-bake jelly cake inspired by the Bird's Milk cake will delight lovers of airy soufflé;
- No-bake jelly cake with pieces of biscuits will make an ideal hearty breakfast for the whole family;
- A no-bake jelly cake made from ready-made shortbread is already a festive surprise for the birthday boy.
Any of the above recipes for jelly cake without baking is prepared according to the same scheme, diluted with variations, which we will try to take into account today if possible, so the recipe presented below for jelly cake with cottage cheese that does not require baking can be considered universal.
Jelly cake with fruits without baking in a step-by-step recipe
- Place cottage cheese and sour cream in a mixer bowl and puree the products at medium speed for about two minutes. You can use a blender if your goal is to obtain a denser creamy mass;
- Add a sweet ingredient to the mixture - honey or sugar. Since the recipe for this jelly cake does not require baking, honey will not lose its beneficial properties and will be very appropriate. Important! It is necessary to take into account that honey is an allergenic product;
- Dilute the gelatin granules with 250 ml of cool water and place it in a water bath to dissolve. It will take approximately 5 minutes of gentle simmering for the crystals to completely dissolve;
- While the gelatin is dissolving, you need to cut the fruit. Fruits cut into circles look very good, but you can also cut them into cubes - in this case, mixing several types of fruits will create an effective mix;
- Carefully, preferably using a wooden spoon with a long handle, begin to knead the curd mass, while at the same time introducing the gelatin solution in a thin stream. Turn the mixer back on to medium speed and beat the resulting cream for 2 minutes;
- To form our fruit jelly cake without baking, it is advisable to use a silicone mold - it will be easier to remove from it. Place chopped fruits on the bottom of the mold (half the total amount) and fill the mold a third with curd mass;
- Place the mold in the refrigerator for 20-30 minutes so that the mass “sets” slightly, then repeat all the steps with laying, only now the mold needs to be filled with cream to the edge of the container;
- Place the future cake in the cold again. In order for the composition to hold tightly, it will take 3-4 hours, but if it is possible to leave the cake in the refrigerator overnight, this is a more preferable option;
- If, after the cake has hardened, it is difficult to remove it from the mold, lower its bottom into hot water for 20 seconds and then immediately tip the mold over a plate. The jelly at the base will melt slightly and come off the walls, but when using a silicone container this problem will not arise, because you can simply “turn it out”.

When decorating the resulting jelly-curd cake without baking, you can rely entirely on your imagination. Grated chocolate with fresh mint leaves on top and a few slices of fruit included in the cake looks most appropriate.
Note to the hostess
Now, let's talk about options for a no-bake jelly-sour cream cake, enhanced with additional ingredients such as sponge cake and cookies, as well as what happens if you remove some ingredients from the main recipe.
A no-bake jelly cake with a cookie base includes all of the above ingredients with the addition of shortbread, butter, or unleavened cookies.
In the first two options, when the cookies are already quite sweet, we will reduce the amount of granulated sugar added to the cream by 1/3. The order of laying out in the mold is then as follows: a layer of cookies broken into small pieces, then a thin layer (for “adhesion”) of the jelly mass, fruit, again the curd mass until half of the mold is placed in the cold.

Bananas look quite harmonious as fruit when forming such a jelly cake without baking. Refilling to the top of the container occurs without cookies. Then cool our no-bake jelly cookie cake and decorate as desired;
In exactly the same way as in the previous recipe, you can use a ready-made sponge cake cut into identical cubes - the sequence when laying such a sour cream jelly cake without baking is completely identical to what has already been said;

Not everyone likes to use sour cream because of its specific sourness, but not everyone knows that no-bake jelly cakes can be made without sour cream! True, you can’t do without a liquid component completely, but you can notice sour cream, for example, on unsweetened cream.
As you can see, no-bake jelly cakes with cottage cheese are very versatile and allow you to serve a healthy fermented milk product in a very advantageous presentation. You can find on the Internet a huge number of photos of no-bake jelly cakes with and without fruit, but they are all prepared according to the same principle, once mastered, you can show your imagination as you please.
Bon appetit!
The recipes in the article will help you prepare quick, beautiful and delicious no-bake cakes with jelly, fruit, cottage cheese, cookies, and yogurt.
Of course, eating healthy is very healthy. But who can deny themselves the pleasure of at least occasionally indulging in something sweet? A children's party or family feast is unlikely to be complete without a cake. Not every housewife knows how to bake and soak cakes, prepare creams and fillings. But to please yourself and your family, you can do without baking. One of the recipes below will help.
RECIPE: no-bake cake made from cookies and cottage cheese
A cookie cake with curd cream takes half an hour to prepare, if you take into account the time it spends in the refrigerator. It turns out very tasty. In addition, if you use children's cookies and cottage cheese and take a moderate amount of sugar, this delicacy can be offered to children who are not yet 3 years old.
Here, in fact, is the recipe for the cake. It requires:
- 400 g sugar cookies or “Anniversary bouquet”
- 400 g 9% cottage cheese
- 200 ml 15% sour cream
- 150 g butter (can be chocolate)
- 4 tbsp. spoons of sugar
- 200 m milk
- 100 g chocolate
- raisins, dried fruits, candied fruits, chocolate drops optional
- All the kitchen utensils you need to make the cake are two bowls, a spoon, a fork and a dish
- First you need to make the cream. To do this, allow the butter to soften.
- Add sugar to soft butter, rub with a fork
- Add cottage cheese and sour cream to the butter and sugar, beat the cream with a mixer
- Separate a quarter of the resulting cream and set aside. She will cover the top of the cake
- Add dried fruits, candied fruits, drops to the rest of the cream, mix well with a spoon
- Prepare a dish for the crusts
- Pour milk at room temperature into a bowl
- Dip cookies into milk, each for 2-3 seconds, no more
- Lay them out into a crust
- Grease the cake with cream
- Make the second and third cakes in the same way.
- Grease the fourth cake with that part of the cream where there are no additives
- Grate the chocolate. You can take a pastry shop or buy a milk bar from the store.
- Sprinkle the cake with chocolate chips
- Keep the sweet product in the refrigerator for at least 10 minutes
IMPORTANT: If you are making a cake for children, it is better to do without chocolate. Instead, you can decorate the deliciousness with banana rings, peach or apple slices. Another simple option is to crumble a couple of cookies used for the cakes and make a sprinkle from it
RECIPE: marshmallow cake without baking
Marshmallow cake is very unusual.
- It's low in calories. Marshmallows are one of the few treats that are allowed even for those on a diet. It is only important to make a light and delicate cream for it
- Marshmallow cake can also be eaten in the summer heat. It goes well with a variety of seasonal berries.
- If you take special marshmallows and a sweetener, this confectionery product is also suitable for diabetics


For the cake take:
- 10 pieces. marshmallows white or pink
- 100 g sour cream
- 100 g cottage cheese 9%
- berries fresh or frozen
- 3 tbsp. spoons of sugar
- vanillin
- 30 g chocolate


- Beat cottage cheese with sour cream, sugar and vanilla into cream with a mixer
- Fresh berries are washed and cleared of greens.
- Frozen berries are defrosted by steaming
- Marshmallows are divided into halves
- Place the marshmallow halves in a dish, one to one, to form a cake crust.
- Grease the cake with curd cream, add berries
- Lay out the second layer of marshmallows, coat it with
- The last cake layer is no longer coated, simply decorated with berries and sprinkled with grated chocolate.
IMPORTANT: To ensure that there are no grains in the curd cream, it is recommended to first rub the curd through a sieve
VIDEO: No-bake marshmallow cake
RECIPE: no-bake cake with strawberries
Strawberries with sour cream jelly are a very tasty and incredibly beautiful combination. This no-bake cake is quick to prepare and even quicker to eat.
- 1 pack of anniversary cookies
- 100 g butter
- 400 g sour cream
- 4 tbsp. spoons of sugar
- gelatin
- 500 g strawberries
- 10 walnut kernels


- First, make the base for the crust: crumble the cookies and mix with melted butter and ground walnuts. Spread the mixture in an even layer on the bottom of the dish, cover with cling film and place in the refrigerator.
- Strawberries are cut into thin slices. A few of the neatest berries are left to decorate the cake.
- Beat sour cream with sugar (you can add vanillin on the tip of a knife)
- Dilute gelatin - 30 g of powder from the bag per 100 ml of water. Allow to swell, then melt in a water bath
- Pour gelatin into the mixture of sour cream and sugar, beat it again with a mixer
Take out the main cake. Place a layer of strawberries on it, pour in a thin layer of sour cream jelly - Place the cake mixture in the refrigerator for 10 minutes to allow the jelly to set.
- Place a second layer of strawberries on the jelly and repeat pouring
- Leave the cake in the refrigerator again for 10 minutes
- Take out the cake and decorate it
- Keep the finished treat in the refrigerator for 1-2 hours
IMPORTANT: In order not to waste time assembling the cake, you can beat the strawberries with sour cream and sugar, then the jelly will turn out to be a pleasant pink color. Several berries are also used to create the presentation of a dish.
RECIPE: no-bake cake made from cookies and condensed milk
A very tasty cake called “Anthill” is prepared at home without baking using cookies and condensed milk. His classic recipe is here: link
Here's the interpretation. It requires:
- 400 g boiled condensed milk (jar)
- 100 g sour cream
- 100 g butter
- 0.5 kg cracker
- 100 g peanuts

- The cream of this cake is softer than that of the “Anthill”, since for it not only condensed milk and butter are whipped, but also sour cream
- The nuts are crushed and half of them are added to the cream.
- Mix the liver with the cream. It’s better to do this with your hands so that the cracker breaks here and there and soaks in better.
- Spread the mass on a plate in a heap, or give it the correct shape
- Sprinkle the delicacy with nut crumbs on top
- Send the cake to cool and soak for an hour
RECIPE: No Bake Blueberry Cake
Blueberries are a very healthy berry. As is known, heat treatment reduces its properties. Therefore, for a change, you can make a delicious cake with berries that does not need to be baked.
The following products need to be prepared:
- 1.5 cups blueberries
- 200 g sugar liver
- 400 g cottage cheese 9% or 5%
- 100 g butter
- 600 g sour cream
- 1 cup sugar and another 2 tbsp. spoons
- gelatin


- The cake turns out to be three layers. Its first layer will be made of cookies. It is crushed into crumbs and mixed with melted butter. You can add some chopped nuts if you wish.
- On the plate on which the cake will be served, a thin, even cake is formed, covered with polyethylene and sent to the refrigerator.
- Prepare the second layer - curd cream. Classically, use a blender to blend sour cream, 0.1 cups of sugar and curd rubbed through a sieve. Take 300 g of sour cream for cream
- Place the second layer of cake on top of the first and put it back in the refrigerator.
- The third layer is sour cream - blueberry soufflé. To do this, simmer blueberries with sugar (2 tablespoons) over low heat so that they give the juice that will be needed to color the jelly.
- Dilute gelatin, when it swells, dilute it in 300 g of sour cream with the remaining sugar and blueberry juice
- The soufflé is placed in the refrigerator for literally 10 minutes so that it thickens and does not harden. Then pour it over the third layer of cake. The entire confectionery product decorated with berries is cooled for 2 hours

VIDEO: No Bake Blueberry Yogurt Cake
Quick cake without baking in a hurry: “Minute”
Minute Cake is fried rather than baked, so it cooks quickly. But that’s not to say that you don’t need to tinker with it.
- 400 g can of condensed milk
- 3 eggs
- 3.5 cups flour
- 0.5 tsp soda
- 600 ml milk
- 2 eggs
- 200 g butter
- 1 tbsp. Sahara
- vanillin

 Cake "Minute".
 - The cake layers are baked from the following dough: 3 cups flour, 1 egg, soda and condensed milk
- Roll out cakes with a diameter the size of a frying pan and fry them on both sides.
- One of the cake layers is crumbled to sprinkle on the cake (can be replaced with grated chocolate)
The cream is made from milk, 0.5 cup flour, 2 eggs, sugar and vanillin. It should thicken - Add oil to cream
- Grease the cakes with warm, but not hot cream. The latter is decorated with sprinkles
- Keep the cake in the refrigerator for 3 hours until it soaks in and becomes tender.
RECIPE: fish cookie cake without baking with condensed milk and sour cream
Children will steal the “Rybki” cracker and eat it anyway. Therefore, you need to manage to save it for the cake. Which is easy to prepare. Take:
- 400 g pack of crackers or the same weight
- 200 g sour cream
- 300 g condensed milk

 Cracker cake “Fish”.
 For the cream, simply combine condensed milk and sour cream. Just repeat the “cookie-cream” layers as long as the ingredients are enough. Keep the treat in the refrigerator for an hour.
VIDEO: T ort Fish (lazy, no baking)
RECIPE: No-bake jelly fruit cake with sour cream and gelatin
Jelly fruit and sour cream cake is a godsend for those housewives who like to “play” in the kitchen. You can experiment with it to your heart's content:
- take various fruits and berries
- make colored jelly, combine it with white sour cream
- pour white jelly over beautifully chopped fruits and years
- pour into jelly in various shapes: make it look like a cupcake, heart-shaped, round, square, etc.
- prepare portioned cakes in small molds
- decorate the product at your discretion

 Kiwi soufflé cake.
 Cake with berries in a cupcake form.
  Cake with fruit jelly “Broken Glass”.
 The following recipe is offered as a basis. Take:
- any fruits and berries
- 1 packet of gelatin
- 400 g sour cream 20%
- 0.5 cups sugar
- vanillin packet
- 150 ml water


- The combination “kiwi – orange – strawberry” is perfect for a cake. It will turn out pleasantly sweet and sour
- Melted gelatin, diluted according to instructions, is combined with sour cream, sugar and vanillin, kneaded thoroughly
- Next, you can proceed in two ways: simply mix the fruits and pour the jelly over them, or prepare the cake in several stages, alternately laying out the fruits and pouring sour cream jelly over them, allowing each layer to harden
VIDEO: Fruit jelly cake
RECIPE: No-Bake Gingerbread Cake
A no-bake gingerbread cake is a worthy alternative to any chocolate cake. For it you need:
- 0.5 kg of gingerbread (chocolate, or better yet, chocolate with orange essence, these are now on sale)
- 0.5 kg sour cream
- 1 tbsp. sugar incomplete
- fruit (banana or canned pineapple)
- a handful of peanuts or walnuts
- 50 g chocolate


- The cream for the gingerbread cake is very simple: sour cream, whipped with sugar.
- Prepare fruit for the filling - cut pineapple into small pieces or banana slices
- Gingerbread cookies are cut horizontally into flat ladles
- Assemble the cake: gingerbread crust + cream + fruit
- Coat the cake with cream on top, sprinkle with chopped nuts and grated chocolate.
- The cake will be incredibly delicious if it sits in the refrigerator overnight
RECIPE: No-bake fruit cake. Banana cake without baking
This recipe is another variation on the theme of jelly fruit cake.
- 600 g fat sour cream
- 1.5 packs of gelatin
- 150 g of any sweet cookies
- 1.5 tbsp. Sahara
- 2 bananas
- 1 can of canned pineapple
- 2 tbsp. spoons of cocoa
- 1 kiwi

- First, dilute the gelatin to swell in 1.5 cups of water.
- Whip sour cream together with sugar, divide it into three parts
- Melt gelatin
- Add cocoa to one part of the sour cream mass, a third of gelatin, beat with a mixer
- Add a banana chopped with a blender, a third of gelatin to the second part, beat with a mixer
- In the third part add pineapple crushed with a mixer, a third of gelatin, beat with a mixer
- Place cookies at the bottom of the mold, fill it with chocolate jelly, and leave to cool.
- After 15 minutes, take out the cake blank, pour in banana jelly, and leave to cool again
- After another 15 minutes, pour pineapple jelly over the cake and leave to cool now for at least 2 hours.
- Decorate the cake with beautifully chopped kiki, optionally, mint leaves
RECIPE: No-Bake Yogurt Cake
A light yogurt cake will not ruin your figure. You can use ready-made fruit yogurt for this. But it will be healthier to make a treat from white yogurt with the addition of fresh fruits and berries.
- 600 g white yoghurt
- 6 tbsp. spoons of sugar
- any fruits or berries (for example, strawberries)
- 1.5 packets of gelatin

The cake is prepared from two types of yogurt jelly: white and strawberry (in a ratio of 1 to 2 or 3). First, the first layer is poured into the mold, and when it hardens for 15 minutes, the second. Decorate the cake with berries and mint.
RECIPE: No-Bake Oatmeal Cookie Cake. No-bake chocolate cake
Oatmeal cookies seem simple, but they can be the basis of a delicious chocolate cake. This cake doesn't even need to be baked. Prepare:
- 0.5 kg oatmeal cookies
- 200 g sour cream
- 5 tbsp. spoons of sugar
- vanillin
- 0.5 cups walnuts
- 30 g butter
- 0.5 cups milk
- 2 tbsp. boats cocoa powder


- The cake is prepared in three stages. The first one is cream. It is made from sour cream with sugar and vanillin.
- The second stage is cocoa glaze. First boil the milk with 3 tbsp. spoons of sugar and cocoa. Finally, oil is added to the thickened mass.
- The third is assembling the cake. The cakes are made from oatmeal cookies and coated with sweet sour cream cream. The cake is topped with chocolate icing and sprinkled with crushed nuts.
RECIPE: No Bake Lemon Cake
Although it is not baked, lemon cake is not easy to make. But the deliciousness turns out to be insane, and it looks worthy of an expensive restaurant dessert.
- 200 g chocolate cookies
- 150 g butter
- 4 lemons
- 4 eggs
- 200 g sugar
- 0.5 tbsp. spoons of starch

- The crust is made from chocolate cookies. Crumble it with a blender. Pour melted butter (100 g) over it, and cover the cake mold with the “dough”. It should stay in the refrigerator
- Add lemon zest to sugar and squeeze lemon juice
- The eggs are broken into a separate bowl and filtered through a sieve. Add eggs to sugar-lemon mixture
- Heat the mixture over low heat, add the rest of the oil.
- When the mixture has just boiled (it will bubble), add starch diluted in 1 tbsp. spoon of water
- Cooled lemon cream is poured onto the cookie crust
- Leave the lemon cake in the refrigerator for 4 hours
VIDEO: Lemon cake
RECIPE: bird's milk cake without baking
A cake made from sour cream and chocolate jelly does a good job of imitating store-bought candies “Bird's Milk”. It literally melts in your mouth. Take:
- 400 g sour cream
- 200 ml milk
- 100 ml cream
- 200 g mascarpone
- 1 cup of sugar
- 4 tbsp. spoons of cocoa
- gelatin packet
 No-bake cake “Bird's milk”.
 - A third of the gelatin is used for the chocolate layer, diluted in water. Two thirds are for cream, it is diluted in milk
- Mix 3 tbsp. spoons of sugar and cocoa, add them to melted gelatin
- Pour the chocolate layer into the mold. It’s better to use silicone so that the cake comes out better
- The mold should sit in the freezer for about 30 minutes.
- Mix sour cream, cream, mascarpone and sugar, add gelatin with milk. Mix the mixture well with a mixer, then pour it onto the chocolate layer.
- It is better to keep the cake in the cold for at least 4 hours. Then it will harden well and come out of shape.
VIDEO: Bird's milk without baking