We build a frame house with our own hands. Do-it-yourself frame house - stages of construction
When you decide to build your house, you must choose the technology for its construction. This choice depends on many factors. First of all, everyone thinks about the cost of future construction. Thus, the financial costs for the construction of a brick or log house will be equal to $530-870 per 1 m². But the price for a frame wooden house is $350-625 per 1 m². Moreover, the process of building frame houses takes only about 3 months.
If you decide to build a frame house with your own hands, then it is important to decide what it will be like - frame-frame or frame-panel.
Tools and materials

- perforated metal brackets;
- self-tapping screws;
- nails;
- dowels;
- hammer;
- cement;
- sand;
- shovel;
- shields;
- beams;
- bars;
- logs;
- boards;
- OSB or DSP boards;
- roofing felt
Features of the construction of frame houses
The frame of the house is based on the lower and upper frames and vertical wall posts. After the foundation is erected, the house is equipped with external and internal cladding, between which insulation, vapor and water insulators are installed. The final stage of construction is exterior and interior finishing.

If we talk about the design features of panel and frame-frame construction, they are almost the same, since in both cases there is a frame. However, there are still some differences.
The construction of the panel frame of the house is carried out from ready-made panels that were obtained in the factory. Such buildings are installed mainly on a strip-type base. The construction of the panel frame of a house cannot be carried out without the use of special equipment, which is used to deliver the material to the construction site, after which a crane must be used, which is needed to install the panels and the roof of the house.
Before installing the shields, it is necessary to install a base under them, which consists of separate trusses made of wood and having upper and lower frames.
The logs act as the top frame of the trusses that underlie the house's panels; the floor will be built on them.

There is another option for installing the base for panel walls; it can be played by an embedded crown made of timber. In this case, the floor joists are not connected to the embedded crown and walls.
The shields are attached to each other according to the tenon-groove connection principle; as an analogy for this type of fastener, metal linings can be used; for this, after the installation process, the shields must be strengthened with an upper trim made of timber.
A wooden frame house, as a rule, has a roof made of rafters. They are mounted on the building or attached to roof trusses.
The frame of a house made of panels has many advantages, including the ease of erecting walls, saving time on construction, the stability and strength of the walls due to the strapping, and the ability to carry out construction at any time of the year. In addition, such houses do not shrink, which means they can be finished immediately after construction.
The technology for constructing frame-frame buildings involves arranging a frame on a mortgage crown made of logs, the latter of which are mounted on the foundation. The frame of the house is made with your own hands from logs or beams, but the frame posts are connected to each other by the beams of the upper and lower frame, as well as horizontally located jumpers. The structure gains rigidity due to the jibs mounted between the frame posts.
The roof trusses are installed on the side walls, and the sheathing is laid on the surface of the rafters. The construction of such a wooden house can also be done at any time, and the work does not require special equipment.

Figure 1. Methods for connecting beams at the corners.
If you want to build a frame house with your own hands, but still don’t know whether to incline your choice towards panel or frame technology, then it is worth considering that the price of a frame-frame building is 15-20% lower than the price of a panel house. Frame houses, although they have no restrictions in the choice of forms of architectural design, unlike panel houses. However, the time costs will be 40-50% higher.
When covering the frame of a house, you can use 2nd grade boards; this will cost much less. For comparison: the cost of 1st grade material is $175 per 1 m 3, 2nd - $115-135 $ per 1 m 3. It is acceptable to use OSB or DSP boards.
By building a frame house with your own hands, you free yourself from arranging boxes and niches for the location of communications, since a design feature of the building is the ability to hide communications in the walls of the house, however, this can make access to them difficult. Particular attention should be paid to laying the electrical network in the walls, since the walls are not fireproof.
The frame of the house has a light weight, which is 35% less than the weight of the log house, this is very impressive, since log houses are distinguished by their lightness. Therefore, the construction of a frame house with your own hands can be carried out not only on a lightweight foundation, but also on weak-bearing soils, including sandy and swampy soils.
Sequence of construction of a frame house

A week after laying the foundation, you can begin assembling the frame of the house. Often, during the process of pouring the grillage, studs are placed into it to secure the beam of the bottom frame. If the wood intended for the frame has not been dried, then it should be mounted and sheathed with OSB as soon as possible. Lumber should be treated with an antiseptic before construction begins.
Roofing felt will be used to provide waterproofing for the foundation and joist supports. Nails and screws will be used as fasteners.
Installation of the timber underlying the lower trim involves laying it on a grillage on which roofing material is laid. The timber must be laid on a horizontally aligned grillage. You can get rid of unevenness using a solution.
You can join the beams of the lower trim using the method of picking at the corners. Although there are a great many sampling options, it is recommended to use 1 out of 2, both can be seen in Fig. 1.
In the corners, the beams can be connected with an anchor, which secures them to the foundation. The beams can be joined with nails, the minimum length of which should be 150 mm; 4 nails should be used per corner.
In those places where the beams are connected, a hole should be drilled with a diameter of 20 mm, a wooden dowel made of dried oak should be driven into it, it should be left 8-10 cm above the surface to fix the corner posts of the frame system.

If there are no studs embedded in the foundation, the timber can be fixed to the base with anchor bolts, the diameter of which is 16 mm. It should be driven 100 mm into the base.
Next, you can begin to fix the bottom frame beam using anchors. Holes for anchors should be drilled into the concrete of the grillage. Afterwards, it is necessary to create holes in the strapping boards in the places intended for anchors. The beam must be fixed to the base using nuts, which are equipped with wide washers.
As soon as the beams of the lower frame are secured to each other and to the base, it is permissible to begin working with the vertical posts of the frame. At this stage of building a house, you should install corner posts with your own hands. If the beam of the bottom frame in the corners was reinforced with an anchor or nails, the corner post should be fixed with metal corners, for which it is preferable to use reinforced corners.
If dowels were used, then vertically located outlets should remain, and the corner posts must be placed on them. To do this, it is necessary to make a hole in the lower end of the rack, the diameter of which is 20 mm, its depth should be 1 cm greater than the length of the protruding part of the dowel. Corner posts should be put on the dowel and reinforced with jibs.
The remaining racks that make up the frame of the house can be attached to the frame by cutting or using galvanized metal corners, the thickness of which should be 2 mm. If you are building a house with your own hands, then you may prefer the method of attaching the racks with corners, which should be done using galvanized self-tapping screws designed for woodworking.
When strengthening the racks using the cutting method, it is necessary to apply markings to the beam of the bottom frame and arrange grooves according to the dimensions of the rack; their depth should be equal to the limit of 30-50% of the height of the beam, which makes up the bottom frame. Regardless of which method of fixing non-corner posts it was decided to use, they must be secured with jibs. It is permissible to install 2 jibs on a rack or 1 long one on several racks at the same time.
If the frame of the house does not have a pre-created layout for the walls, be sure to take into account that the pitch between the racks at the locations of the openings may be different. That is why now it is possible to make a layout with dimensions.

The frame of the house at the corners in the process of attaching the beams of the upper frame should be joined by cutting. The timber that makes up the upper frame should be fixed to the vertical posts using the same method that was chosen for fixing the posts to the bottom frame. Fastening should be done with wood screws.
If fastening is done by cutting, then before putting the bars on the vertical posts, it is necessary to form grooves in them for the posts; it is important to ensure that the grooves are positioned strictly vertically in relation to the grooves in the lower frame.
After the grooves are ready, the timber can be installed in place on the vertical posts, and then fixed to the frame; this must be done to each vertical post, using 2 nails, which should be driven 10 cm into the post.
When building a house with your own hands, the wooden frame must gain rigidity and stability; for this, diagonal connections, called slopes, should be used. Each rack in the house must be fixed with 4 jibs, 2 of which must be located below, the other 2 - respectively, on top. But you should get rid of the temporary jibs that were installed earlier.
If the slopes have a smaller cross-section compared to the main posts, it is preferable to fix them closer to the internal cladding of the frame system, this will allow a heat insulator to be placed between the bracket and the outer skin.

The technology in which you build a frame house with your own hands, at the next stage involves fastening shelf beams, where you can use one of the existing fixation options. Thus, the installation can be carried out using perforated metal brackets for the beam, in addition, it can be fastened using metal corners. Another method is fastening by cutting.
You can support the beams using the cutting method on the beams that make up the upper frame by arranging grooves at the end of the beams, the width of which is equal to the width of the beam. The depth of the groove should be 30-50% of the height of the beam. The edges of the beams should be fixed to the top frame using 2 nails, recessing them into the rack by 10 cm.

For small and short parts that will form the basis of the building frame, the remains of long elements should be used. Those that turned out to be bent or deformed at the time of production are also suitable. Some materials can be reused.
Thus, boards that were used for temporary bracing can be cut into permanent jibs. Elements of the formwork of the base of the house are suitable as temporary spacers. Such reuse of materials should be planned in advance, then they will have to be purchased in much smaller quantities than originally planned.
Improper storage of lumber can lead to damage, which is detrimental to savings, so they should be carefully protected from getting wet and dirty.
It should be remembered that burning lumber that has been treated with an antiseptic has nothing to do with saving. In particular, such materials should not be burned in a bathhouse, as this is hazardous to health.
Not only can you build a wooden frame house yourself, but you can also do it without the additional help of professionals; such technologies allow you to carry out the construction process without having any skills in this area, because it is easier than building houses made of bricks.
It will be easier to assemble the frame of a house with your own hands if you purchase ready-made factory-made panels, rather than wood for frame technology. However, you can save more in the latter case. After completing their operational life, it is recommended not to repair such houses, but to demolish them and rebuild them; it will be cheaper, and the foundation will no longer have to be installed, since it will not collapse under such a light construction.
Over the past few years, the construction market has been flooded with so-called frame houses, which are erected weekly in huge numbers both by companies and with their own hands. The reason for such love for “frameworks” lies in the ease of construction and the pace of construction. The phased construction of a frame house allows you to assemble a full-fledged residential building in one season, which will look quite presentable, and have an attractive price and cost-effectiveness in maintenance. The technology is easy to understand and implement with your own hands.
What is the essence of construction
As the name implies, the technology consists of forming a kind of frame made of wood (boards or timber) or metal, with gradual, step-by-step covering of it with layers of films, membranes, insulation, etc. This multi-layer wall construction makes it possible to achieve good thermal characteristics with fairly thin walls.

What materials form the wall?
- mineral wool insulation
- insulation foam sheets
- waterproofing in the form of a film or membrane
- vapor barrier in the form of a diffusion membrane
- OSB sheets
- external and internal finishing

When constructing the building frame, do not forget to make openings for windows. They must be strengthened with crossbars that take the load and distribute it evenly to the foundation. Read more about inserting windows.
After erecting the walls, it is necessary to proceed to the next stage.
Third stage of construction: roofing
Even while designing your house, you should have decided what type of roof will crown your building. Most often, a gable roof is chosen for frame houses, however, single-pitch roofs are also in demand due to the ease of do-it-yourself installation, simplicity of design and lower price.

The construction of the roof begins with the rafter system. The rafter system is the main frame of the roof. The rafter system consists of the following elements:
- Mauerlat
- rafter legs
- racks
- runs
- puff
- sill
- struts
- sheathing
When the roof frame is completed, it is necessary to insulate it. The roof filling consists of almost the same layers as the wall. From the outside, we insulate the roof with sheets of foam plastic or mineral wool, lay down waterproofing, which we fix with lathing.

On the inside we put a layer of mineral wool or polystyrene foam if the attic space is not intended to be residential. We fix the vapor barrier layer and cover everything with OSB boards. We cover the roof with roofing materials depending on the slope of the slope and our own preferences. Remember that soft roofing, which has become very popular recently, is laid only on a plane, so the sheathing must be supplemented with OSB boards. In this case, the angle of inclination can be small - from 5 degrees.
Fourth stage of construction: floors
On the ground floor, floors are most often installed on the ground. What does it mean? The technology is as follows. We remove the initially fertile layer of soil and fill it with a layer of gravel. It is necessary for drainage, since moisture will seep inside and have less contact with the cement screed. On the ground we make a layer of sand of 30-50 cm, depending on the height of your foundation. Carry out compaction with your own hands or using equipment. As a result, the sand layer should be located 5 cm below the foundation level to avoid cold bridges and freezing in the corners.

Next, we perform a rough screed using liquid cement. If you take cement that is a little more liquid than for constructing a foundation, you will not have to level it with tools, since under the influence of gravity the cement itself will be evenly distributed over the ground. The most important thing is that the ground is level, otherwise the liquid cement will flow into one place.
When the rough screed is dry, you can continue installing the floor. To do this, we waterproof it with a film, on top of which we lay out the floor insulation. Using a mesh, you can attach underfloor heating pipes (liquid or electric) on top of the insulation. And fill in the finishing screed.
The final part of floor construction is the floor covering. These can be wooden floors, tiles, laminate, etc.
If you do not want to use cement in the construction of the floor (for example, if construction takes place in winter), the technology of constructing wooden frame floors based on logs will help you. How to arrange such a floor, see the diagram:

To set it up you need:
- board 25x100
- timber 200x200
- timber 70x195
- board 50x150
- wind protection
- insulation
- underlay and laminate or tile
You will find more information about flooring in a frame house.
Fifth stage of construction: finishing
At the fifth stage of construction, the external and internal finishing of the house, installation of plumbing, connection of lamps, sockets, heating of the frame house and other work are carried out, which will make a real home for living or recreation from a simple box with walls and a roof.
Since the walls of the frame house are covered with OSB boards, it will not be difficult to carry out external and internal decoration even with your own hands. You can read about how to make external finishing and choose the right materials in our article.

Interior decoration depends primarily on the preferences of the home owners, and can be done using tiles, wallpaper, liquid wallpaper, plaster, in particular decorative. The walls can be painted, covered with clapboard, siding, the ceilings can be whitewashed, or suspended ceiling technology can be used. The floor can be covered with tiles, parquet, laminate. In general, there is room for your imagination to run wild.

By this time, you should already have all the pipes for installing plumbing installed (they are removed during the construction of the floors, during the rough screed), and the electrical wires should be laid out. Construction of a frame house from the first to the fifth stage takes about 3 months.


Frame house projects
Number of projects 39
A warm and inexpensive house that can be built in one season is the dream of any owner. Frame house construction meets these requirements. The low weight of all structural elements makes it possible to do without the use of lifting and other special equipment, and modern thermal insulation materials make frame houses suitable for living even in harsh northern winters. But it is not enough to know how to build a frame house; it is necessary to comply with all the requirements of the technology and take into account the phased features of the construction of the structure.

Finished view of a frame house
Basic rules of frame construction
To ensure that the final result of construction does not disappoint, before construction you need to familiarize yourself with simple rules:
The main criterion when choosing lumber is quality. It is better to give preference to laminated veneer lumber than naturally dried wood, which can crack when drying out. A good option would be to technically dry the timber, which minimizes the amount of moisture in the wood.
Entrust the work to professionals. Building a house in which you will live is not the most suitable platform for experiments; if something is done wrong, then at best it will lead to uncomfortable living conditions, and at worst to emergency situations. And this is not even taking into account the fact that construction is not only the construction of walls, but also many narrow-profile types of work: wiring communications (sewage, electricity, heating), roofing work at heights and much more.

A professional team builds a frame house in a short time
Every little thing matters. Trying to save money on fastening materials, insulation or wood impregnations can be expensive. Low-quality but cheap insulation can emit harmful substances that are hazardous to health. Unreliable fastening of elements can lead to damage to the integrity of the frame.
The technology of building a frame house is a step-by-step work, which in itself will help save budget funds. Therefore, you should not save on building materials.
Choosing a location on the site
Two groups of factors that influence the location of the future home are recommendatory and obligatory.
The latter include:
Fire regulations. They regulate the rules for the location of buildings depending on the fire hazard. For example, the distance between buildings made of non-combustible materials is at least 6 meters, for wood and other combustible materials - 12 m.
Sanitary standards. They regulate the distance from the house to outbuildings, power lines, trees and other things.

To choose the right location for your home, you need to take into account many factors.
Horizontal orientation. Windows facing south or east will allow for maximum natural light.
Accounting for prevailing winds. There is no need to install additional windows and doors on the leeward side.
Distance to roadway. The greater the distance to the road, the quieter it will be in the house, but it will increase the access road.
Exterior view from the window. It is preferable to have windows overlooking the garden rather than those overlooking the estate's courtyard and outbuildings.
To comply with all standards and select the most suitable location, you must contact the design organization.
The foundation for a house is the basis
A strong foundation is the key to a strong and durable home. For frame buildings, a foundation of one of the following types is usually built:
shallow belt;
pile-screw.
In the first case, excavation work will first be carried out so that there is somewhere to pour the foundation, then formwork is made and a reinforcing frame is laid out in it.
The second stage is pouring concrete. It is technologically correct to do this in one step, but sometimes layer-by-layer filling is allowed. As the formwork hardens, it is removed - the foundation should gain strength within 30 days. After this, waterproofing work is carried out, and the assembly of the lower trim begins.

Scheme of a strip foundation for a frame house
The pile foundation, in turn, is considered one of the most inexpensive and quickly erected.
The pile is a thick metal pipe, the end of which is equipped with a screw blade. They are twisted into the ground using special equipment. There are some types of driven piles, but they are rarely used.
You can see the advantages and disadvantages of screw piles in the video:
Piles are an innovative method of foundation installation that has recently appeared on the domestic market. Therefore, for now it enjoys the distrust of consumers. However, correct installation in compliance with all requirements will ensure the reliability of the building and a long service life.
Bottom rail and floor
To protect the piping from moisture from below, roofing material or waterproofing is laid on the foundation. You can use bitumen mastic, but it will be more expensive than roll material. Sometimes materials are combined: once the foundation is covered with mastic, and waterproofing is laid on top.
The assembly of a frame house begins with strapping. For it, boards with a section of 15x5 cm or timber 15x10 cm are used. The boards are laid around the perimeter and aligned along the outer edge of the foundation. Holes for the studs are drilled in the required places. The second layer of boards is laid in such a way as to cover the bottom joints of the boards. This gives the structure additional strength. Installation of timber is easier and faster, but its price is higher than that of boards. In addition, the overall load-bearing capacity of a double board will be higher than that of a single beam.

This is what fixed joists look like
A 15x5 cm board is installed on the harness on the edge. It is also aligned along the outer edge of the foundation and secured with ordinary nails. The logs are mounted from boards of the same section. Fastened with nails or special corners. Installation step – 40–60 cm.
Important! The longer the lag, the smaller the step. This will ensure even weight distribution and eliminate sagging.
The next stage is insulation. The simplest option is polystyrene foam. It is easily cut with a hacksaw and fits tightly between the joists. This will eliminate the need to install a subfloor underneath, which will hold the insulation.
To support the insulation, you will need to fill two 5x5 cm bars along the joists. Two layers are laid at intervals - the top layer overlaps the seams of the bottom one. Joints and seams with joists are treated with sealant.

Joints with joists must be sealed with sealing materials
Important! Polystyrene foam is a flammable material, which makes it undesirable for insulating wooden structures. Therefore, sheets of stone wool and expanded polystyrene are most often used for thermal insulation of floors.
To install the subfloor, a 10x2.5 cm edged board is used. Plywood 0.5–0.6 cm thick is laid on top of it. Sheets of plywood can be laid immediately without a flooring of boards. In this case, the thickness of the sheets should be at least 1.5 cm. This option is faster, but in some cases more expensive. Like brickwork, plywood is laid in staggered patterns. A gap of a few centimeters between the sheets compensates for expansion when air humidity increases.
On our website you can get acquainted with the most popular projects of frame houses from construction companies presented at the exhibition of houses “Low-Rise Country”.
A strong frame is the key to a strong house
There are two possible schemes for building a frame house:
construction of a wall on the floor and its subsequent installation in a vertical position;
assembly of all elements immediately on site.
The first method is usually used in factories for the production of modules of frame-panel houses. In some cases, assembly on the floor is easier than on site, but the resulting structure will have considerable weight, so several people will be needed to lift and install it.

Installation of an already assembled wall
Even one person can assemble the elements vertically at once. This method is slower, but will help to avoid inaccuracies in dimensions - the parts are assembled “in place”.
For one-story buildings, corner posts are chosen with a section of 10x10 cm. If another residential floor is planned, then the dimensions increase to 15x15 cm.
The intermediate posts must be as deep as at the corners, and at least 5 cm wide.
To calculate the pitch, there are special formulas that take into account the load on the structure. But in practice, most often the pitch between the racks depends on the width of the insulation. The distance between them should be several centimeters less than the insulation. This will ensure a tight fit to the racks and retain heat.
Racks are most often fastened using metal corners - one corner on each side. It is possible to mount it with a cut into the bottom trim board, but this may compromise the integrity of the entire structure.
Another ancient method is dowel fastening.

Scheme of fastening the rack with a dowel
On our website you can find contacts of construction companies that offer frame house design services. You can communicate directly with representatives by visiting the “Low-Rise Country” exhibition of houses.
A hole is drilled diagonally through the rack to the middle of the lower boards or timber - a wooden pin is driven into it. This provides reliable fastening, but this method is difficult to implement. In addition, if the material is wet, the dowel may dry out and lose rigidity.
Depending on the type of outer cladding, permanent or temporary cuts are made. If the outer part is sheathed with sheet material with sufficient strength, it will add additional rigidity to the structure and constant mowing will not be required.

If the exterior finish is hard, this option for installing slopes is possible.
If the finishing material is composite - siding or lining, then the installation of permanent slopes will be required.
The best option would be to install four small slopes on each rack - two on top, two on bottom.
The installation of corner posts requires special attention. The technology is simple, but simply installing a vertical beam can freeze. If the cross-section is 15x15 cm, then for a moderate zone this may be enough to not allow heat to pass through.

Vertically installed racks are secured with bevels
If lumber of a smaller cross-section is used or the owners additionally want to insulate the corner elements, then several options are possible:
To increase the thickness, two boards with a depth equal to the depth of the post and a width of 5 cm are nailed to the corner posts. After external finishing, a special platband is placed on the corner, which provides an air gap between the corner and the platband board. This will reduce heat loss.
Before starting the outer cladding, a counter-latten is installed that will hold the waterproofing. Typically a beam of 5x5 or 5x4 cm is used. 5 cm is the optimal size for the ventilation gap between the wall and the finishing material. The selected material is attached to the counter-batten - lining, siding, imitation timber.

Attaching the counter-batten to the posts of a frame house
Overlap
Ceiling beams are attached to the top frame using the cutting method or to metal corners. The notch should not exceed 50% of the thickness of the top trim beam. The cross-section and pitch of the beams depends on the purpose of the second floor.
If the presence of an attic or a full-fledged residential floor is assumed, then the construction of the floor is similar to the floor of the first floor.
If there is only an attic above, then the beams are taken with a smaller cross-section.
For ease of work, a subfloor made of 10x2.5 cm boards is laid on the ceiling. This will make moving easier and make work safer.
If the house assumes a one-story structure, then the upper beams are mounted with a 30-centimeter extension beyond the walls of the frame. This is done to secure the rafters.

Fastening beams using the cutting method
Installation of the rafter system
An important stage in the construction of a frame house, as with any other technology, is the selection of the type and installation of the roof. Frame construction is positioned as fast construction. Therefore, most often they choose a conventional gable design. If all construction standards are observed, the roof of a frame house can be constructed of any configuration and complexity, but this will require more time.
For good snow removal, the roof slope should be more than 28 degrees, but should not exceed 50 degrees - the wind load on such a roof increases several times.
To construct the rafters, boards 15x5 cm 6 m long are taken. The first pair of rafters is assembled from two boards and installed on the edge of the frame. The same pair is installed on the opposite side. Cords are stretched between two pairs of rafters on both sides to control the plane of the roof. The rest of the rafters are set along them. The step between them varies from 60 to 80 cm depending on the choice of insulation. For strengthening, wooden crossbars with a cross-section of 15x5 cm are used. They fasten a pair of rafters like the letter “A”.
How to make a rafter system for a frame house is shown in the video:
The nature of the lathing depends on the selected roofing material. This can be soft tiles, corrugated sheets or metal tiles. The limitation will be the weight of the roofing material. For example, the use of clay or clinker tiles is not recommended - heavy weight will create additional stress on the frame of the house.
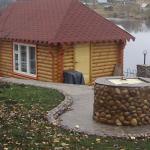
Photos of frame houses

Frame house with balcony

Frame house with classic German exterior decoration

Original frame house with a small roof slope

Frame house with veranda and sloping roof

Factory-assembled two-story frame house

Construction of a frame house in winter

Frame house with a 4-slope combined roof
Conclusion
A frame house is a technology that is only gaining popularity in domestic housing construction. Short construction times and cost savings are significant advantages over other construction methods. But the technology for building a frame house will require strict adherence to all technological processes and stages of construction, which will allow its advantages to be fully appreciated.
Frame house construction has been a leader in the domestic market for several years now. A building built using Canadian technology will be not only economical, but also reliable, the main thing is to comply with all stages of construction of a frame house.
Why frame construction is gaining popularity
Based on such criteria as cost-quality, the technology of constructing frame houses, which is shown in the photo and video, has an undoubted advantage and is therefore gaining momentum in our country. The advantages of frame construction include the following:
- Low cost of the house.
- Low time costs for construction, since a team of 3 people can build a house from foundation to finishing in 2 months.
- Good performance characteristics, allowing you to save money on building maintenance.
- Frame technology makes it possible to install communications inside the walls, which is a feature of this type of house.
- Building a house does not require a strong foundation.
- Work can be carried out at any temperature.
- During the construction process, you will not have to use heavy equipment, since all elements of the house are relatively light in weight and can be moved and installed by three people.
- The frame house has high seismic resistance.
- Long service life - average service life is about 80 years.
Having considered all the advantages of frame houses, we will learn how to build a frame house step by step and what types of foundations there are in order to choose the most optimal one for your home.
Types of foundation
The technology for building such a house is quite simple, but it is somewhat different from other varieties. If you have already prepared a project and agreed with the relevant authorities, then it’s time to begin the first stage of construction.
The foundation for a house built using frame technology can be piled, columnar, slab or strip, each of them has its own characteristics. It is advisable, before settling on any type of foundation, to view photos and videos of its construction in order to understand the process itself.
Columnar foundation
This type of foundation is the most attractive in terms of cost, and it is quite suitable for a frame house. The foundation consists of columns made of ready-made blocks, on which the future housing will actually be placed.
First, you need to make recesses for future pillars according to the drawing, level the ground and arrange a sand cushion. The sand needs to be leveled, spilled with water and compacted. After this, install the blocks themselves on the cement mortar, and lay a layer of roofing material on top.
Pile foundation
This type of foundation is considered universal; it is suitable for any type of soil. It consists of metal supports screwed into the ground, which outwardly resemble huge screws with threads and a pointed end. Video and photos of such a foundation are attached.
Both the pile foundation and the columnar foundation will subsequently require a back-up device. The fence is installed between pillars or piles in order to protect the underground space from cold and water. It can be made from boards or by brickwork.
Strip monolithic foundation
The only drawback of a strip foundation is that it is unreasonably expensive for this type of construction, since for a frame house there is no need to build such a reinforced foundation, although, judging by the photo, this method is also in demand.
Brick foundation
A traditional type of foundation, which is ordinary brickwork in one version or another. This is a fairly expensive foundation, and its reliability is slightly exaggerated. Such a foundation is rarely performed, especially for frame construction, as it is considered an outdated variety. Photos or videos of how to lay it can also be viewed on the website.
Trim and floors
The phased construction of a frame house involves the implementation of strapping. A layer of waterproofing material is laid on the foundation, and then a number of beams are installed, which are located around the entire perimeter, and, in addition, where it is planned to erect load-bearing interior walls. A prerequisite is that before laying the timber it must be thoroughly treated with an antiseptic. There are two ways to fix the bottom rails:
- anchor bolts.
- on metal vertical pins, which are laid during the concrete pouring process.
After completing the strapping process, we begin installing the floor beams and installing the vertical frame posts. As beams, you can use a beam with a section of 10x10 cm or a board 5–6 cm thick and 15 cm wide.
The beams are laid in increments of 60–70 cm. After this, a subfloor is laid from unedged boards. If you need to make a warm floor, then logs are laid on the rough flooring and between them an insulating layer of mineral wool, expanded polystyrene or expanded clay gravel is made, after having laid the waterproofing material. The insulation is covered with a vapor barrier film and the finishing coating is installed from tongue-and-groove flooring, laminate, parquet or ceramic tiles. The technology of these processes can also be seen in the video.
Wall assembly
The bottom trim, made of timber, must have grooves every 50 cm. It is imperative to ensure that the dimensions of the groove correspond to the cross-sectional dimensions of the vertical frame element. After installing all the vertical posts, you will need to move on to installing the top trim, which is also made from a small section of timber or a thick board.
All vertical posts of the frame are temporarily secured with two side jibs, which are attached with self-tapping screws to the lower frame and to the vertical post. For jibs use any boards or bars. You can even take long poles that can be used to secure several posts at once.
Vertical frame elements are installed not only for external walls, but also for interior walls, simultaneously marking future door and window openings.
After all the vertical elements have been placed, the top trim is made. To do this, grooves are cut out in the beams or boards for each rack. Therefore, it is necessary to maintain maximum accuracy when marking and cutting grooves. The beams of the top trim are attached to the vertical posts with metal corners or ordinary nails. To give greater rigidity to the frame, permanent struts and struts are installed instead of temporary ones.
The walls can be ready-made factory panels with insulation inside or made independently. In this case, boards are sewn onto the frame, vapor and waterproofing are laid, a layer of insulation is laid, again a layer of hydro and vapor barrier is laid, and all this is again sewn up with boards. It turns out that the frame elements remain inside the walls. This is a fairly simple method, but most often they use ready-made sandwich panels.
Installation of ceiling beams
The construction of ceiling beams is carried out using timber with a section size of 15x15 cm. They are fixed above the vertical posts so that the entire load is transferred to the posts and not to the beam between them. Fastening is carried out using perforated steel brackets and angles, using the method of cutting grooves and nails.
When building frame houses, all openings should be made at once, that is, door and window frames need to be made so that after the work is completed, doors and windows can be inserted. If you decide to do this yourself, then look at the photos or videos so as not to break the technology.
Roofing and frame sheathing
The construction of a frame house is completed by installing the roof. The roof structure consists of a rafter system and a roof. First you need to make temporary ladders along which you can safely move. Boards with a thickness of at least 5 cm are laid on the top frame of the house so that they can support the weight of a person. The boards are temporarily nailed to the top element of the trim.
Initially, the rafters are installed, for which the ends of the beams are connected at an angle that determines the selected roof slope. Rafter legs are installed in increments of 60–70 cm. Temporary installation is done using jibs. After all the rafters have been installed, ridge boards are nailed along the top of them on both sides.
The next step is sheathing the roof, laying thermal insulation, as well as laying roofing material, which is selected based on your own financial capabilities. Depending on the type of roofing material, the lathing is sparse or continuous.
The outside of a frame house can be additionally insulated or simply finished with decorative material - vinyl or metal siding, plastered, lined with ceramic tiles or lined with clapboard. But in any case, a steam and windproof membrane must be laid under the finishing.
The construction of houses using frame technology is not only a fast, but also a profitable process, especially if all building codes and regulations are followed, with the involvement of professionals who are guided not only by photos, but also by their knowledge.
Prefabricated buildings have already won their place in the sun in the housing market. Warm, light, luxurious, they have two significant advantages in conditions of constant crisis - reasonable cost and the possibility of independent construction. To build a frame house with your own hands, you need to step by step understand the essence of the technology so that the object meets all the requirements for safety and comfort.
The principle of frame construction
As the name suggests, the object is built on a wooden frame. The walls consist of numerous stiffening ribs and insulation. Finish coating – panels, slabs. The advantages of a frame house are increased heat capacity, lightness and reasonable cost, especially for young families.

Before starting construction, it is necessary to obtain a professional project, since frame technology is structurally complex. Drawings and plans are verified according to studies of the site, soil and area as a whole - the future facility must meet increased safety. This is the only point that should only be dealt with by specialists.
In addition, the received document must be agreed upon with the utility services whose resources pass through the site, and registered with the BTI or a similar city office. Unfortunately, it is impossible to do without bureaucratic delays.
When all the necessary paperwork is completed, the construction stages begin.
Frame house foundation
It is impossible to deviate from the type of platform designated by the project - sometimes a poured base is required. But, as a rule, for a frame house they choose piles or steel, the pillars are reinforced concrete or self-assembled from brick.
Operating procedure:
- The area is cleared of vegetation with special care. Plants are uprooted and the root system is sprayed with chemicals in order to stop future growth - plant moisture is detrimental to the wooden frame. The soil is leveled and compacted.
- Marking. It consists of setting the perimeter according to the project and marks for installing piles or pillars. To do this, stakes with a stretched cord are installed in the corners. The pitch between the supports is from 0.7 to 1.2 m, depending on the dimensions of the residential building. The racks must be located under the load-bearing walls of the house.
- Installation of piles or pillars. For the first option, digging holes is not required. It is enough to set the piles at right angles to the ground and screw them to a depth greater than the freezing level - the length is selected in advance. The work is done independently or with the help of equipment. The second option of supports requires depressions in the ground, their depreciation, reinforcement and filling. They also work with bricks.
Harness
The lower beam must be of an impressive cross-section - from 150 mm, since it will bear the entire load of the object. Before laying, all wood is impregnated with antiseptic agents, and the heads of piles or pillars are waterproofed with mastic and covered with roofing felt.

Installation of timber around the perimeter is carried out by cutting down half a tree. Fixation and reinforcement - with nails and steel corners. The wooden beam is attached to the base with screws or anchor bolts - special grooves are provided in the piles for this.
The foundation is almost ready. A larch board is laid on top of the wooden beam - this species is generally insensitive to natural phenomena - precipitation, freezing, cracking - and will reliably protect the top wood.
Maintaining walls
The corner posts are installed first. Their standard size is indicated in the project - the timber for one floor should not be less than 100 mm in cross-section. They are secured with steel angles, the cutting method, and anchor bolts. Then stiffening ribs are installed - boards up to 5 cm thick. For their reliable fixation, each element is equipped with a jib - a diagonal strip.

Places for technological openings - windows and doors - are equipped immediately, since a frame house gives little shrinkage, unlike log and lumber objects. To do this, shortened racks are mounted under the windows and a box is immediately installed for inserting future windows.
According to the project, the internal walls are built immediately in the same way as the external ones - racks, jibs. To save material and if the house is planned to be built on one floor, use timber or boards of a smaller cross-section. Otherwise, it is impossible to deviate from the overall project.
Install the upper trim beam. This is an equally important design, so a beam similar to the bottom trim is used for it and the lumber is fixed with a notch, corners, brackets, and self-tapping screws. For greater reliability, the methods are combined.
Construction of a gable roof
The roof is laid out in the same way as the walls. Of course, construction is not carried out alone, however, and does not require a large number of assistants. A couple of people will get by on their own.
The roof construction stage requires a separate description, since it includes a large amount of information. You can find the construction process in the article:.
Exterior finishing
When the frame has received visible outlines, it needs protection from natural precipitation - wood is sensitive to moisture - insulation and exterior finishing. The roofing material is laid first. It is chosen depending on the type of roof and the angle of inclination of the slope - flat ones require smoothness, steep ones - structural coverings are possible.
A variety of raw materials are used for work - siding, block house, fiber cement panels, lining. The materials are united by ease of installation - all units have locking grooves and ridges. Installation is carried out from below, and finally the house is decorated with corners, slopes, ebbs and other fittings.

Waterproofing, wind protection and vertical sheathing are laid on the walls - a wooden house requires as many ventilation ducts as possible to extend the life of the wood. Detailed instructions for installing siding are included with the building materials, so there shouldn’t be any difficulties.
Insulation and protection
Walls require special treatment. After finishing, it is important to protect them with a cake consisting of several layers in this order - the insulation itself, the vapor barrier and the finishing coating.

There is no need to hesitate - it is important to carry out the work quickly in order to avoid damage to the material, if it is traditional to use basalt wool for the main layer. It is dense, voluminous, not subject to burning and deterioration. However, it has a serious drawback - caking even from a small portion of condensate.

Therefore, if construction is delayed, it is worth considering other types of insulation:
- Expanded polystyrene boards. The air enclosed in the shells is securely retained by a 5-cm thickness similar to 30-cm-thick brickwork. The disadvantage is that it does not burn, but smolders, releasing toxic fumes into the atmosphere. The advantages, in addition to high heat capacity, are absolute inertness to moisture and durability.
- Sprayed extruded polystyrene foam. Reliably closes all joints and cracks. Only performed by professionals as automatic installation is required.
- Ecowool. Absolutely pure environmental material, applied with special devices similar to polystyrene. The disadvantage is the high price.
The time for interior decoration will come last. A frame house accepts any interior and materials for decorating walls, ceilings and floors. Creating a unique interior look of your own home is always interesting, so there is no need to rush.
Video on how to build a frame house with your own hands step by step
We also recommend
 Peony "Coral Sunset": variety description, cultivation and care
 Business ideas on your site
 Business ideas on your site
 Business plan for a children's playroom
 Trends in outdoor advertising
 Instructions for the application of norms for the natural loss of meat and meat products during refrigeration and storage in retail distribution refrigerators